50 Thanksgiving Nail Ideas: Autumn Nail Designs You’ll Want
We can all agree that autumn is one of the most colorful times of the year, and it’s no wonder that those who celebrate Thanksgiving and Halloween tend to go above and beyond with their decorations. The leaves are plentiful, pumpkins are abundant, and there’s no shortage of color in nature.
It’s also no surprise that all that color can be used to create beautiful Thanksgiving nail art designs and not just any designs, but ones that will blow you away. There are so many amazing possibilities when it comes to creating these types of nail art designs because they can be made in just about any style imaginable.
From traditional to modern, from subtle to loud – there is no limit when it comes to what you can do with your nails for Thanksgiving! And we all know how difficult it can be not only to find a bunch of designs that will look great on you this autumn but also to decide which one is the one.
Thanksgiving Nails
In this guide, we’ve created a list comprising only the best-looking Thanksgiving nail art designs that you can choose from. All the designs feature bold colors, amazing patterns, and they’ve all been designed to impress.
Thanksgiving nail art is very fun, but it can be tricky if you have never done any before, so make sure you read some tutorials on how to get started before you check out these ideas for some inspiration.
Doing good quality research on what your nails will look like when painted is essential; do not settle for less than perfect! Once you’re done with checking out our choices, you should look up some tutorials online if you want to apply them correctly.
Without further ado, let’s take a look at some great nail art designs, so you can start working on other parts of your outfit for your Thanksgiving dinner.
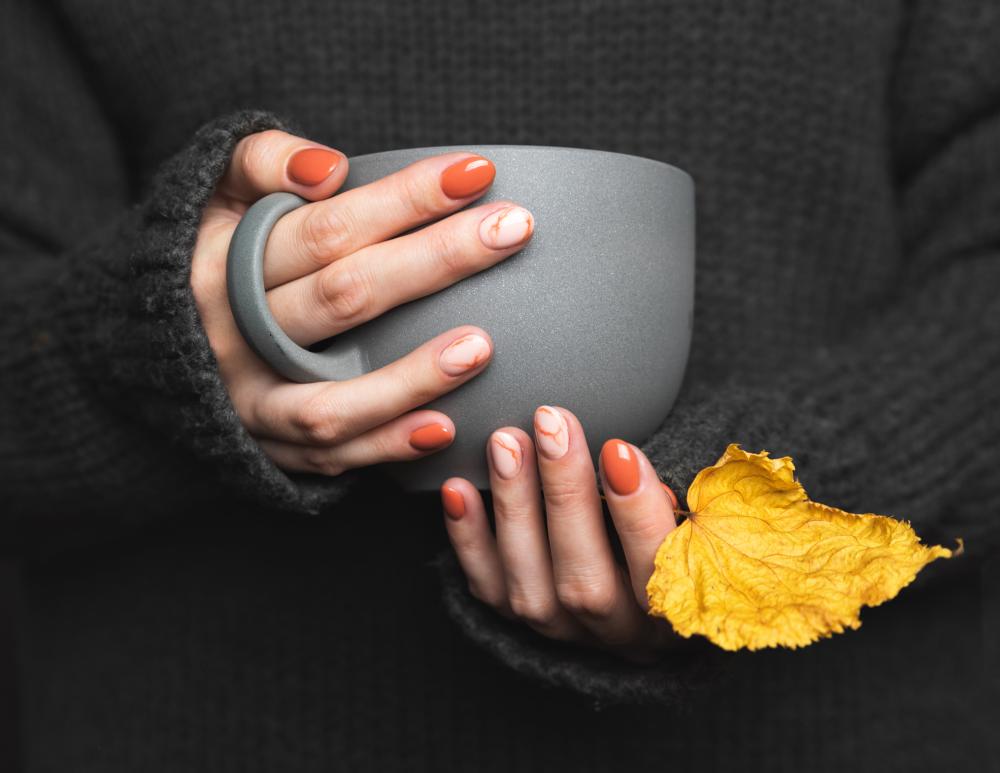
1. Marble Pumpkin – Thanksgiving Nail Designs
Marble nails are always an excellent choice for all types of events and occasions, and that includes Thanksgiving as well.
The most popular version of marble pumpkin nail art is the one where each hand has a different color scheme, but you can choose to go with either if you feel like they’ll work. If you want to make this design even more special, try using glitter!
Black and orange is another fun color combination that looks great on nails, especially when done in the form of simple yet stunning nail art designs.
This one will definitely impress everyone you know with its simplicity. After all, it’s not every day that someone sees an intricate handpainted design like this one.
If you’re into monochromatic designs, then this is also an option, but the colors that are usually used for this design are orange and white. Don’t be afraid to experiment with different color combos, though!
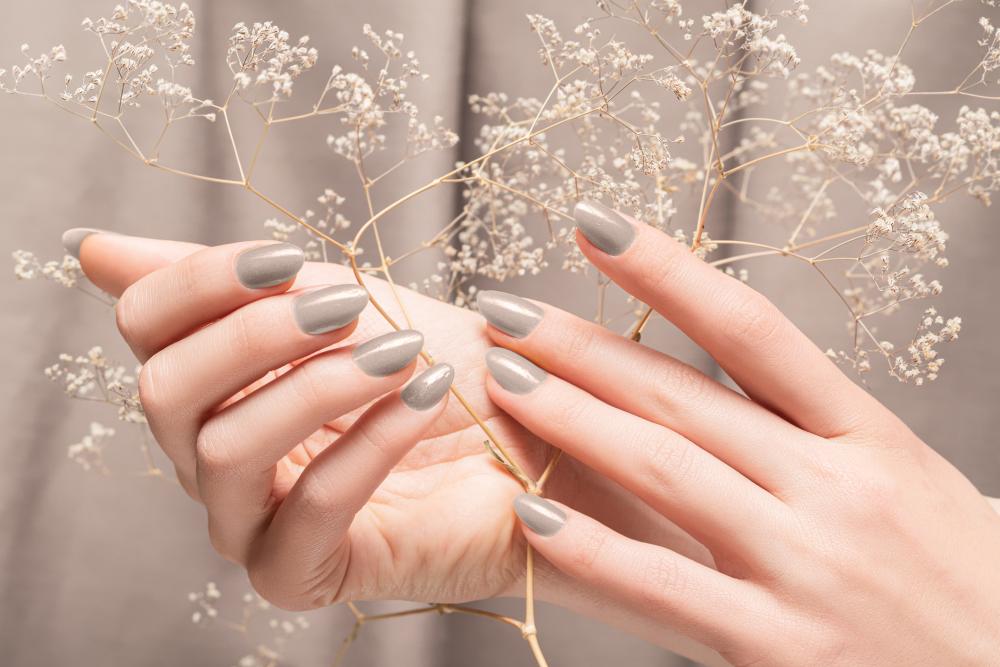
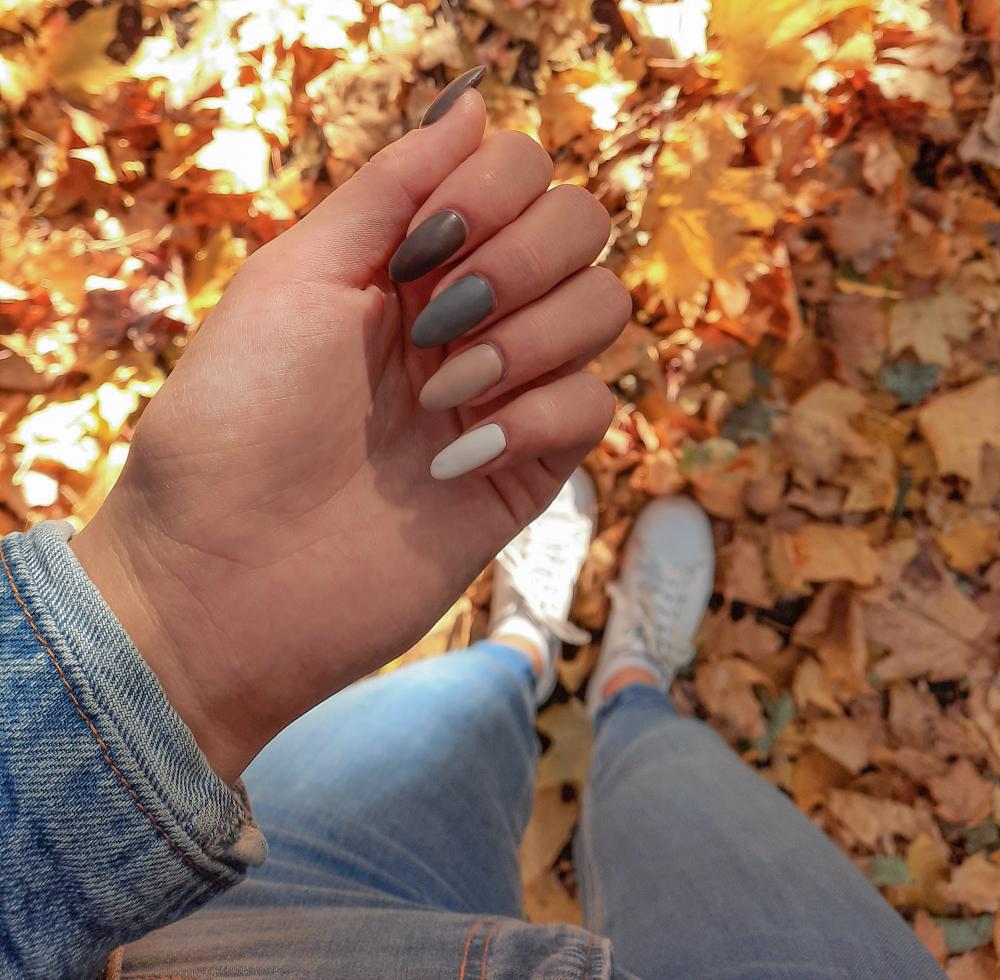
2. Gray Pastel Manicure – Simple Fall Nails
If you like to play it safe and make sure your nails will look flattering at your next Thanksgiving dinner, then this nail art design is definitely for you!
Thanksgiving nail art ideas don’t have to be complicated – in fact, they can be as simple as a solid color. If you go for a more interesting shade of gray that has some lilac undertones, then you’ll look modern and chic at the same time.
This nail art design is perfect for a Thanksgiving dinner or even a new year’s party because it looks great and will definitely get you noticed.
Don’t forget that these designs are just guidelines – feel free to experiment with other colors if you want something brighter or more eye-catching. But don’t change it too much from what we’ve put together here because those are our favorites!
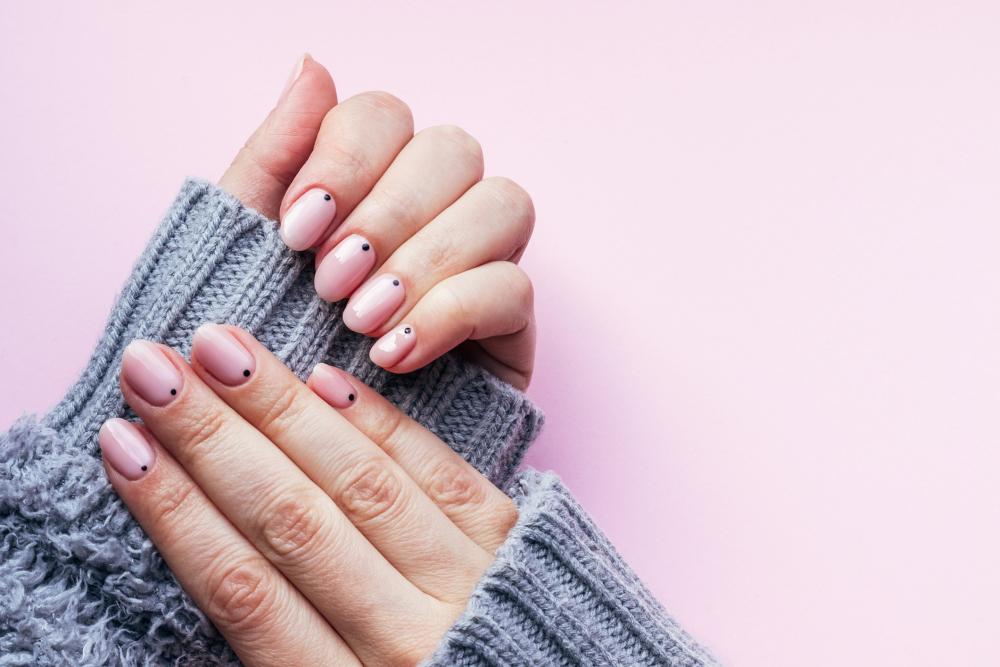
3. Pink Nude Nails – Nail Art Ideas
Nude nails have been a huge hit in the fashion industry for a while now, and if you didn’t know it yet then you will soon find out as more and more people start getting involved with this trend.
There are many different designs that you can choose from when it comes to nail art ideas, but nude nails are one of those trends where simple looks best.
Therefore, we recommend going for a classic look that never goes out of style – pink-toned nudes!
You can also use white if your skin color is very pale. However, staying away from darker colors is always a good idea because they might end up looking too harsh on such pale shades.
The great thing about these designs is how easily you can adapt them to any other color combination. You can even add subtle decorative elements such as the small dots in the example photo above if you want to.
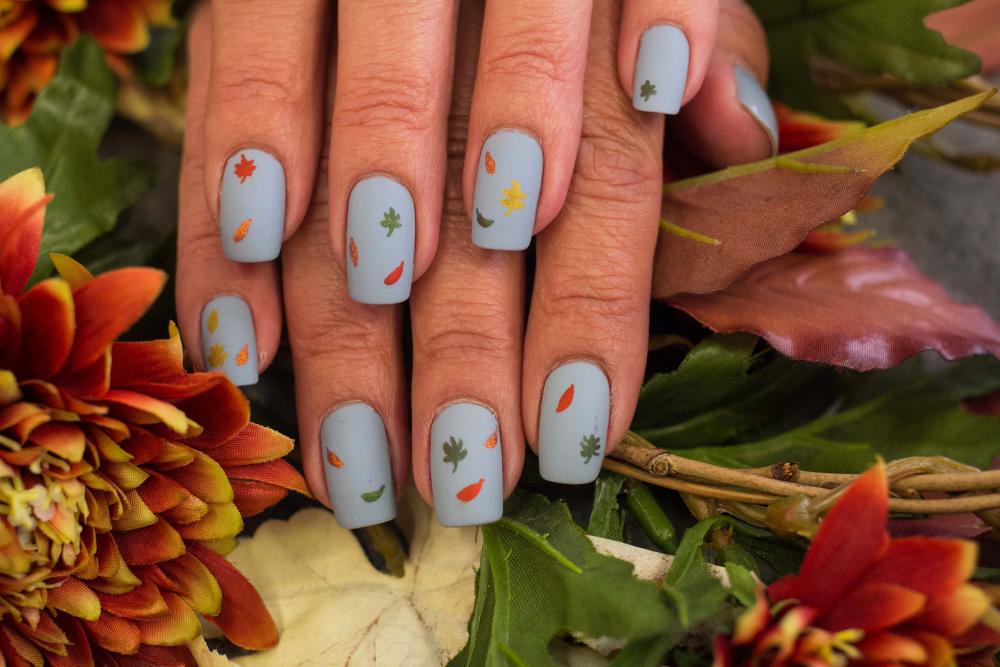
4. Fall Leaves – November Nails
Nail art designs don’t always have to be about abstract shapes and patterns. There are plenty of other options that look amazing as well, one of which is fall leaves!
Since Thanksgiving is around the corner, this would be an excellent idea for your nails if you’re planning on carving a pumpkin at home. The colors are festive but not too loud because they’ve been toned down so much by the black background.
Another great thing about these designs is how good they look with only three colors – perfect if you don’t want to spend hours painting tiny details onto your nails.
To make it even easier for you, we recommend using just two colors – green and brown or orange and brown instead of having all four hues in your design.
A white outline around the leaves can also make your design look more interesting, and it will make them pop out from the background even more.
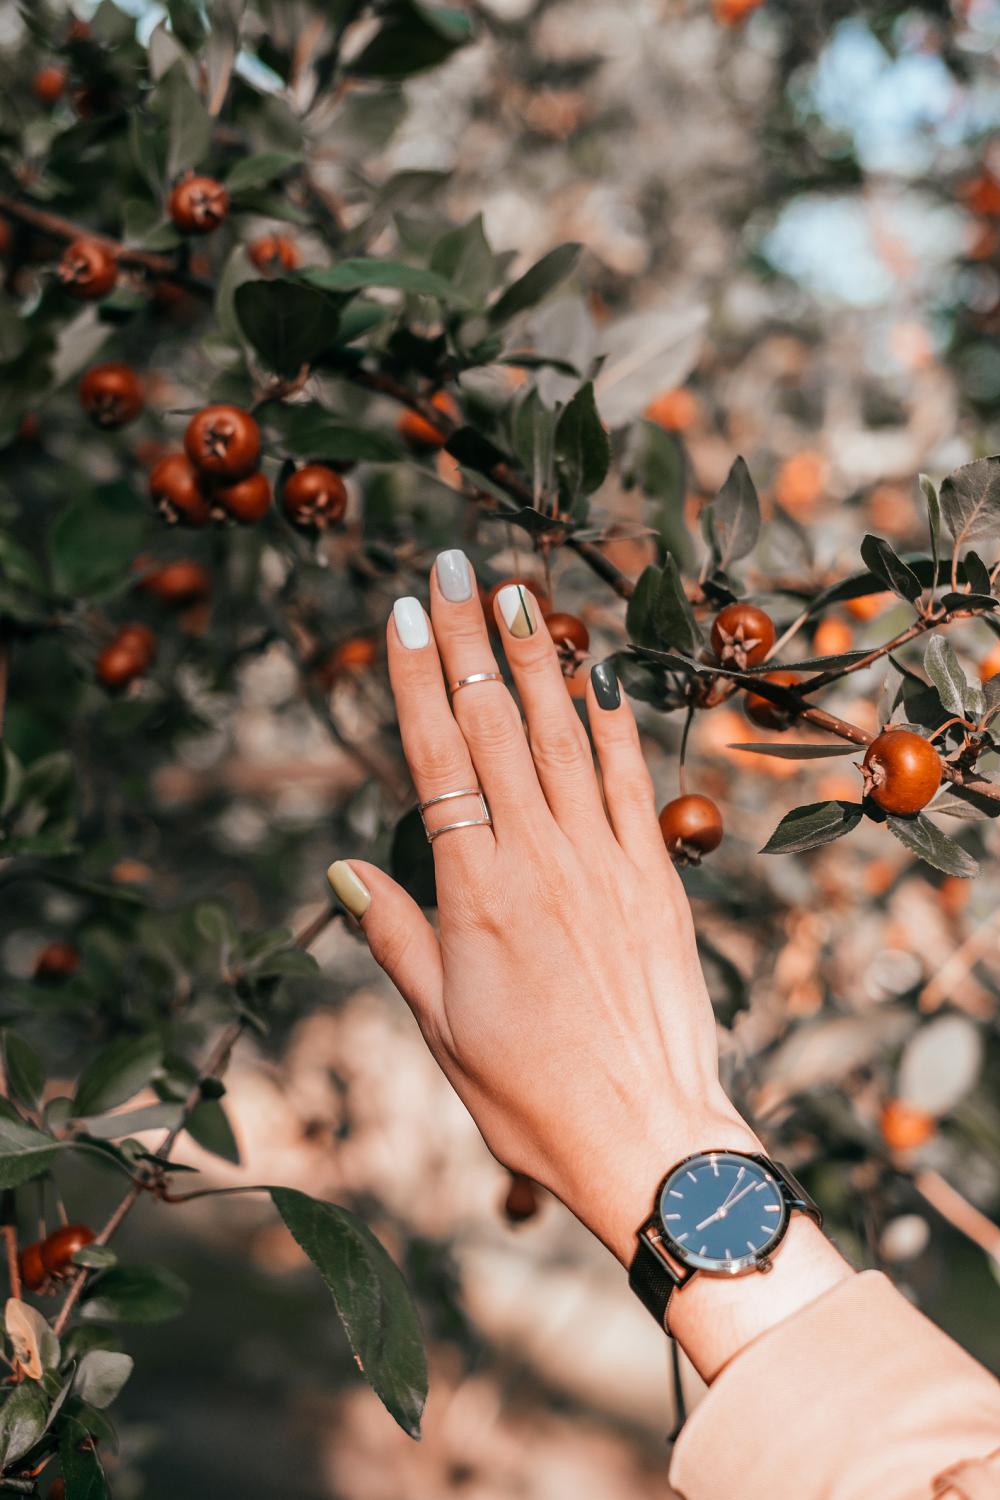
5. Geometry Minimalistic Manicure – Simple Fall Nails
Simple manicures can be as fetching as the more complex designs if you find the right colors and patterns.
The best thing about minimalistic nail art designs like this is that they look effortless and modern at the same time – perfect for those who want to stay on top of trends without having to make too much effort.
If you’re not into spending hours trying out new nail art ideas or looking through Pinterest, then we highly recommend these simple fall nails!
The design itself only consists of a few straight lines, but it may take some people time to get used to such clean and sharp shapes.
You might also want to add dots in either black or the dominant color from your background because it will give your design a more dynamic feel. As for the design itself, you can make your nails matte or shiny as in the photo above – both look great!
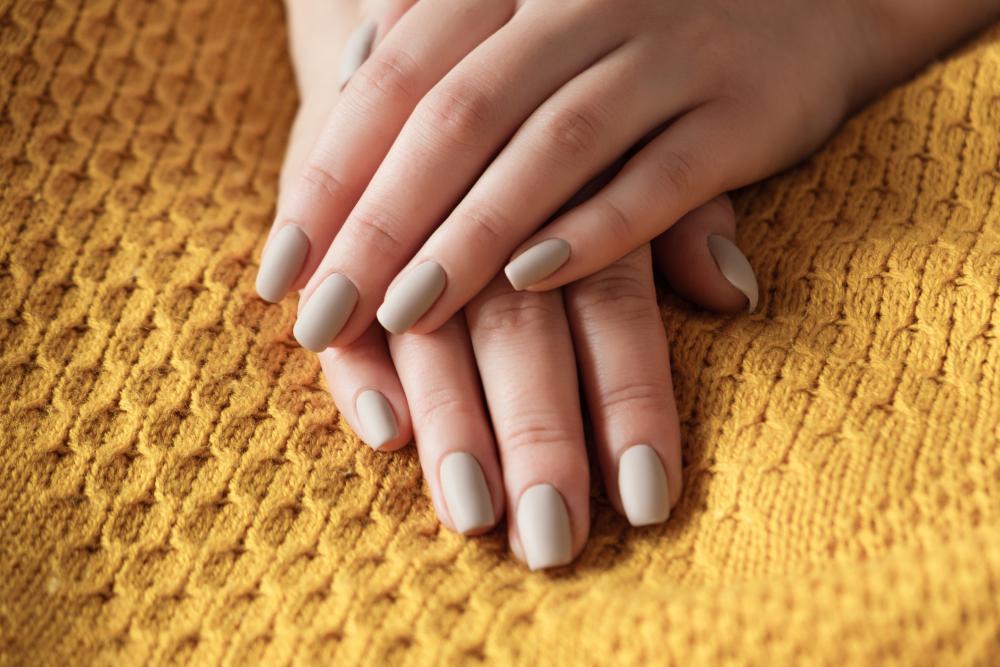
6. Matte Nude Beige – Autumn Nail Designs
If you thought that nude nails were a little too boring for your taste, then we have yet another solution.
Matte nude beige with a touch of gold is an excellent design idea that will help you make the best out of this beautiful autumn.
The great thing about these things is that they look elegant and expensive even though the only thing you’re using is matte beige nail polish.
If your skin tone is too pale, then we recommend going for a brighter background because it will make the design pop out more while still keeping it classy.
You can also try lighter shades such as vanilla or cream if you don’t want to go with a more complex color scheme.
Whatever colors you choose, matte nails always look chic and understated – perfect for those who don’t want their nail art designs to stand out from everything else they wear.
As for the shape of these autumn nails, there is no strict rule about it, so feel free to experiment as much as you want!
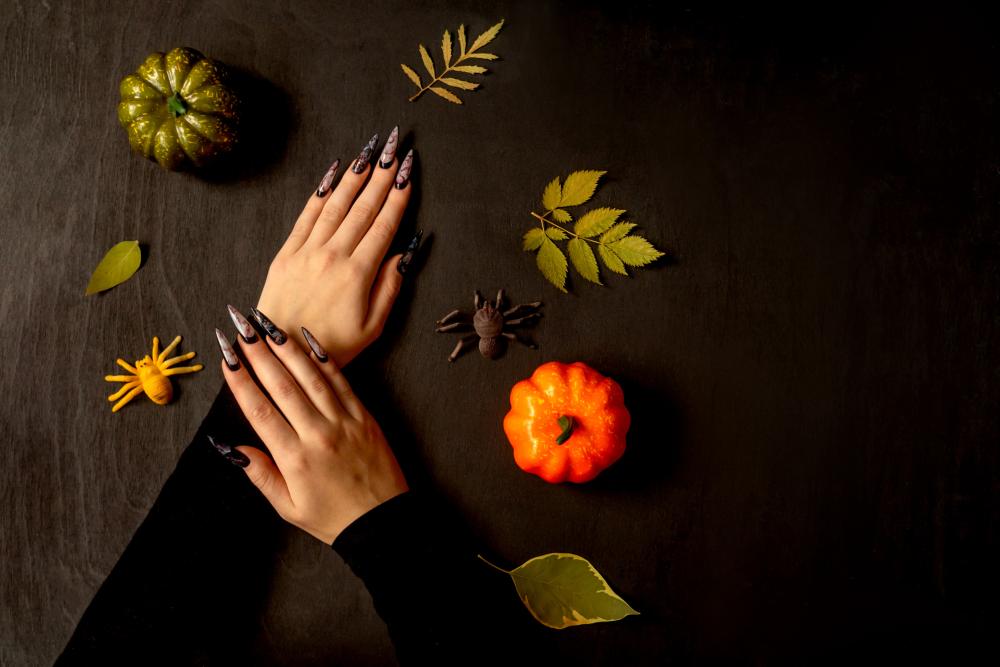
7. Purple Marble Stiletto – November Nails
You don’t have to go with nude colors if you’re planning on doing something simple but chic for Thanksgiving nails.
A great idea is to try out purple marble because it will make your manicure look more fun and festive – perfect for this upcoming holiday.
Choose a color that looks good against the background you’ve chosen, whether it’s black or brown, and go from there!
Everyone knows how nail art design ideas can be endless, so feel free to mix things up as much as your heart desires. Play around with different hues until you find one that suits your style and that you feel comfortable with.
What we like best about this design is that it’s easy to recreate, but at the same time, it looks fun and unique, which makes it a great way for beginners to try out new things without making mistakes.
It doesn’t matter if your stiletto nails aren’t exactly the same as in this picture because even imperfections can make your hands look sexier – perfect for those who want Thanksgiving nails they’ll love showing off!
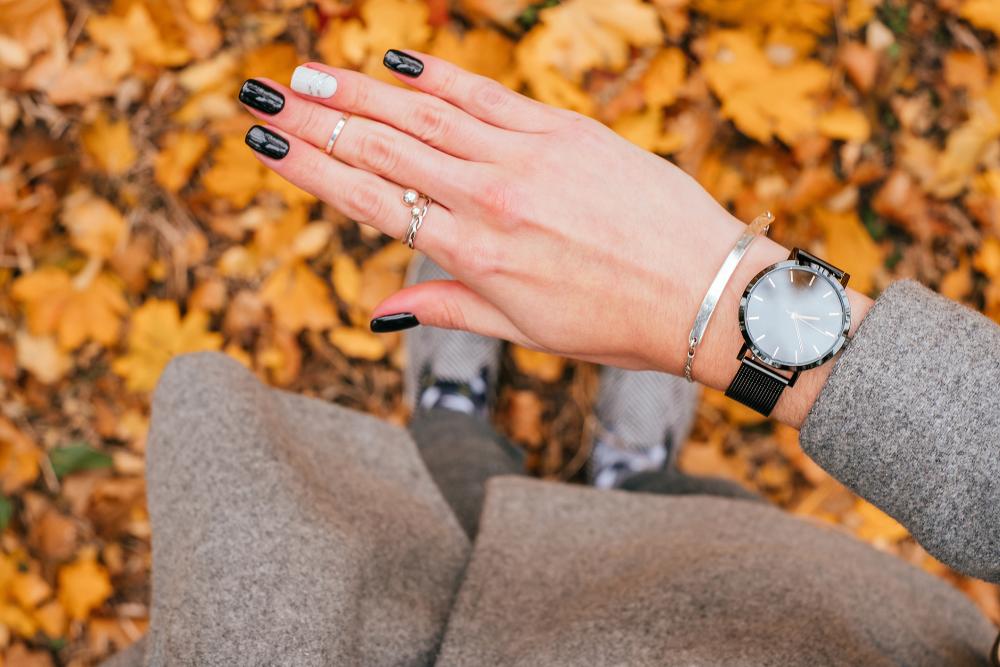
8. Fall Black Manicure – Thanksgiving Nail Art
A simple way to make your Thanksgiving nails stand out is by using black nail polish.
Black looks great during this time of the year, but it can also be used for other occasions as well, especially if you’re aiming for a more elegant look.
The design itself is very classic and works with any shape – long or short! – which makes it perfect for those who want something that will never go out of style.
All you have to do is paint your favorite nail polish color on all your nails and use tape to create stripes in either dark red or brown so they’ll contrast nicely against the background color of your choice.
You can even try combining different hues together, such as red and orange or yellow and green, just like in the image above.
The great thing about this design is that you can experiment as much as you want, and you’ll always come up with something unique and eye-catching because there are so many color variations to choose from!
If you feel like giving your hands a break then simply switch to lighter colors such as orange, yellow, green, or white instead of going back to clear, which will make your Thanksgiving nails look fresh and beautiful all year round.
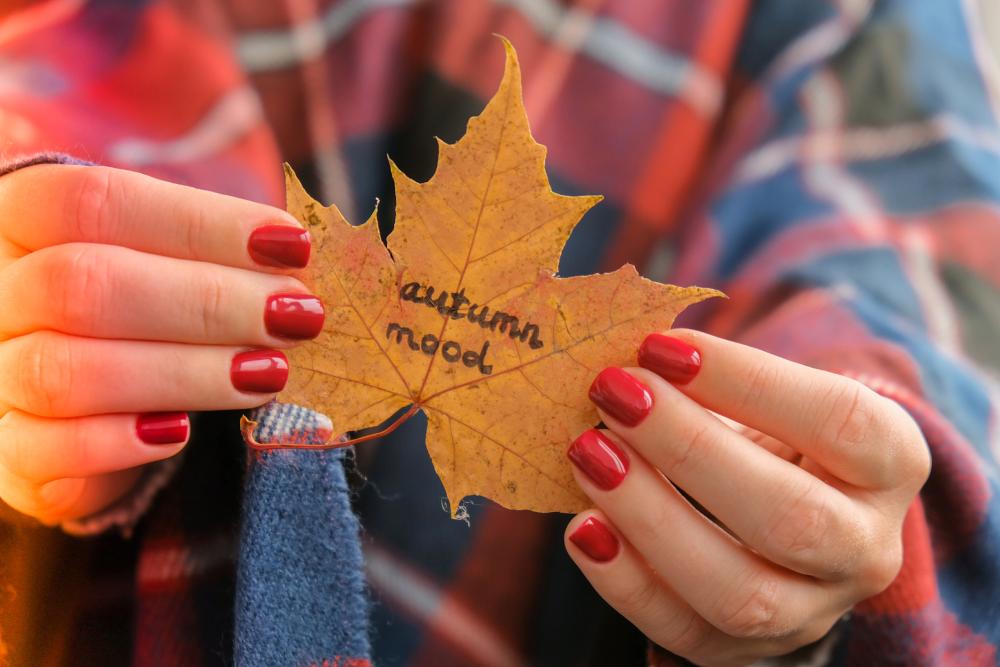
9. Dark Red Nails – Simple Fall Nail Ideas
Just because Thanksgiving is right around the corner, it doesn’t mean that you’re only supposed to wear bright nail polish colors.
If you don’t want to go with something too bright, then why not try opting for dark red instead?
This shade is perfect for this type of occasion because it looks festive and eye-catching, but at the same time, it’s understated enough so it won’t overshadow your outfit.
There are many ways in which you can experiment with this color – mixing with white or black, for example, or using glitter on top! – but what we like best about this design is how sleek it looks when done right.
All you have to do is paint your nails in dark red and wait until they dry before drawing a line in the middle. Make sure all your lines are thin so they’ll blend in seamlessly with the background color!
After you’re done painting your nails, it’s time to add the finishing touches, so try using a nail dotting tool for this step because it makes the process easier and creates cleaner shapes.
As a final step, make sure to protect your manicure by applying a coat of clear nail polish.
You can also use glitter if you want but just remember that this might not be the best option for those with long nails because it may chip off.
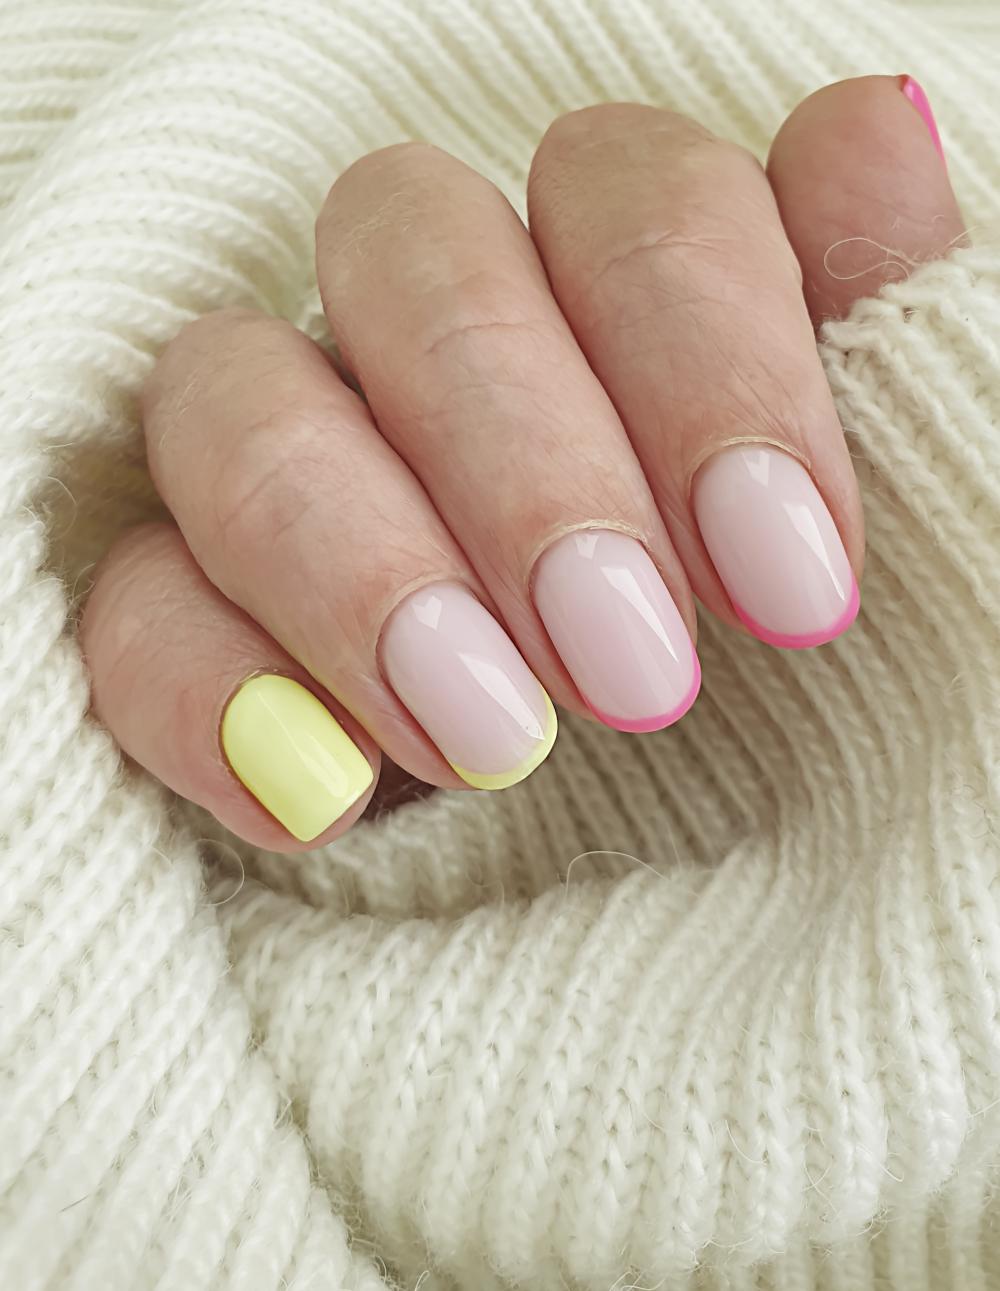
10. Multicolor Pastel Nails – Thanksgiving Nail Designs
The trend these days is all about colorful nails, yet sometimes even that isn’t enough to make your manicure stand out.
If you really want to turn heads, then adding glitter, for example, is a great way to do it but if you don’t have any nail polish on hand or simply want another option, then why not try painting your nails in different pastel hues?
This may require some practice, but the results will definitely be worth it, so there’s no need to worry!
The reason why we’re so in love with this design is all these little elements that create a cohesive look when combined together.
As you can see in the picture above, each nail has its own unique color, which means they’re bound to look good on their own. Alternatively, you could paint them all the same shade to achieve a bright, eye-catching result that’s hard to ignore.
All you have to do is paint your nails one pastel color at a time and then use the remaining nail polish on each finger to create small dots. You can choose any colors you like or simply stick with pastels for an elegant touch.
When it comes to choosing the base color, make sure they’re neutral because this will allow other hues to stand out more instead of blending in, which is what usually happens when they share similar shades.
If there are any areas where some colors overlap, then try fixing it by painting clear nail polish over it so it won’t look messy!
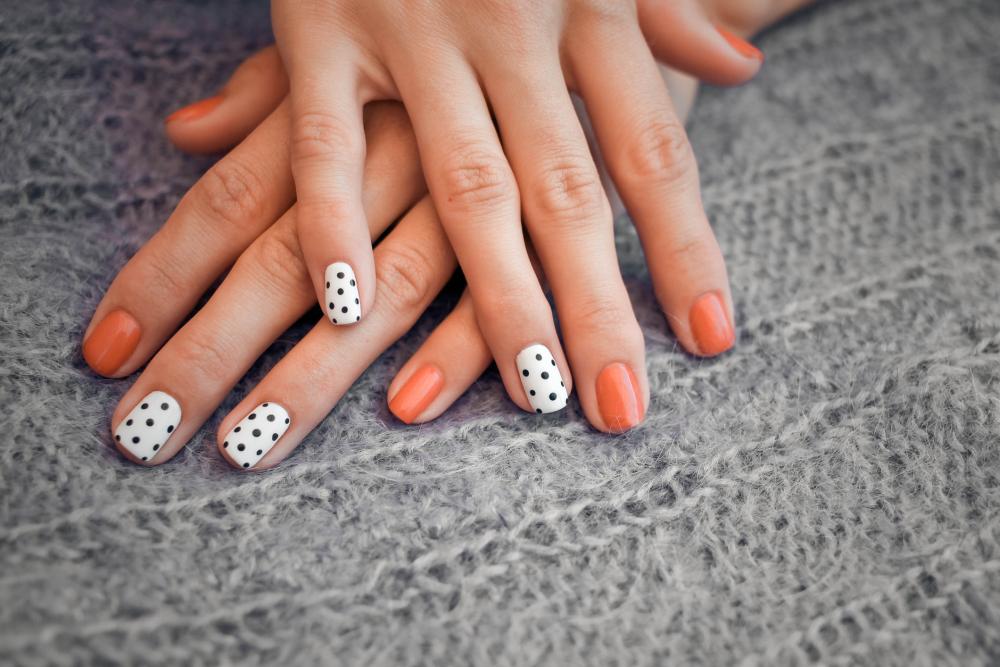
11. Dotted Manicure – Thanksgiving Nails
There’s always something special about well-done dotted manicures because they give off a fun, casual vibe that makes them hard to ignore.
If you want your nails to be the real star of the show at your next Thanksgiving dinner, then this is just what you need!
You can either go with the classic French manicure look or get creative and use different colors instead, but there are no limits when it comes to what you can do here, so don’t be afraid to experiment!
This design is not only absolutely gorgeous, but it’s also incredibly easy to recreate at home. Thus, you can easily do it on your own instead of spending a small fortune at your local nail artist salon.
All you have to do is paint your nails in white, and once they dry up, grab a dotting tool – which you can buy online for cheap – and simply follow along with the tips of your nails.
If there’s an area where the dots don’t look just right, then simply fix it by painting clear nail polish on top!
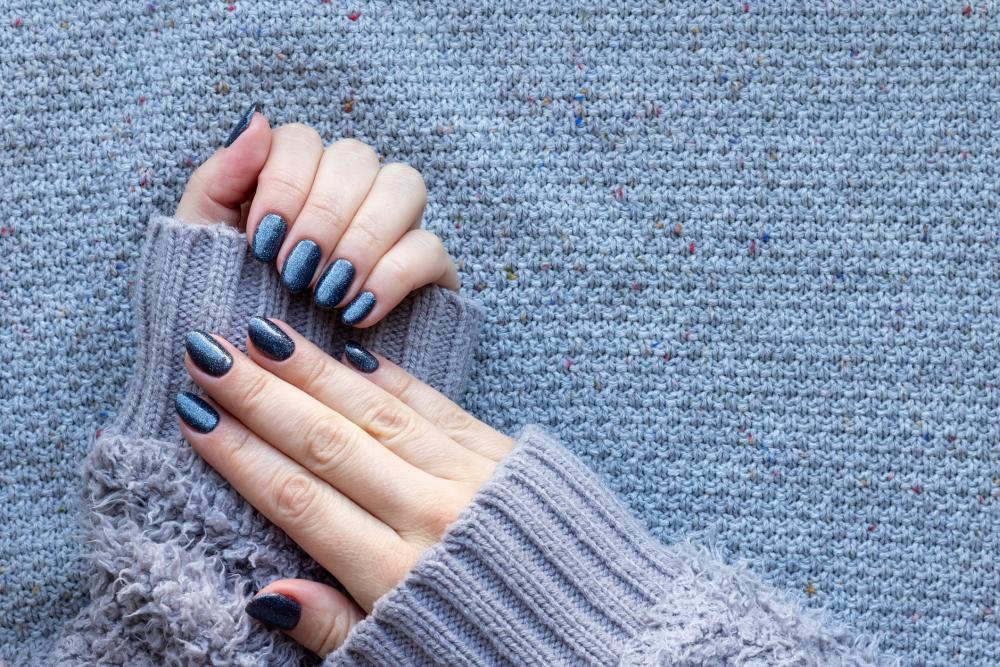
12. Dark Blue Glittered Manicure – Autumn Nail Designs
Glitter is a wonderful way to make your nails stand out without going overboard, and this tutorial will show you precisely what you need to do in order to achieve the perfect look.
The most important thing here is to always start off with a really good base which means that there’s no need for any type of nail care beforehand.
As with all manicures, once you’re done painting your nails, it’s time to add the finishing touches, so try using a nail dotting tool because it makes the process easier and creates cleaner shapes.
When it comes to choosing an appropriate color, don’t go for anything too dark, or else it will be hard to see all those little sparkles!
What we love most about this design are all the tiny details that are easy to miss if you’re not paying close enough attention.
Go ahead! Add some extra glitter for a more festive look, and try adding some striping tape around the edges for an even more stunning effect.
There’s no need to hurry when it comes to painting your nails in darker colors because it allows better coverage which means fewer strips will be needed, making this manicure last longer!
13. Glitter Gray Manicure – Thanksgiving Nail Colors
Why not go with a trendy gray color to celebrate Thanksgiving?
This is a great way to make your nails stand out if you’re not in the mood for an overly bright design, and you can always add some extra details to suit your taste.
Once you’ve chosen the shade that’s just right for you, it’s time to paint your nails, so let them dry completely before you add the other details.
When it comes to adding glitter, don’t be afraid to get creative because all you have to do is pick a few colors that will pop next to your base polish, and voila! You’ve got yourself a stunning manicure.
This design is especially unique because it doesn’t require any specific tool or piece of equipment. Incidentally, this is also the reason why it’s so easy to recreate at home.
Just make sure to apply a top coat of polish, or else your manicure will look dull, and you won’t be able to appreciate all the glitters!
If you want a more festive effect, then simply add some cute little turkey shapes on top of your nails, but if not, then just skip them and get right down to painting on those tiny gems!
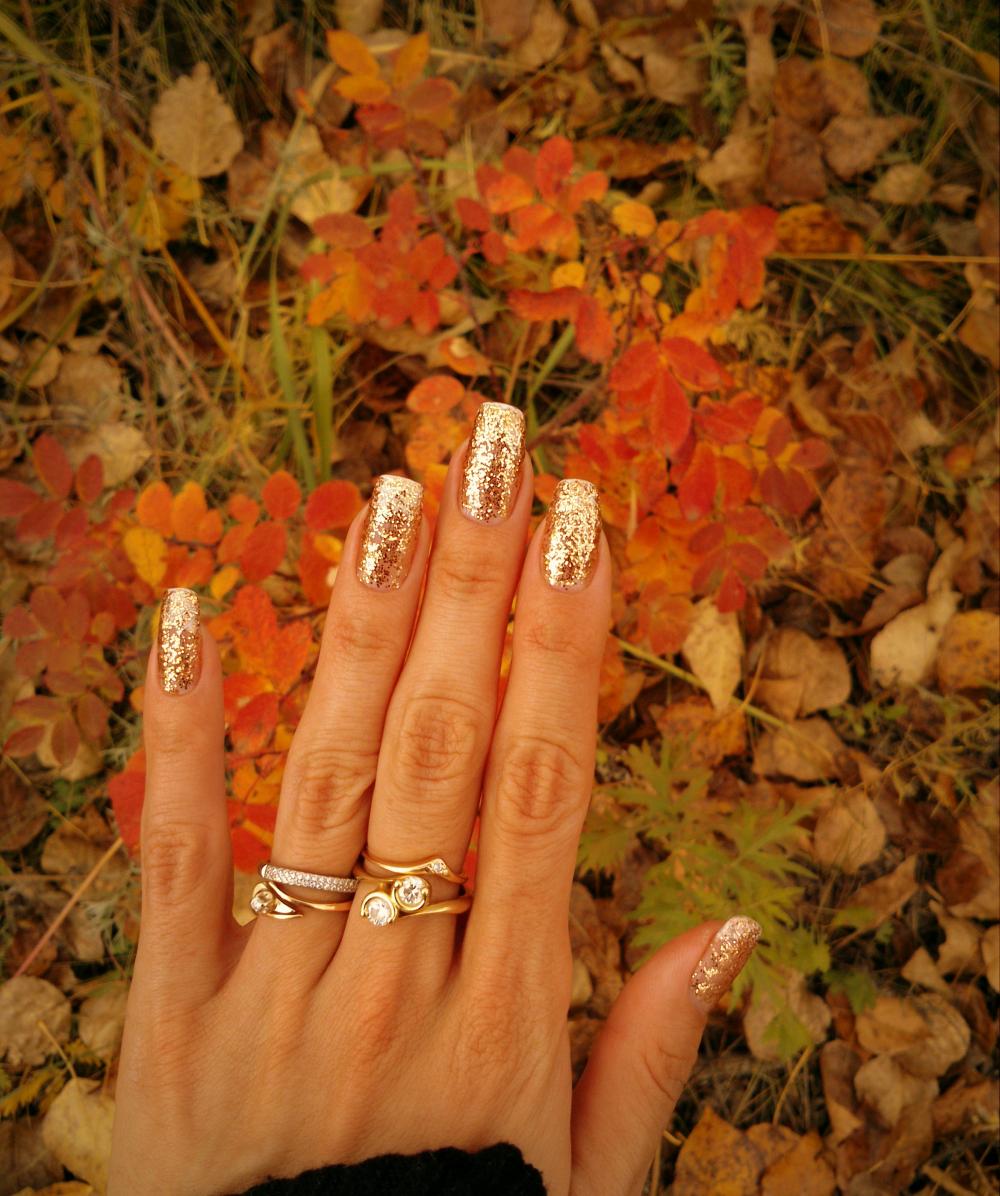
14. Autumn Golden Manicure – Thanksgiving Nail Art
There’s no need to spend hours at the salon in order to get an elegant manicure because all you really need is a few coats of gold polish, and this tutorial will show you exactly what needs to be done in order to achieve it.
Once your nails are dry and ready for some color, apply the golden polish and let them dry completely before applying another coat if needed.
After everything has dried, it’s time for some extra details which means that you’ll need a dotting tool – although any type of stick with a sharp end will do just fine – and two contrasting colors.
All that’s left now is simply dabbing on those dots, so take your time when applying them and try not to rush through this step because the results will speak for themselves.
Wanna hear something great about this design? You don’t have to be a professional nail artist in order to make it look flawless, which means that even if it’s your first time trying out a manicure like this, the results will definitely catch everyone’s attention.
If you really want this design to stand out, then simply try using gold glitter instead of the regular version because it has a thicker consistency which makes everything much easier and faster, not to mention how great it will look at your next Thanksgiving dinner.
15. Glitter Green & Yellow Nail Design – Simple Fall Nails
If you’re looking for a simple yet stunning Thanksgiving nail art design that will be the envy of all your friends, then this is definitely the right design for you to try!
Although it might look like there’s a lot going on, don’t worry because it’s actually very easy to recreate!
All you need to do is choose two contrasting colors and apply them to your nails, as you see in the example photo above.
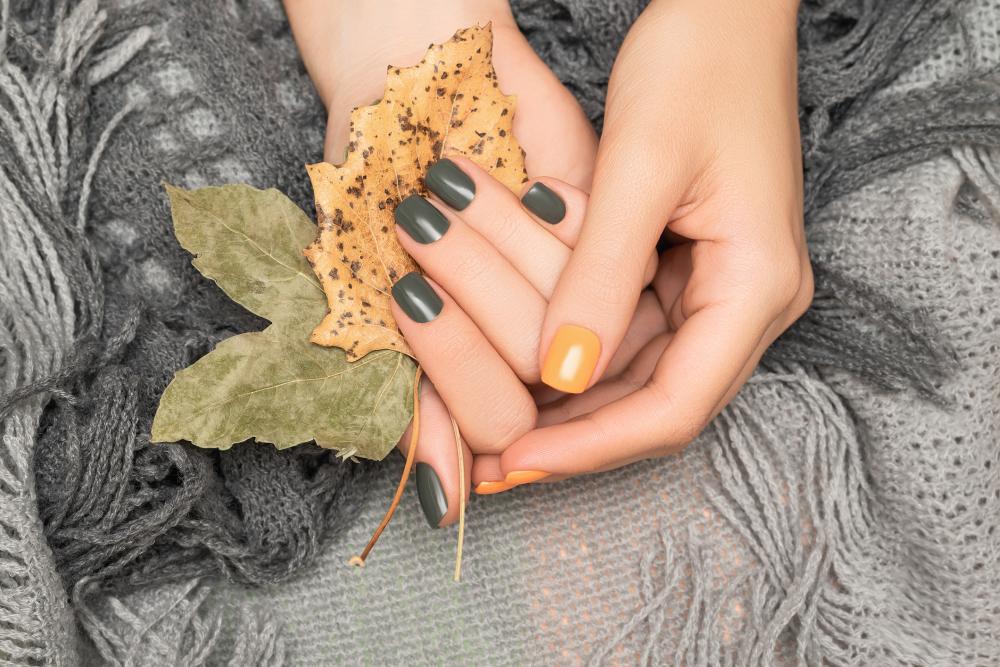
You can use the darker color (in our example, it’s an earthy tone green) on most of your fingernails and the brighter one on one finger of your choice (ring finger and thumbs are popular choices).
Alternatively, you could paint the nails on one hand in the darker color and the other hand with the brighter one, depending on how you feel.
Once you’ve chosen the colors, it’s time to start painting, so make sure your nails are nice and dry before you do.
Once everything has dried completely, all that’s left for you to do is apply a clear top coat, so everything stays in place.
We guarantee that you’ll catch a few glances at your next Thanksgiving dinner and the best part is that nobody will ever know how easy this elegant design actually is!
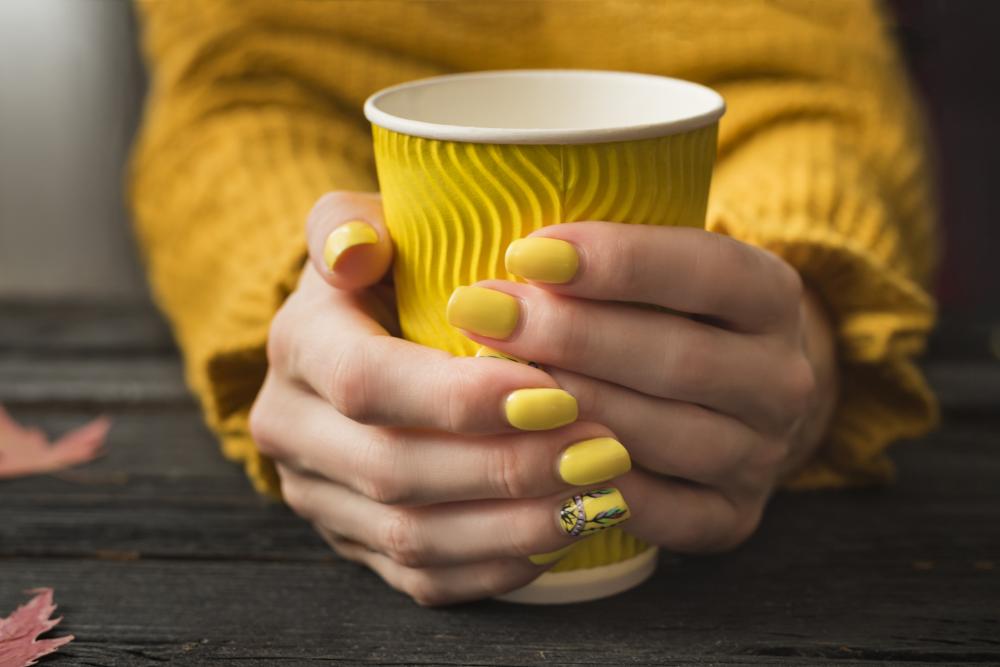
16. Bright Yellow Autumn Manicure – November Nails
If you’re a fan of bright and bold colors, then this is the perfect nail art design for you because it’s both easy to recreate and sure to turn heads wherever you go!
In order to make your manicure look spectacular, all you really need are three coats of yellow polish and two coats of clear top coat.
If you’re feeling creative, you could also add some orange lines on each side of your nail, but we suggest you leave it as it is. This manicure looks absolutely gorgeous when all the nails match.
Fine, if you really want to add a splash of personal touch, I guess you could do an odd finger in a different manner, but don’t go overboard!
It’s time to get started once you’ve gathered everything you’ll need. Make sure your nails are dry before you begin painting, so they don’t chip.
When it comes to the lines on either side of your nails, there’s no need to be precise because they’re going to have a dotted look that will only add to the final design. But this only applies if you really want the side lines.
Once everything has dried completely, apply a few coats of clear top coat, and voila! There you have a gorgeous manicure that will definitely get a lot of compliments from everyone who sees them!
We love how unique this idea is, but if it’s not quite what you’re looking for, then feel free to check out our other tutorials, which feature plenty more Thanksgiving-themed designs!
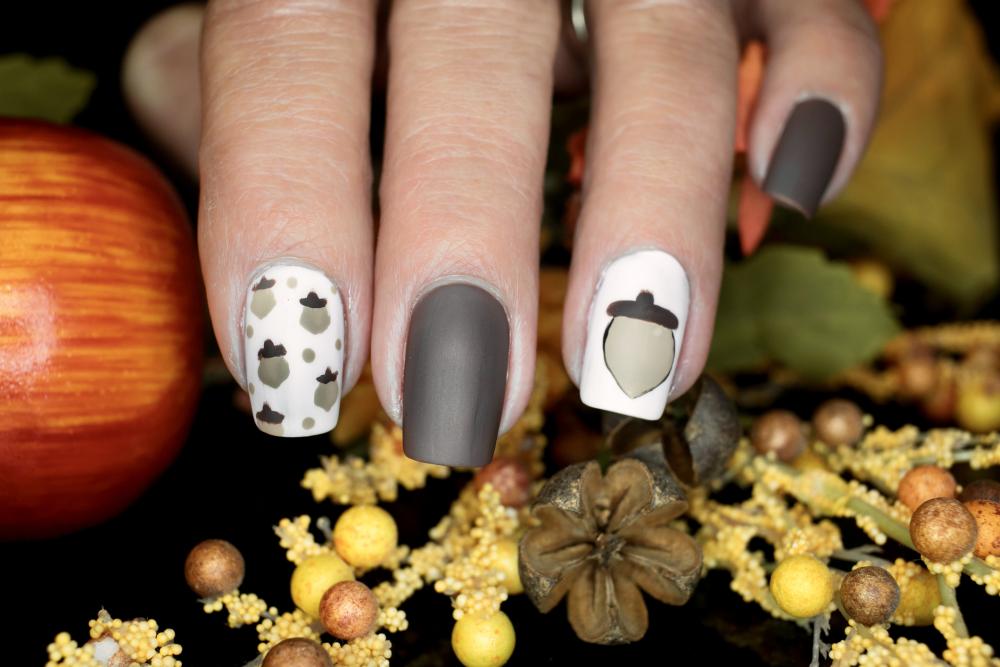
17. Acorn Manicure – Simple Fall Nail Ideas
If you love acorns, nature, and fall foliage, then look no further because this stunning yet straightforward manicure is ideal for your next Thanksgiving dinner.
The great thing about this design is that it may be really easy to recreate, but the end result looks incredibly elegant.
All you need to do in order to create this autumn nail art effect is choose a beautiful light shade of brown polish and two colors that stand out more which you can use as accents.
When choosing your accent colors, make sure they contrast with each other so that the final design stands out even better than if all three colors were just one shade.
Once everything has dried completely, you will then need some tweezers and a small pair of scissors. If needed you can also use a nail file to create the desired shape for your acorns.
Next, it’s just a case of gluing them onto your nails. Make sure you leave room for one accent color at the top and then place the second one just above that, leaving enough space between them so that they don’t look overcrowded or clustered together.
If you don’t have the decorations, then feel free to paint on some acorns using an appropriate nail varnish color or just leave it as it is if that’s what you’re going for.
Once all of your acorns are in position, simply apply two coats of clear top coat, and voila! You will finally have the perfect manicure, which everyone will be talking about, especially come Thanksgiving time!
As we said before, if this isn’t quite what you’re looking for, make sure you check out our other tutorials because there’s bound to be something that takes your fancy!
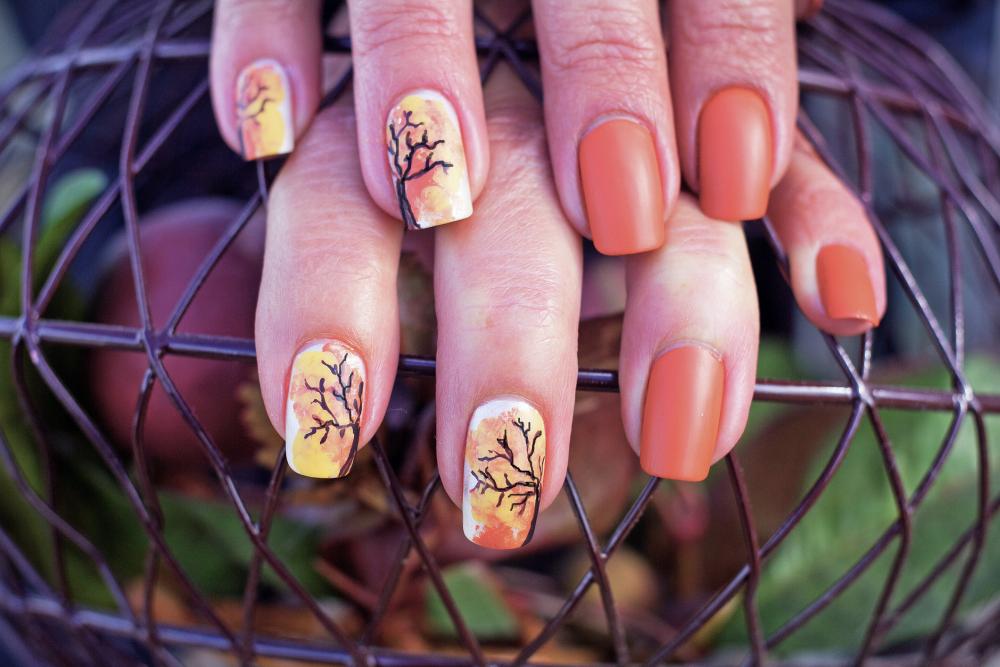
18. Leaves & Trees Nails – Thanksgiving Nail Art
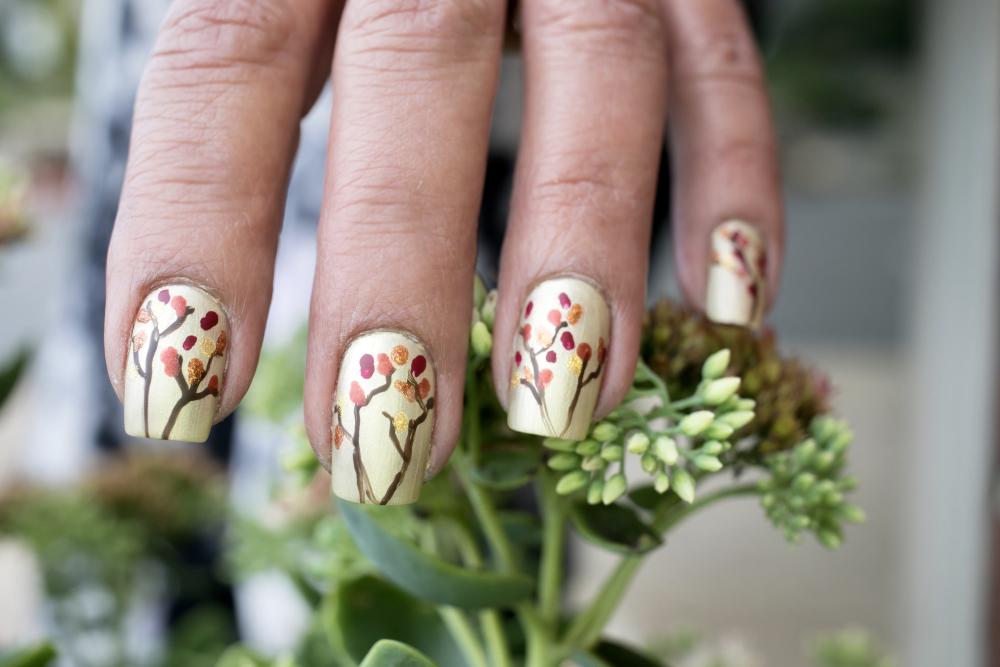
If you love leaves, trees, and fall foliage, then we have just the manicure for you! This simple yet stunning design is ideal if autumn is your favorite time of year and if you just can’t wait until Thanksgiving rolls around.
Before getting started with this tutorial, ensure that your nails are dry so that they don’t chip while you’re trying to create their gorgeous new look.
To get started, all you really need are two different shades of orange and yellow nail polish along, some dark (brown) nail polish, and a small brush or applicator.
Depending on how many tree branches you want to include on your manicure will depend on whether or not you will need more than one shade of brown nail varnish.
It’s best to only use one shade if you want a more minimalistic look, but two shades are also fine if that’s what you’re going for.
Using your small brush or an applicator, paint the outline of the branches onto your nails using dark polish. Try to create as many individual branches as possible so that they don’t all blend together and just look like one solid stripe across each nail. The more variety there is, the better!
Once everything has dried completely, you can then apply either very little or several coats of your lightest shade of orange polish, depending on how much depth you want in their design overall.
When applying this color, ensure that it doesn’t cover up any sections of the branch polish that you’ve already applied.
Now it’s time to move onto your lightest shade of yellow nail varnish and, using an orange one, paint on some tiny spots across each tree branch so that they look like leaves bursting out from underneath it.
Once everything is completely dry, give them a clear top coat so that they are protected against any damage. And there you have it! The perfect autumn-inspired manicure that will have everyone talking about how unique and exquisite it looks once Thanksgiving rolls around!
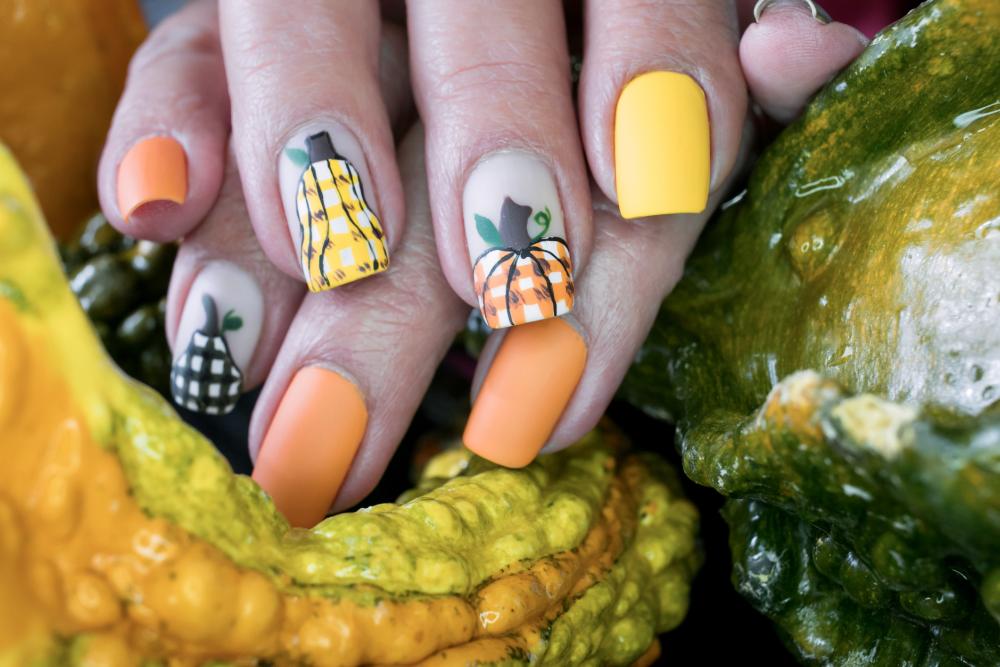
19. Pumpkin & Gourd Manicure – Autumn Nail Designs
As we all know, people use pumpkins and other gourds as decorations during the autumn months because of how festive they make everything look! We’ve put together a simple yet stunning manicure that’s ideal for this time of year and even better around Thanksgiving time.
Before getting started, ensure that your nails are completely dry in order to avoid accidentally smudging your hard work while you’re in the process of creating it.
If you want to get started on this pumpkin and gourd manicure, you will first need several different shades of green nail varnish, yellow nail varnish, orange nail varnish, and different shades of brown for the stems.
Obviously, you will only need to use two shades of green if this isn’t quite what you’re looking for, but it’s up to you! The more variety there is, the better!
Using your first shade of green nail varnish, make sure that all of your nails are completely covered before moving on to your next color. If they aren’t, simply paint on another two coats until they are.
If you’re having a hard time creating the design for your gourds and pumpkins, just take a look at the example photo we’ve attached above and use it as a reference point. Also, don’t be afraid to look up other gourd & pumpkin nail art designs if you’re into that.
Once everything is completely dry, give them a clear top coat so that they are protected against any damage. And there you have it: another simple yet beautiful manicure design for this time of year that will have everyone talking about how festive and fall-inspired it is.
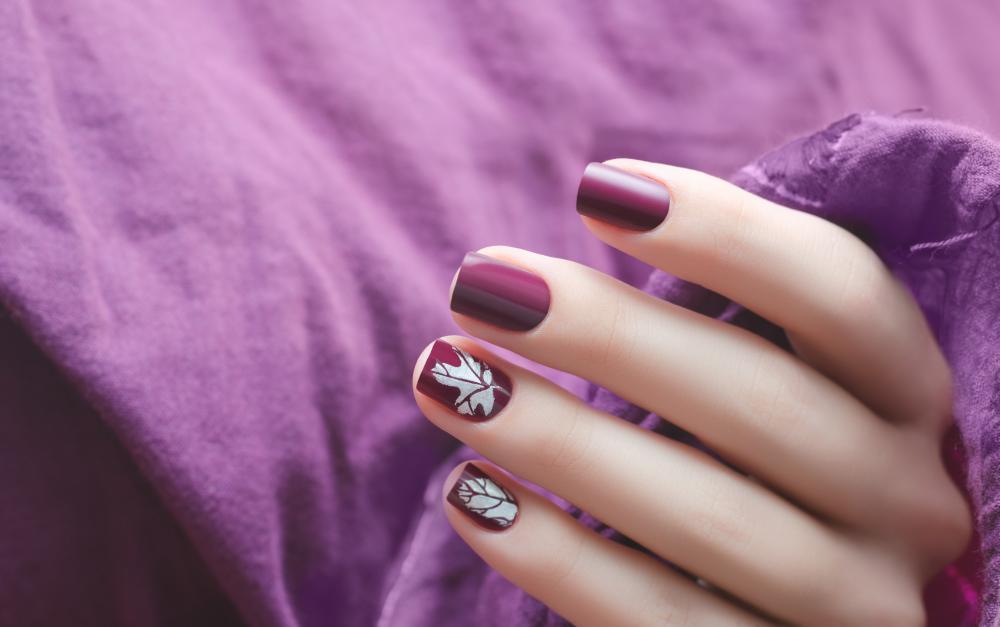
20. Dark Purple Nails With White Maple Leaf – November Nails
If you’re like us, then you love the way that dark purple nail polish looks when paired with everything else on this list! We’ve decided to add another simple yet stunning design for November nails which is ideal for this time of year and even better around Thanksgiving time!
Before you get started, you’ll have to ensure that your nails are completely dry. Otherwise, you risk accidentally smudging your hard work before you even have a chance to complete it.
To get started on this autumn manicure, you’ll just need a shade of purple that would look great on your nails and some white nail varnish. You can choose between shiny or matte dark purple nail varnish, but we’d suggest you go with the matte one.
Once you have everything ready, paint all of your nails with the dark purple varnish. Make sure to coat every nail evenly, then wait for it to dry completely before you apply a second coat of varnish.
Next, using white nail varnish and a thin paintbrush, draw a few maple leaves on top of the dark purple coating, but only do that on one or two fingers on each hand.
If you want to, you could apply a maple leaf on one finger and some tree branches (still using white) on a neighboring finger on the same hand.
This step is optional, but it’s up to you if you want to take it or not. Either way, your nails will still look amazing!
Apply clear coat as usual, and there you have it: another simple yet stunning manicure design that will definitely look amazing Thanksgiving time comes around!
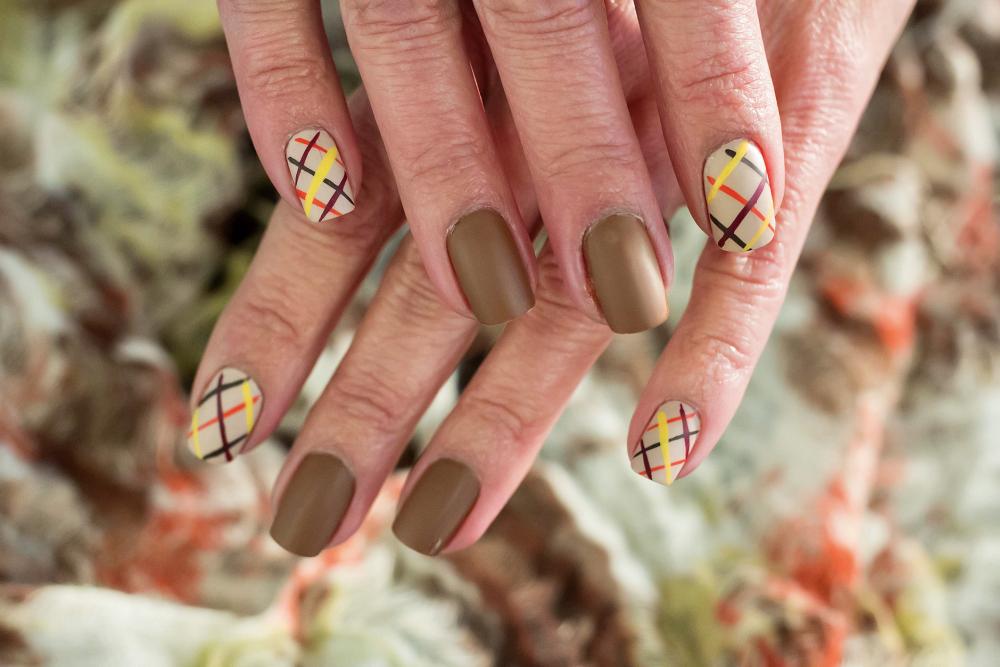
21. Plaid & Bronze Manicure – Thanksgiving Nail Designs
If you’re looking for a nail polish design to celebrate Thanksgiving with but don’t know where to begin, we have got you covered! We’ve decided to add another simple yet stunning manicure idea that’s ideal for this time of year and even better around Thanksgiving time.
Before getting started, ensure that your nails are dried completely so that you can prevent accidentally damaging your hard work by smudging or cracking it.
To get things started on this plaid and bronze Thanksgiving nail design, you’ll need some matte bronze nail varnish, as well as various other colors for the plaid pattern.
If you’re not a fan of painting the plaid pattern, you could go with nail stickers, although it won’t look as great.
Just like all of our previous designs, you’ll need to paint each nail with a bronze shade. Make sure to coat every nail evenly, then wait for it to dry completely before you move on.
Next up, using festive colors for this manicure (green, red and white), draw plaid patterns onto your nails that are next to one another.
In our example, the model applied the plaid pattern to fingers that were further apart (pinky and index), but you can feel free to experiment.
Furthermore, if you want, feel free to use various different shades instead of sticking with just three.
Once everything is completely dry, give them a clear top coat to protect them against chipping and any other kind of damage.
We guarantee that if you manage to pull it off, this Thanksgiving nail design will have everyone asking you where you found such a gorgeous manicure! Little will they know that you did it yourself and how easy was it for you to do so.
22. Pastel French Manicure – Simple Fall Nail Ideas
If you’re looking for a more traditional Thanksgiving nail design, this one is perfect for you! It’s easy to create, has an autumnal vibe to it, and will have everyone thinking that you’ve just visited the salon when in fact, it was your very own doing, which makes this idea even better!
Before getting started, ensure that your nails are completely dry so that you don’t accidentally smudge the design before you even get the chance to complete it.
First things first, you’ll have to gather a bunch of materials. For this French manicure with a fall twist, all you’ll need are some pastel purple or green nail varnish plus white nail paint for the French tip.
If you’re not a fan of painting the nail tips with white, feel free to use some other color instead of this one.
Make sure that you dry your nails completely before moving on to step two, then apply a generous coat of the pastel purple or green varnish on all of your nails.
Once again, carefully apply the varnish so that there are no visible streaks anywhere. It will take longer for it to dry if you do this on more than one coat at a time. Therefore be patient and allow each layer to dry completely before doing another.
French manicures are always in style, and that’s why we find it easy to assume that you’ll love this idea as much as we do! If you’re looking for an excuse to show off your new manicure, Thanksgiving is the perfect opportunity!
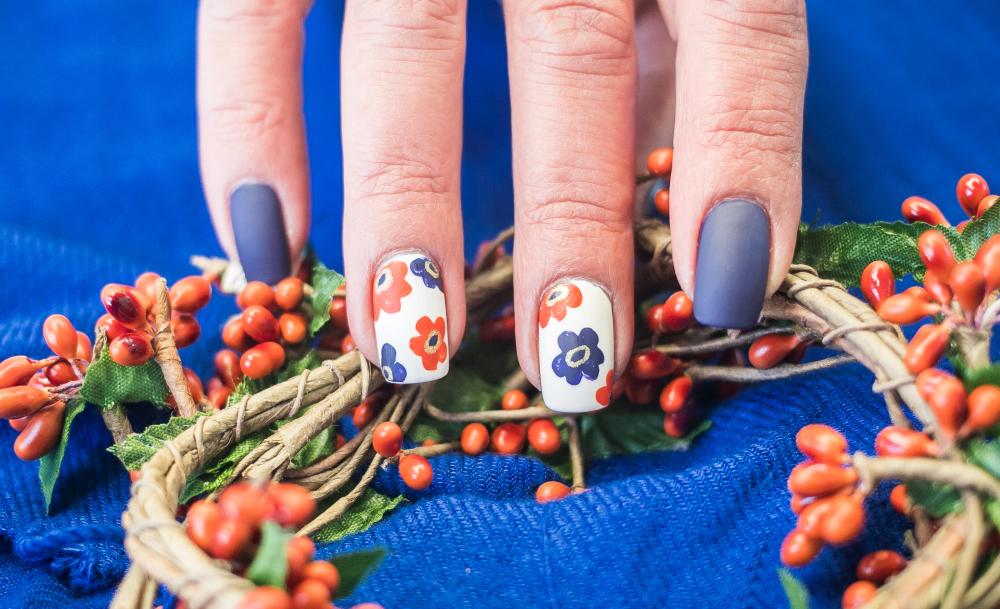
23. Fall Colored Flowers Manicure – Nail Art Ideas
Some of you might like the idea of adding flowers to your Thanksgiving mani, and if that’s the case, then this is just the right article for you! These nails subtly show off autumn colors while remaining simple enough that anyone can pull them off!
Before getting started, ensure that you dry your nails completely so that you don’t accidentally smudge your Thanksgiving nail art before you get it done.
If you feel like getting started on this French tip manicure, all you’ll need are two nail varnishes, one shimmery bronze, and another dark pink. Also, some tweezers or a dotting tool, plus a clear top coat will come in handy too.
Just make sure to dry your nails thoroughly and completely before moving on to step two, then apply the dark pink varnish to the “tip” of your nail.
You can also use a brush or some tweezers for this part if you prefer. However, do ensure that the application is an even one so that no streaks remain visible.
Using your dotting tool (or another small object), apply little dots along the edge of each nail in the same way as you did with our plaid French manicure earlier on in this article. If you don’t have a dotting tool, then feel free to use the end of a pin instead!
And there you have it, an easy autumnal design that will make sure that your nails are noticed! And why wouldn’t they be? After all, it takes seconds to achieve this Thanksgiving nail art!
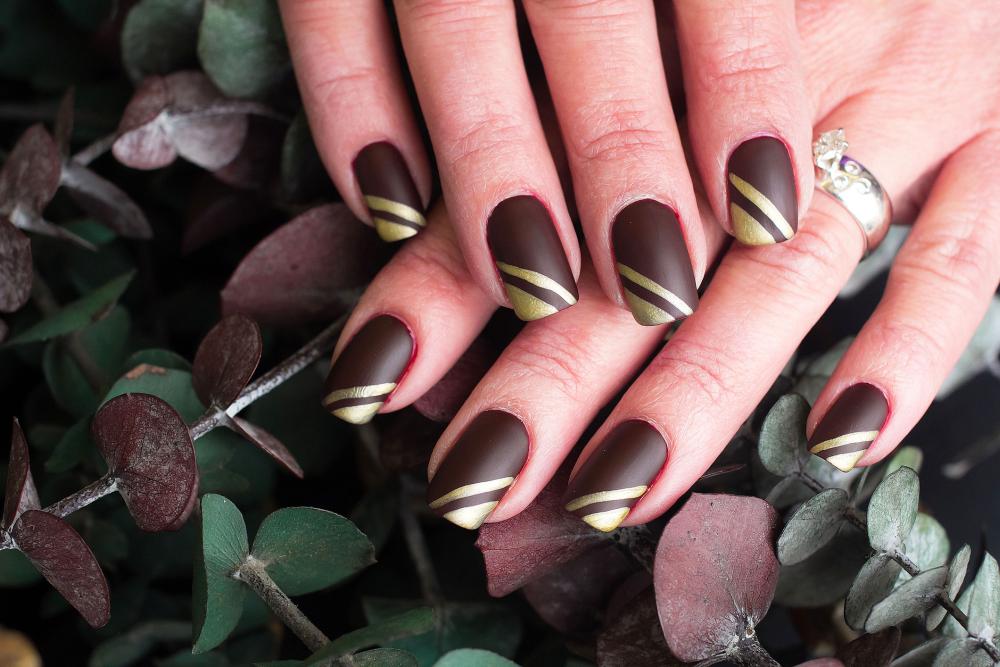
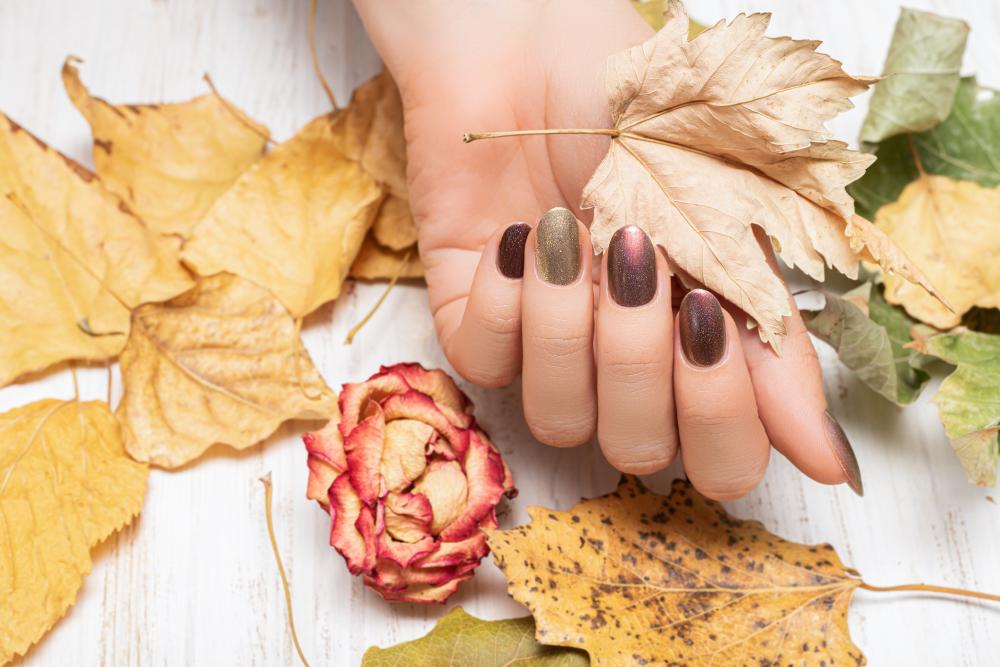
24. Dark Burgundy And Gold Manicure – Thanksgiving Nail Colors
If you’re looking for a manicure that’s not too in your face but still says Thanksgiving, look no further! This design is simple yet very effective and will make sure that you stand out from the crowd.
Before getting started, ensure that your nails are completely dry. This way, you won’t accidentally crack or smudge any of your hard work while attempting to create it.
To get started on our Thanksgiving nail art, all you’ll need are some dark burgundy or maroon varnish, plus a glittery gold one. Feel free to add in a top coat, too, before applying the final layer.
We can’t stress this enough, but you really have to ensure your nails are completely dry before moving on to step two, then apply the dark shade over all of your nails. The next step is to add a thin coat on top of the dark shade once it’s dry.
You can also use a brush or some tweezers for this part if you prefer. However, do ensure that the application is an even one so that no streaks remain visible.
Using your dotting tool (or another small object), apply tiny dots along the edge of each nail in a similar way to our plaid French manicure earlier on in this article. If you don’t have a dotting tool, then feel free to use the end of a pin instead!
If you like the model in our example photo above, you could choose to paint thin stripes instead of dots. Or better yet, dot one nail and paint stripes on the other if you feel like mixing it up a bit!
And there you have it, a Thanksgiving nail design that will have your guests wondering where did you have it done!
25. Fall Leaves On Trees – Autumn Nail Designs
This fun and colorful yet simple nail design is perfect for showing off during the long Thanksgiving weekend! All you’ll need are a base coat, two or three different shades of green polish, some dotting tools/tools, and a top coat.
To get things started on this Thanksgiving nail art, all you’ll need are some bright green, light green, and dark brown varnishes, plus some tweezers or dotting tools. A clear topcoat will come in handy, too, before applying the final layer.
Before applying the first color, dry your nails thoroughly, then check, then double-check. Although seemingly exaggerated, this dryness of the nails is paramount to the whole painting process.
After making sure that there’s absolutely no sign of moisture on your nails, you can paint them with the green shade of your choice.
It’s up to you which one you use, but try mixing it up a bit by using different shades! For example, you might want to choose a lighter green for the base coat and a darker green for the tip – or vice versa if you’re feeling brave!
Once your nails are covered in two or three coats of their chosen color, allow them some time to dry before moving on. If they’re not fully dry, then this next step could end up smudging them, so be patient!
Using some tweezers or dotting tools, apply the leaves of various sizes all over your nails. Ensure that they’re evenly spread out over each nail before moving on to step three.
You can choose to do more or less of these depending on how much effort you want to put into your Thanksgiving nail design, but either way, it will look fantastic! Now all that remains is for you to apply a top coat before admiring your handiwork.
You might also want to consider adding some gold or silver lines across your green base coat – this will help to make the design stand out even more!
This simple yet effective Thanksgiving nail design is perfect for any occasion, but it will truly shine at your next Thanksgiving dinner!
More Thanksgiving Nail Designs
26. Gilt Tip Red Thanksgiving Nails
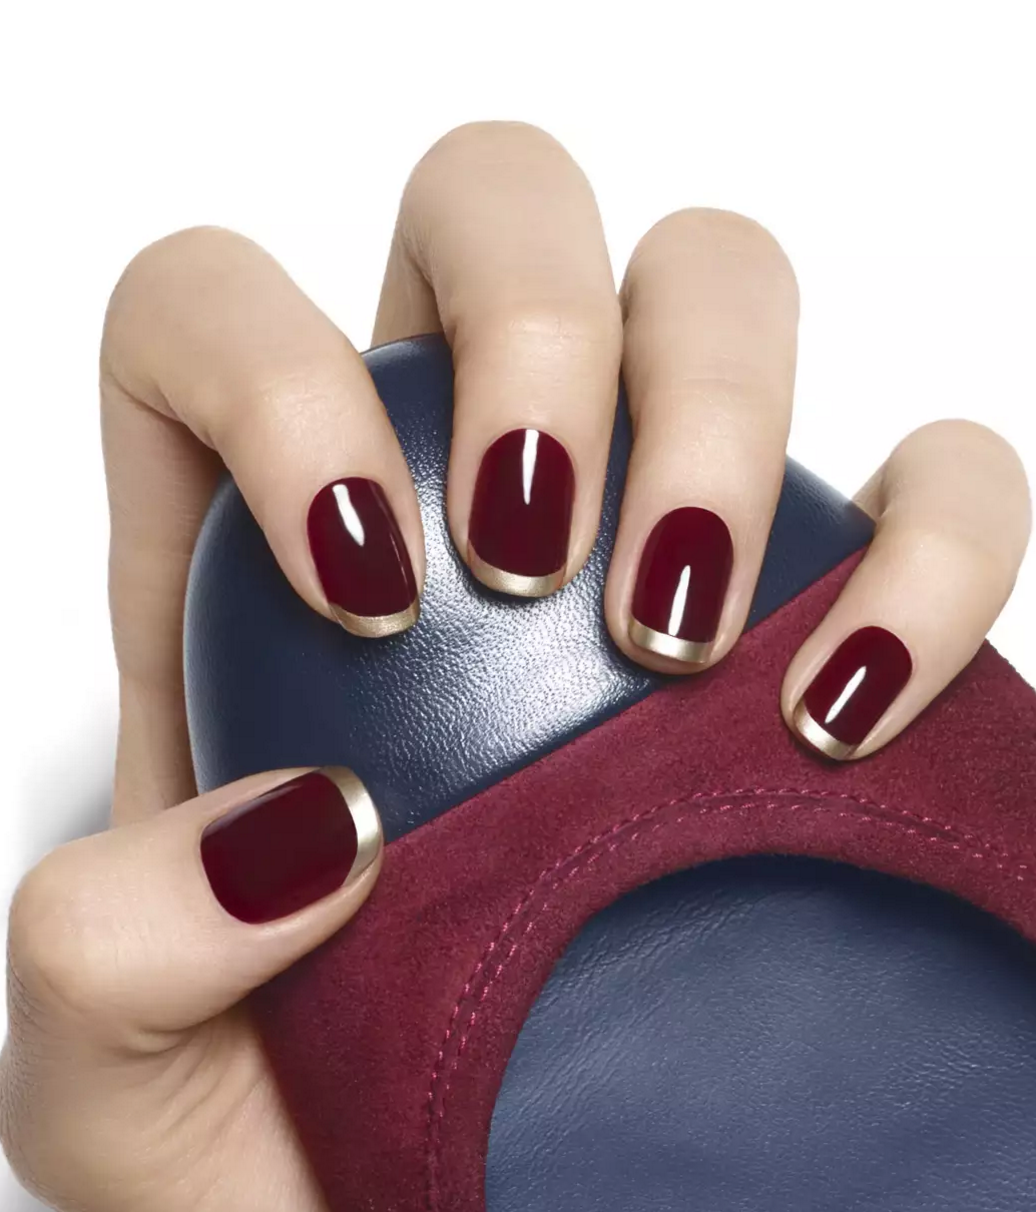
This elegant red manicure is perfect for Thanksgiving, with its dark hues and metallic gold tips. This would be a simple look to recreate, with a steady hand to paint the lines for the tips. Make your way over to Essie’s website to check out the easy tutorial.
27. Glittered Brown Thanksgiving Nail Art
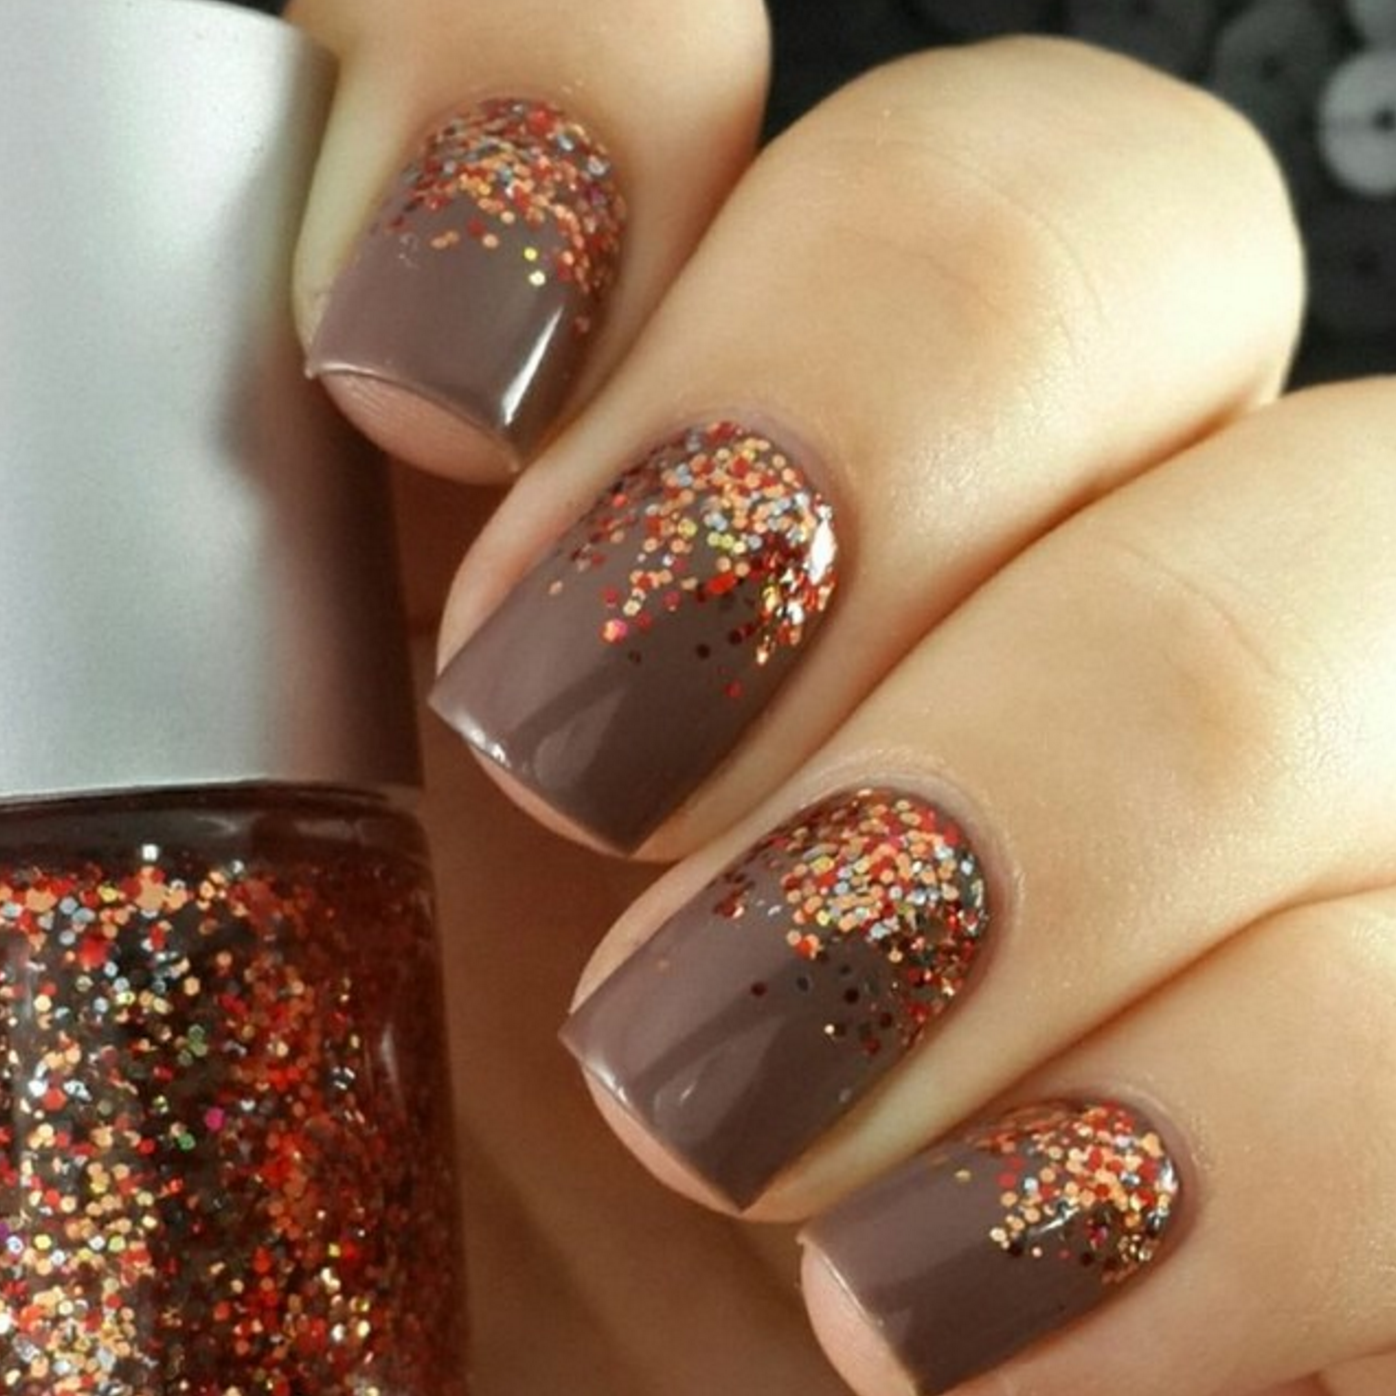
Transform your tips into festive Thanksgiving themed beauties, by painting them with a brown base color and accenting them with colorful glittered polish that looks just like tiny bits of fall foliage. Head over to Amazing Nails 67’sInstagramaccount to check it out.
28. Soft Brown Nail Art Ideas
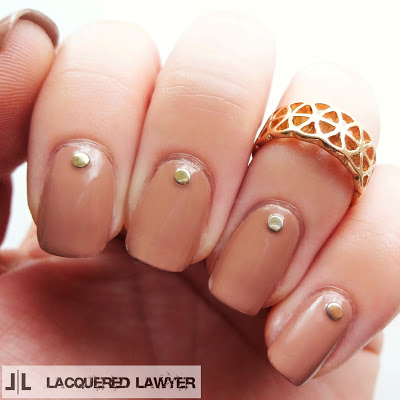
Looking for a subtle style this Thanksgiving? Try this beautiful studded soft brown look. Begin with two coats of light mocha colored polish, and top with small gold studs as an accent. Make your way over to the Lacquered Lawyer’s site to read all the details.
29. Burgundy Chevron Thanksgiving Nail Idea
This is another great potential style that you may want to consider for your Thanksgiving manicure. This look is done with a deep burgundy red polish and some striping tape which masks off the chevron shapes. Head on over to Lulu’s blog to check out the how-to.
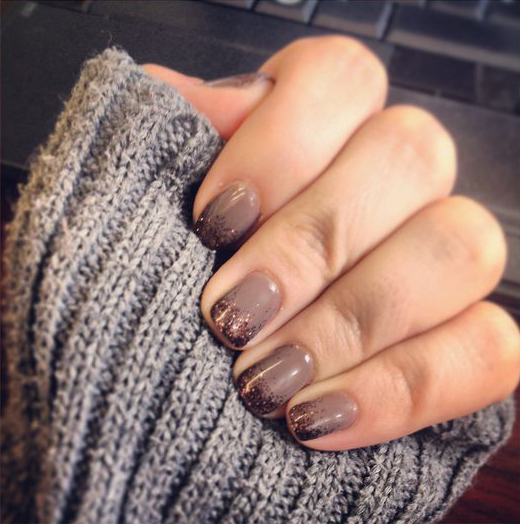
30. Glittery Brown Thanksgiving Nails
Don your tips with coppery glitter this year for Thanksgiving… your friends are sure to be jealous of your awesome mani! The key is to choose a light brown polish color with purple undertones, so the copper stands out just enough. Found over here.
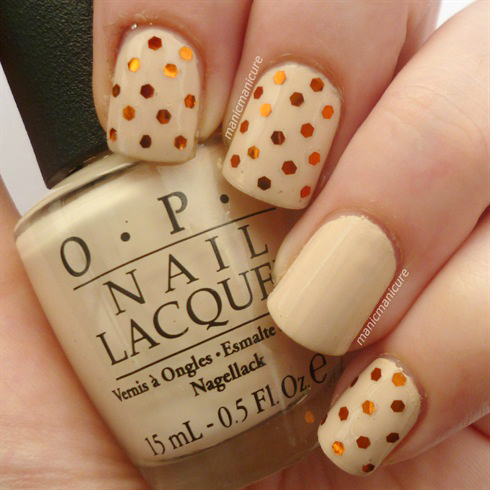
31. Beige Sequined Thanksgiving Nail Colors
This beautiful manicure is reminiscent of a yummy Thanksgiving dessert… maybe aperfectly bakedpie or crême brulée. This nail art look begins with a warm beige polish underneath, and is topped with gold “sequins” on top. Found over at the Nail Art Gallery.
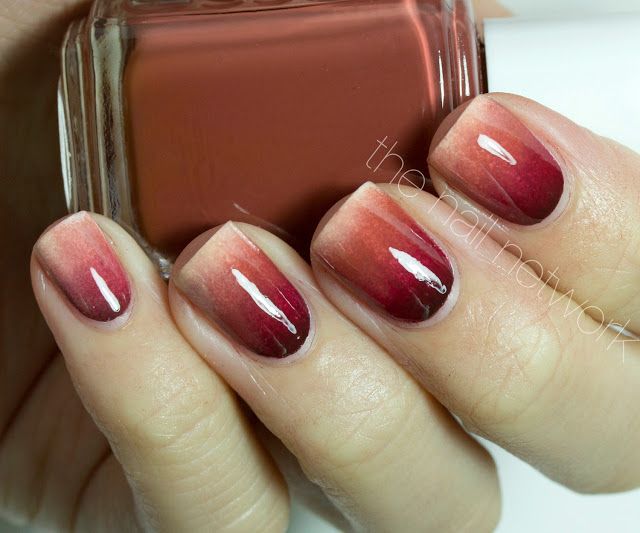
32. Ombré Gradient Autumn Nail Design
Next up, we have a lovely gradient effect which ranges from a dark cherry red to a light nude shade. The ombré effect is achieved by painting a variety of colors on a sponge and gently laying it onto the surface of the nails. Read more about it at The Nail Network.
33. Plaid Nail Art – Thanksgiving Nails
This plaid look is super unique in that it has four different designs on each hand. Red, orange and a grayish brown color are onthe thumb, pointer and pinky respectively, while a plaid pattern in the same colors covers the middle and ring fingers. Check out the how-to on YouTube.
34. Criss Cross Thanksgiving Nail Design
This fun manicure reminds me a bit of a classic Thanksgiving dessert – cherry pie! The background color is red, while the overlapping diagonal grid pattern is a warm beige hue. Make your way over to Refinery 29 to check out this and other Thanksgiving mani ideas.
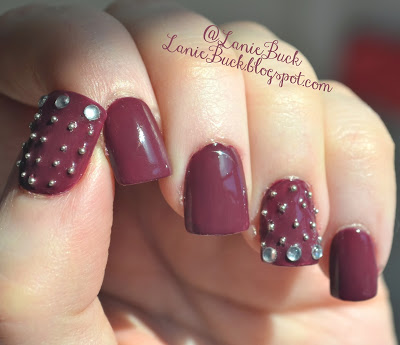
35. Studded Purple Nail Art Ideas
If you prefer embellishments to patterns, give this look a try. The base color is a warm purple with red undertones, which is then accented with different sized studs on the the thumb and ring fingernails. Head on over to Lanie Buck’s blog to read all the details.
36. Ombre Leaf Thanksgiving Nail Designs
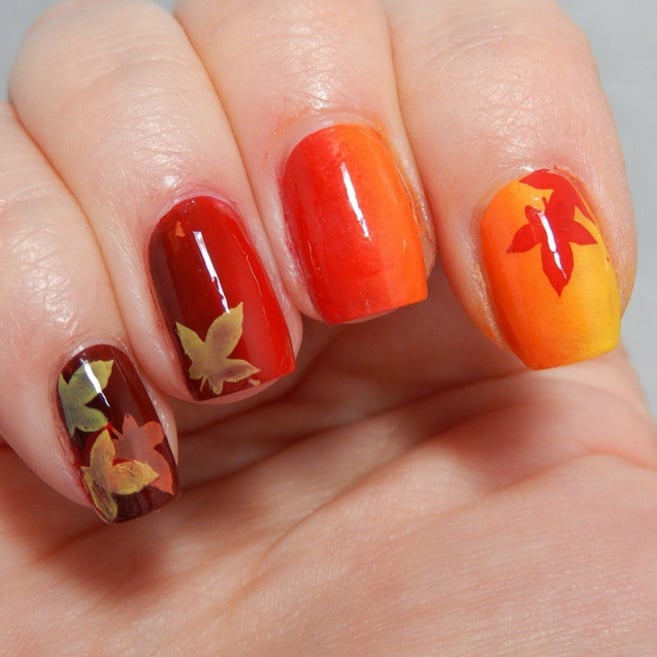
This stunning look has a couple of different effects, including an overall ombré starting at the pinky and moving through the other nails, and also a handful of pretty fall-colored leaves printed on most of the nails. Head on over to PopSugar to see this and many others.
37. Metallic and Matte Thanksgiving Nails
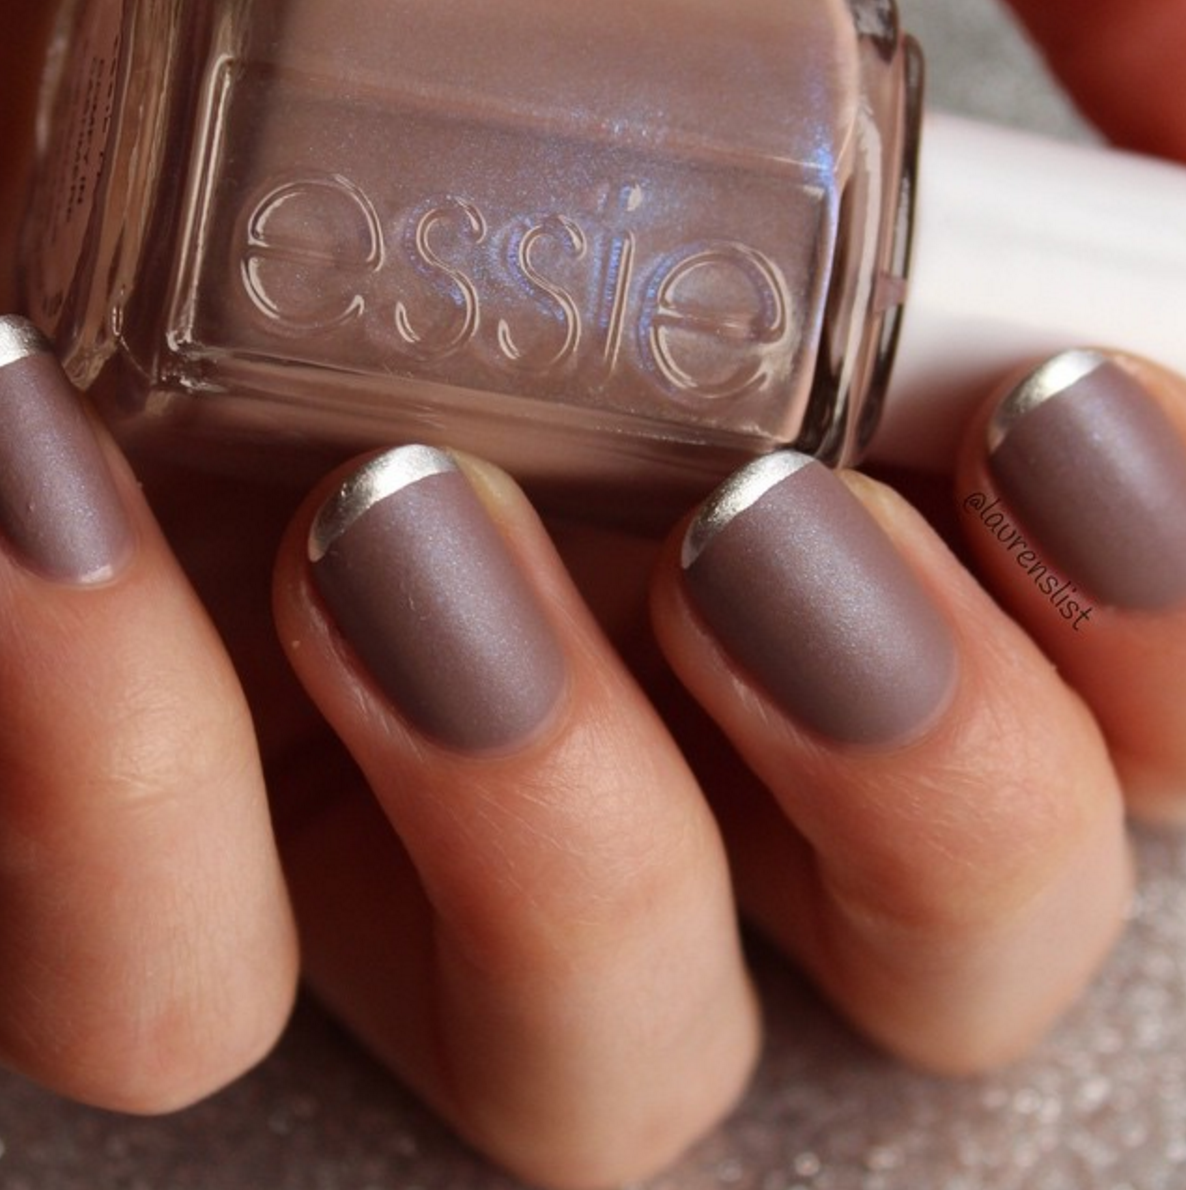
This fresh look has a combination of metallic and matte, giving it a very modern look. The muted purplish brown color would be perfect for Thanksgiving, while the metallic silver tips with lend a fancy vibe. Found over Lauren’s List’s Instagram account.
38. Sparkly Fall Leaf Thanksgiving Nail Idea
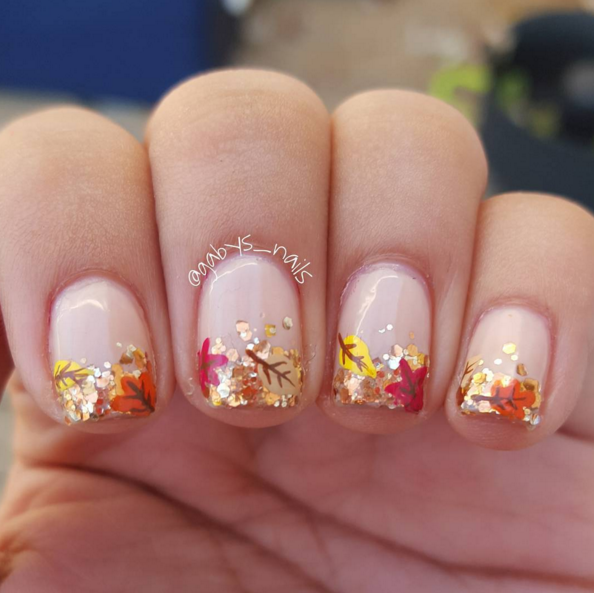
If you prefer brighter, more glitzy style manicures, then this one might be perfect for you. The base color is a simple pale pink, while the tips are embellished with metallic glitter and then topped with leaves in autumnal colors. Found over on Tumblr.
39. Striped Thanksgiving Nail Colors
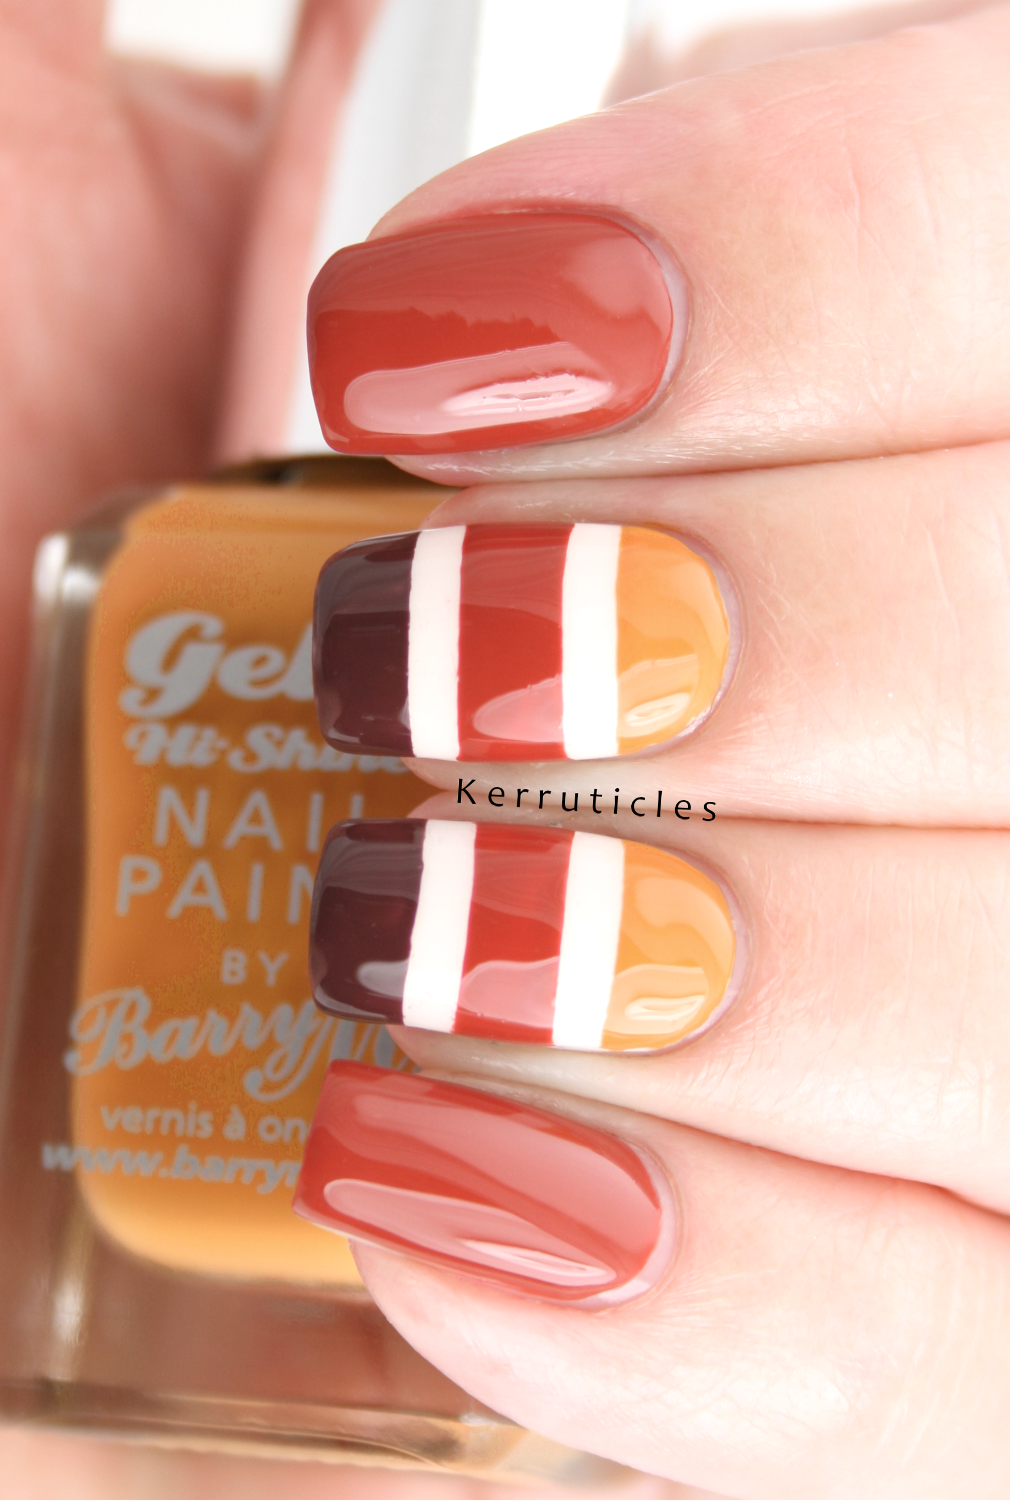
This look is a bit different, with a more uniform design of stripes. The colors would be perfect for Thanksgiving – a dark brown, burnt orange and a warm yellow span a base color of white on the middle and ring finger. Get the tutorial over at Kerruticles.
40. Thanksgiving Nail Art – Turkeys
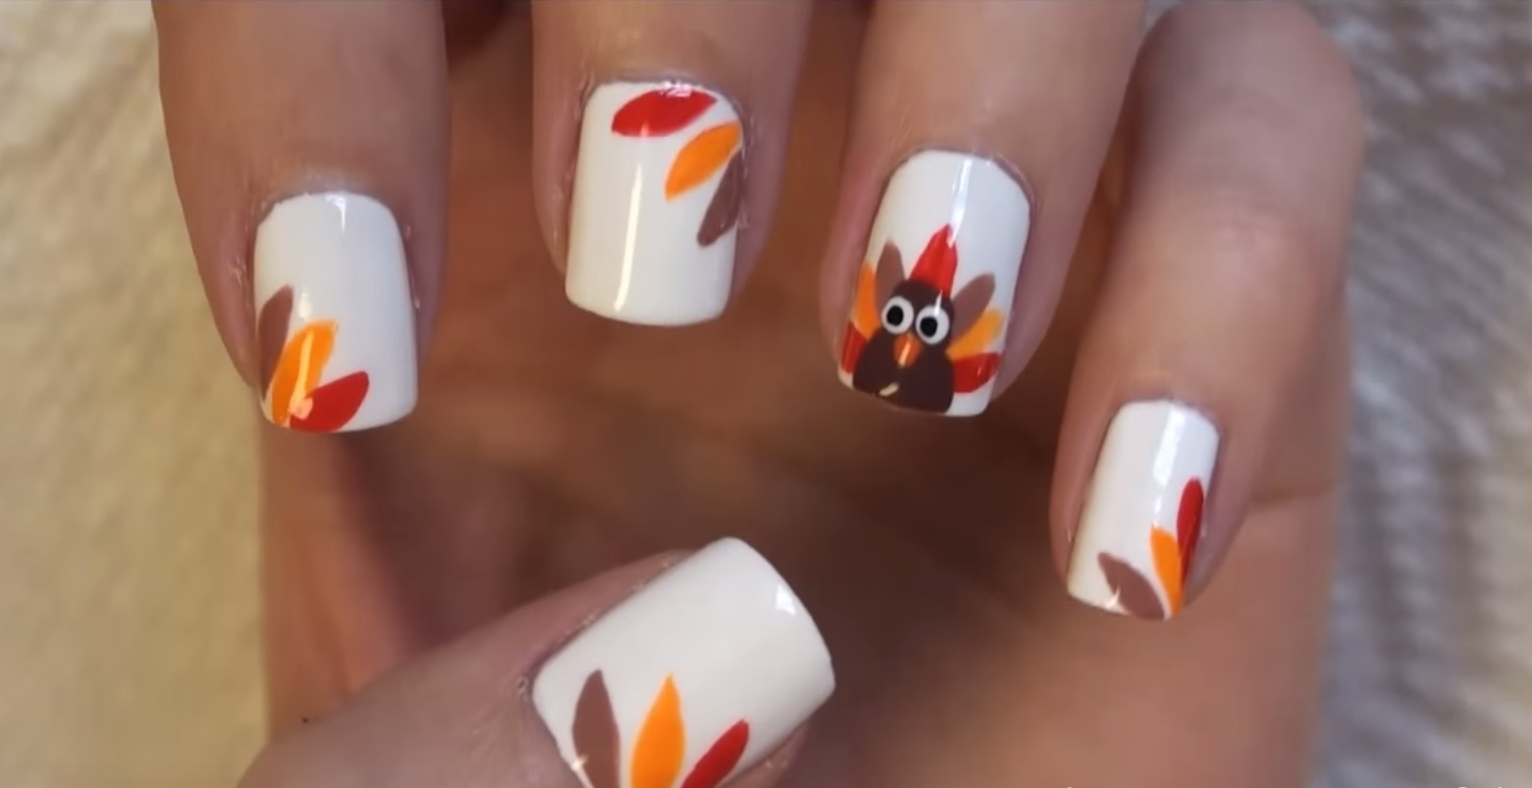
This fun manicure has an adorable little turkey painted on the ring fingernail, while the others have turkey feathers in the corners. The white polish really lets the nail art stand out. Head on over to Jenny Claire Fox’s YouTube channel to check out the tutorial.
41. Red and Gold Chevron Thanksgiving Nail Art
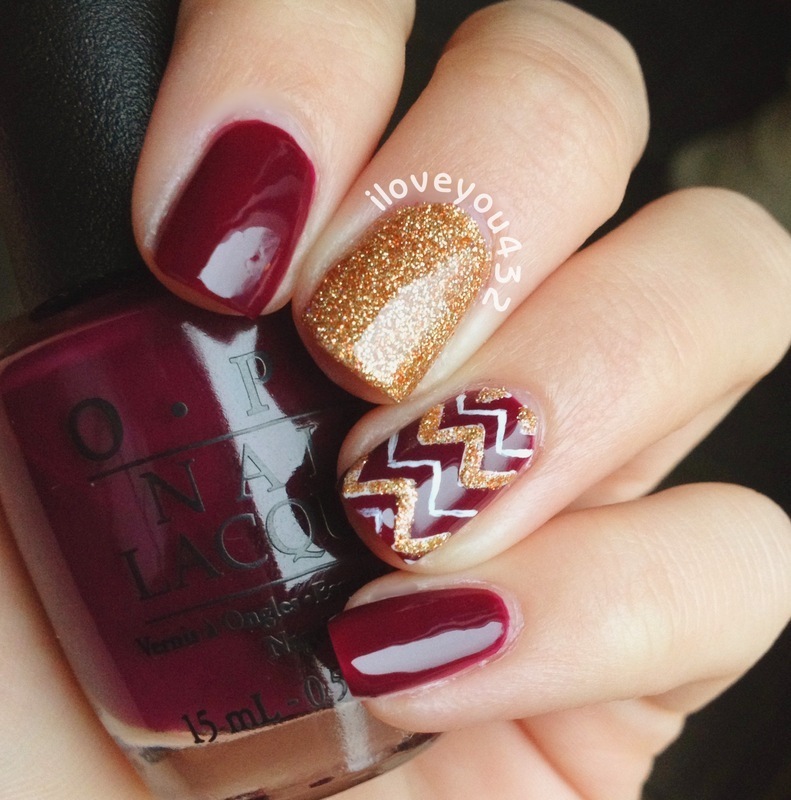
This bold look is done with a lovely red wine polish color from OPI, paired with a sparkly gold hue. A small white chevron alternates with the gold for a bit of contrast. Mix up the chevron with solid red on two nails, and solid gold on another. Found here.
42. Glitter Autumn Nail Design
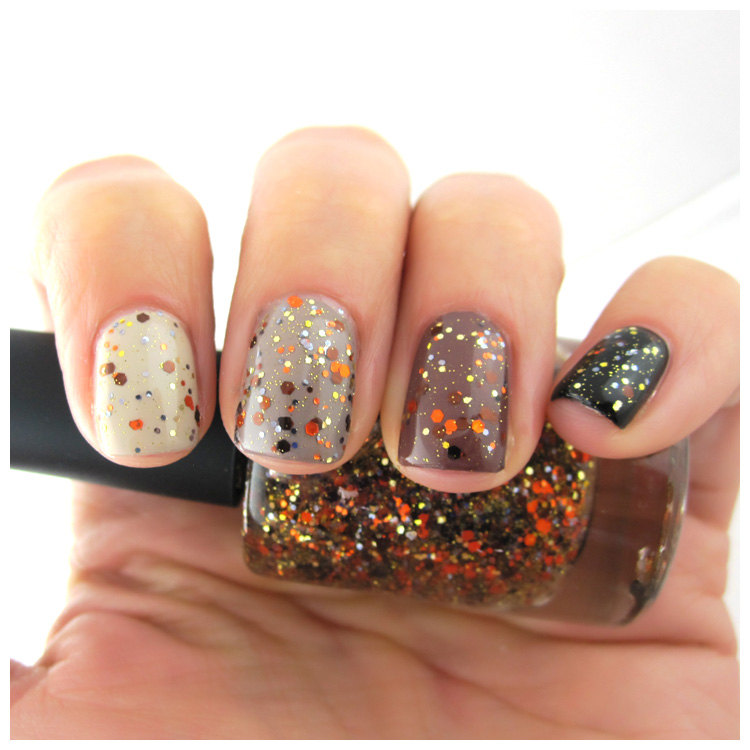
While each of these nails looks completely different, they are actually topped with the same glitter polish – just the color underneath is different. Paint each nail in a different neutral hue, then finish with an autumnal sparkle polish like the one shown here. Found on Etsy.
43. Graphic Thanksgiving Nail Idea
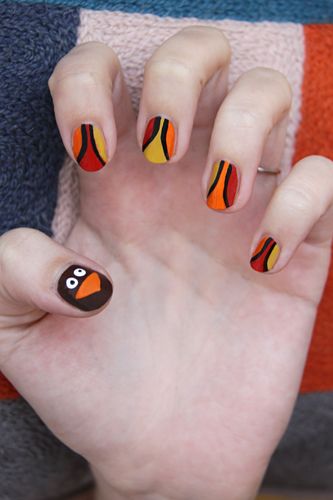
This colorful Thanksgiving mani has a very graphic look, with bold reds, oranges and yellows. Black lines separate each color, lending a very unique look. And don’t forget to paint the cute little turkey face on the thumb! Found over here.
44. Turkey Nail Art – Thanksgiving Nails
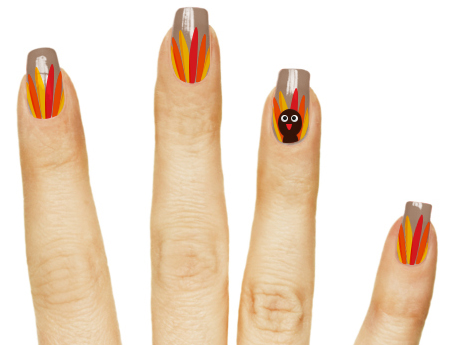
Here’s another fun look that includes a turkey. The base color is a lovely mauve color, which is the perfect backdrop for the colorful red, orange and yellow feathers – along with the adorable turkey on the ring finger. Get the full tutorial over at Buzzle.
45. Purple and Gold Leafy Autumn Nail Design
This manicure is a fresh take on the more traditional red, orange and gold mani that many people choose during the Thanksgiving holiday. Instead of red, a purple with red undertones is combined with a sparkly metallic gold hue. Found here.
46. Red and White Patterned Thanksgiving Nails
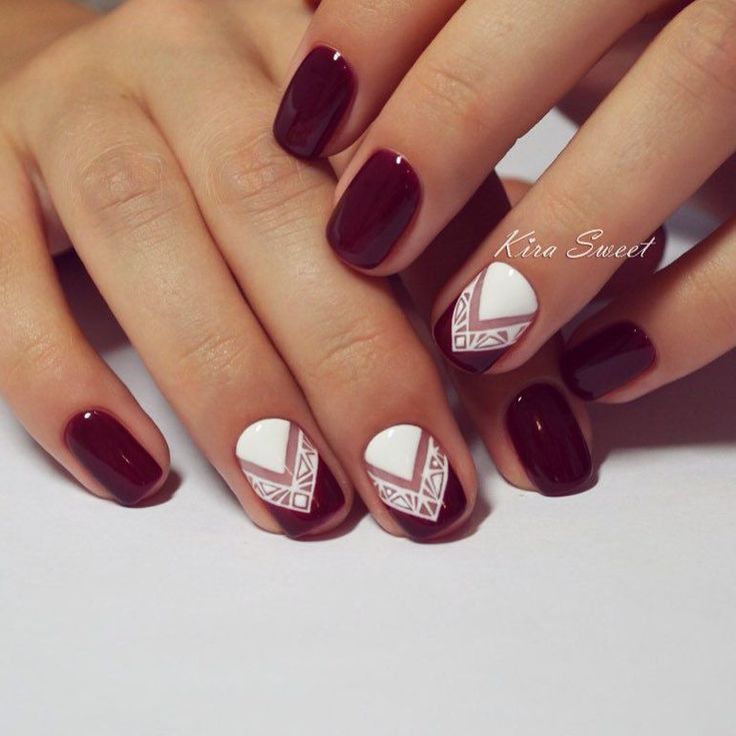
If you prefer abstract patterns to literal ones, then this might be the perfect manicure for you. This is a combination of dark merlot red polish along with brightwhite, creating a high-contrast mix perfect for creating this intricate pattern. Check it out over here.
47. Bold Gold Stamping Nail Art Idea
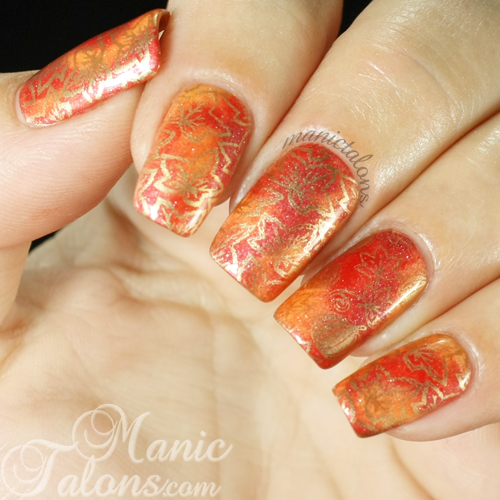
Stamping patterns over a mix of colors creates another great effect, shown above. Begin with a base of burnished red and orange, and then stamp the beautiful gold leaves over the top. Make your way over to Manic Talons to check out the full tutorial.
48. Cartoon Style Thanksgiving Nails
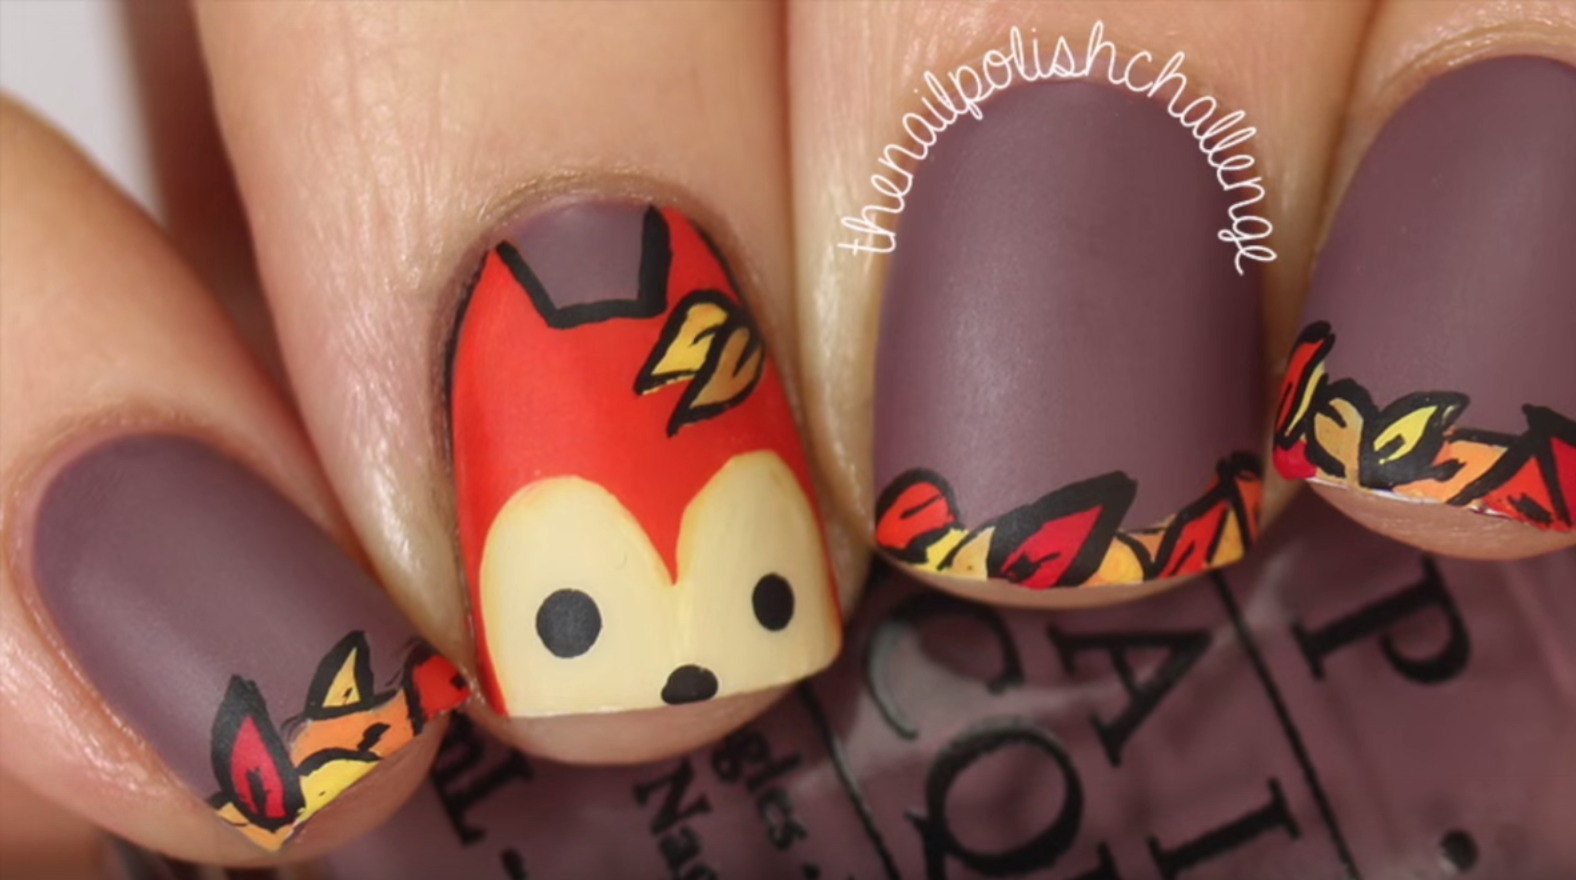
If you err on the side of playful with your manicure style, then you might enjoy this fun cartoon-style design. Fall leaves outlined in black don the tops, while a cute little cartoon character is painted onto the ring finger. Get the full how-to over on YouTube.
49. Brown and Silver Swirls – Simple Fall Nails
For a super unique Thanksgiving mani, give this beautiful swirly design a try. Begin with a deep chocolate brown polish, then add the silver swirls over the top. The last step is to add the tiny silver dots using a toothpick. Found over at Tassa’s Blog.
50. Warm Autumn Nail Design – November Nails
If you enjoy the colors of fall, but you’re not quite ready to let go of your favoritebright red summer polish… don’t! Simply use it on a couple of fingers as shown above, then combine it with some oranges and yellows to give it that Thanksgiving feel. Found here.
Conclusion
All things considered, if you’re sick and tired of always using the same nail art ideas for your Thanksgiving outfit, then you’ll definitely find our guide to be quite helpful.
The models we’ve presented in our article are varied and thus guaranteed to catch your eye. Well, maybe not all of them, but we’re positive that you’ll find at least a couple of Thanksgiving nail designs that you’ll definitely love and feel like trying on.
Note that, although we tried to include some step-by-step instructions on how to achieve the nail designs in this article, they may not be enough. In this case, you should feel free to use the example photos we’ve also attached at the top of each item.
If the instructions and photos are still not enough, don’t shy away to look up even more detailed instructions about how to achieve each Thanksgiving nail art. Last, but not least, make sure to have fun and stay grateful.
Happy Thanksgiving, everyone!


