50 DIY Outdoor Christmas Decorations: Make Your Front Yard Magical
Christmas is one of the most beloved holidays of the year, and it’s not hard to see why: there’s snow, caroling, hot chocolate, Christmas trees, and last but not least, decorating your house to embrace the spirit of the season.
Unfortunately, most of these wonderful things come with one major drawback: they require you to be inside. This year, why not take the holiday spirit outside for a change? Here are some ideas to inspire your own creativity.
With so many great tutorials online, it’s hard to know where to begin. Fortunately for you, we’ve done all the hard work for you! We’ve collected a list of ideas and arranged them by project difficulty, so if you’re new to the DIY scene, we recommend starting with something simple like stringing lights or making a wreath.
Of course, it’s important not to lose sight of the goal: outdoor Christmas decorations that will make your house shine during the holidays! We’ve got some ideas that are sure to shine through, like the DIY starburst mirror ornaments and lovely terrariums.
So if you’re ready, grab your drill and an extension cord; it’s time to make the season bright. Happy decorating!
Outdoor Christmas Decorations
Although Christmas is the kind of holiday that’s celebrated mostly indoors, there’s little to no reason why you shouldn’t take it outside as well, if the circumstances allow you to. For instance, if you have a front yard, that’s a golden opportunity for you to bring some Christmas cheer to your visitors and neighbors!
If you want to get really creative, you can even try adding some Christmas lights or other decorations outside of your holiday décor. It’s a lovely way to show people that you’re a big fan of Christmas, and it can even be done with things that you already have at home.
Or if you have a garden but there isn’t an actual yard around it, that’s okay too! You can string up some simple white lights across the patio or balcony and embrace the spirit of Christmas in your own way.
We put together a list of DIY Christmas decorations you can make at home. These include both traditional and modern ideas that will help you get into the holiday spirit while also saving up some money on decorations (if that’s what you’re looking for).
So with that being said, here are some ideas for decorating your outdoor areas during Christmas time!
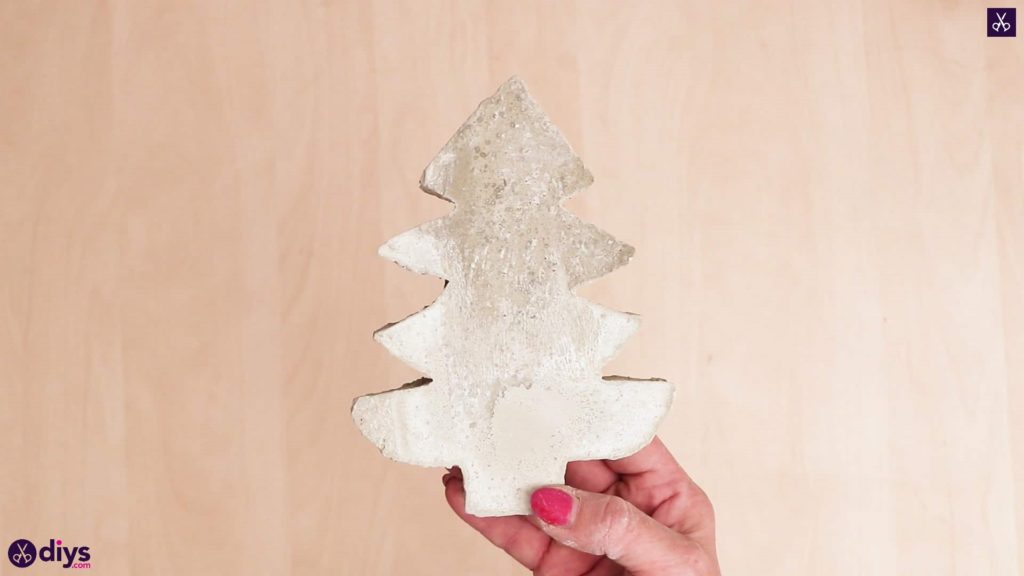
1. DIY Concrete Christmas Tree Decoration – Outdoor Christmas Decoration Ideas
A modern take on the usual Christmas tree, this project is simple and inexpensive to do. It makes for a wonderful decoration that you can use every year during the holidays!
However, you’ll need to have a bit of know-how in terms of handling concrete. Well, the actual handling part is not complicated: you just have to make sure not to crack it once it’s done; in fact, the mixing and pouring is the tricky bit, but don’t fret, as we’ve absolutely got your back on this one!
With a bit of luck and a lot of patience, this DIY Christmas tree decoration will be the highlight of your front yard. You can paint it any color you want or even add some lights to make it stand out well during the night.
The pros? It’s an easy-to-do project that looks simple yet attractive, does not require much effort on your part, and makes for an excellent outdoor Christmas decoration.
Now for the cons: it could be a bit difficult if you don’t know what you’re doing when it comes to working with concrete (e.g., mixing, pouring).
Just have a look at the step-by-step tutorial and you’ll be good to go. It’s not that hard, but if you’re having a hard time getting it done, just check our list for more ideas.
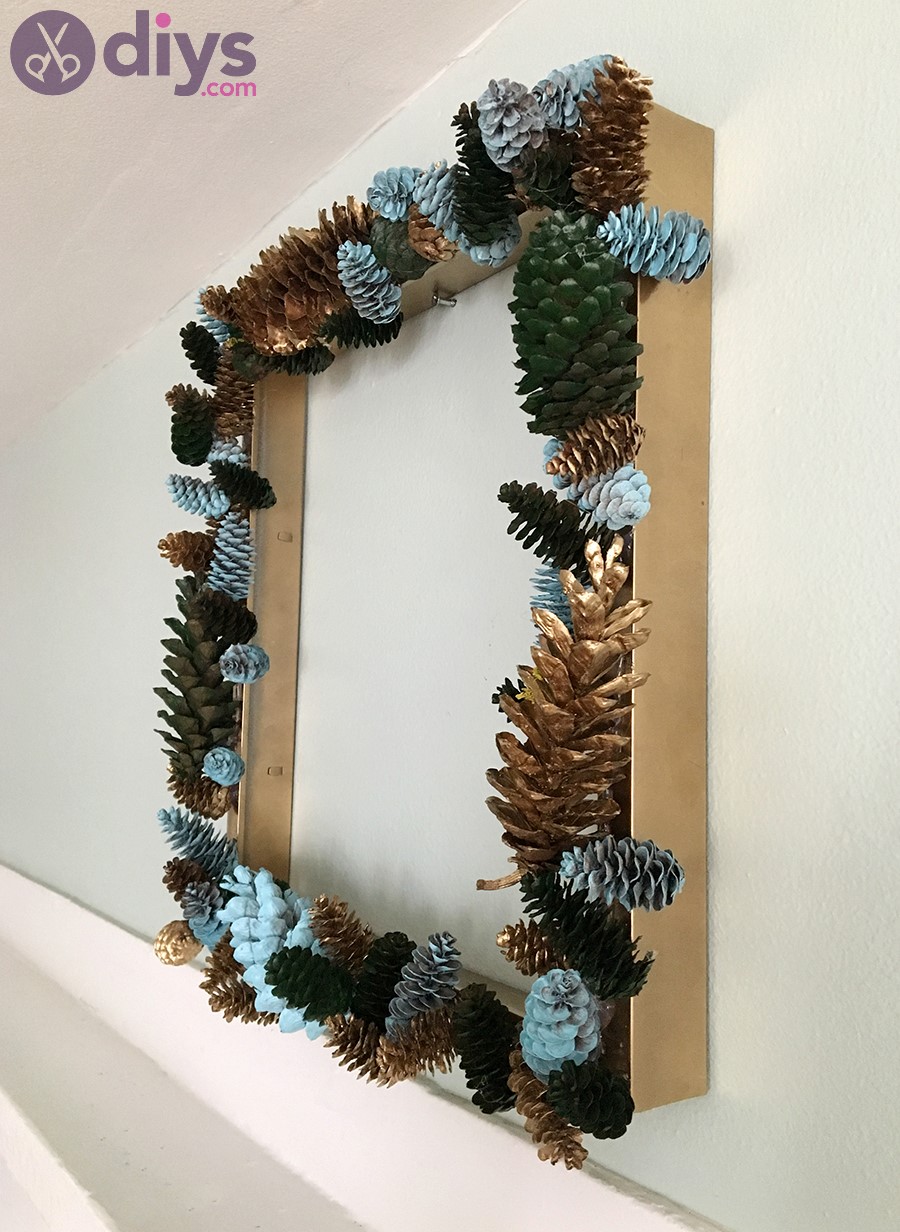
2. Square Pinecone Wreath – Outdoor Christmas Decorations
A square wreath is something you usually see for indoor decorations, however, it’s also amazing as an outdoor decoration.
You’ll need pinecones (or other natural materials) plus some wire and ribbon to make this project come together.
It doesn’t require much skill or effort on your part, not to mention it doesn’t take up too much time!
This square-shaped pinecone wreath can be done in just a couple of hours, so if you’re looking for some simple DIY Christmas decorations that don’t require elaborate preparations, this one’s highly recommended.
The result? An impressive-looking square wreath perfect for outdoor Christmas decoration! You can hang it anywhere, like near the front door or even outside; the choice is yours!
Plus, since it’s a square, it’s a bit different from the usual circular wreaths you see during the holidays.
The cons? It does take some time to finish, although not more than a couple of hours. Another con is that it needs a bit of patience and effort on your part, so if you’re prone to giving up on projects before completing them, this one may not be for you… Although there are some other options on our list!
3. Rustic Christmas Branch Wreath – DIY Outdoor Christmas Decorations
A rustic wreath is perfect for those living near the woods or any other place where nature’s abundant.
If you’re one of those, then this project will surely be a delight for you! It brings out the best of nature with it being so rustic and eye-catching to look at.
You’ll need some branches, wire, ribbon, small pinecones, and other natural materials – all available in your backyard or even outside your house. Simply put them together according to the instructions given by the tutorial to come up with this awesome Christmas decoration that can go on your front door or anywhere outside.
The great thing about this DIY Christmas wreath is that it’s very easy to without taking too much time off your hands.
Say goodbye to those pre-made wreaths, especially those that cost a lot and still look quite cheap! If you’re looking for an outdoor Christmas decoration that screams rustic and natural beauty, this one is perfect for you!
The only problem? It’s best done outside because it involves gathering tree branches and other natural materials from the forest or your backyard.
So if you don’t have access to any of these places, then this project will be rather difficult to do… But not all hope is lost since there are many more options on our list of DIY outdoor Christmas decorations.
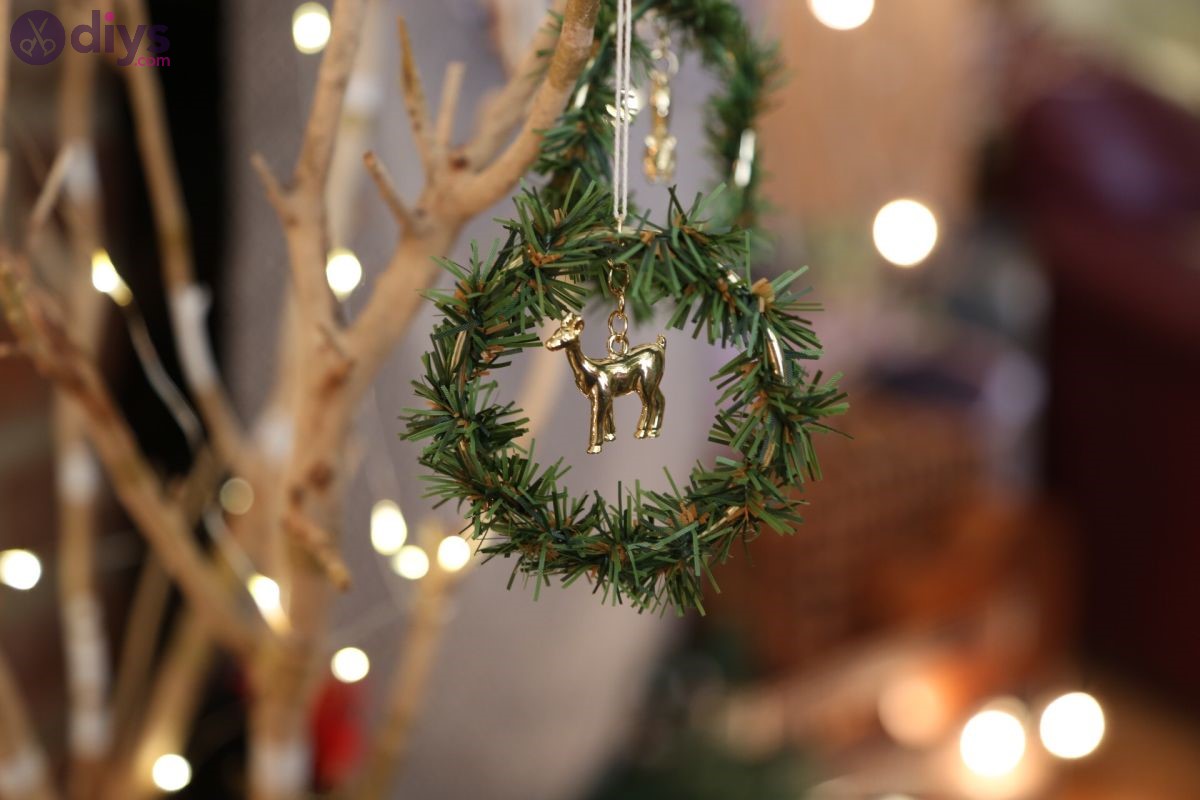
4. DIY Christmas Wreath – Cheap Outdoor Christmas Decorations
This is another easy DIY Christmas wreath that you can do without too much effort. If you’re looking for some simple outdoor Christmas decorations, then this one’s highly recommended!
It can be done in just a few minutes with items you have around the house, so it doesn’t require anything special. Also, did we mention that it costs next to nothing?
That’s one of the reasons why you should consider this as an option if you want some cheap outdoor Christmas decorations but still want them to look good!
You’ll only need a pair of scissors, a tiny wired pine garland, a bunch of metal rings, a pair of pliers, some string, a bunch of charms, and some gold jump rings.
Well, some of the items on the list are not exactly day-to-day stuff that you can just stumble upon in any household, but trust us that the required items are dirt-cheap compared to other decorations in our guide.
The good thing is that you can use all the spare materials and supplies at hand to finish this project. If you’re looking for some cheap outdoor Christmas decorations, look no more because this wreath will be perfect!
A great tip: if you have a wire mesh with small holes, then it’ll save you the trouble of creating your own wire garland by wrapping one around a piece of card or paperboard. It’s up to you if you want to make the garland yourself or not.
So if your wallet is thinning out and you still want to add on some decorations outside your house, then this Christmas wreath will surely be a good choice for you!
The only downside? It could take you longer to make it than other DIY outdoor Christmas wreaths we’ve included in our list. But that’s not really a big deal considering how cheap and easy-to-make it is!
5. Joy Holiday Wreath – Outdoor Christmas Decorations
If you’re looking for some outdoor Christmas decorations with snow, then this wreath is the best option if you want to try something easy!
All you need is a wire mesh, some wire cutters, and your choice of fabric. That’s all the supplies needed to make this great DIY Christmas decoration that screams winter in every way possible.
One thing we didn’t mention in our list so far was yarn or fuzzy material in general. This type of natural-ish material is perfect for creating your very own DIY holiday wreath because it looks so lovely on its own without needing any additional trimmings.
So if you don’t have any fancy yarns around but still are keen on adding some decorations outside your house, then this Christmas wreath is a perfect choice.
Not only is it cheap, but it’s also easy to make with no complicated materials needed! That’s what makes it perfect for beginners who are looking for something simple yet stunning on their front doors or anywhere else they want.
As long as you have a wire mesh and some yarn, this DIY holiday wreath will be quick to make in just a couple of hours. So if you’re short on time but still want to add some outdoor decorations, then this one is good enough for that!
Make sure you check the tutorial we’ve included above if you need a step-by-step guide to following along. The photos will also help you visualize the process better if you have a difficult time making it through our article!
Regardless of whether you go with another option or choose this joy Holiday Wreath decoration, there are plenty of options out there so your wallet won’t break down any time soon.
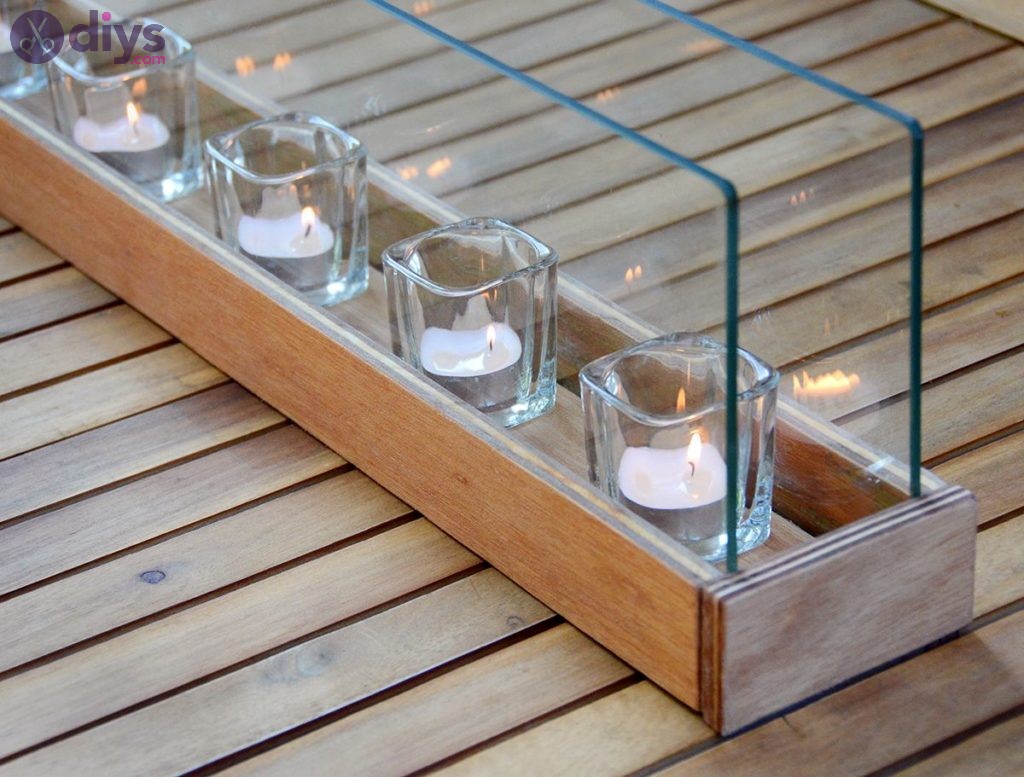
6. Votive Candle Holder – Outdoor Lighted Christmas Decorations
If you’re looking for some outdoor Christmas decorations with lights, then why not try something as simple as a votive candle holder?
One thing we want to make clear here is that this type of decoration isn’t made for partying and having fun.
But if you still like the look and feel of it, then there’s no stopping you from using them outside your house at night time! So don’t limit yourself to just adding these cute little light-ups inside your home during the holidays.
All you need are some metal wire rings, gold spray paint (optional), some thin wooden dowels/rods, and votive candles with holders. The supplies needed aren’t all that hard to so it shouldn’t be too much of a hassle for you to pick them up from your local store!
A more elegant touch would be gold spray paint here, but it isn’t necessary. All you need is some metal wire rings and wooden dowels/rods to make these great Christmas outdoor decorations stand tall and pretty on their own!
You could also use a different hue or shade of gold or silver if you want. But the best part about going with plain old metallic silver is how versatile it is when paired with other colors like red, green, blue, etc., during the holidays.
So there’s no need to worry about getting stuck with one color that matches poorly with everything else your home has during the season!
Make sure to check the tutorial we’ve included above if you need more details on how to create these awesome outdoor Christmas decorations with lights.
If you love candles as much as we do, then you will adore this type of outdoor Christmas decoration. So don’t think twice about adding these votive holders somewhere near your front door or at your patio!
7. Mushroom Jute Garland – Cheap Outdoor Christmas Decorations
Jute garlands are so versatile and stunning to look at, which is why they’re one of the most popular types of material people often use for their DIY projects. That’s why we love them so much!
Multi-purpose decorating materials like these jute garlands are perfect for outdoor Christmas decorations because they can be used in many ways if you think about it.
So instead of using the same old ornaments that everyone else does during the holidays, consider adding some jute garlands to your front door or around your home instead.
This type of natural material is also perfect if you want something more subtle than yarn but don’t want to go overboard with other types of decorations like tinsel.
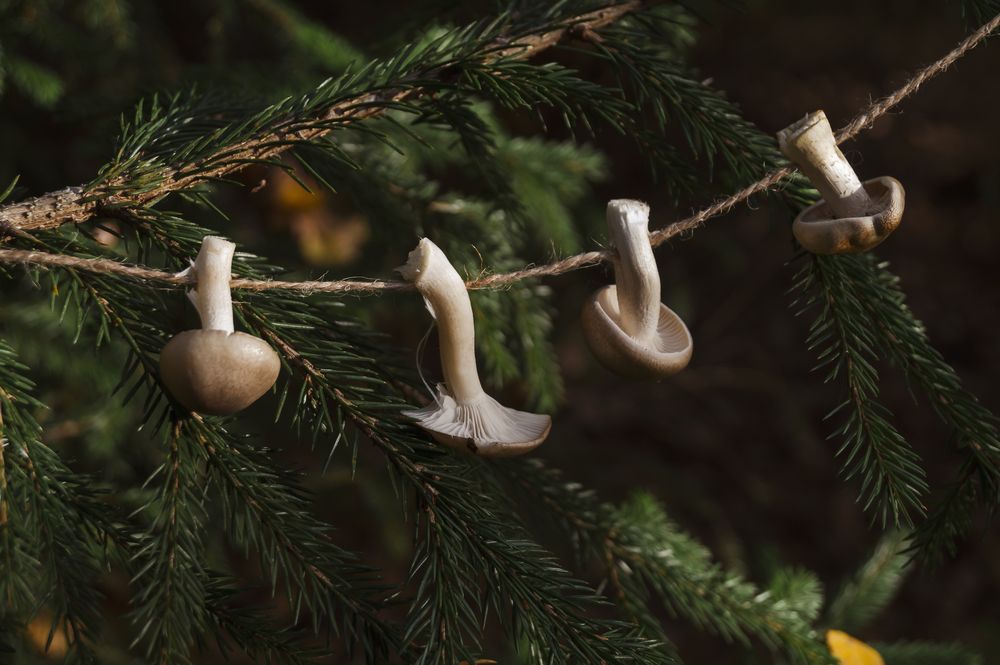
If you’re someone who loves mushrooms, then this option is perfect for you! These cuties are great for hanging up on Christmas garlands or just by themselves on anything really.
All you need is some jute string and an assorted variety of mushrooms. Make sure they’re not dry; otherwise you’ll end up with some shriveled mushrooms that won’t look good on your garland.
Hang the mushrooms on the jute string and place the newly-made garland somewhere outdoor. If you want to make sure the mushrooms will last for longer, just spray them with some hairspray or cover them in clear nail varnish.
These are perfect if you want some outdoor Christmas decorations made out of natural materials.
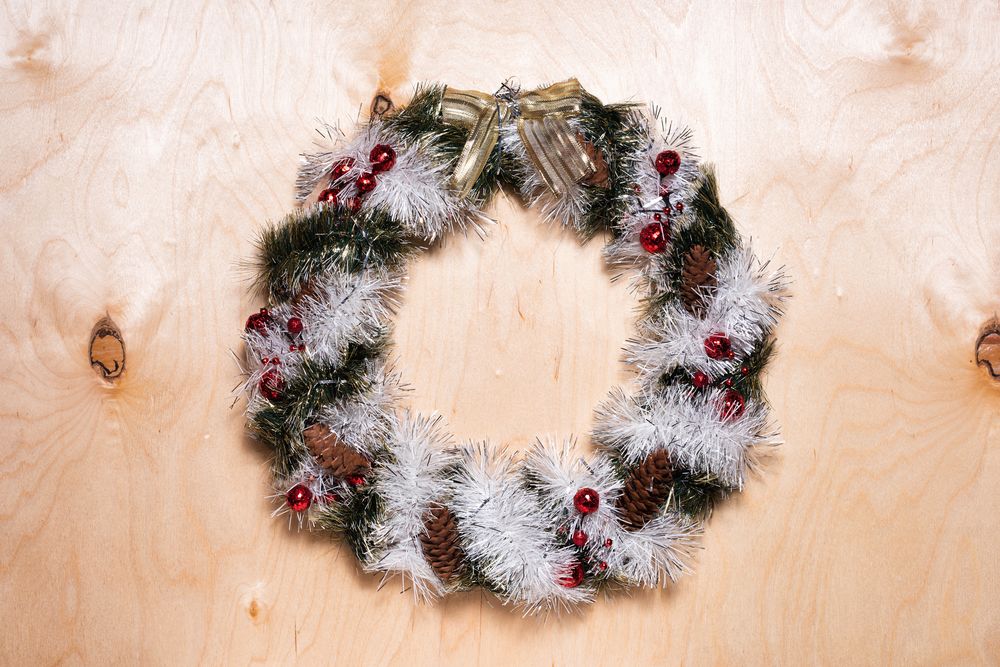
8. Tinsel Wreath With Cone – Christmas Decorating Ideas Outside
This is one of the easiest ideas for outdoor Christmas decorations. So if you’re someone who’s just getting started on making their home festive for the holidays, then consider giving these a shot!
All you need are some cones (size depending on how big or small you want them to be), tinsel garland, and some gold ribbon.
Make sure to get your hands on some glittery cone-shaped mini tree ornaments like the ones shown in the picture to make this idea look even better! You can find these pretty much anywhere online or in stores (they’re quite popular).
If you find that it’s too difficult attaching the tinsel garlands where they should go with hot, try using staples instead. They work just as well, plus they won’t damage your cones.
You can place these anywhere you want, whether it’s by your front door, on the tree in your backyard, or even somewhere else near the entrance of your home. It’s up to you!
This type of outdoor Christmas decoration is perfect for those who love glittery things (like us)!
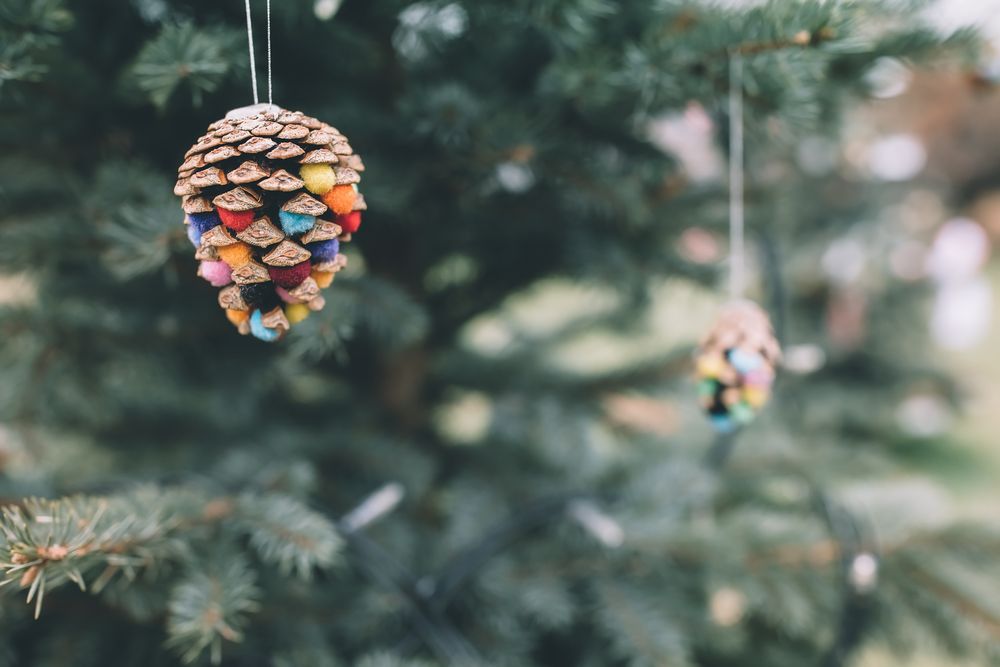
9. Colored Pinecone – DIY Christmas Decorations For Outside
One of the easiest ways to make outdoor Christmas decorations is by using pinecones! They’re inexpensive, easy to find, and are perfect for any occasion – even if you don’t celebrate Christmas.
All you need are some pinecones (look outside or ask your friends/family members if they have some lying around), paint in various colors, a brush, purée bowl filled with water, paper towels, and newspaper.
You can use poster paint or acrylics instead of regular kinds of paint that you can buy from gifts stores if you want to make the colors stand out more.
Just make sure you don’t mix any other types of paint with regular water-based or oil-based paints because doing so will ruin your painting session before it even begins!
Be careful not to spill anything on your clothes, furniture, carpeting, etc.; otherwise, things might get messy real quick! We suggest wearing some old clothing while you’re working on this outdoor Christmas decoration idea along with an apron. Don’t forget about that!
Now that’s done, take your pinecones and dip them in the bowl filled with water (just enough for there to be no dripping). You can leave them next to or near a window for several hours so they can dry off. Once they’re dry, start painting!
You can either cover them entirely in a single color or take your time and paint each cone in a separate color, like the example we used above. If you want to, you can even add some Christmas-themed leaves to the mix just for kicks.
These types of outdoor Christmas decorations are perfect if you love all things related to fall and winter. It’s definitely something that everyone will love!
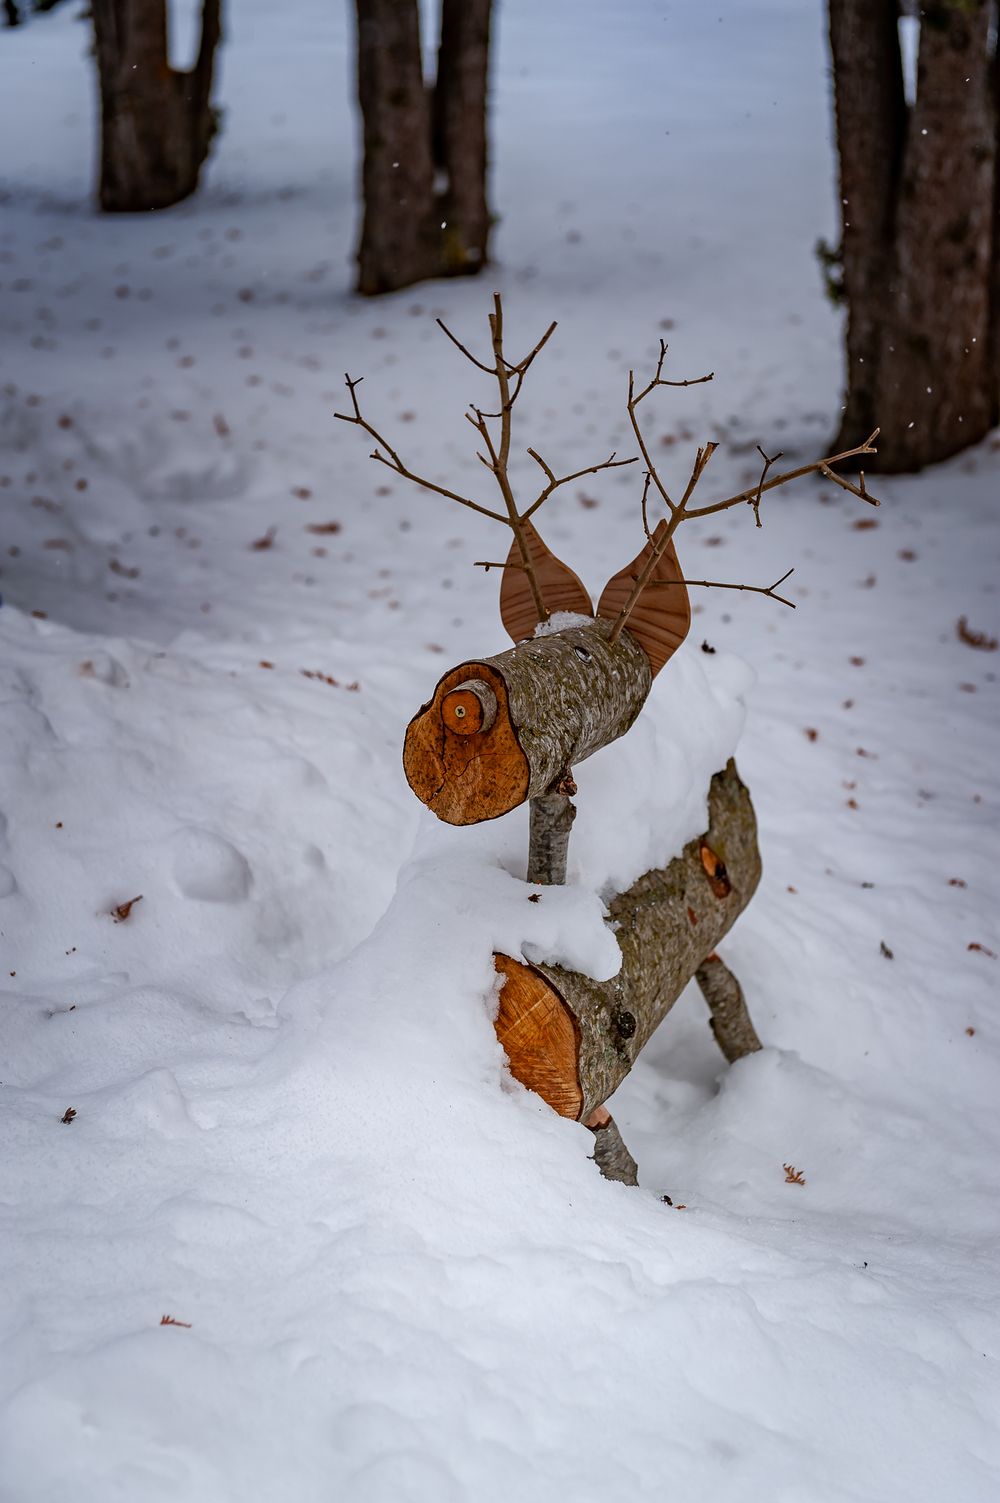
10. Christmas Deer Made Of Logs – Large Outdoor Christmas Decorations
We’re nowhere near the end of our list, but this one’s definitely special! It’s a large outdoor Christmas decoration that might require some help from your friends or family members if you’re by yourself.
All you need are some logs (either real or artificial), brown spray paint, black spray paint, white construction paper, a hot glue gun with glue sticks, and scissors.
Just make sure that your logs are cut into equal lengths before you begin working on them because it’ll make things a whole lot easier – plus it’ll save you a ton of time in the long run!
Start off by painting all of your logs either solid brown or black first depending on what color scheme you want to go for. Once those dry completely, take your scissors and cut out little white trees.
Then, take your hot glue gun with glue sticks along with the white trees and begin gluing them onto the logs wherever you want.
Once you’re finished with that, all that’s left for you to do is to put it outside! We suggest putting it near the top of a hill so everyone can see it clearly.
Alternatively, you could use the example photo above for inspiration and “craft” a reindeer out of two relatively thick logs (a longer one for the body, and a shorter one for the head), 5 thinner ones (four for legs and one for the neck), and some branches to serve as antlers.
This large outdoor Christmas decoration will be loved by anyone who loves rustic designs (and this is one of our all-time favorites!).
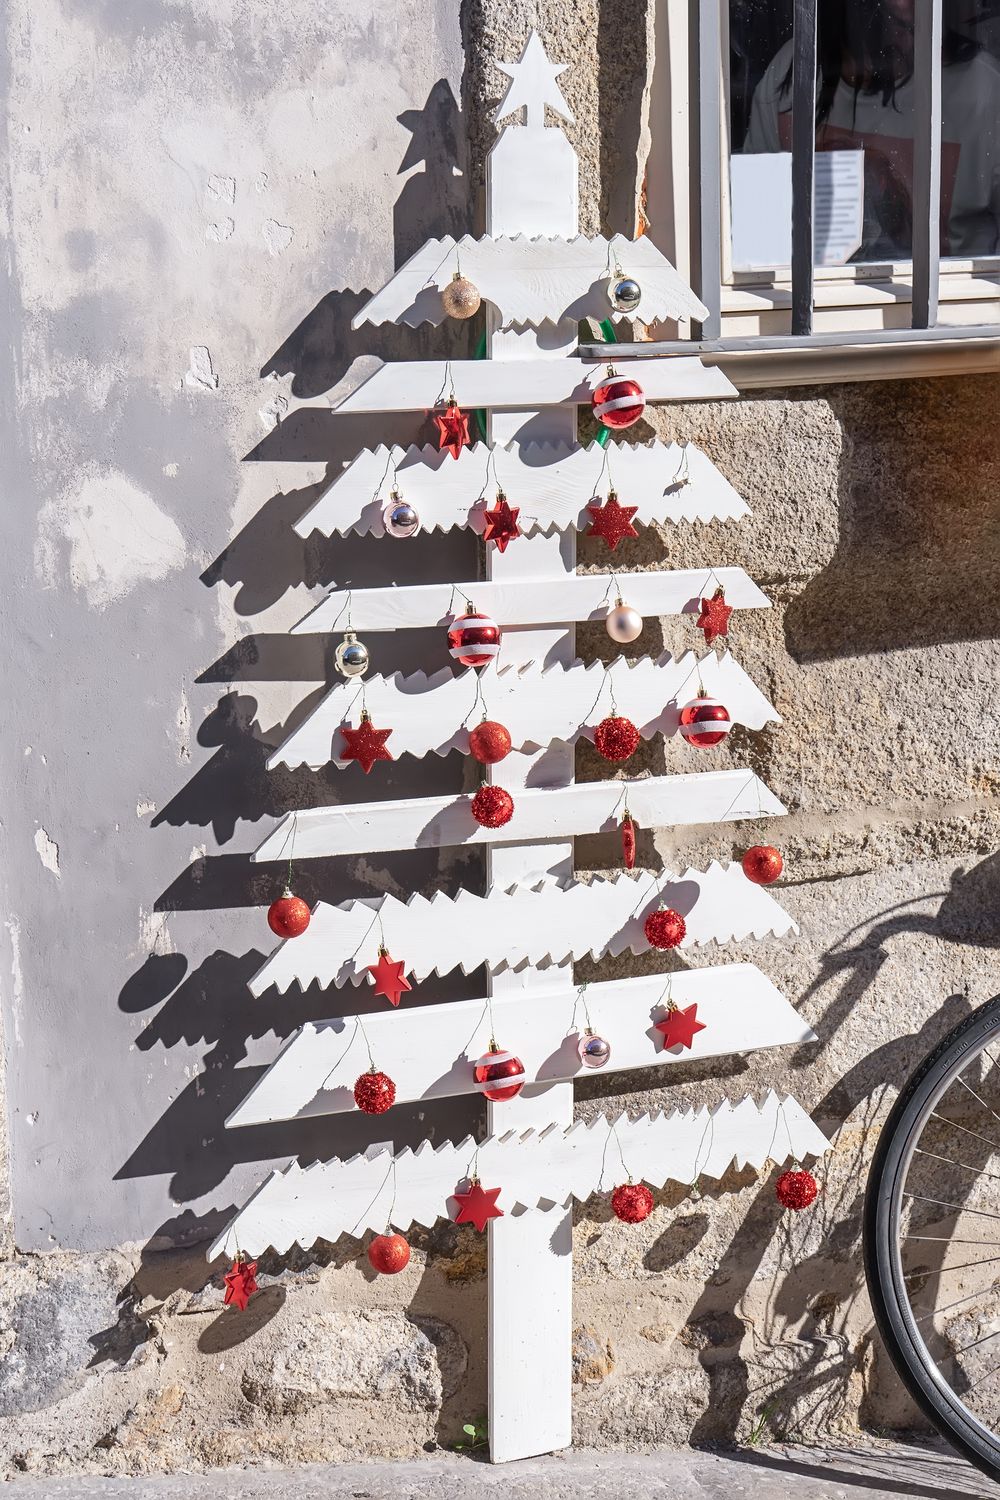
11. White Christmas Tree From Wooden Planks – Front Yard Christmas Decorations
This next one might seem a little random to some of you, but trust us when we say that it looks amazing! It’s perfect for people who don’t want anything too fancy when it comes to their outdoor Christmas decorations.
In order to do this project, you’re going to need several wooden planks (it doesn’t matter if they have designs on them or not), white paint, a brush, and 2 cups of water.
We suggest using poster paint instead of regular acrylic ones if you can because the colors will look much better.
Take your wooden planks and dip the bottom halves in water. Once that’s done, attach your wooden plank onto something so that the wet side faces downwards – preferably into dirt or sand so things look more natural.
You can even take it a step further and paint the planks so they look like they’re covered in snow! You can use some additional pieces of wood or branches to achieve this effect if you want, too!
Now use the longest plank as the trunk of your Christmas tree and the smaller planks as branches. Use the photo above for reference or just create your own design, the choice is yours!
Once you’re finished with that, all that’s left for you to do is to put it outside! We suggest creating a thin base at the bottom (using soil or dirt) and then putting it in a location where everyone can see it.
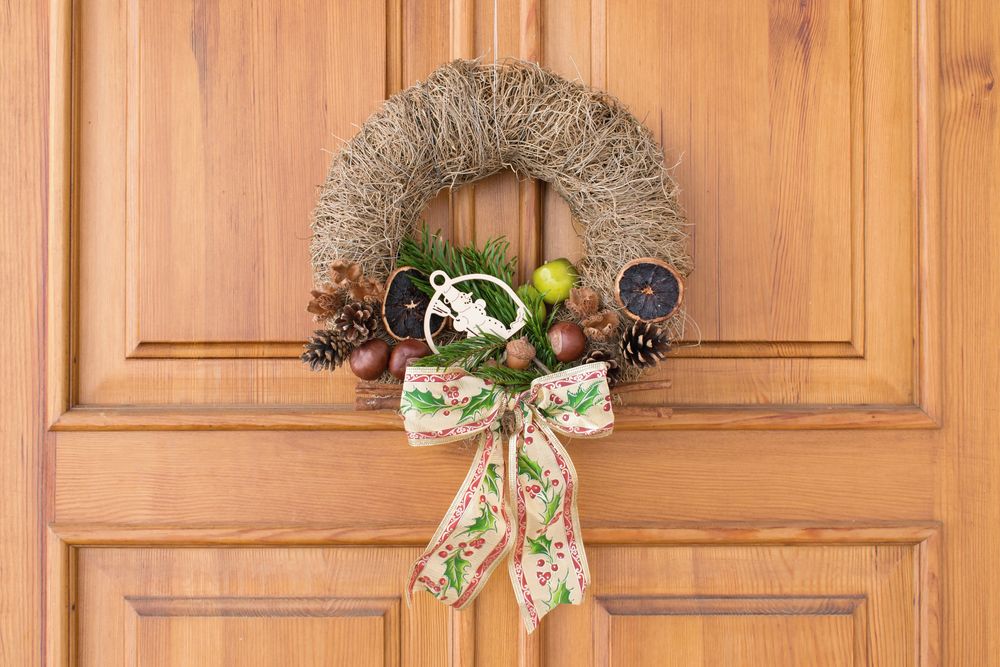
12. Natural Twigs And Jute Wreath – Cheap Outdoor Christmas Decorations
Okay, so this next one isn’t necessarily an outdoor Christmas decoration, but it’s still a great idea for the entrance to your house!
All you have to do is combine twigs and jute rope into a wreath. You can buy them at any craft store if you don’t have these things on hand.
After that, simply tie the ends together in a circular shape to make the wreath. If you’d like, add a bow or embellishments to make it look even nicer.
And there you have it – an inexpensive and rustic outdoor Christmas decoration that can also double as a wreath!
Then choose where you want to put it – you can hang it on your door or just lean it up against the wall – either way is fine!
If you’re not exactly satisfied with the way it looks, feel free to add some more decorative elements, including but not limited to pinecones, dried mushrooms (make sure to apply some clear varnish, or hairspray to preserve them), chestnuts, and ribbons.
Although we believe that this wreath looks absolutely marvelous in its natural brown-ish colors, some of you may not feel that it captures the spirit of Christmas. If that’s the case, don’t shy away from using spraypaint or various other elements of decor to add to its overall aesthetic.
It’s a little bit rustic, a little bit modern, and overall just perfect!
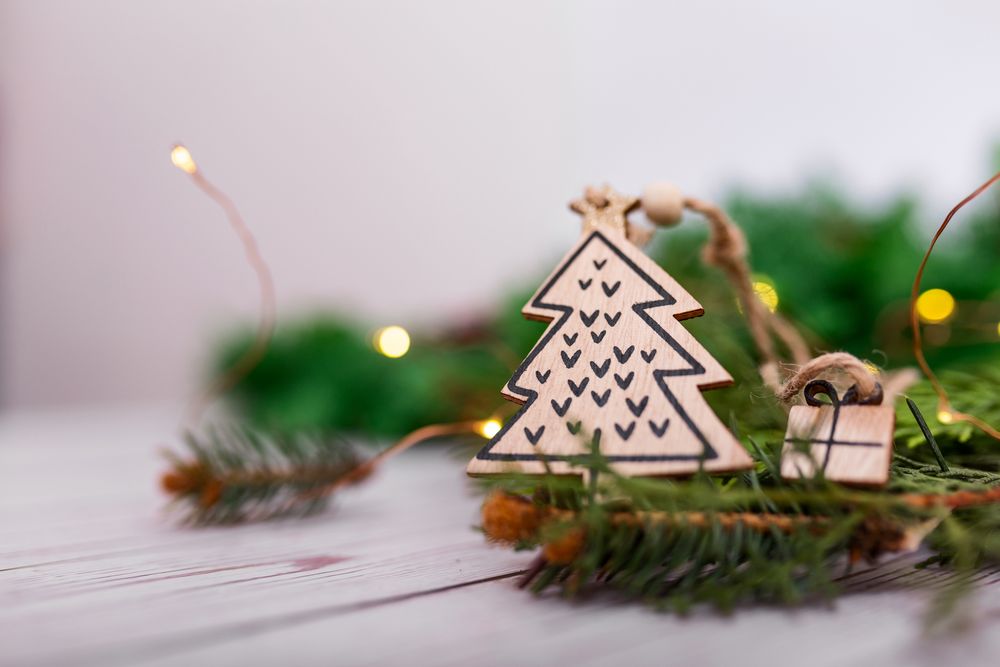
13. Christmas Tree Matboard Decoration – Christmas Decorating Ideas Outside
If you’re looking for something that’s quick, easy to do, and relatively inexpensive, then this next idea might be perfect for you!
It uses matboard – a material that’s usually used for making picture frames that is available at art supply stores or other places where they sell craft supplies or other things like that.
All you need to do is paint it in one color (white would go well with this specific decoration) and let it dry completely before using some Christmas-inspired stencils. You can probably find thousands of models online if you just look them up.
Once you’re done with that, just add another coat of paint over the stencils and when it’s dry you can remove them.
Alternatively, you could simply cut a Christmas tree shape out of matboard, and make sure to leave a small square on top of it, which you can drill and run some ribbon through the hole so you can hang your decoration.
After cutting the desired shape, all you have to do is create a simple Christmas tree outline near the edges of your decoration and there you have it!
At the end of this process, your matboard decoration will look something like the photo above!
You can add some ribbon and add it to a wreath or – if you prefer – just hang it from a tree branch in your garden. It’ll be perfect for adding that special touch to the entrance to your home!
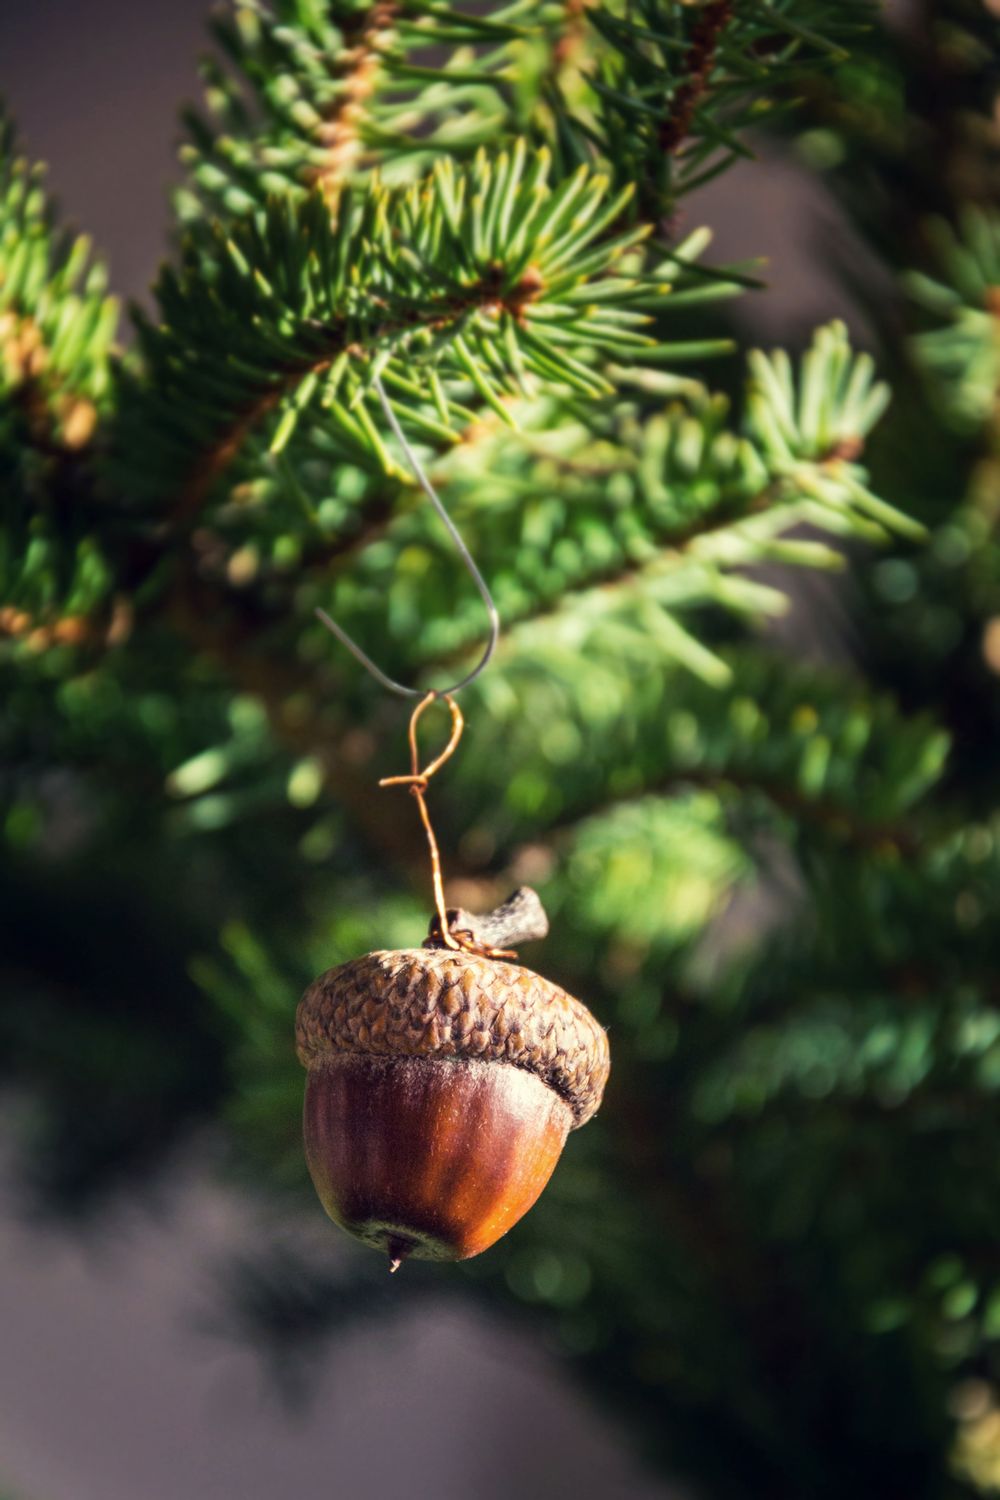
14. Brown Acorn Christmas Decoration – DIY Outdoor Christmas Decorations
This first decoration is perfect if you’re planning on decorating a real tree and want something that’s simple, inexpensive, and easy. If you like this idea but aren’t sure how to make it, then just follow the instructions below!
First, all you have to do is remove any leaves or debris from an acorn and paint it white.
While the paint dries completely (which may take a few hours), feel free to prepare your Christmas string lights – they don’t have to be too complex: all you need to do is thread them through a piece of green wire mesh so they look more natural. You can also go for a more rustic look by not attaching any extra elements.
After the paint has dried completely, you can add another coat of paint to make your acorn look even more realistic.
Once the second layer of paint is dry, thread your string lights through it and then hang or place it around wherever you want!
If you’re not exactly a fan of Christmas lights or the whole concept of creating a garland out of Christmas lights and real acorns, you could just keep it really simple.
In this scenario, not only you’ll skip on using Christmas lights for this decoration, but you’ll also leave the acorns as they are (so no painting). Just use a glue gun to create an anchor point to your acorn and attach some yarn, jute, or string to it so that you can hang it wherever you see fit.
If you still want the acorns to stand out, we suggest grabbing a can of hair spray or clear nail varnish and applying a subtle coat to each acorn. That way they’ll appear shinier and they’ll also last for longer (i.e., their caps won’t detach as easily).
Last, but not least, if you’re worried about acorn caps detaching, you can remove them yourself and reattach them using your glue gun.
15. Dried Roses And Leaves Wraith – Christmas Decorating Ideas Outside
This next decoration is perfect if you’re feeling a bit adventurous and want to try something new!
If you like the look of dried flowers and leaves still hanging around after autumn, then this design will be right up your alley.
If you’d like to take things one step further, we suggest using those shiny leaves that start resembling gold as they dry (we’ll discuss how to make them in detail below).
First, brace yourself for a little bit of work: collect as many brown or red roses as possible – it doesn’t matter too much what type, or color they are – just try not to go for green ones. Heck, even if all you find are green ones it’s okay: just dye them any color you want (although we recommend going for darker shades).
After you’ve collected all your roses, spread them out on a table (or any flat surface you prefer) and cut off the thorns. Once that’s done, separate each rose into smaller flower bunches by cutting the stems at different lengths.
To avoid having to buy loads of extra tools, just use your scissors or kitchen shears to create small hooks with each bunch of flowers. Why not make things even easier for yourself? Simply tie each bunch together using some twine (yes, it’s that easy!)
If there are any leaves present in your bouquets once you’ve finished prepping them, simply remove them with your hands – they should come out easily.
Now that your flowers are ready to use, you can start working on the actual wreath itself. To do that, first, wrap some wire around a branch or thick twig. This will be used as the base of your wreath.
Once you’ve secured it all around with wire, feel free to decorate it with your dried rose and leaf bunches. Keep in mind where the hook is for each bunch so that it’s easier to position them properly when attaching them to the base using hot glue.
If there’s not enough room inside your wreath for all your bouquets (or if they won’t fit at all), don’t worry: just attach a few extra ones somewhere nearby! Needless to say, wherever you decide to put your dried flowers and leaves is up to you, but we recommend keeping them inside your wreath instead of on the outside.
16. Handmade Cotton Wreath – Front Yard Christmas Decorations
This next decoration is perfect for anyone looking to spruce up their front door. Although the name may sound like the entire wreath is made out of cotton, trust us that it’s not.
First, find a wreath base that you can work with – keep in mind that this needs to be both sturdy and sizable if it’s going to stand on its own (if not, you’ll need to get a bit creative).
Once your base is secured, go ahead and fluff out your cotton so that it matches the dimensions of your wreath.
After that, simply use some hot glue or spray adhesive to attach it. If you want the cotton balls to stay put even more securely, add some additional pieces of fabric inside them before gluing them down.
If you have everything you need to get started but have absolutely no clue on what to do next, just take a look at the example photo we’ve used above.
Try using thin leather straps to wrap your wreath, or if you want to keep it simple, just use straps of burlap, jute, or yarn to run around the base of your decoration.
Sticks or twine could also work great at bringing the best out of this DIY outdoor Christmas decoration.
Feel free to go all out when decorating the cotton-covered wreath by adding just about anything you can think of: berries, Christmas ornaments, little pinecones, twigs, etc.
We recommend adding some larger pieces of dried flowers to your wreath (just use some glue and wrap the stems lightly with twine) to add a lot of depth and visual interest to it.
Once everything is in place, you’ll have an impressive decoration fit for anyone’s front door to use this Christmas.
17. Woodblock Snowman & Deer – Outdoor Xmas Decorations
This next Christmas decoration is the perfect outdoor addition for anyone looking to bring a bit of joy into their home this holiday season.
The entire thing is pretty simple to put together, so you won’t need anything too out of the ordinary.
All you’ll need are four pieces of wood (three measuring around eight inches each and one measuring twelve inches), nails, some paint (white and black, or whatever colors you want your snowman to be made out of), screws, three more wooden blocks (the size doesn’t really matter; they just need to be secure on top of the twelve-inch plank), hot glue or adhesive, and some twine.
Once everything is ready to go, simply use measurements to hammer together all of the pieces of wood into the shape that you want your decoration to take.
This DIY outdoor Christmas decoration is perfect for anyone in need of a bit more space, especially if they have nothing but snow outside!
Before attaching the larger plank to the base with its own screws or nails, affix two smaller ones at either side of it using additional glue.
Once everything looks good and sturdy, it’s time to get painting! Paint on your snowman (making sure not to forget his eyes, nose, and mouth) along with any other designs that you’d like before letting all of it dry completely.
Once everything has dried completely, simply run some twine through the top plank and around the whole wreath before finishing up by hanging your new decoration on a nail or hook.
Alternatively, you could use small wood blocks and try to recreate the decor from the photo above. You can use pinecones, buttons, googly eyes, and crafting paper to get everything looking the way you want it to.
The best thing about this decoration is that it’s interactive, so you’ll get to spend twice the time admiring your work before you even hang it up!
This DIY outdoor Christmas decoration is perfect for anyone in need of a bit more space, especially if they have nothing but snow outside!
18. Water Bottle Christmas Tree Ornament – Outdoor Christmas Tree Decorations
The next DIY outdoor Christmas decoration is perfect for anyone who wants to add a nice, colorful touch to their Christmas tree.
A lot of people think that you need lots of different materials to get started decorating something like this outside, but that’s not the case at all.
In fact, this DIY outdoor Christmas decoration can be made using only a single water bottle and a few other pieces of cardboard!
You could even repurpose old boxes or shipping containers if you have any lying around your home without having to buy anything new.
Once everything has been found or purchased, it’s time to get crafting! Here’s what you’ll need: one empty water bottle with its label removed, some construction paper in whatever colors you want, glitter (optional), cellophane tape, scotch tape, double-sided tape with at least three inches of length on each side, cutouts of stars or other shapes in gold or silver cardstock with a bit of space between the two sides of the paper, and a few small pieces to use as ornaments.
First, take out your water bottle and cut off its top section. Next, measure the circumference of your water bottle’s base before cutting a small strip from a piece of cardboard that you’ll be able to fit around it easily without leaving any excess room.
Add about half an inch to this total measurement before using that number as a guide for how long you need to the strip that will go around your bottle based on how wide it is.
Once everything has been cut and measured, use a bit of double-sided tape to attach the strip around your water bottle and then cover all but its base with construction paper using cellophane tape.
Once everything is ready to go, simply cover these new pieces of cardboard with construction paper or cardstock just like you did before and cut two small stars from gold or silver cardstock.
Draw a circle on the back of each star, leaving as much space as you can between both circles, and use these as ornaments by attaching them to your tree using double-sided tape.
Alternatively, you could just spraypaint the top of the bottles and hang them on your outdoor Christmas tree. They won’t look exactly stunning up close, but it will definitely look like you got something nice going there from afar!
This is one of the most festive DIY outdoor Christmas decorations that you could find thanks to its vibrant color (if you decide to go with vibrant colors, that is).
19. Popsicle Stick Snowflake – DIY Outdoor Christmas Decorations
A different kind of homemade decoration is perfect for anyone who really wants to show off their DIY skills this holiday season.
As you can see in the photo above, you don’t need more than four popsicle sticks, glue, string, as well as red and white paint to create this cheap DIY outdoor Christmas decoration.
This is the sort of thing that anyone with enough time on their hands can make if they’re looking for something to do with the winter season, but it’s also great for parents who want to help their children craft homemade decorations.
Here’s everything you need: four popsicle sticks (preferably without any glue or paint on them), string or thread of some kind, red and white paint, a small container filled with water, and something you can use as a brush.
The first step in this DIY outdoor Christmas decoration is obviously going to be painting your popsicle sticks! If you have more than four popsicle sticks to work with, try painting one set at a time so that you don’t have to wait for one set to dry before moving on.
Now arrange the popsicle sticks into a snowflake shape, like in the photo above. The easiest way you could go about it would be making two plus signs (+) by gluing together two pairs of popsicle sticks, rotating a plus into a cross sign (x), and gluing the two signs together.
Once everything is ready to go, take your popsicle stick snowflake and dip it into your container of water. If air bubbles don’t drive you nuts, then feel free to skip this step since the end result will be every bit as good without needing to create tiny little air pockets inside a layer of glue that’s barely an inch thick!
After getting wet, simply hang your popsicle stick snowflake somewhere where you think it should go before using a bright red paint marker or paintbrush to add some extra dimension to it.
Ornaments are usually the last thing on people’s minds when they start thinking about DIY outdoor Christmas decorations, but consider adding some homemade ones to your tree for a nice change of pace from the expensive store-bought ones.
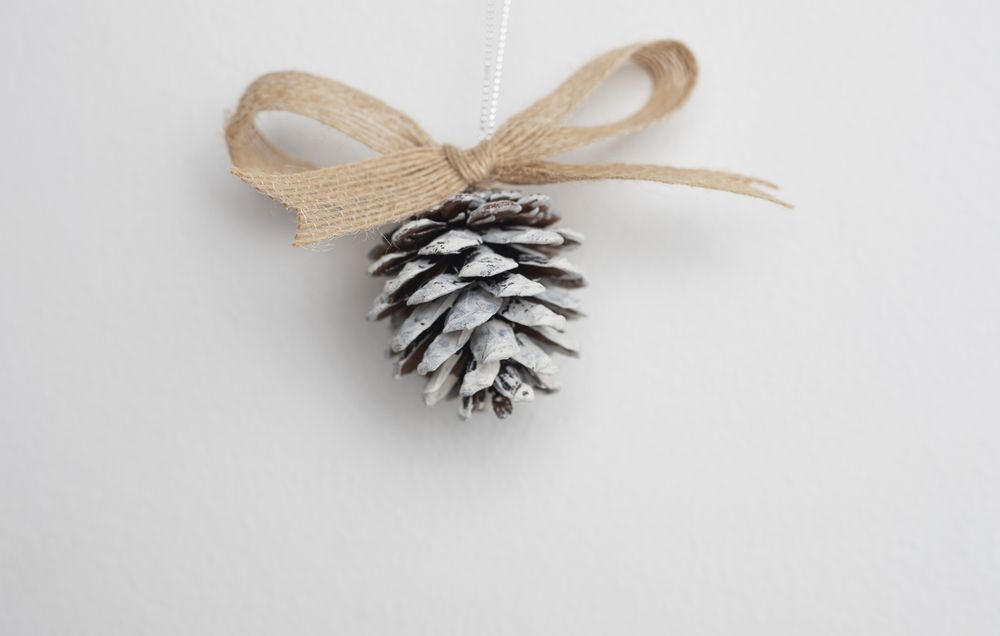
20. White Pinecones & Ribbons – Cheap Outdoor Christmas Decorations
Unlike the other DIY outdoor Christmas decorations that you can find on this list, these white pinecones aren’t exactly dynamic. The only thing they’re good for is adding to your existing decor, although – to be fair – they do take up very little space and are easy to make!
You’ll need one bag of white fake snow (you could even use cotton if you prefer something more natural), some glue or hot glue gun, a foam brush, and four pine cones per decoration.
If you want to be extra festive about it, feel free to turn off all the lights inside your house before decorating these things since they’ll look simply amazing once it’s time to turn back on the Christmas lights!
First, moisten your pine cone with a little water. Next, take the fake snow and place it in a bowl before taking some glue or hot glue gun and adding a layer of it to the top.
Once this is done, simply roll your pinecone around inside the fake snow until you have a perfectly white decoration!
No need to wait for anything to dry once you’re finished – these things will look amazing no matter how long they sit out at room temperature!
If you can’t source fake snow, you can use some white or silver spray paint. However, note that during this season, local stores have fake snow in a can to spraypaint your windows, and it works just as great!
And that’s all there is to making these white pinecones! You can use them as part of your existing decor – just be prepared for people who come over to ask where exactly you got such unusual decorations from since most stores don’t sell white-themed Christmas décor.
Although we’ve included this decoration as part of our outdoor Christmas decorations guide, you can also use them inside and they’ll fit just as well.
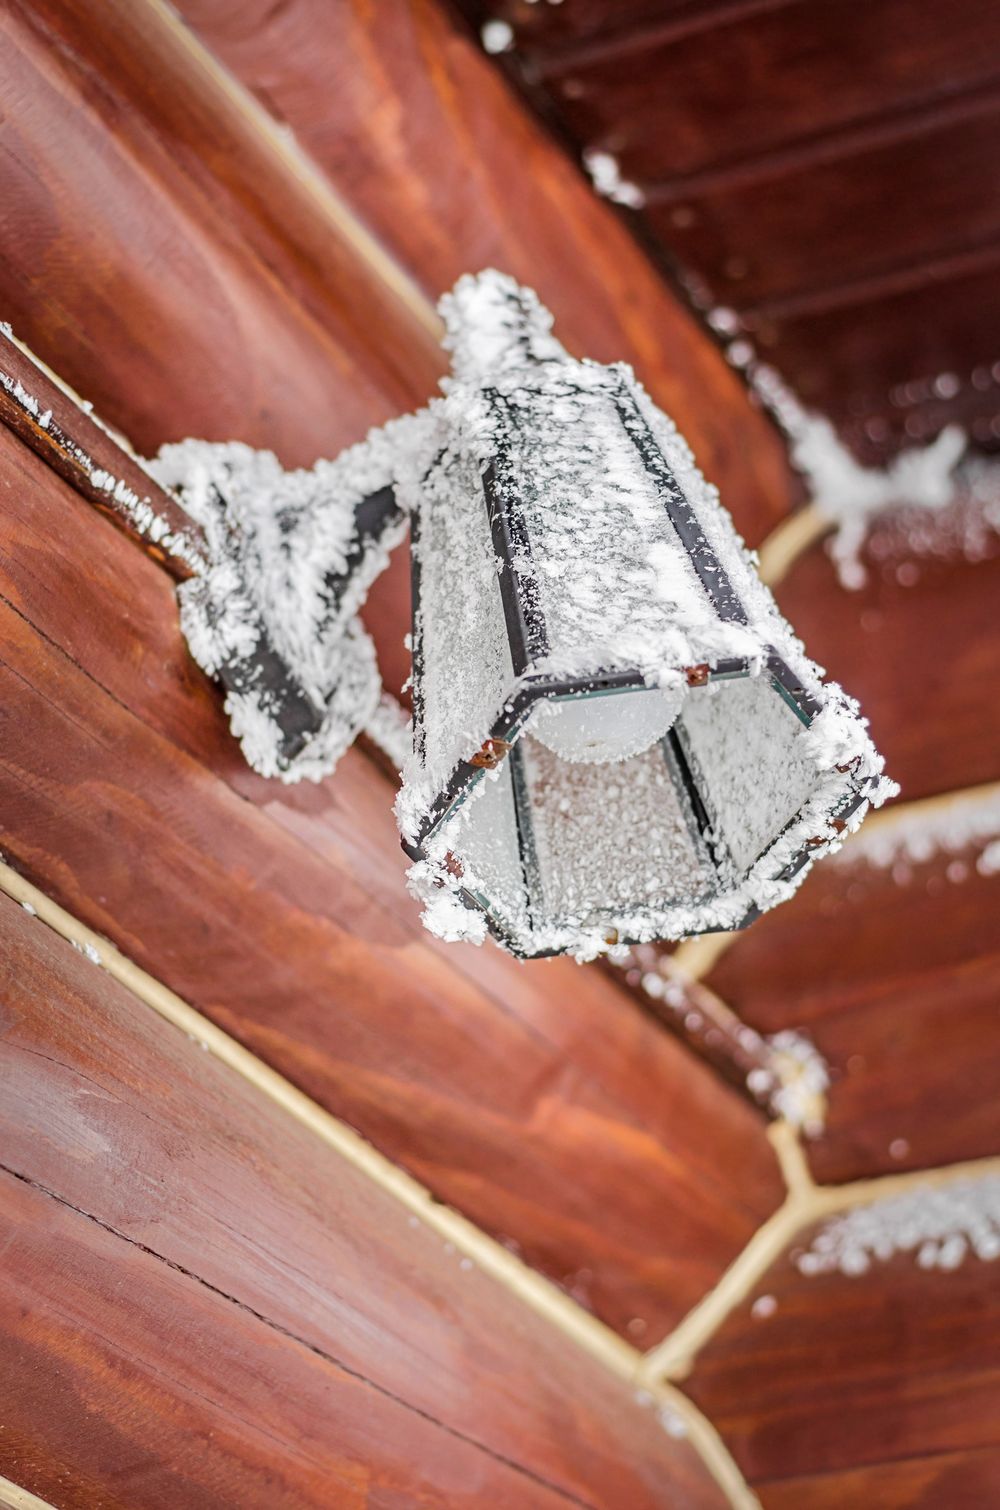
21. Frozen Outdoor Lamp – Simple Outdoor Christmas Decorations
If you have a lamp on your porch, consider making a little winter wonderland of sorts! To do it, all you need is some fake snow and glue.
Start by spreading out the fake snow on top of your lamp so that it doesn’t get anywhere else or spill off of the edges. You can also use duct tape to hold everything in place before adding the glue.
After you’ve added the glue and let it dry, you can slowly peel off your lamp and marvel at how well this DIY outdoor Christmas decoration came out!
If you don’t have an outdoor lamp on your porch, feel free to stick this decoration anywhere else where it’ll fit in. Remember that it doesn’t have to be a direct light source since the fake snow will reflect its color no matter where you decide to put it.
This next step is entirely optional, but if you want to add a personal touch to your decoration, you could try it and see how it fits.
Now that your lamp is covered with fake snow, simply take a marker and write something using white paint. Make sure not to make any mistakes here – even an extra letter will ruin the entire thing!
If you have kids who want to help with the decoration, this is a great way for them to learn how to spell words correctly!
Boom! A simple yet stunning DIY outdoor Christmas decoration that costs next to nothing to make but will make everyone green with envy when they see it!
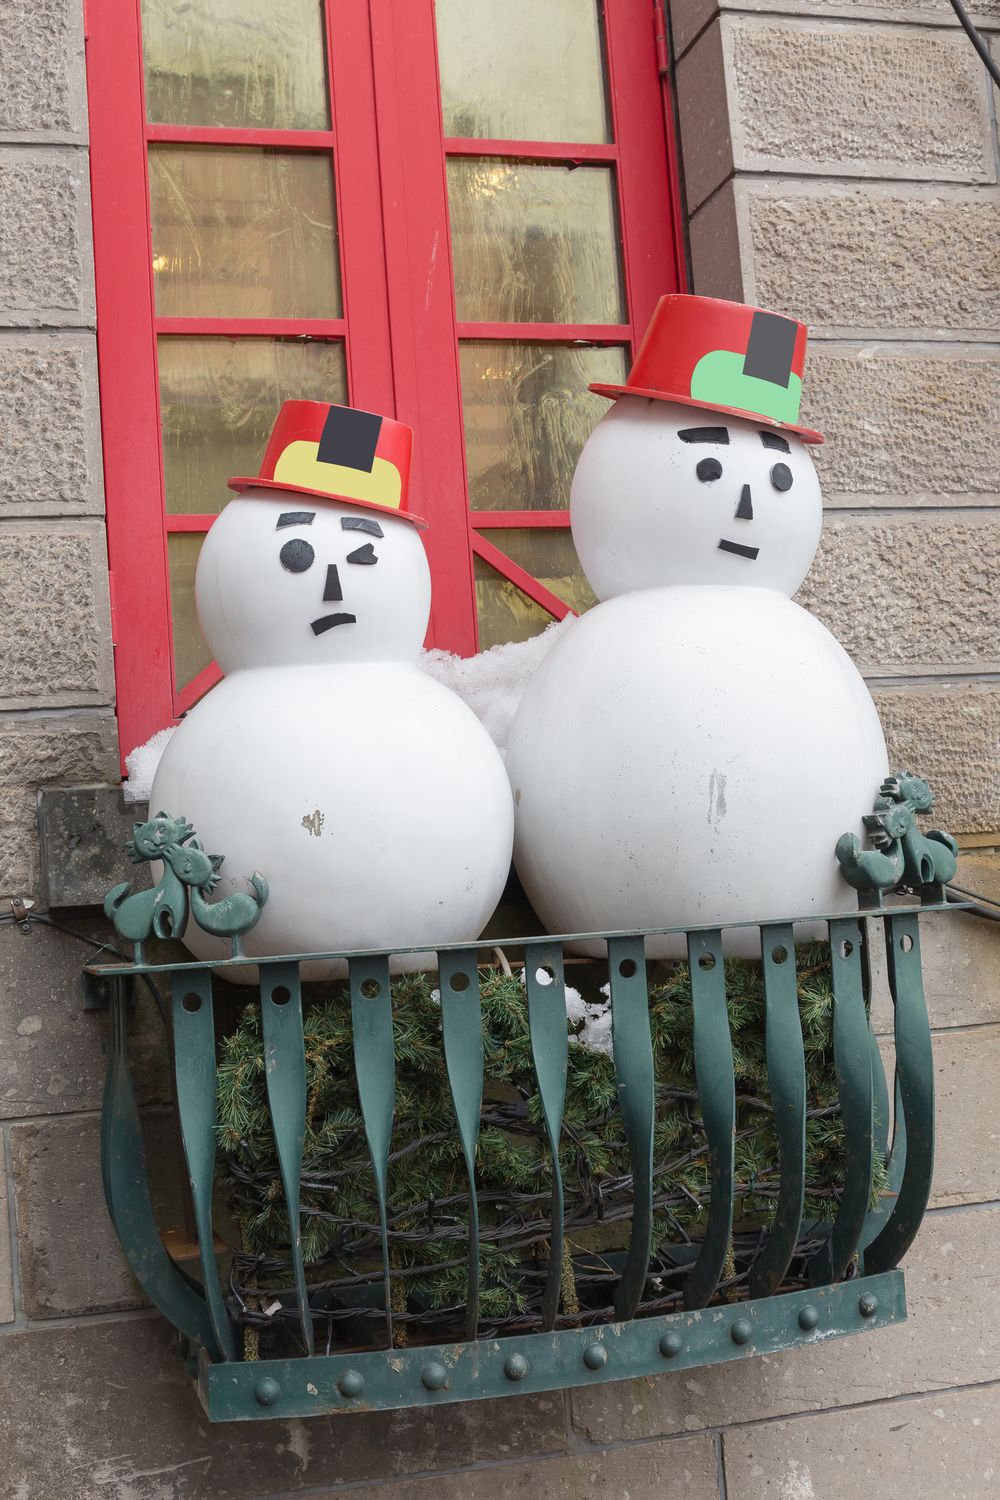
22. Styrofoam Snowmen – DIY Outdoor Christmas Decorations
This outdoor Christmas decoration may seem a little unusual, but it’s actually fantastic if you’re having lots of people over on Christmas Eve.
To do it, we’ll need three Styrofoam balls of different sizes (one large, one medium, one large), some wire or hot glue, fake snow or cotton wool stuffing, paint, and paintbrushes of your choice.
The first step is to take the foam balls and glue them together so that they become one big snowman shape. After this has been done, simply wrap the wire around the top to keep them in place and create a sort-of hat shape on top.
Now that this part is done, you can add some eyes and a mouth to the ball with the wire on top. This is where you’re free to get creative – if you can’t draw or paint, just print out a picture of someone’s face from the internet and glue it on with some water!
If you don’t want your snowmen to be too tall, you could just go with two foam balls instead of one, like the example in the photo we’ve used above.
For a little extra effect, you could fashion a tiny scarf from some fabric since it’ll make your decoration look a lot better.
After you’ve done this, simply grab some fake snow to cover the entire thing and make sure that all of the cotton wool stuffing is gone!
If there are any gaps in between the Styrofoam balls, you could use more foam balls to cover them up before adding the glue and fake snow or just tie a scarf around the gap.
This DIY outdoor Christmas decoration requires absolutely no artistic talent – anyone can do it! It’s a great way to spruce up a bare tree during wintertime or even as a backdrop for a Christmas-themed photoshoot among other things.
23. Red Hot Chili Pepper Wreath – Outdoor Christmas Decoration Ideas
If you’re a big fan of spicy food and have a green thumb, this simple outdoor Christmas decoration will be perfect for you!
While it may take a few days to do, all you’ll need is some red jalapeno peppers (or similar), some wire mesh (to make the shape of your wreath), and polystyrene cone-shaped floral formers.
To get started, simply string the peppers around the cone until they’re all gone or until you can’t fit any more of them – the bigger and hotter the pepper, the better since they look amazing on top of everything once they’ve dried up.
After this first step has been done, we can move on to what makes this outdoor Christmas decoration look so good: the wire mesh.
You’ll need to cut out a long strip of the mesh that’s approximately 6 cm in height with some lace-cutting shears before placing it around the wreath form.
You can use hot glue or metal wire to keep everything in place, but make sure you don’t attach the strips together so they won’t be visible on top of your decoration when you’re done.
Before you know it, this outdoor Christmas decoration is easy as pie and all you have to do is hang it up with some string or another type of strong wire!
The dried chilies will eventually shrivel up into red balls which look amazing against the green foliage of your pine trees during wintertime – more people should think outside the box like these creative individuals!
While this is definitely one of the simplest DIY outdoor Christmas decorations you could think of, it’s sure to turn heads and wow all kinds of visitors.
And if you need more inspiration, just check more of our outdoor Christmas decorations in this guide. We’re sure you’ll find something that you’ll absolutely love.
24. Christmas Forest Florarium – Outdoor Christmas Ornaments
Flowers are beautiful, but they don’t last forever. However, this outdoor Christmas decoration doesn’t have that problem since you’ll be using faux flowers that will never wilt or die!
If you want to try something different this year, this Christmas forest florarium is definitely the right choice.
To get started, you’ll need some clear glass (or plastic) containers of various shapes and sizes in addition to some fake vegetation.
You could start this project by placing your smaller containers into larger ones that are big enough for them or just create a cluster without the help of any additional materials – it’s really up to you!
After this step has been done, you can move on to positioning all of the faux flowers in whichever way is best for you. The containers should have space between them so they don’t touch each other but will still fit in nicely with the foliage around them when everything is said and done.
Once again, there are no rules here even though most people prefer walking up to their yard or home with trees covering it instead of flowers.
Regardless of what you choose to do, placing some kind of water inside the containers and positioning them near a window will make sure they look great all year round! Just make sure to move your florarium away from direct sunlight when it’s hot outside – we don’t want anything catching fire!
Once the balsam fir tree branches have been dried out with a heat gun (and any bugs removed), use hot glue to attach the fake flowers to them – make sure all of them are facing forward so your forest looks perfect once everything’s done.
At this point, you could go with some rustic moss for added effect if you wanted to, but it isn’t compulsory – simply tuck in between the branches and wait for wintertime to come.
We’re not done yet, though – to make this DIY outdoor Christmas decoration look perfect during the festive season, you’ll need some glitter glue or even gold spray paint!
However, this step is optional, so it’s entirely up to you if you want to use spray paint or not.
Before you know it, this will turn into one of the most impressive outdoor Christmas decorations you could come up with, and all for less than $30! It looks great next to small potted plants as well if that’s something that interests you.
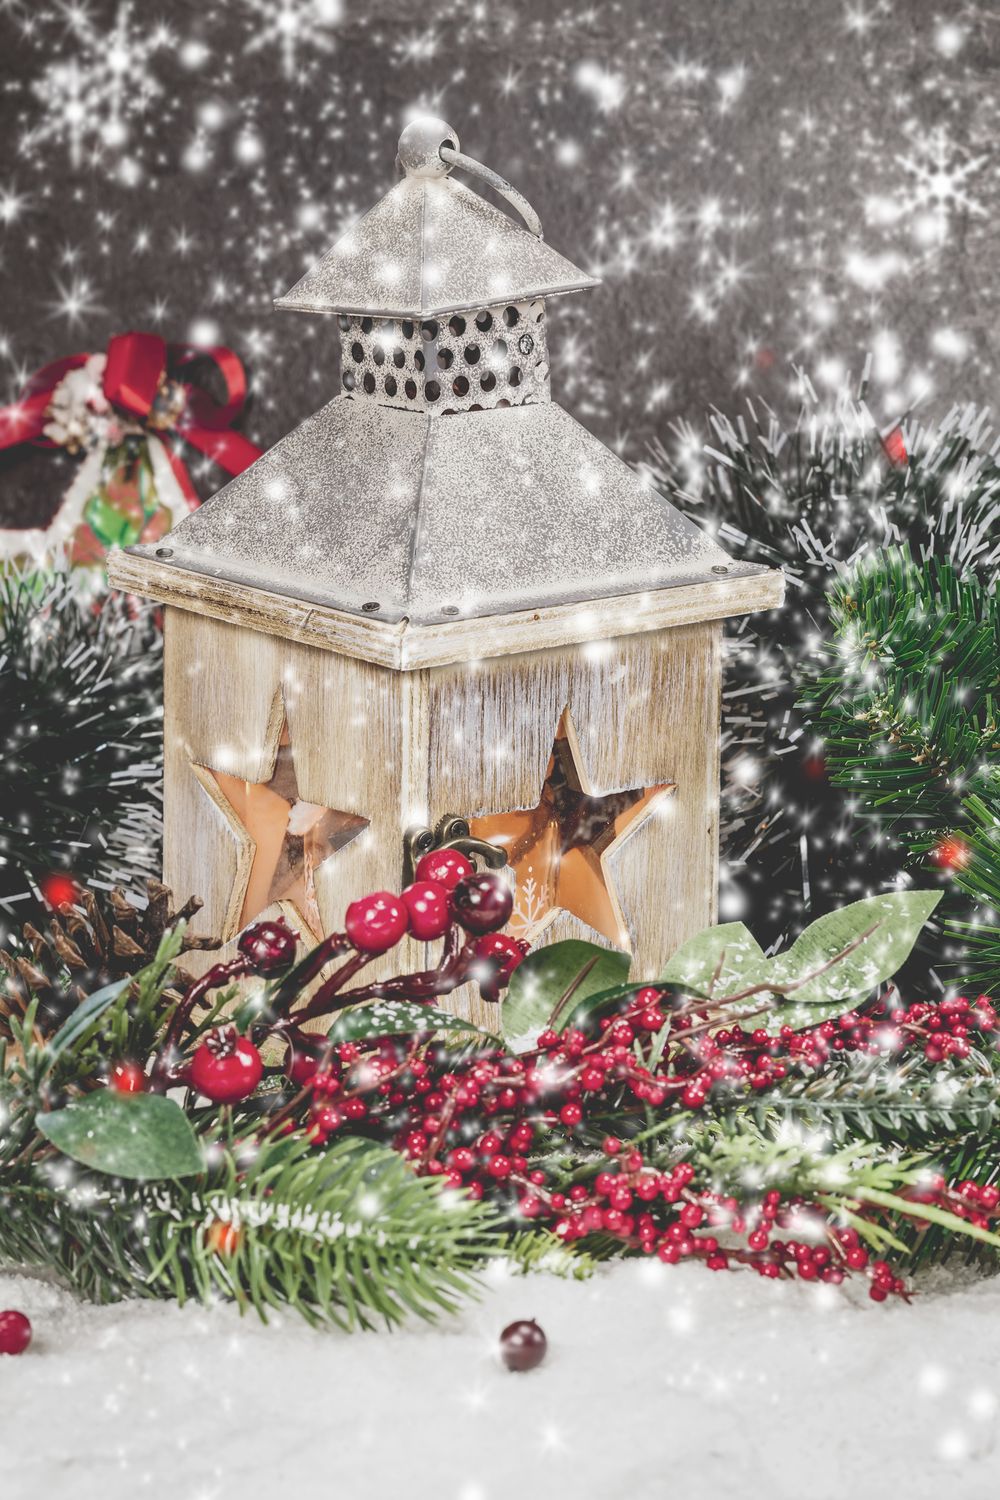
25. Holiday Lantern – Unique Outdoor Christmas Decorations
With the holiday season almost here, it’s time to start thinking about all of the DIY outdoor Christmas decorations that will make your property look beautiful!
We’re going to kick things off by taking a look at this stunning holiday lantern that has been crafted from some matboard.
Before we get started, this is one of the more complicated projects in this guide, so if you’re not handy with a saw (or other sharp cutting objects), you’d better skip this one.
You’ll obviously need some mat board (2 pieces, one 11″ x 17″, another 4″ x 17″) to make this project. If you source the materials, here’s how it’s done!
To start things off, cut out the larger piece of mat board using a box cutter. The shape doesn’t really matter since you’ll be covering it up with other pieces.
Once this is done, you can move on to creating the actual lantern by cutting four 0.5″-thick strips from each end of the smaller piece before placing them into the small notches towards the center of the larger matboard sheet. Be sure to use hot glue to attach these pieces so they don’t fall apart after a short while.
At this point, you can move on to cutting five strips from the smaller matboard sheet (0.8″ x 4″). These will be attached via hot glue as well and should form a square shape around the edge of the lantern – don’t worry if it’s not perfect since we’ll be covering it up with the other pieces later on.
After this step has been completed, simply continue adding more strips until there are no gaps left between them – make sure they overlap each other as much as possible by alternating their orientation. The last strip should be placed face-up so that we can still see some of its design.
To cover up any imperfections created during the previous steps, we’re going to work on attaching more matboard pieces (0.5″ x 4″). This time around, you’ll need to create two strips of each type since they’re going on both sides of the lantern!
After all of this hard work has been completed, it’s time to add some color to our holiday lantern – simply use glitter glue or spray paint to give it that finished look that will truly stand out during the holidays.
If you want an even more impressive piece of DIY outdoor Christmas decorations, you could always go for another color scheme and attach some string lights inside before switching them on! If done correctly, this should be the perfect addition to your lawn during the festive season.
26. Yarn Christmas Tree – Cheap Outdoor Christmas Decorations
Christmas is all about coming together with your family and creating memories, so why not try out some DIY outdoor Christmas decorations you can make with your kids?
Since it’s the holidays, this piece is big enough to fit into almost any environment – best of luck finding a place for it in your home!
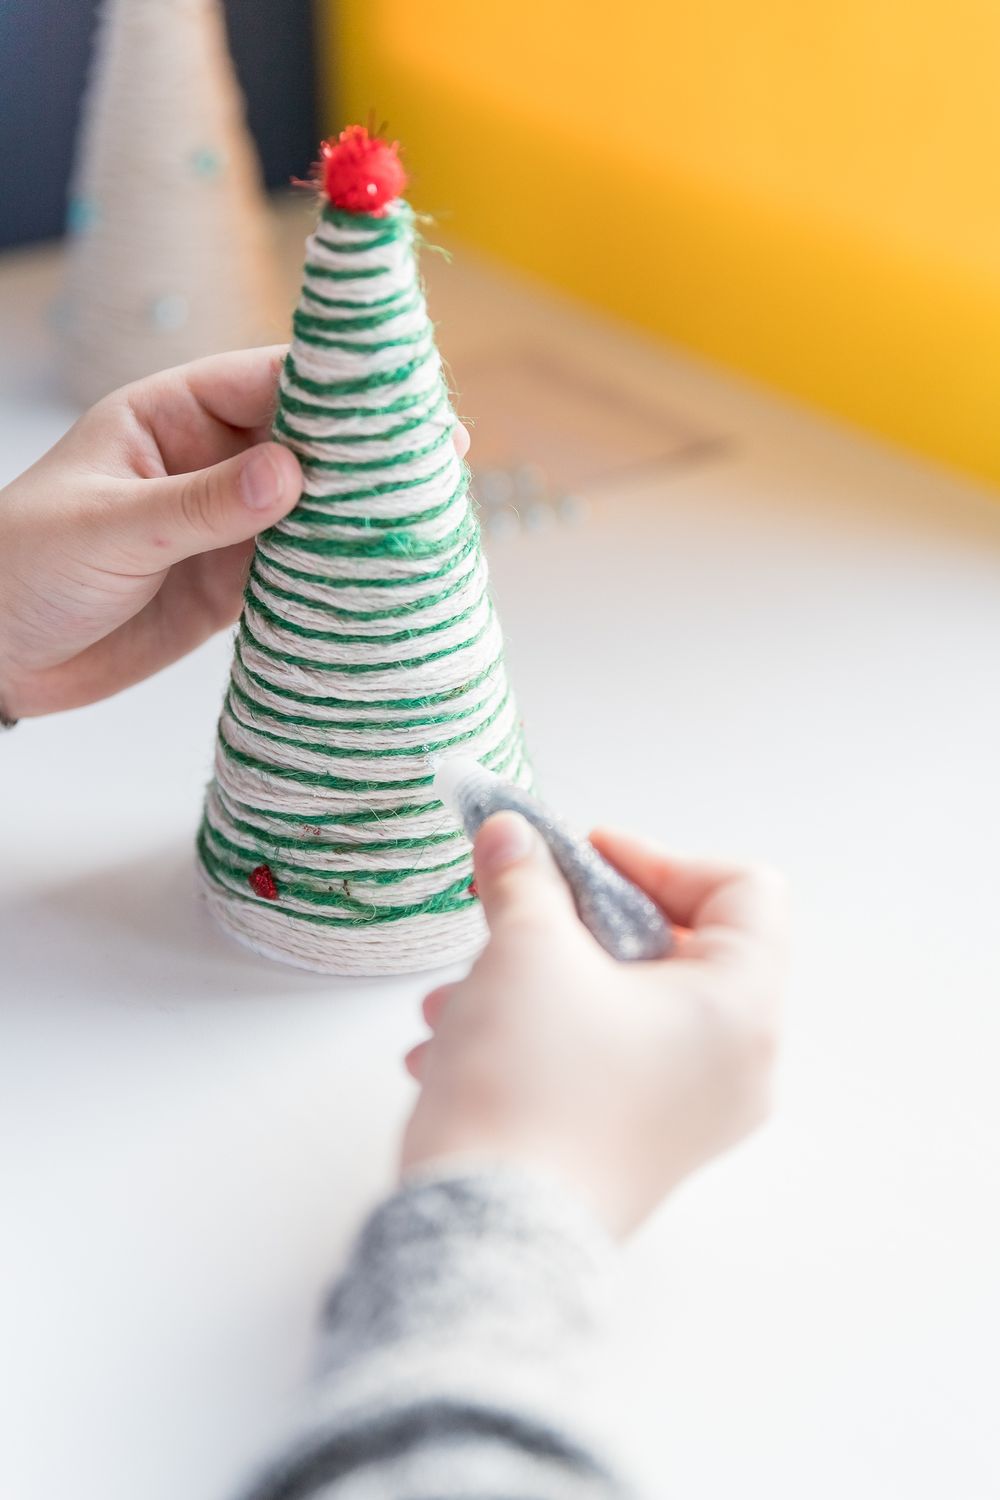
For this project, you’ll need one styrofoam cone (if you can’t source these locally, they’re easy to find on Amazon), four balls of yarn (green, white, and red), scissors, a hot glue gun, or glue sticks, and a can of white spray paint or primer if you don’t want the color of the cone to show through.
The first step requires you to cut three holes along the top of the styrofoam cone, one that’s 1″ in diameter and the other two around 2″ in circumference.
Next, use a hot glue gun to attach all of the strands so they form a tight grid at the top of the tree – we suggest alternating between green, white, and red yarn.
Once you’re finished, simply spray paint the entire thing with one to two coats of white primer or paint, allowing it to dry between applications before completing the final step.
The final step is to stand this piece up wherever you want this outdoor Christmas decoration to be displayed!
As a bonus, you can use this as a festive centerpiece by placing a small table underneath and decorating it with pinecones and other holiday trinkets!
27. Dried Orange Garland – Simple Outdoor Christmas Decorations
This next project is perfect for those who want quick and easy outdoor Christmas decorations that don’t cost much if any, money at all!
For this piece, you’ll need three to four oranges (depending on the size), some scissors or a knife (to cut the top off of an orange), fishing line or string, and a glue gun with hot glue sticks.
First things first – remove the top of the oranges. If you decide to use scissors for this step, make sure they’re sharp enough so you can avoid creating rough edges around their opening.
Now cut the oranges into thin slices (but not too thin, though), so you could attach them to your garland. You’ll want to leave a bit of orange flesh so that the slices are not see-through.
Now here’s the tricky part: you should dry your oranges in the oven, in a food dehydrator, or with a heat gun before you go to the next step. The way you want to go with this is entirely up to you.
The following step now requires you to either use fishing line or warm up your glue gun! You should create holes in each orange slice so you could drive the thread through them without significant effort. Alternatively, you could use a sewing or knitting needle (depending on the thickness of the thread).
This is where you’ll thread the fishing line through to create that garland effect – don’t worry if things aren’t perfectly straight, you can always fix that later.
Now it’s time to display your outdoor Christmas decorations! Use double-sided tape or pushpins to put them up in a grassy area near your home around the holidays.
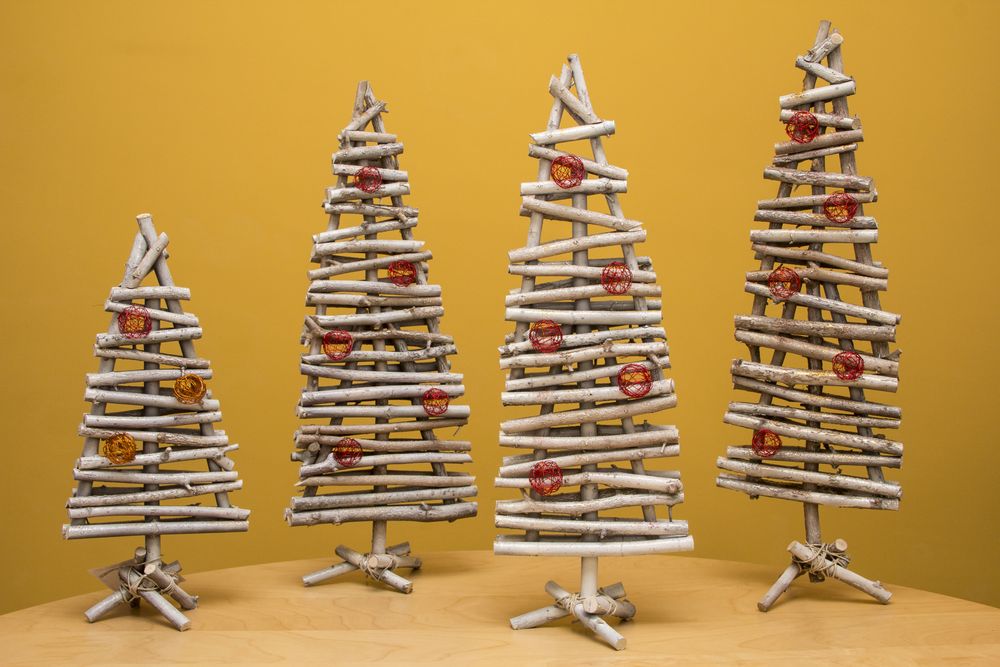
28. Stick Christmas Tree – Christmas Decorating Ideas Outside
This next piece is a great project you can do with your family since it’s not complicated at all! Plus, it’ll look fantastic wherever you decide to put it up around the holidays.
For this outdoor Christmas decoration, you’ll need a box of sticks (you could also use twigs), a hot glue gun and glue sticks, and some artificial snow spray if you want to be able to see where you’re putting those sticks together.
First things first – separate your box of sticks into piles by size so they’d be easier to work with as far as sticking them together is concerned. Now start gluing two supplies together at the end near the handle, making sure they’re flush with one another (they shouldn’t stick out).
If you want to make this Christmas decoration look like it has “branches”, then simply glue two sticks that are longer than the others together so they’d create a V effect.
Now attach your branches to either side of your main stick in order to create an X pattern. If you don’t feel like sticking every single branch on there, just use some extra hot glue for this step!
When you’re done, display it wherever you see fit and enjoy the outcome! Plus, if you happen to have any leftover supplies, try creating them into other outdoor Christmas decorations.
29. Christmas Lights And Branches Jar – Simple Outdoor Christmas Decorations
This next project is one of our favorites since it’s extremely simple, yet very effective in adding to your overall outdoor Christmas decorations!
For this piece, you’ll need an empty glass jar (mason jars work excellently), some twigs and branches (a bit longer than the width of your jar) with leaves on them, some string or fishing line, battery-powered Christmas lights, and a pair of scissors.
Start by sticking the branches into the jar until they’re nice and firm without falling over (make sure they don’t stick out too far). If needed, use glue for this step!
Now attach the string through the leaves so that you could hang up your jar wherever you please – trees are recommended if possible! You can also use some fishing line, but make sure your string would be thick enough to support the jar.
Finally, attach the lights somewhere in between the branches so it’ll light up when night comes! If you want to protect your battery pack from water damage, use clear tape or nail polish to cover it before applying hot glue (make sure not to get any on the bulb itself!).
This is another great decoration that requires minimal effort and time and works really well near a pathway or along a fence!
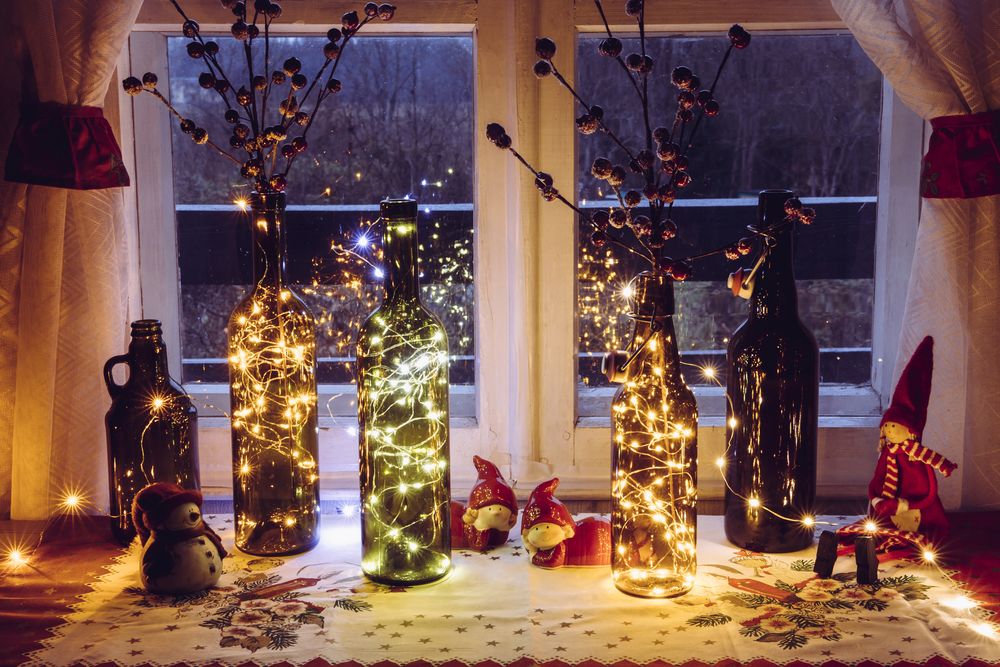
30. Vintage Beer Bottles Lights – DIY Christmas Yard Decorations
Now, this is another fantastic outdoor Christmas decoration that you can use to decorate your patio. It’s extremely simple and won’t require much time, but it’ll look great once you’re finished!
For this project, you’ll need an empty glass bottle (we suggest doing something with beer bottles since the shape of them looks lovely during the holidays), some hot glue or nail polish, optional accessories like a wooden rod for support if needed, and some lights if you want to make your overall lighting brighter.
Start by sticking your lights around the middle section of the bottle so they’d create an effect where it lights up.
You can do this either by using pushpins or gluing them on depending on what kind of adhesive works best for you.
If you want, glue a wooden rod onto the middle of your bottle for more support! It definitely won’t hurt to do this if you’re planning on hanging it somewhere high up.
Alternatively, you could look up specially-designed bottle lights at your local stores. These lights are battery-powered and have their remote control placed in a cork-shaped box, so you can just plug it in the bottle and enjoy the show!
Once it’s ready, set it aside and give yourself a pat on the back – enjoy! You can also change up the design by using different bottles with different colored lights or even painting yours with some cool colors to make them stand out even more.
20 More Outdoor Christmas Decorations
When it comes to Christmas, it’s all about inspiration, so let’s check out some more outdoor Christmas decorations that you could make this year
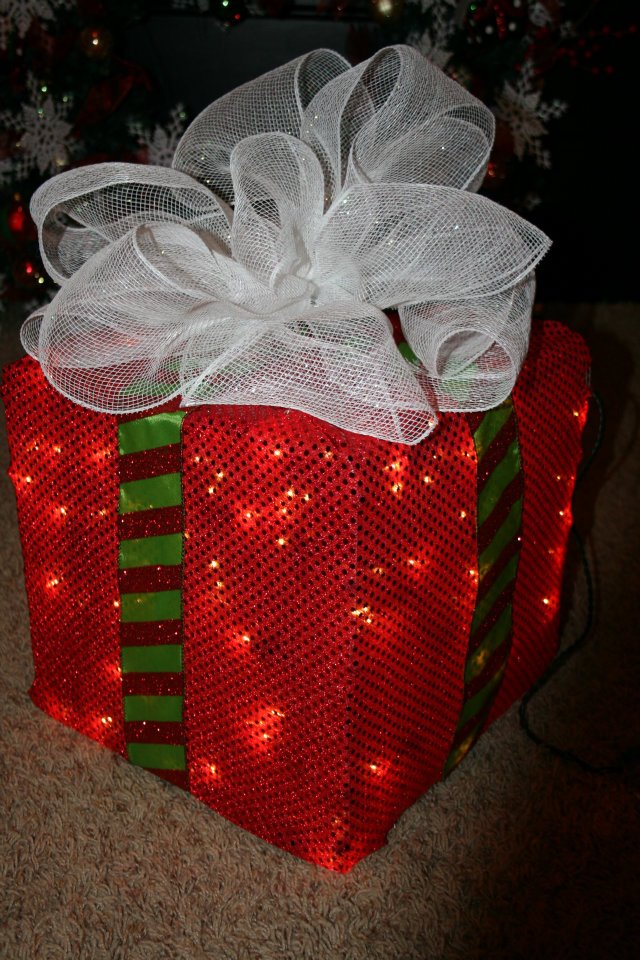
31. Outdoor Christmas Decoration – Lit Gift
Trendy Treemakes a lighten Christmas box that can help out with your festive curbside appeal. Create different sizes too!
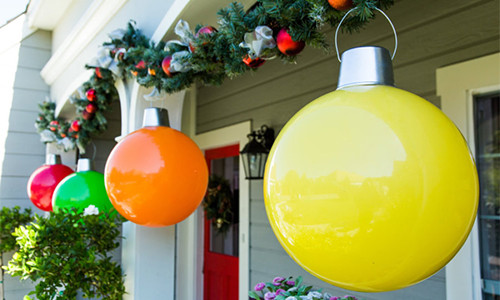
32. Giant Ornaments – Outdoor Christmas Decorations Ideas
Over atHallmark Channelyou’ll learn how to make some giant ornaments to dress the porch with. It doesn’t get more spirited than this!
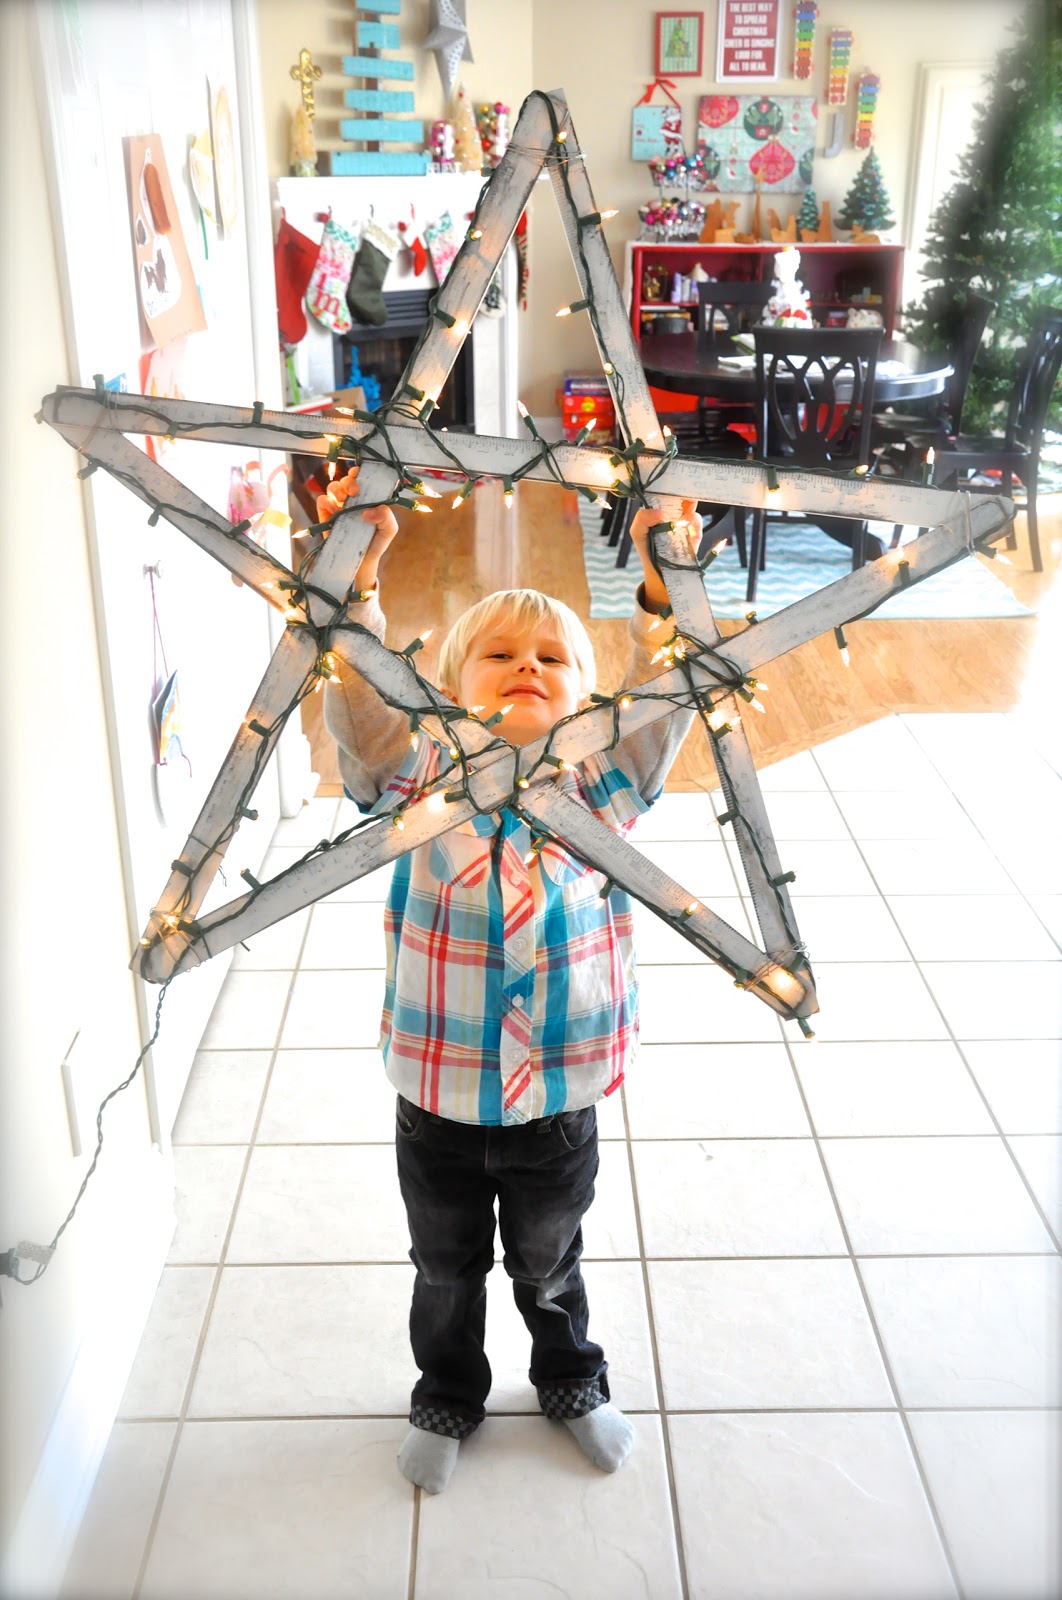
33. Giant Star – DIY Outdoor Christmas Decorations
Little Bit Funkygives us another “giant” DIY and this time it’s a star! For the side of the house, the barn, the garage – the possibilities are endless here!
34. Snowflake Garlands – DIY Outdoor Christmas Decorations
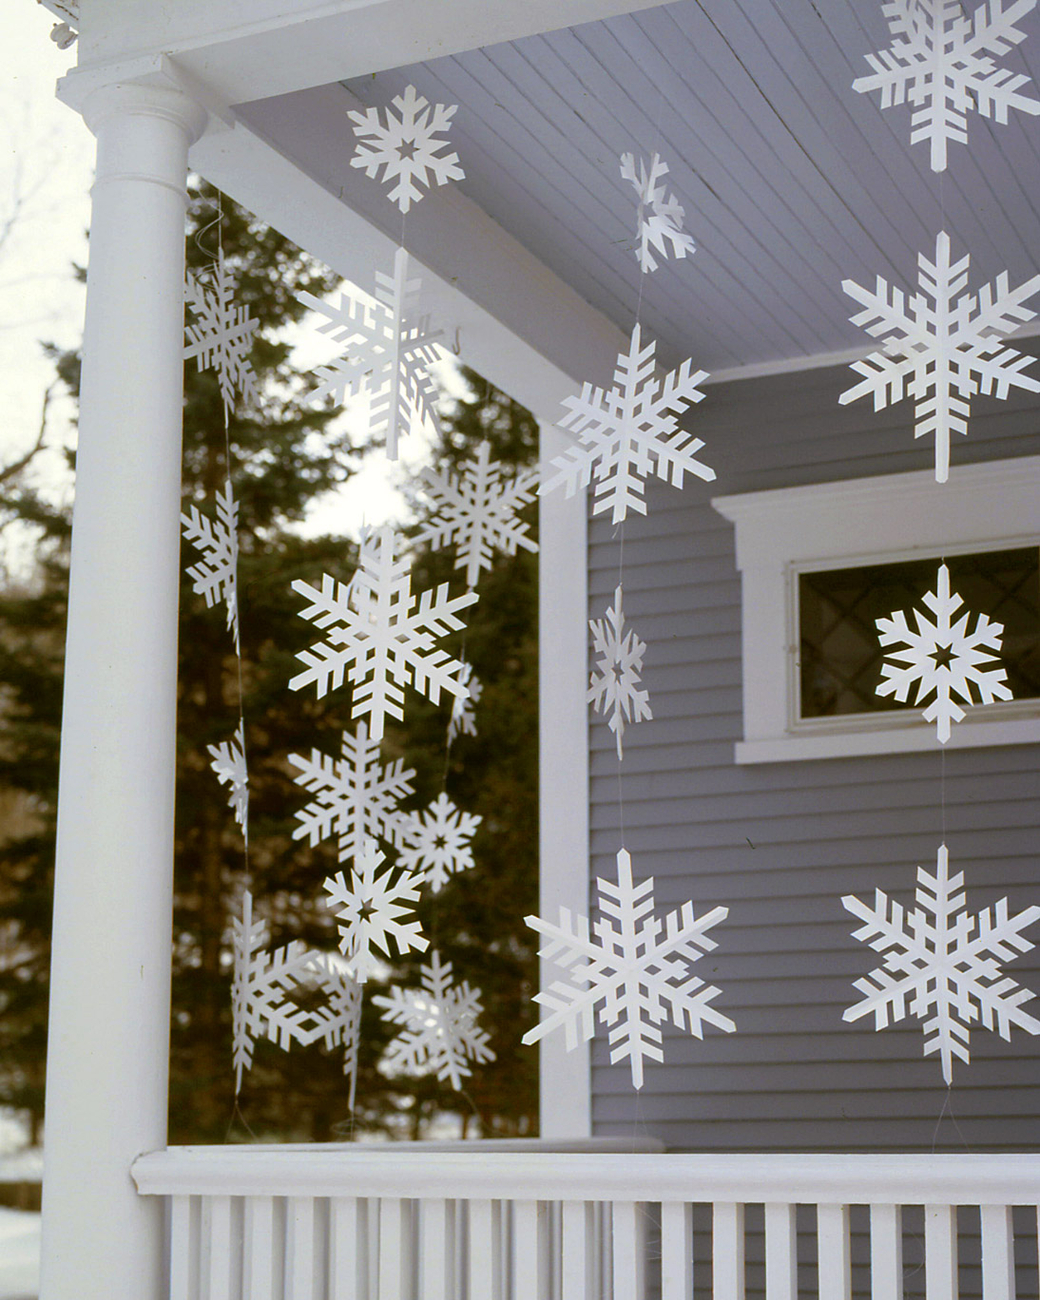
VisitMartha Stewartand learn how to make some of these snowflake garlands for the porch. Add some frostiness to your home and ignite the season!
35. Rustic Porch Outdoor Christmas Decorations
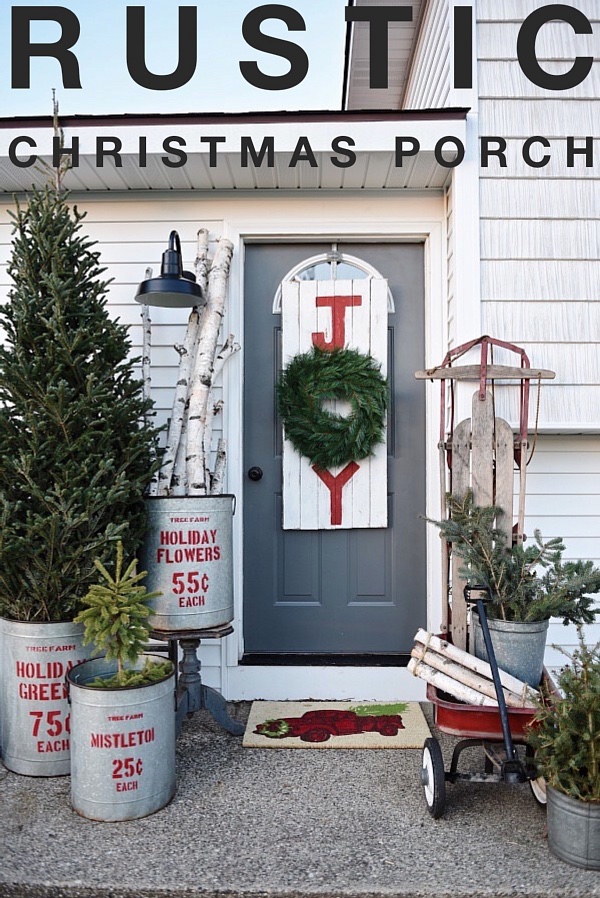
Learn how to create a rustic, Christmastime flavored porch with the help ofLiz Marie. We really love the wagon addition!
36. Tire Ornaments – Cheap Outdoor Christmas Decorations
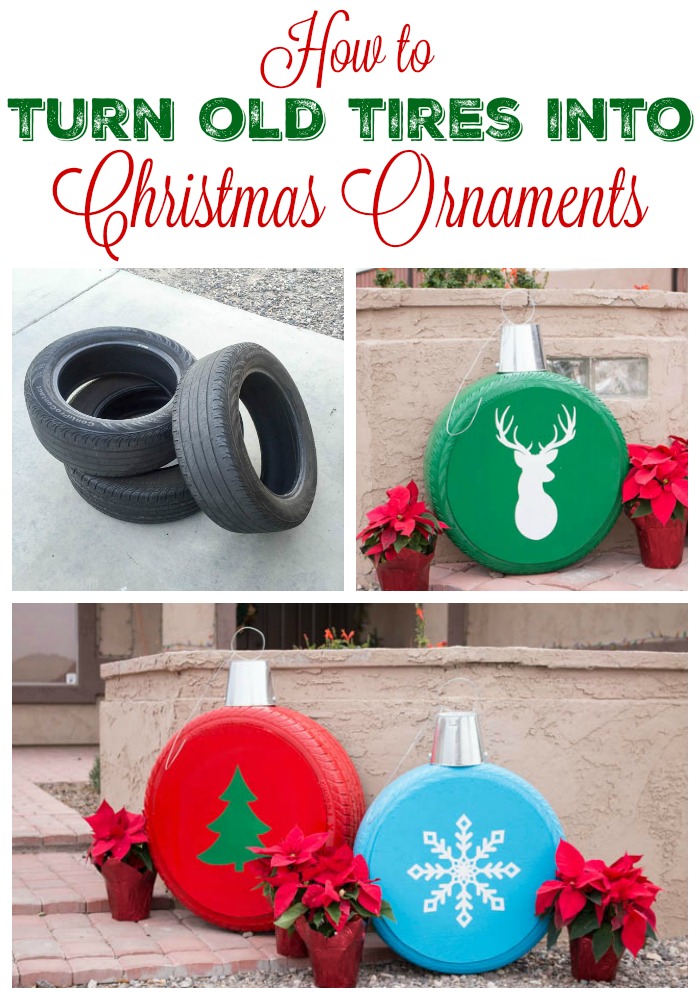
Learn how to turn old tires into giant ornaments for the yard! Check out Addicted 2 DIY for all the details.
37. Cheap Outdoor Christmas Decorations
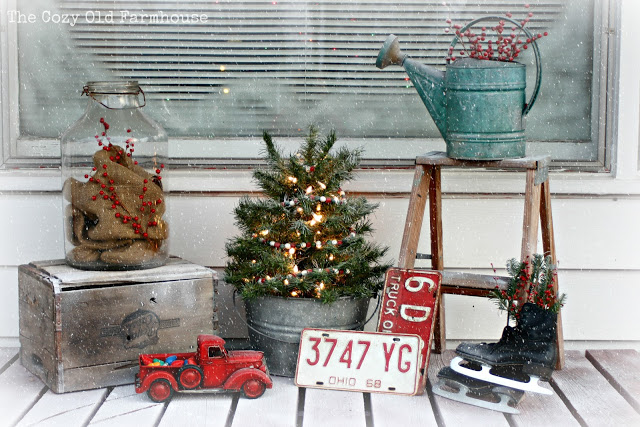
The Cozy Old Farmhousemakes a fun, spirited porch too. But this time its use of “flea market” finds makes a unique, vintage vision.
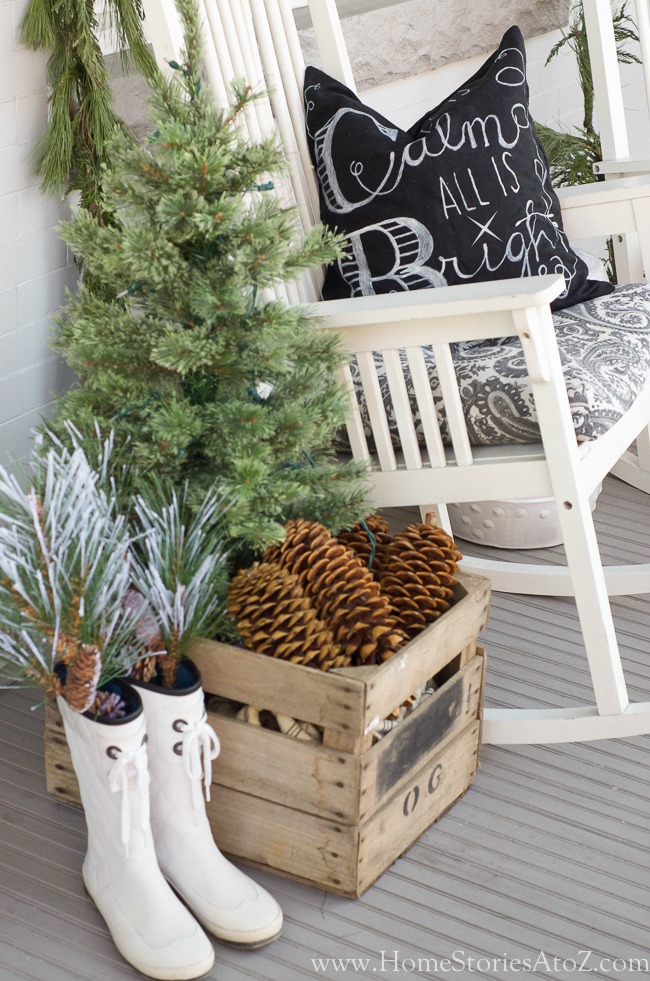
38. Chic Porch – Outdoor Christmas Decorations
VisitHome Stories A to Zfor a look at an easy-to-DIY “chic” Christmastime porch. From the pinecones to the boots, we love this style.
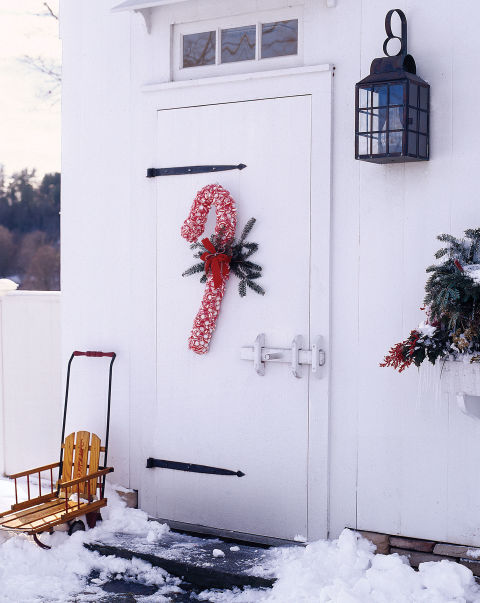
39. Candy Cane Wreath – Front Yard Christmas Decorations
We’re swooning for this whimsical and fun candy can wreath. And thanks to Good Housekeeping you’ll be able to whip one of for yourself.
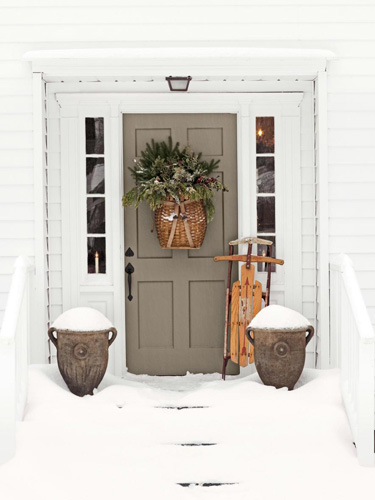
40. Traditional Porch – DIY Christmas Decorations for Outside
Country Livingmakes up a traditional porch that you may want to recreate too. With some urns and a trappers basket, you can get started on this style now!
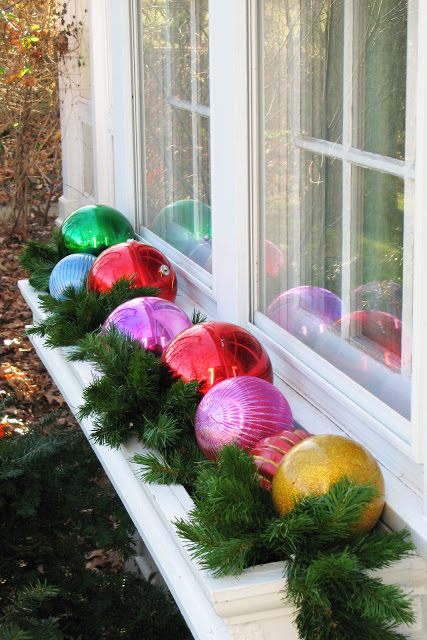
41. Window Box Ornaments – Cheap Outdoor Christmas Decorations
Check out these window box ornaments over atJust Grand. We love how it finishes off the entire house and adds extra Christmastime color!
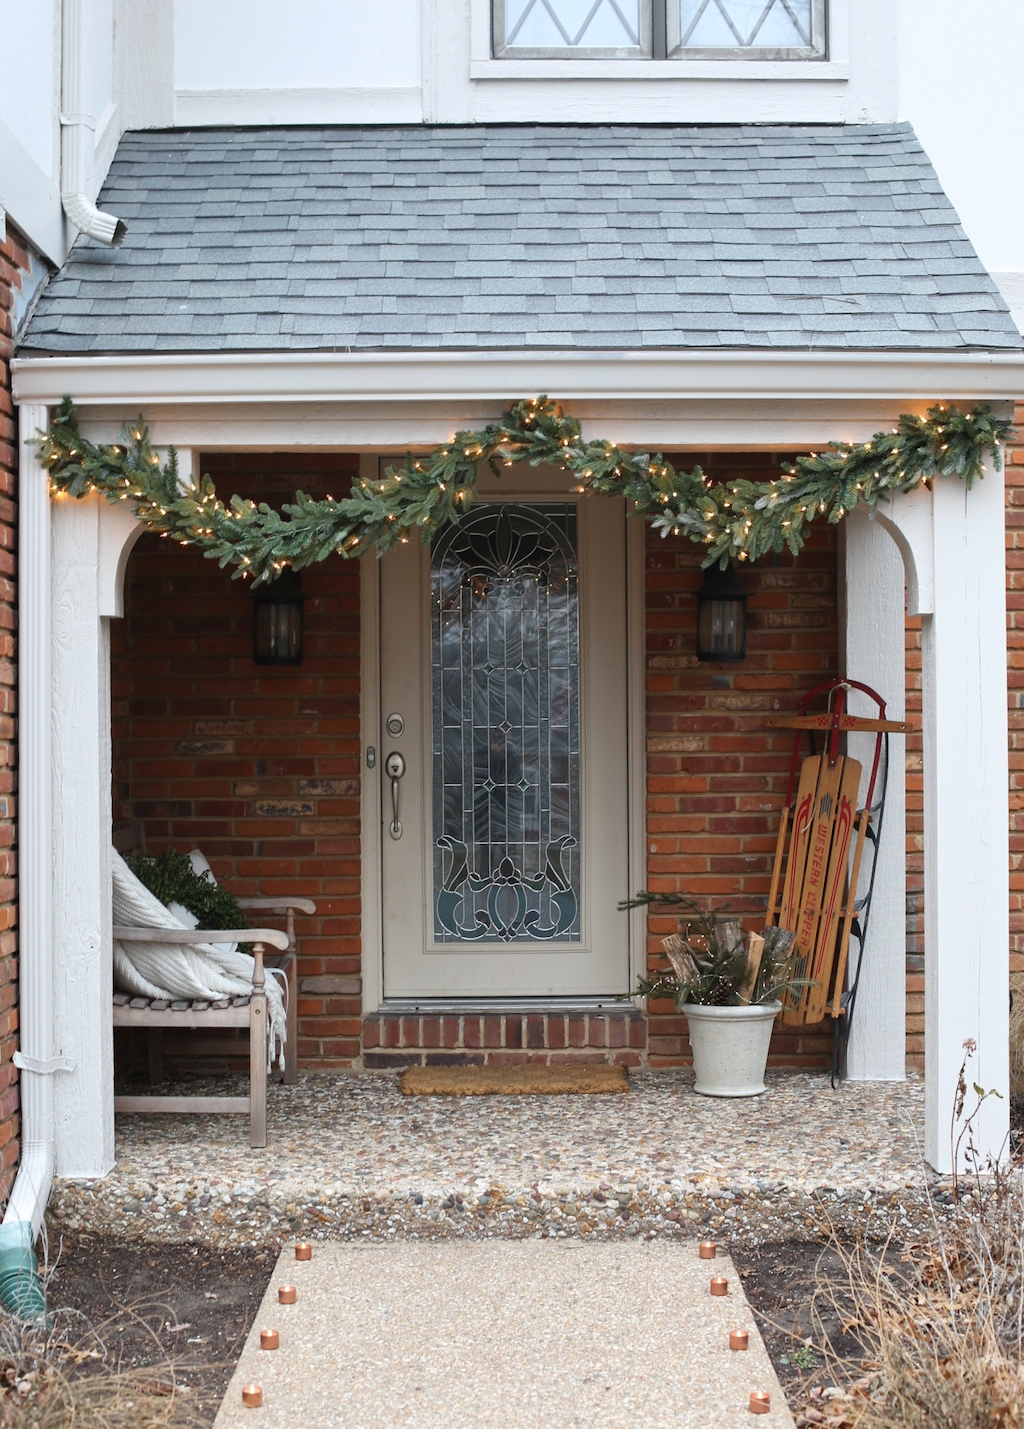
42. Copper Tea Lights – Outdoor Lighted Christmas Decorations
Julie Blannermakes a Christmas-inspired front porch that we’re loving too. But we especially love the easy addition of those copper tea lights.
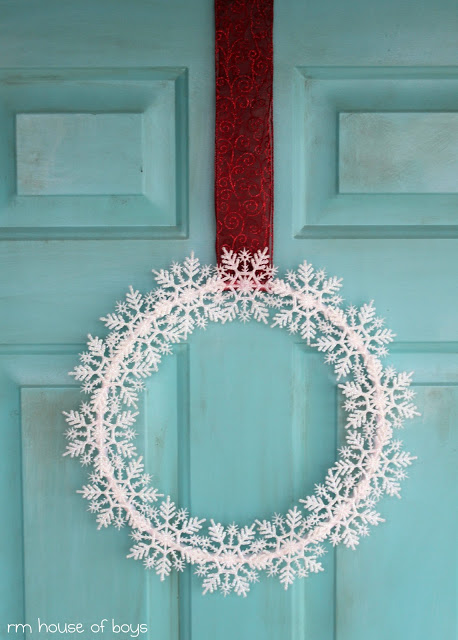
43. Snowflake Wreath – Outdoor Christmas Decorations
Here’s another wreath to learn how to whip up. With some snowflakes on your door you’ll be paying homage to the season and the holiday. (via)
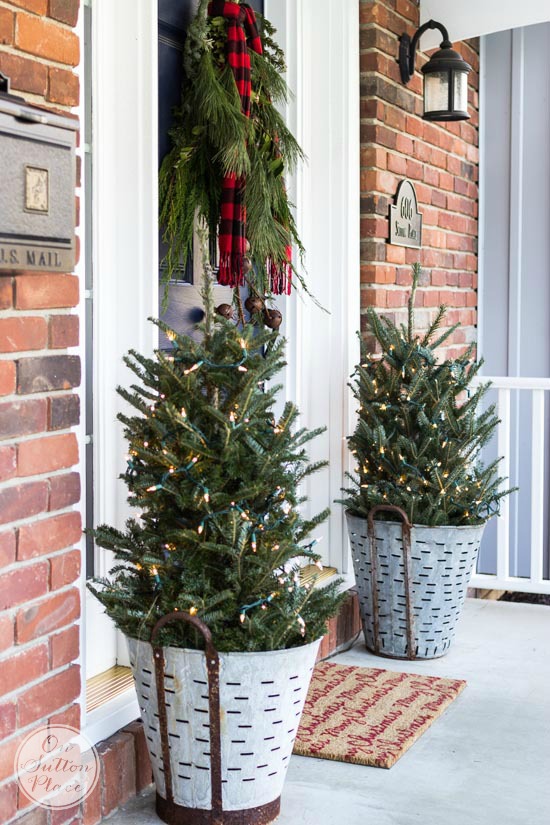
44. Front Yard Christmas Decorations
With the help of some olive buckets, you too can create this festive and frugal front porch. Grab the details at On Sutton Place.
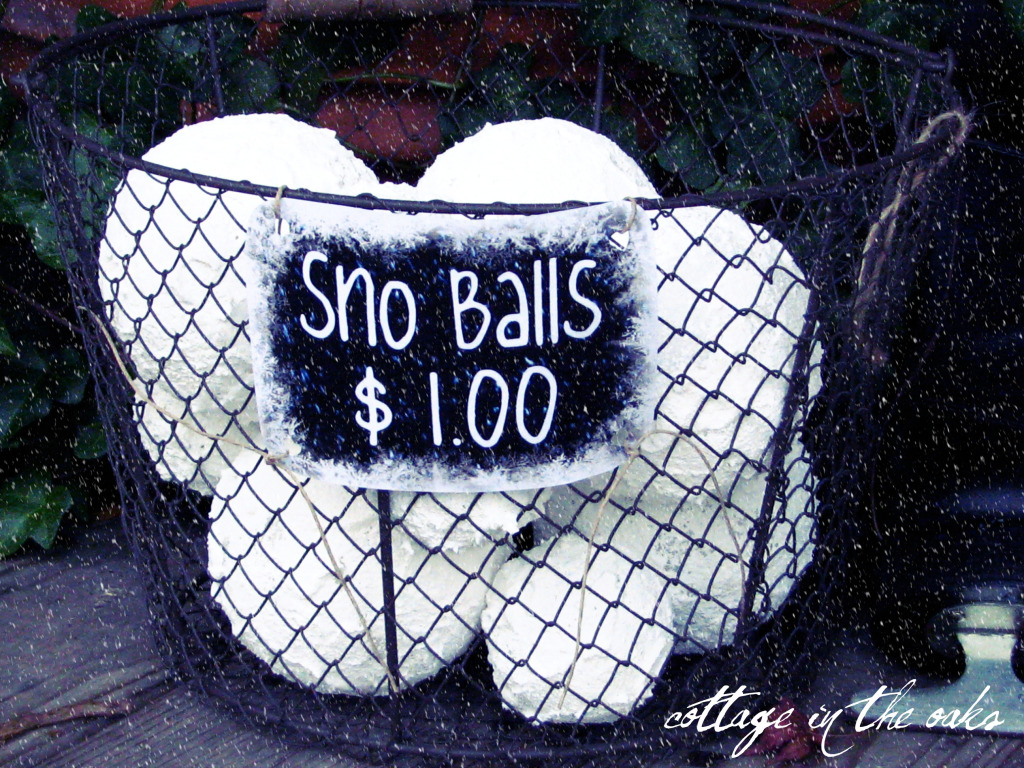
45. Snowballs – DIY Christmas Decorations for Outside
Cottage in the Oaksshows us how to have snowballs without any snow to work with! Check this one out and bring a white Christmas to your front porch.
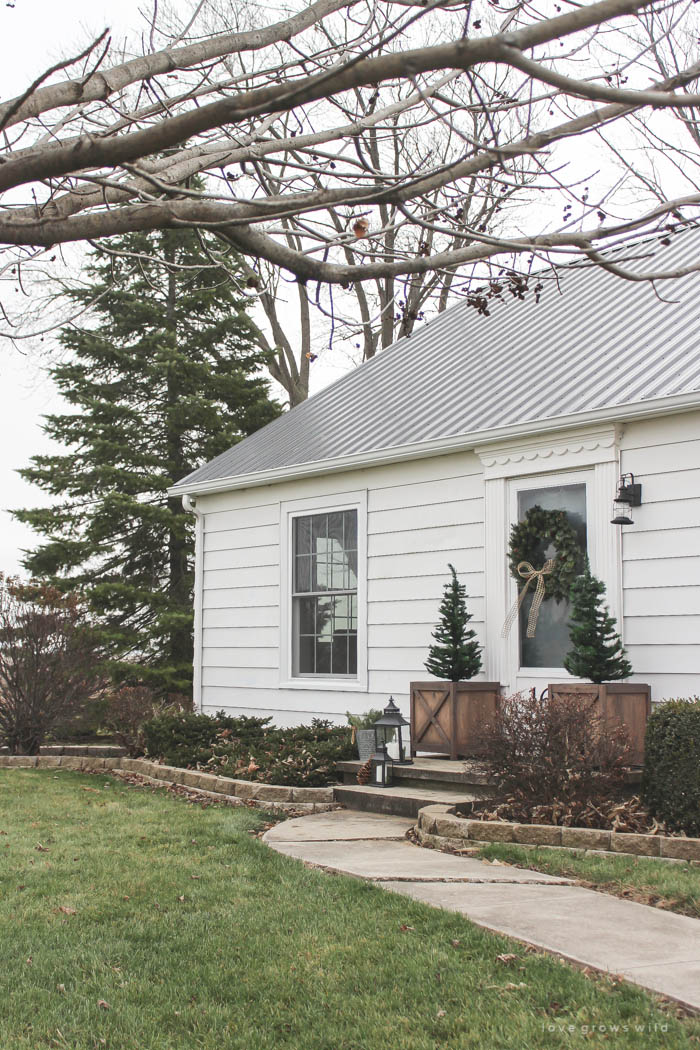
46. Wood Box Planters – Outdoor Christmas Tree Decorations
VisitLove Grows Wildand gather some even more outdoor inspiration for your own home. We especially love this wood box planters.
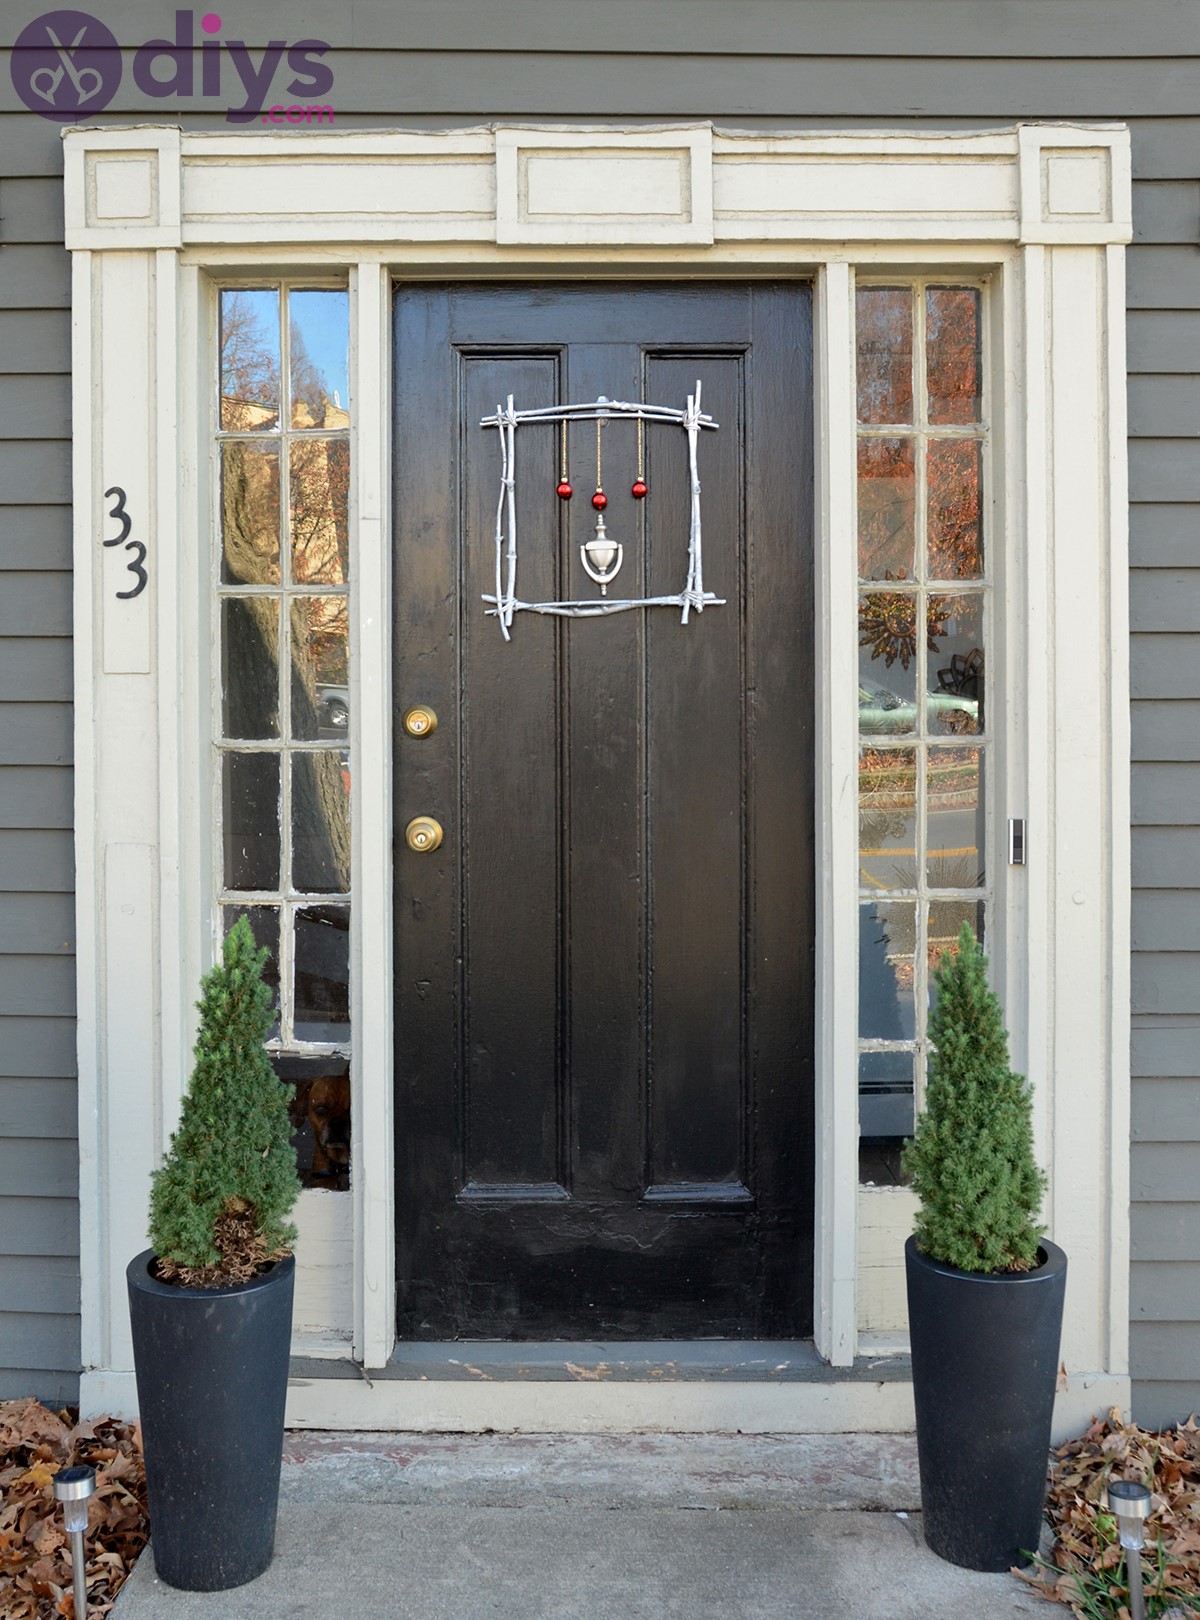
47. Square Branch Wreath – DIY OUtdoor Christmas Decorations
HGTVmakes a square branch wreath that we’re swooning for. It’s festive but it’s also a bit more modern than most as well.
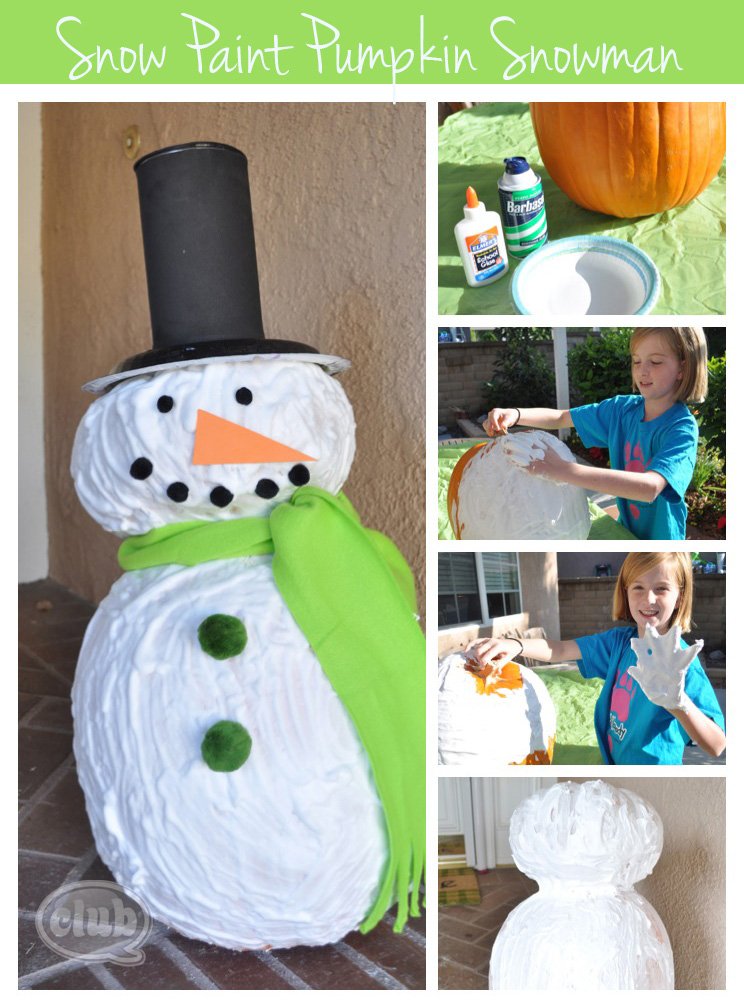
48. Pumpkin Snowman – Large Outdoor Christmas Decorations
Club Chica Circle turned pumpkins into snowmen! The kiddos will love to get involved on this project!
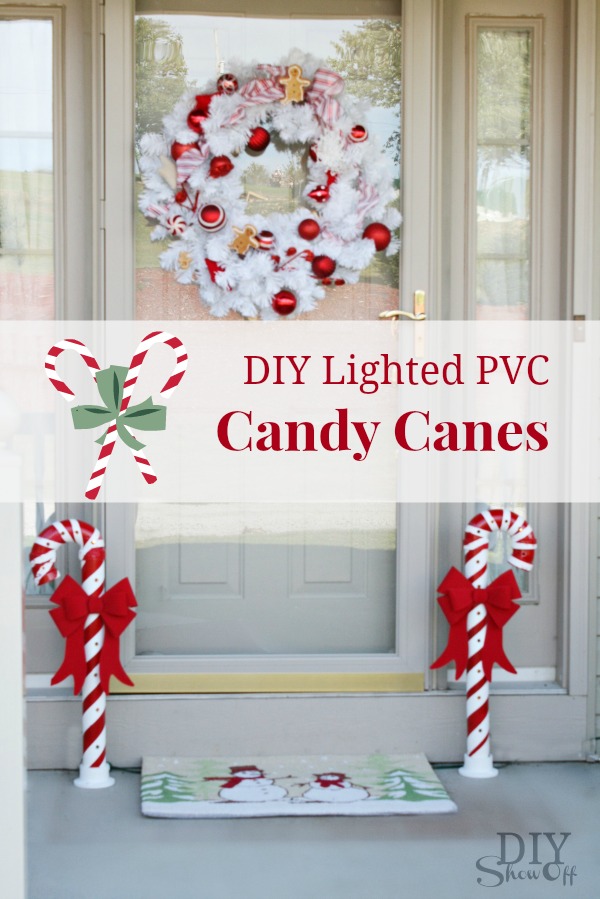
49. Lighted PVC Candy Canes – Outdoor Christmas Decorations Ideas
DIY Show Off makes some lighten candy canes over to PVC pipes and the end result is so whimsical and perfect for the season! Check it out now!
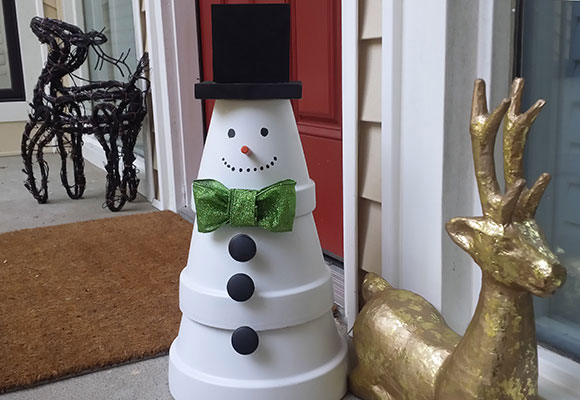
50. Terra Cotta Snowman – Front Yard Christmas Decorations
VisitGarden Clubto learn how to make this fun little terra cotta snowman. It’ll be a fun project to dive into this weekend!
Conclusion
As you can see, there is a slew of outdoor Christmas decorations that don’t involve the typical plastic Santa Claus or holiday lights.
If you’re looking to add some more character and originality to your yard this year, try out one of these ideas to make it look absolutely stunning!
We believe that our selection of DIY outdoor Christmas decorations is varied and generous enough that you’ll definitely find something worth making and placing in your front yard this holiday!
If you’re not comfortable with crafting either one of our suggestions here for any reason (you don’t know how to operate a certain tool or lack artistic skills), you could simply skip it and try finding a different one.
Although we tried to provide you with as many details as possible about each craft, looking up more info about each project may come in handy.
We hope you enjoyed this article and we’ll see you next time! Merry Christmas, everyone!
