50 Easy DIY Halloween Decorations To Make for Your Home
Halloween is a fun holiday that everyone can safely enjoy, from kids who go on relentless pursuits for candy trick-or-treating in the neighborhood to adults who attend parties and decorate their houses, either expecting kids who come asking for candy or other fellow adults that want to party together. Either way, both kids and adults are huge fans of outfits, staying out late, candy, and not to mention the spooky decorations that spring out of nowhere just before Halloween.
Since it’s a pretty huge deal, various companies have capitalized on Halloween decorations, as people seemingly forgot that it’s not about how much you spend, it’s about how much fun you have while decorating your house, front lawn, and porch. However, there are a select few who refuse to give up and still create DIY Halloween decorations, and if you’re interested in becoming a DIY Halloween decorator, our guide will definitely be right up your alley.
We’ve included nothing short of 50 Halloween decorations that you’ll definitely be able to pull off on your own (or with little help here and there from friends or family) so that you’ll have a unique, spooky house this Halloween without breaking the bank. After all, you’ll only keep them up for the occasion, so there’s absolutely no point in spending a fortune on market decorations when you could have some fun creating some on your own.
Homemade Halloween Decorations to Try Out This Year
As we’ve already mentioned, some people prefer to craft their own Halloween decorations, and that’s definitely a thing we can all get behind. Homemade decorations, although not as “perfect” as the ones you can buy from your local stores, can light up a house in ways you can’t possibly imagine. For starters, you get an awesome sense of accomplishment that you’ve managed to create nifty decorations from things you just found around in your house.
Furthermore, you’ll definitely steal the spotlight if you manage to create some truly remarkable decorations this year and not limit yourself to merely sculpting a pumpkin and hanging up a banner or two. However, if you want to turn your house into something that resembles a genuine haunted place, you’ll have to go the extra mile, and that requires not only craftsmanship but also a dash of creativity.
If you already have the handiness working for you, then all that remains is creativity since you’ll probably want to create more than just a bunch of Halloween decorations, and, aside from that, you’ll want them to be as varied as possible, right? Don’t fret, that’s exactly why we’re here for. Our guide comprises 50 DIY decorations you could try out this Halloween; feel free to try out as many as you can, so that you’ll have more time to focus on other important things this Halloween, such as getting candy for trick-or-treaters or finding the perfect playlist for your party.
1. Popsicle Stick Monster for Halloween – DIY Halloween Decorations
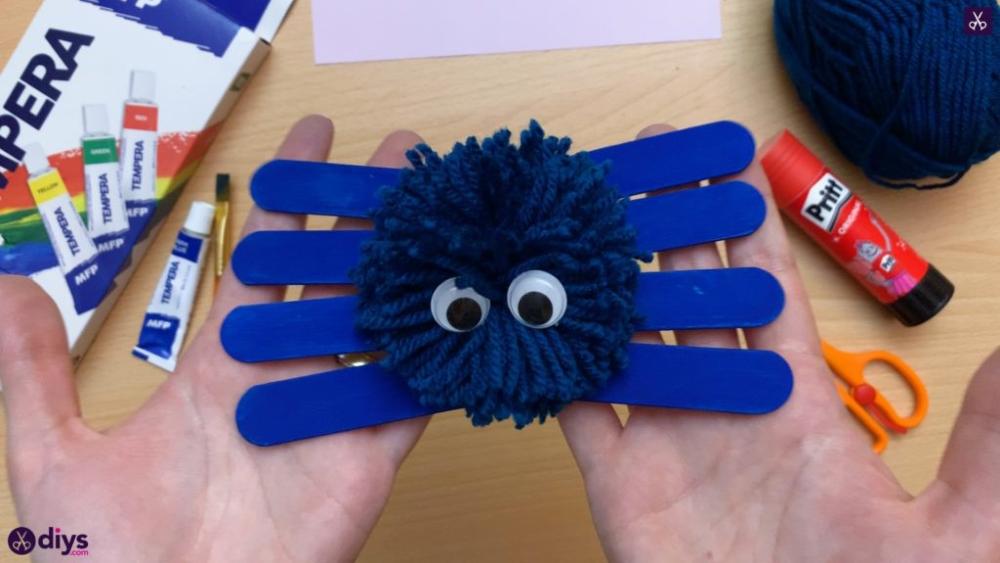
If you’re a fan of crafts, then you probably acknowledge the huge amount of versatility that popsicle sticks have, seeing as you can use them in a lot of projects, from creating the Eifel Tower and the DaVinci’s bridge to creating spider legs for make-believe creatures this Halloween. Sure, the design may seem a little child-like, but not everyone wants to see realistic skeletons, zombies, witches, and vampires all the time during Halloween.
For this craft, you’ll be needing at least four popsicle sticks per monster unit, but if you really want to go at it, you could use at least 8 per monster. So here’s what you have to do: take the four popsicle sticks, paint them in a dark color, then cut them in half and arrange them so that they look like spider legs. Once you do that, prepare the similarly-colored yarn as we’ve explained in the tutorial above and stick it to the spider legs you’ve designed.
If you went with the eight-stick version, repeat the same procedures with the additional four popsicle sticks (paint them and cut them in half), and attach them to the other sticks you’ve prepared, but at an angle, so that they resemble spider legs even more. Here’s a nice tip: if you don’t like your spider decorations dark, you could consider painting their “legs” in a bright color, one that will add a nice contrast to the decor, but make sure to use a dark-colored yarn.
2. Pumpkin & Cat Halloween Decor – Easy DIY Halloween Decorations
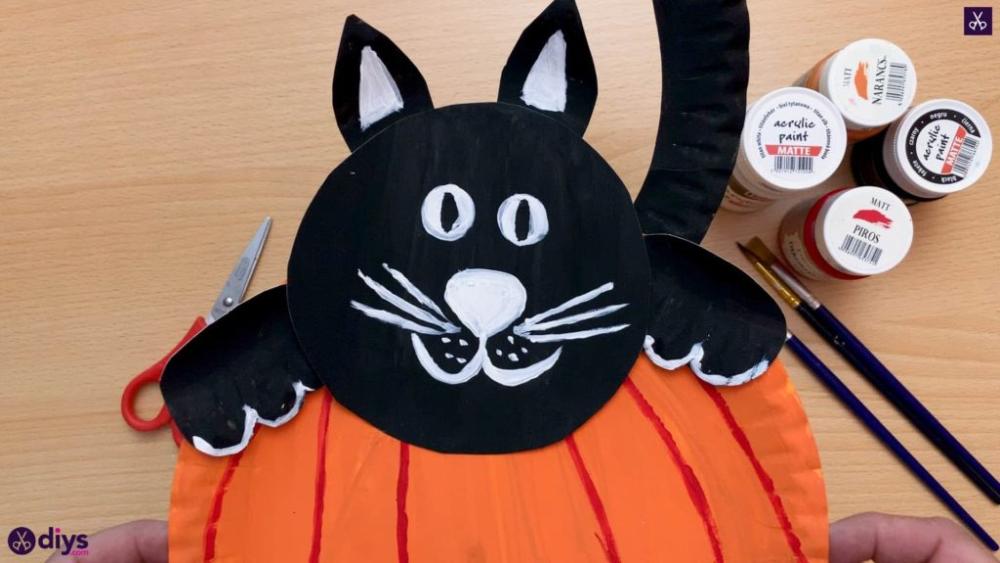
Cats have been a symbol of Halloween for a long time ago, and pumpkins don’t even need an introduction, so pairing them up for a little spooky boost this year seems like a logical choice, right? Well, right, if you’re gonna turn the cat into some sort of werewolf and pick a scary design for your carved pumpkin then you’re gonna have a scary combo, but this one’s not exactly scary as it is goofy or cute. So it goes without saying that if you’re a hardcore fan of scary stuff for Halloween, you may want to skip ahead.
This design is more fitting to pass on to your children and let them help you decorate the house, as it’s not complicated at all. First of all, you’ll need to score some paper or styrofoam plates and paint them. One of them will be the pumpkin and the other will be the cat after a few adjustments. Paint an entire plate with orange, then use red paint to draw the lines so that it will resemble a pumpkin. The next step is a bit complicated to explain, so make sure to follow the tutorial we’ve attached above.
After painting both plates and cutting the one that you’ve painted black into all the required pieces, you can start assembling your design by gluing the pieces together. Once you’re done with that, you can use white paint to draw a face and some other details for your paper plate cat. For instance, you can add a white contour to the outline of its paws, and paint the tip of its tail white. You can use the face we’ve included in our example, but if you’re a creative spirit, feel free to choose a different face and different colors for it (for instance, you could paint its eyes green or red if you want to).
3. Halloween Candy Holder – Halloween House Decorations
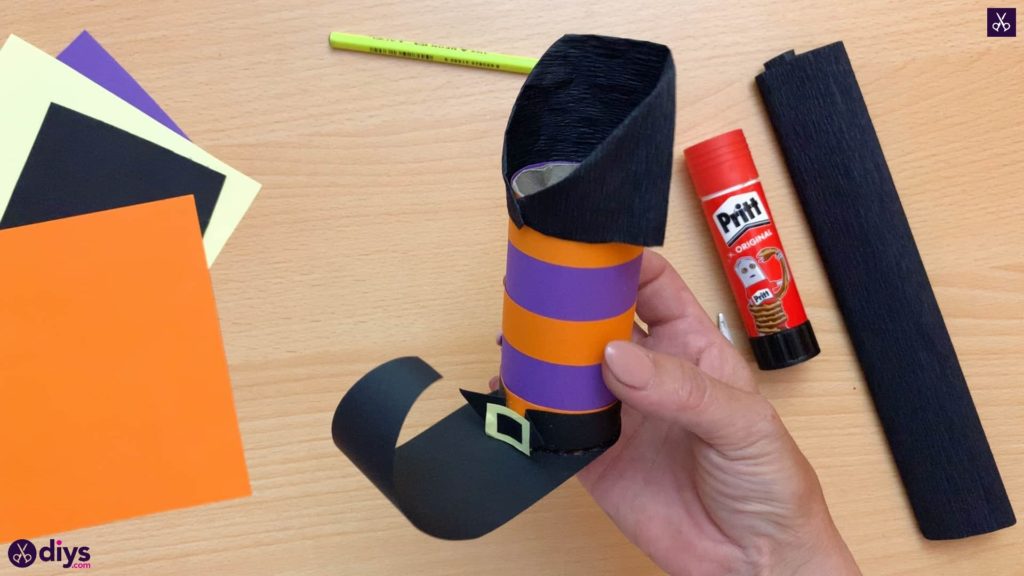
If you’re about to celebrate Halloween, you probably know that you can’t do that without candy. And you can’t just have candy laying around in the open, else you’ll run out of them before you can say trick or treat. Well, maybe that’s not the most compelling reason why you’d want a candy holder in your house, but it’s one of the best ones we could find. Besides, these Halloween-themed candy holders look so nice, you’ll definitely want to keep them at hand for the next year’s Halloween party.
First of all, they’re shaped like witch’s boots, and we all know that witches are paramount to having a successful Halloween party. Second of all, they don’t take up a lot of space, considering that the main container is just a bit larger than an empty toilet paper roll (well, they are made out of empty toilet paper rolls, so there’s that). Last, but not least, they’re very practical to use, whether you’re thinking about hanging them around the house like Christmas stockings or have your children wear them as candy holsters.
If you’re thinking about crafting them, then you’ll be glad to learn that you won’t need to be a master crafter and a ton of materials. For each candy holder, you’ll simply need a stick of glue, colored paper, black crepe paper, an empty toilet paper roll, a pencil, and some scissors. Just follow the tutorial we’ve added above if you want to learn how to do them. The Halloween candy holder is a fun project and the best part about it is that the whole family can partake, given that it’s not too complicated to do.
4. Lollipop Spiders – Halloween Party Decorations
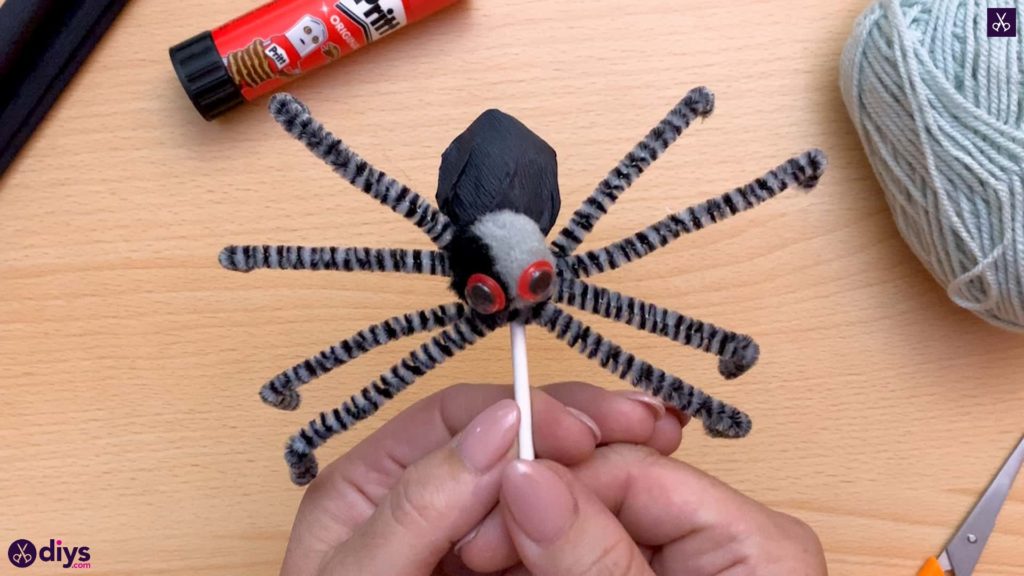
If you have a lot of time on your hands and patience is one of your strong cards, then this project that will have you craft lollipop spiders is definitely worth checking out. They’re cute, they don’t require a lot of materials to be crafted, and you can turn a boring evening of watching random TV shows into a fun night of crafting-related activities for your whole family, especially if you were already thinking of decorating the house in a fun, creative, and unique fashion.
These lollipop spiders aren’t exactly lollipops, so you won’t be able to eat them once you’re done (without ruining them, that is). These nifty decorations get their name from the fact that they’re built around an actual lollipop (unless you could come up with some other similar-shaped object), so you’ll have to source one and refrain from eating it, even though we can all agree that lollipops are simply irresistible. And no, the lollipop stick won’t cut it, you’ll need the whole thing.
The process is quite simple: once you have the lollipop, you’ll only need to acquire some yarn (preferably dark), black crepe paper, red googly eyes (for added creepiness), a glue stick, a pair of scissors, a small (preferably dark) crafting pom-pom, and four dark-colored pipe cleaners (if you can find black and grey striped ones it’s perfect). We forgot to mention that most of these materials are meant for just one spider, so you’ll need to grab some more materials (especially lollipops, pom-poms, googly eyes, and pipe cleaners) if you plan on doing more than just one spider.
5. Lollipop Ghost – DIY Halloween Decorations
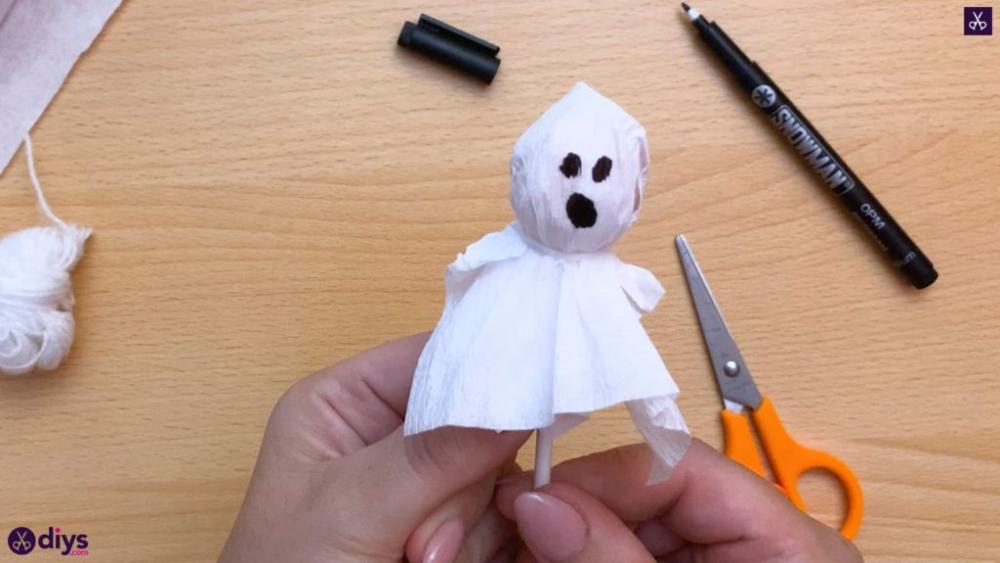
As long as we’re on the subject of lollipops and Halloween, here’s yet another project that will have you combine the two into a nifty decoration for your Halloween party this year. Or maybe you won’t throw a party, but this decoration will definitely set a spooky mood in your house this year, and the best part about it is that you don’t have to spend a lot of time or materials to craft it. More so, you could bring the whole family into it and spend a fun evening together crafting lollipop ghosts.
As you can see from the photo above, the ghostly figures are cute and small, as you have to build them around a lollipop (as with the spider lollipops we’ve also included in our guide). The things you’ll need to create these cute little lollipop ghosts are a lollipop, some white yarn or string, a black felt-tipped pen, a pair of scissors, as well as some white crepe paper. It goes without saying that you’ll need one lollipop per ghost, so make sure to stock up before you start.
The principle behind this easy craft is quite simple: all you have to do is wrap the white crepe paper around the lollipop and tie the paper with the yarn or string just below the “head” of the ghost. You also need to make sure that you’ve left just about enough paper that the ghost also has a body, otherwise, you’ll simply have a plain old lollipop wrapped in white paper. Once you’ve designed the head and body of the ghost, you can use the pen to draw its face; the surprised face is always a popular choice, but you could come up with your own design if you want to.
6. Paper Cone Witch – Halloween House Decoration
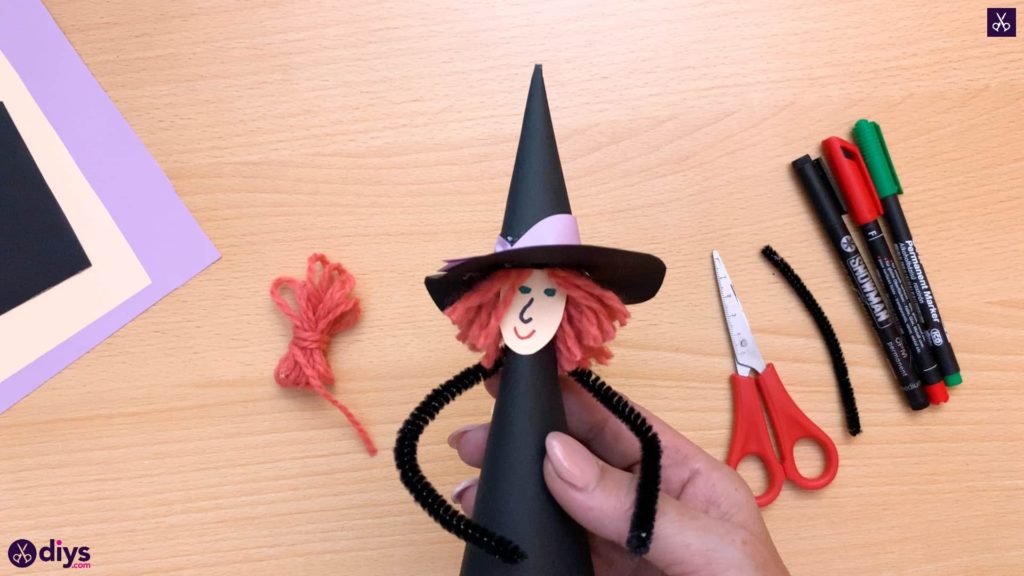
With Halloween just around the corner, it’s easy to fall into the trap of raiding your local stores and emptying shelves’ worth of theme decorations and turn your house into a spookier version of itself. However, things don’t have to be that way, especially if you’re one to enjoy a cozy evening of cutting, gluing, and sewing things together, or, in other words, crafting. This paper cone witch, for instance, is quite a great example of why you shouldn’t spend a fortune on Halloween decorations.
Sure it’s not a rabid werewolf head that roars, bleeds, and glows in the dark, so you won’t be able to just place it somewhere randomly inside your house and scare the soul out of your peers, but if you’re not a fan of realistic, scary Halloween decorations and prefer a more cute, goofy approach, then this witch is definitely for you. As with other projects in this guide, you won’t have to be a master crafter to make this project, and you won’t even need a lot of ultra-specific materials.
All you’ll need to create a paper cone witch you can use as a Halloween decoration is a pair of scissors, some orange yarn (or green, we’ll use it for the hair), some black pipe cleaners, felt tip pens (red, black, and green), some construction paper (preferably cream, black, and purple), and a glue gun. If you’ve done other crafting projects before, chances are that you already have most of this stuff laying around, so check out the tutorial we’ve attached above and get to work!
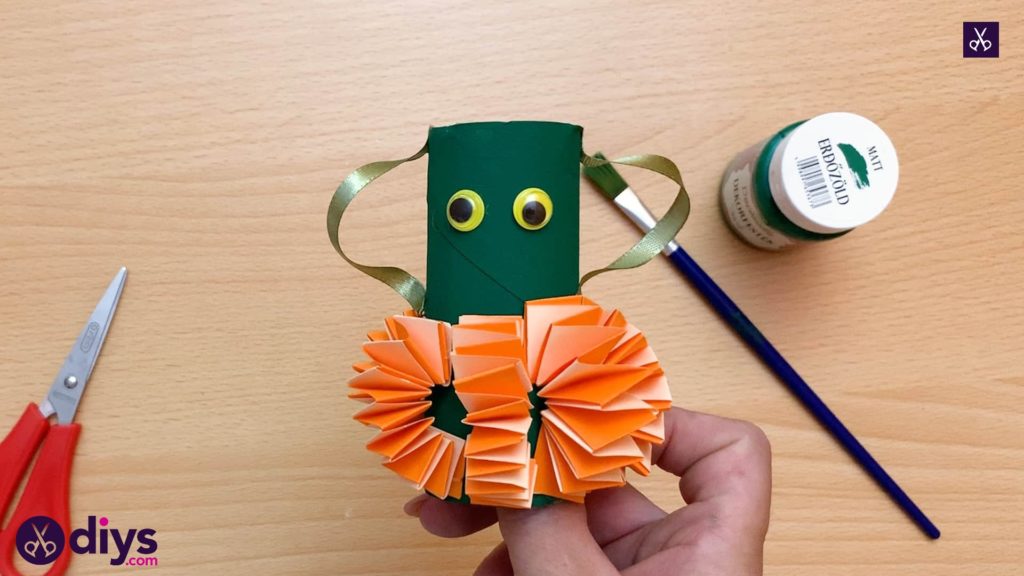
7. Toilet Paper Roll Pumpkin – Halloween Yard Decorations
If you have no idea what should you use to decorate your house this Halloween, then you’ll definitely want to check out the toilet paper roll pumpkin we’ve added to this guide. It’s fun to make, and it will definitely add a splash of color to your house this Halloween, and the best part about it is that you can use it indoors, as well as in your yard if you want to. Well, as long as it doesn’t rain since water can really do a number on it.
Do you also have children in the household who can’t seem to keep it together before the trick-or-treating season comes? You could perhaps lure them to the crafting table and ask them to help you make these adorable toilet paper roll pumpkins, considering that crafting them is not exactly rocket science. Your kids will definitely enjoy your time spent together and they’ll have a sense of accomplishment that they’ve created awesome decorations that you actually showcased during Halloween!
Alright, so before getting started it’s important to mention that having an empty toilet paper roll won’t cut it for these cute little pumpkins, so you’ll have to source some other materials, as well. These include colored paper (orange and cream), googly eyes, small green ribbons, green paint, a paintbrush, a glue gun, a pair of scissors, and, of course, some empty toilet paper rolls. When you checked off everything on this list, you can check the tutorial above and learn how to craft these cute pumpkins that you can use as Halloween decorations.
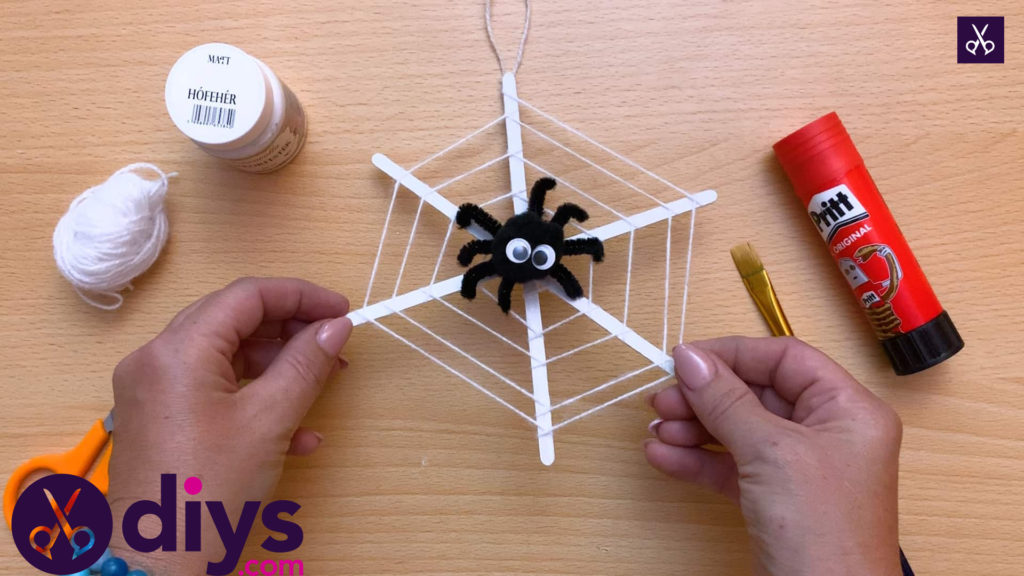
8. Spider Web Decoration – Halloween House Decorations
Spiders aren’t as harmful as we’d like to think they are, so the reason why they became strong symbols of creepiness is probably due to the fact that they have a lot of eyes and a lot of legs, you always seem to find them in dark spaces, and the fact that getting tangled in one of their webs will most definitely have you say (or better yet scream in a whiny voice) “Get it off! Get it off!”. So lo and behold, we’ve included in our guide some spider web decorations for Halloween that you can craft without spending too much time.
Now we’re familiar with the realistic spider web that comes in a spray can and you can buy it from any local store come Halloween season, but unfortunately, our model isn’t so advanced. In fact, it looks harmless enough that it might even tone down your irrational fear of spiders, especially if you’re the one crafting it. Furthermore, your kids will love it, especially if they’re not exactly huge fans of arachnids, either.
So here’s what you’ll have to get if you want to craft this spider web decoration for Halloween: some white paint, a stick of glue, black pipe cleaners, googly eyes, a paintbrush, some white string, a pair of scissors, three popsicle sticks, and some black crafting pom-poms. Once you get all that checked off of your list, make sure to check the tutorial we’ve included above and learn how you can craft this harmless spiderweb Halloween decoration with ease.
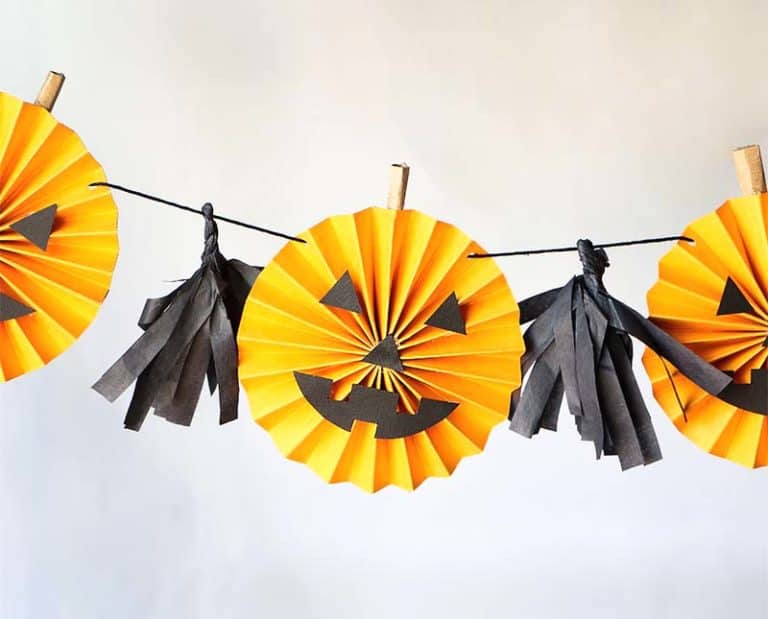
9. Rosette Pumpkin Garland – DIY Halloween Decoration
Again with the pumpkins, but who among us doesn’t love pumpkin decorations for Halloween? Or at least who doesn’t immediately think about Halloween or suddenly feels the urge to carve a face and stick a candle in it upon seeing a pumpkin? If you like pumpkins as much as we do, then we give you this rosette pumpkin garland that you’ll be able to craft from the comfort of your home instead of spending a lot of money at your local store for Halloween decorations.
However, this garland doesn’t have real pumpkins, but paper-crafted ones. We’re yet to discover someone bold enough to craft a garland and use real pumpkins. As you can see from the photo above, these pumpkins are actually crafted from paper, and they also feature little spooky faces. We’d like to say that you could skip adding the faces, but then you’d just have a garland made out of round, orange pieces of paper.
Without further ado, here’s what you’ll need to craft this nifty Halloween decoration: a scoreboard, a paper trimmer, some cardstock, a hole punch, some black twine, black tissue paper, double-sided tape, a pair of scissors, a hot glue gun, and, obviously, some hot glue sticks. After you’ve gathered all the necessary materials, make sure to check the tutorial we’ve attached above and see how you could craft this rosette pumpkin garland this Halloween without breaking a sweat.
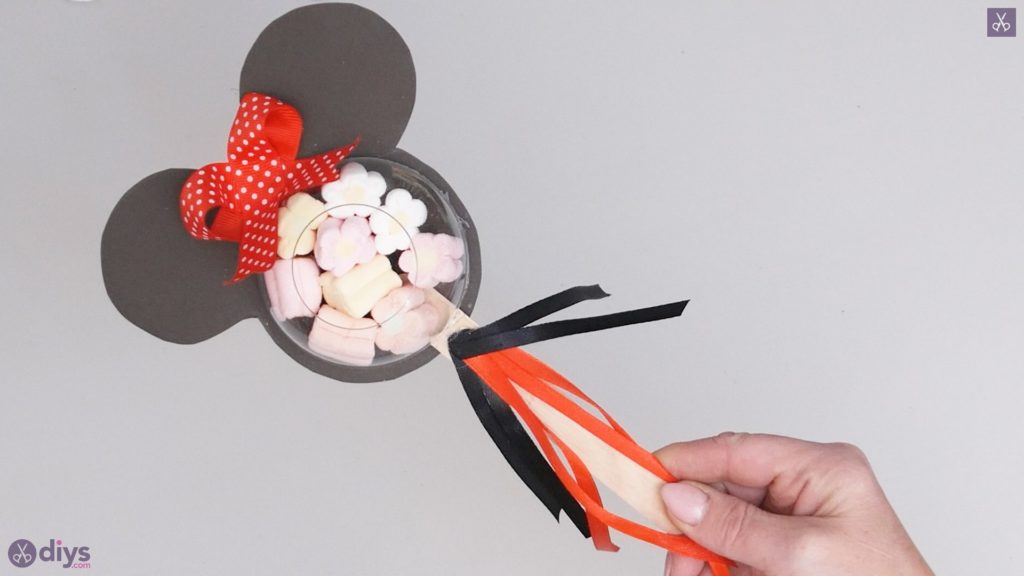
10. Minnie Mouse Candy Holder – Halloween Party Decorations
Alright, we’ll give you that, Minnie Mouse is not something you’d find in a horror movie, which kinda makes it unfit to be in a guide for Halloween DIY crafts, right? Well sure, if you’re decorating your house for a spooky Halloween party, then yes, this decoration would make no sense, but if you have kids and they decide that they want Minnie Mouse as a decoration, then suddenly it’ll become the perfect Halloween decoration, no further questions.
Jokes aside, nowadays it’s not exactly a requirement to be creepy during Halloween; you just have to find a creative outfit, and if Minnie fits the scenario, then it sits. You could craft this Minnie Mouse candy holder and hang it in your house like a Christmas stocking, but you could also devise it as a holster for various pieces of candy (such as a candy cane or an energy bar) and give it to your kid to wear it during its next trick-or-treating session.
The greatest thing about this project is that it won’t eat up a lot of your time and it doesn’t require a lot of exotic materials. In fact, you’ll probably find most materials simply laying around your house. These include a hot glue gun and some sticks, some black cardstock, a pair of scissors, some ribbons (polka dots, plain red, and black), a pencil, some large popsicle sticks, and an open-topped plastic dome (you could get that from a local crafts store).
11. Simple Paper Lantern – Easy DIY Halloween Decorations
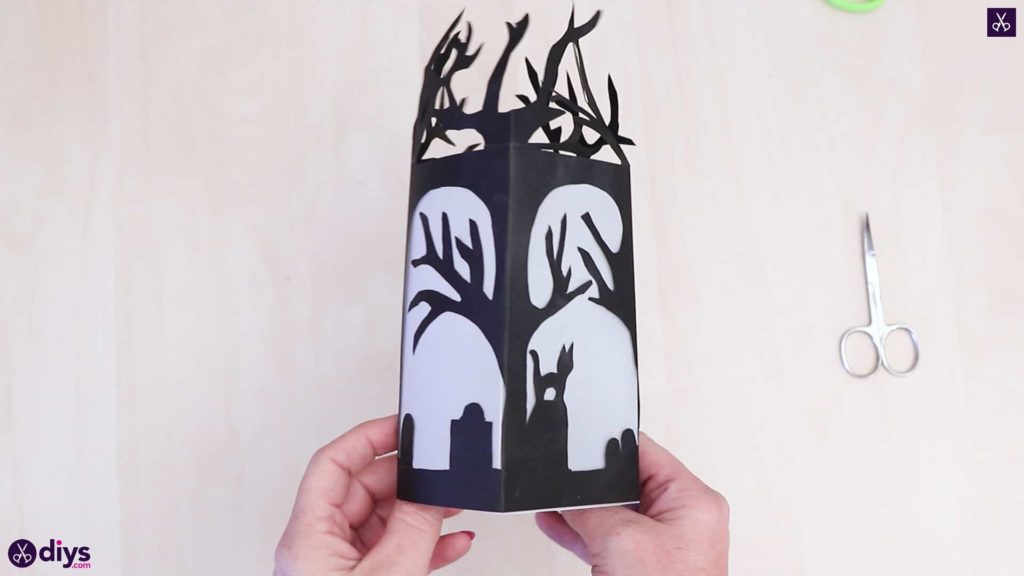
Lanterns are commonly used to set the mood in various scenarios, and Halloween makes no exception. What, you can’t think of a lantern that everybody uses during this time of year? Well, what about Jack-O-Lanterns, which are commonly known as carved pumpkins? This simple paper lantern that we’ve included in our guide doesn’t require pumpkins or other hard-shell fruits you’ll need to carve but is based entirely on paper, making it easy to craft, and highly effective.
As you can see in the photo above, the lantern is actually made out of two types of paper, black and white. The white paper is actually used as a background and lets light shine through it, and the black paper is the foreground and the actual drawing that the light shapes and projects on your wall after you add it a light source. Much like any other lantern, this one requires a source of light, otherwise, it would just be a decoration made out of paper.
You can check out the tutorial above and learn how to craft this simple paper lantern, but first, you’ll have to source a bunch of materials. These include some black paper, white vellum, a pair of curved scissors, a white pencil, a stick of glue, and a pair of small scissors for detail. Once you’ve got all of that, you’ll have to think about a source of light. Naturally, you won’t want to use a candle (because paper catches on fire very quickly), and also nothing that generates a lot of heat (such as incandescent lightbulbs).
12. Black & White Pattern Pumpkin – Halloween Yard Decorations
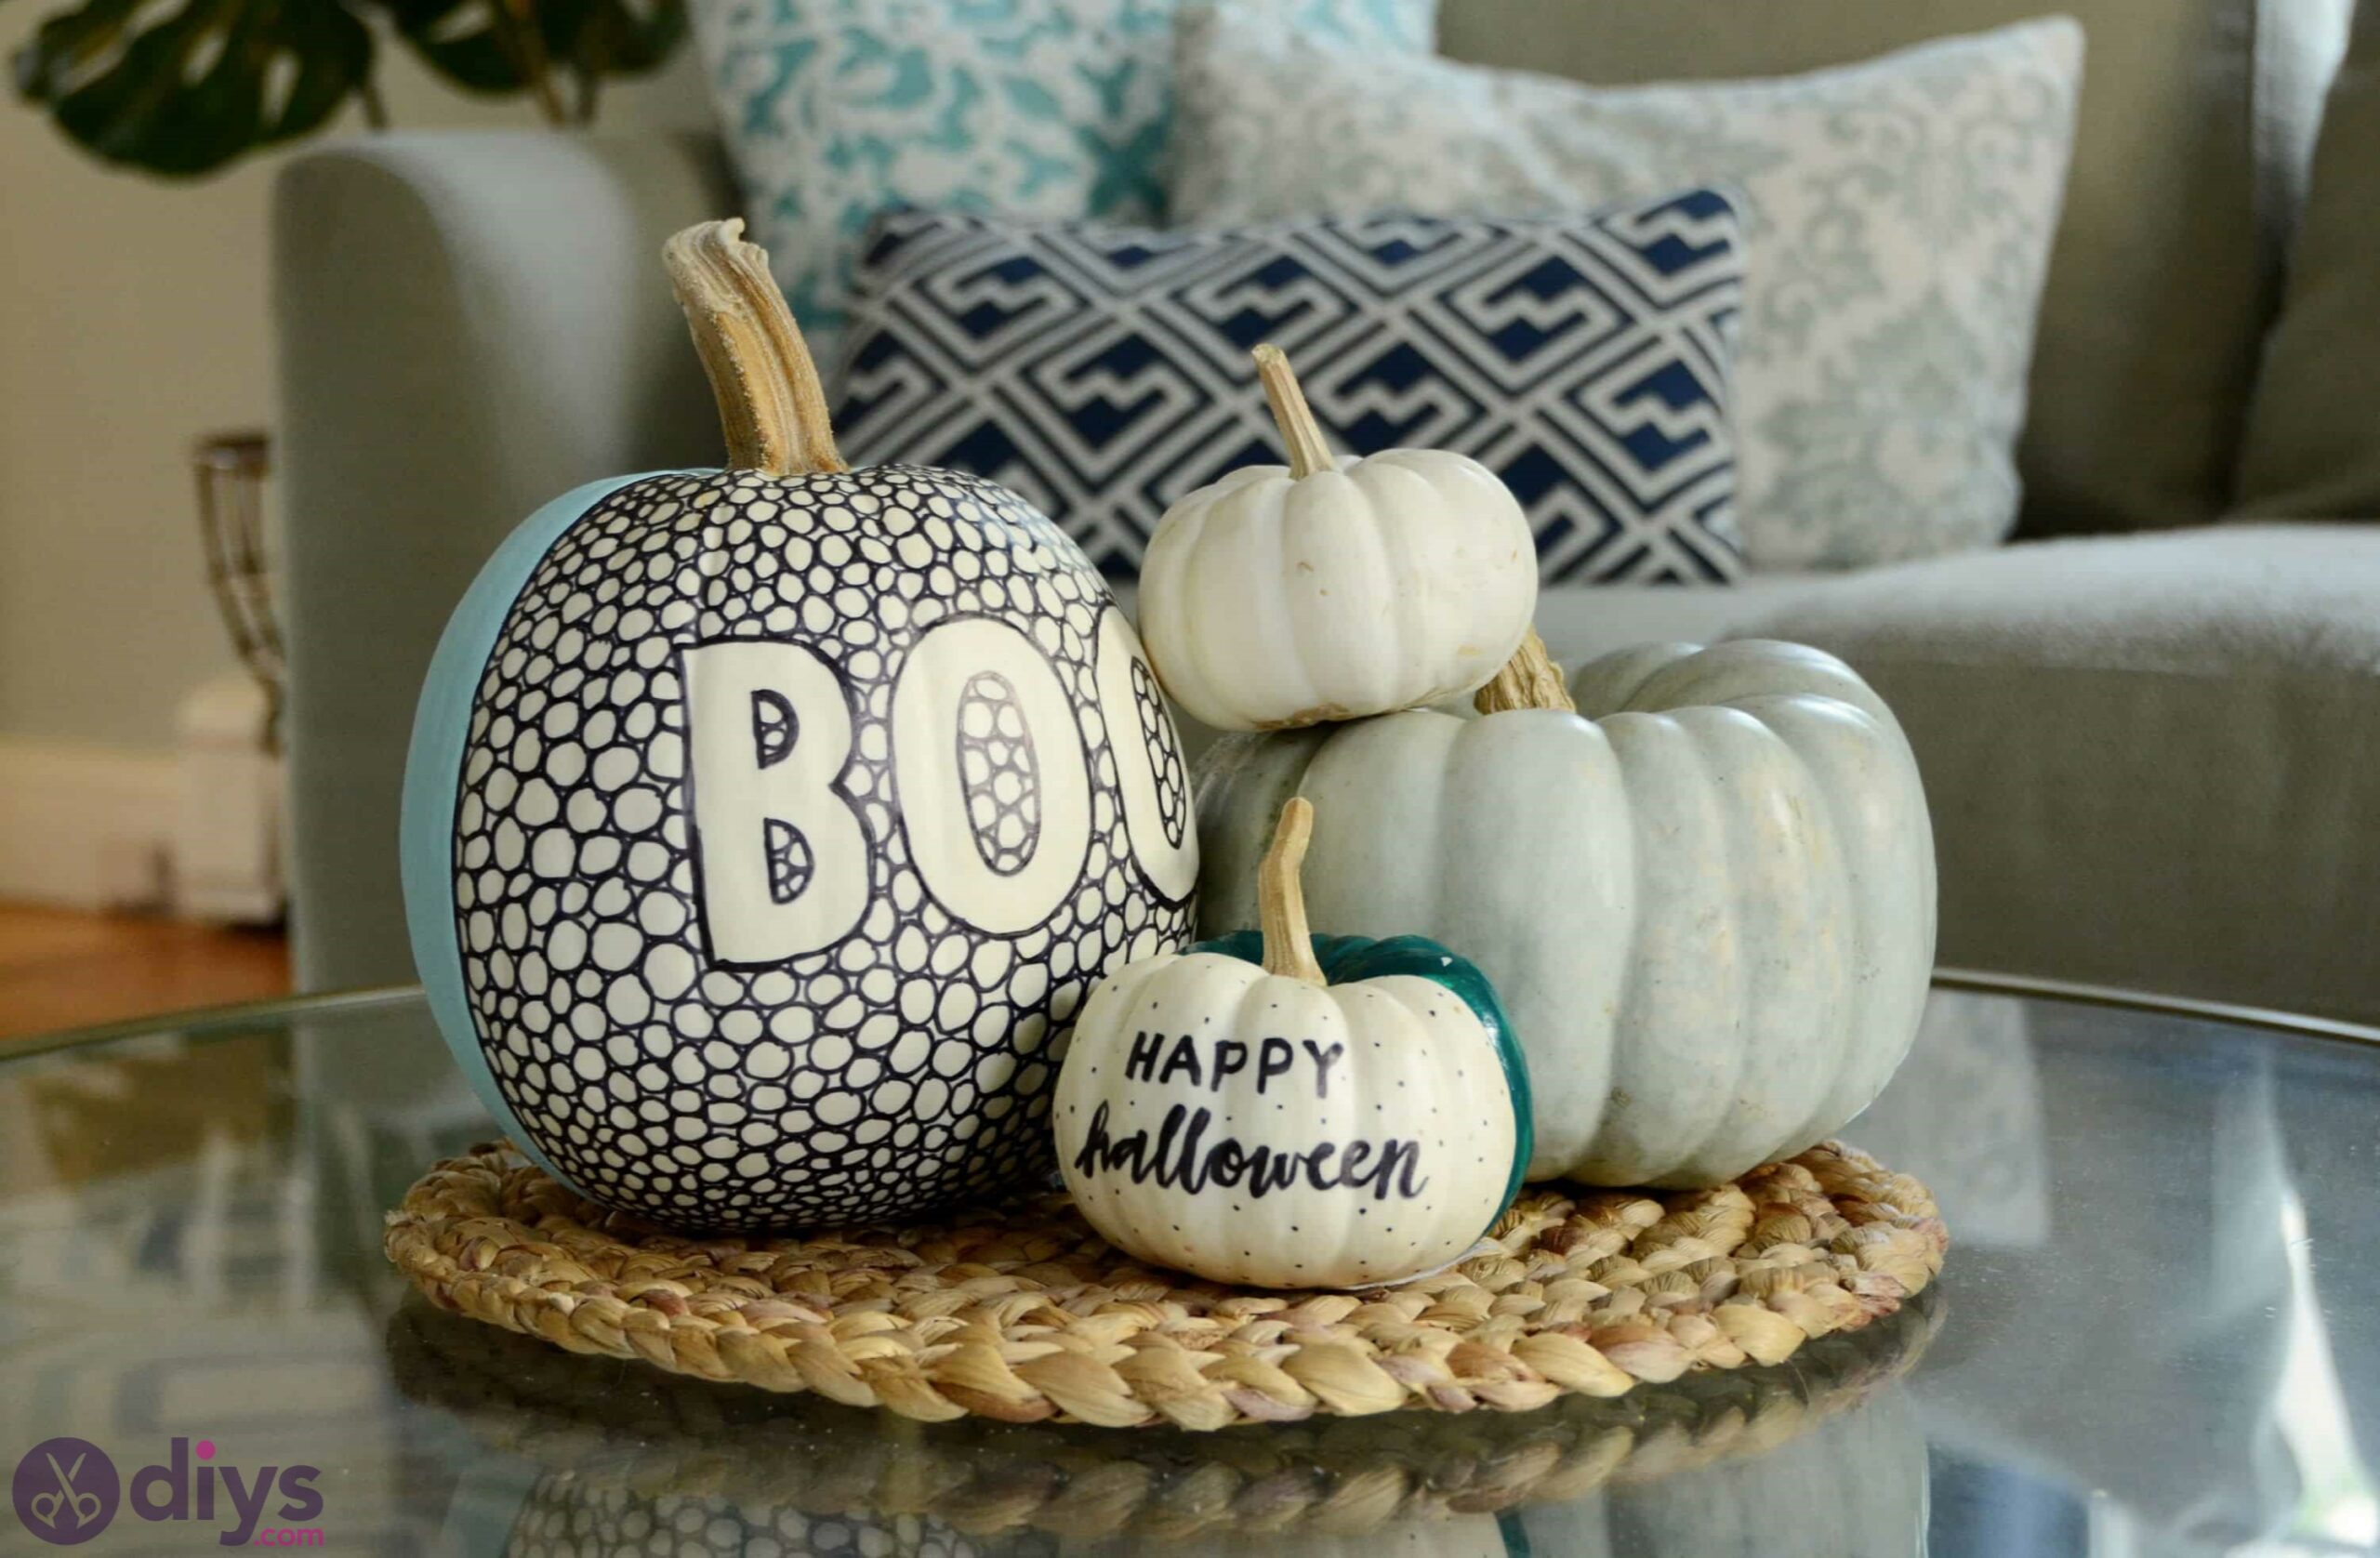
Although we’ve mentioned pumpkins several times in our guide by now, this time we’ve got something entirely unique. Most pumpkins we usually worked with are orange because ripe, orange pumpkins are paramount to symbolizing Halloween, but this time we’re gonna use a white pumpkin. White pumpkins are not only easier to work with, but they also give you a lot of elbow room as far as the variety of colors you can use to paint over them.
Furthermore, most Halloween enthusiasts carve their pumpkins, but in this example, we’re simply going to draw and paint over them to create an awesome pattern. You’ll need a white pumpkin (obviously), some adhesive letters (optional, if you want to spell out a short message), some painter’s tape, a foam craft brush, a black sharpie marker, and acrylic paint in your favorite color. After you get all the required materials, you can start working on the pumpkin.
The first step would be applying painter’s mask tape to the pumpkin as we’ve described in the tutorial above, and use the acrylic paint to cover half of the pumpkin in the color of your choice. After that, you could use the adhesive letters to spell out a short message on the pumpkin and then start creating the pattern using the black sharpie marker. For the best results, make sure to check our tutorial above, as it has some pretty comprehensive instructions for this easy DIY Halloween project.
13. Whimsical Halloween Wreath – Halloween Door Decorations
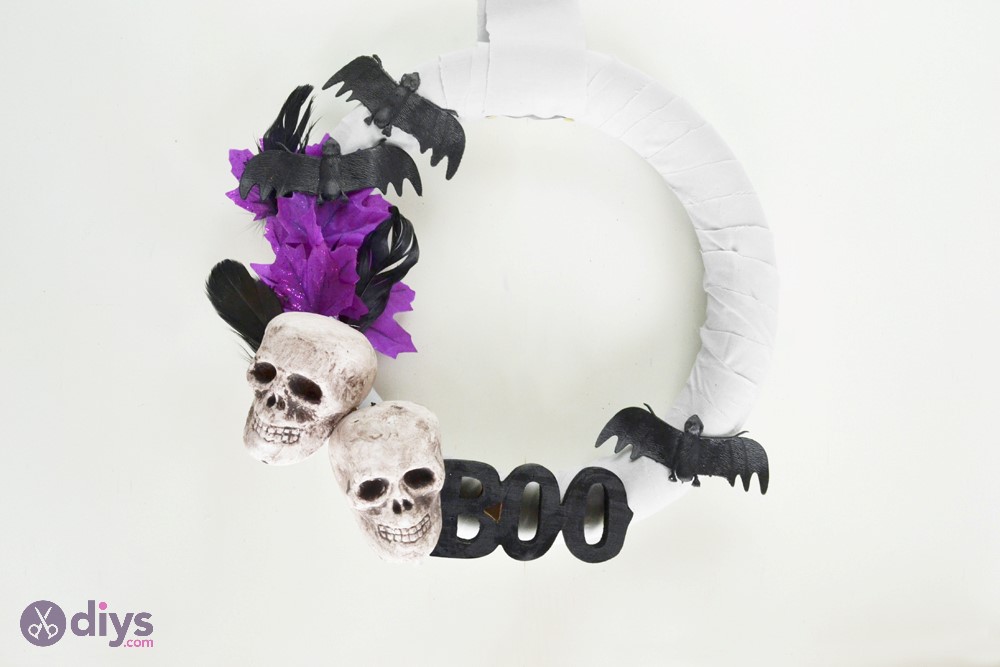
Wreaths are generally associated more with Christmas than with Halloween, but we’ve seen a lot of them (appropriately themed) on doors during Halloween, as well, so it’s safe to say that they’ve become quite a popular choice nowadays. If you’re expecting trick-or-treaters and don’t want to bust the bank on a decorative Halloween wreath this season, we’ve got the perfect project for you that will help you craft your own spooky wreath.
It’s worth mentioning that you’ll need a styrofoam circle-shaped wreath for this project, and you can probably find one at your local crafting store. However, if you’re crafty enough, you could probably create a circle-shaped frame out of anything else, such as willow branches, tinfoil, sponge, or cloth-covered wire. Furthermore, you’ll also need some Halloween-specific decorations, such as bats, spiders, skulls, or witches, which you can also find at various local stores. If you have some leftover decorations from last year, you could repurpose them.
Aside from these two specific elements, you’ll also need some strips of fabric, a bunch of pushpins, and a pair of scissors. The actual crafting process of this wreath isn’t complicated at all, since you’ll basically assemble some stuff together instead of cutting and sewing, but trust us that the end result will be totally worth it. Since this project uses various Halloween decorations as a main “ingredient,” you could unleash your creative side and mix & match anything you could think of.
14. Autumn Centerpiece – Halloween Party Decorations
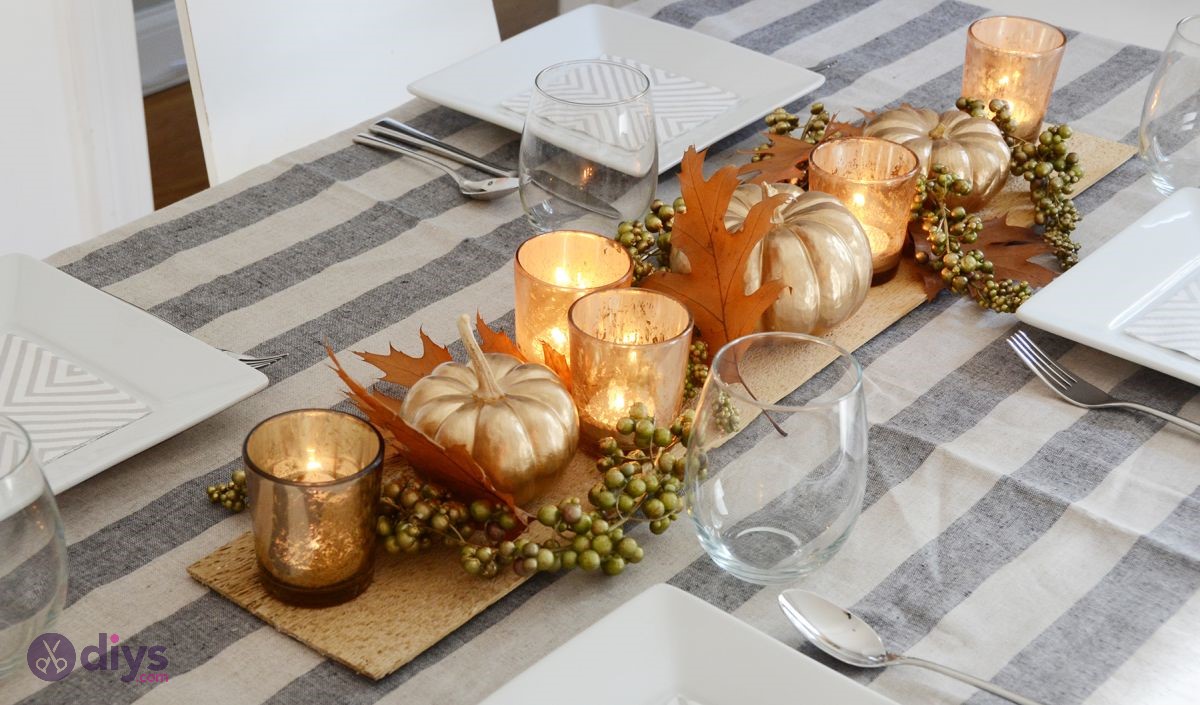
If you’re a fan of finer, fancier things than your average Halloween enthusiast, then you’re probably sick and tired of seeing all the bloody, dark, dusty, scary decorations that people seem to love hanging around in their houses and on their front yard during this holiday. However, who’s to say that Halloween should only be enjoyed by those who seek a thrill out of this holiday? In fact, there are several ways you could decorate your house for this occasion without being tacky about it. Take this centerpiece for example; it’s cozy, if not downright classy.
Sure, you might not be able to use it outside of a fancy party and at the center of a carefully planned dinner table, but if you find yourself in this situation (of having to plan a classy party for your friends), then this centerpiece will definitely wow them. One of the greatest parts about it is that you don’t need to spend a lot of time to craft it, and you probably already have most of the things you need to create in the first place, if not all of them. Furthermore, it’s not really a crafting project, as it’s more an arrangement, as you’ll see.
All you need for this project is a piece of scrap wood (you know, to put everything on it like a platter), some golden liquid leaf, a paintbrush, a bunch of mercury tealights, some oak leaves, a handful of assorted artificial floral accent stems, as well as 3 or 4 small pumpkins. Once you have sourced all the materials, make sure to check out the tutorial we’ve attached above to see how you can craft this awesome, classy centerpiece quickly and without significant effort.
15. Paper Maché Pumpkin – Halloween Decoration Ideas
We’ve said it before, and we’ll say it again: you can’t have a proper Halloween holiday without pumpkins. Whether they’re real pumpkins that you carve a funny face on and stick a source of light in, ceramic ones, or even papercraft (such as the garland we’ve also included in our guide), pumpkins are a staple item when it comes to Halloween, and a lot of people recognize them as some of the most important symbols of this holiday.
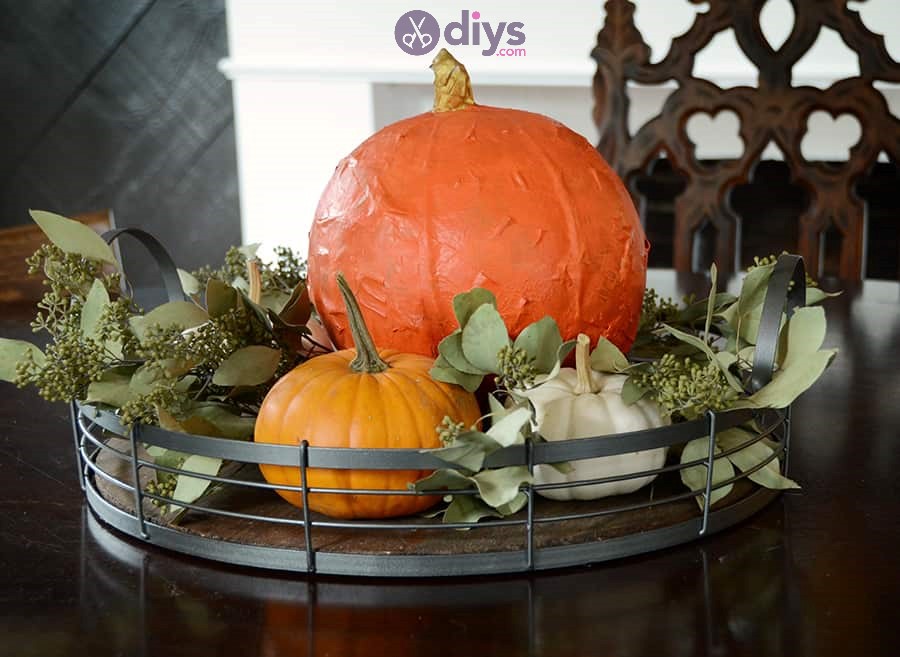
This paper mache pumpkin is incredibly easy to craft, but you’ll have to be a bit careful about it, as it involves working with a blown-up balloon. We feel like we don’t need to say what happens if you’re not gentle while working with a balloon that’s filled with air. Alright, so what you’ll need for this project is obviously a balloon that you’ll need to blow up, some flour, a few pieces of jute twine, some scotch tape, a pair of scissors, acrylic paints, a foam brush, a bowl, a fork, and a newspaper.
Once you’ve sourced all the necessary materials, you’ll need to blow up the balloon, wrap the jute twine pieces around it to emulate the lines on a pumpkin, mix the flour and water really good, rip strips of newspaper, dip the strips in the water-flour mix, and layer them on top of your balloon. Once you’re done with that and the paper dries, you can start painting it. However, this craft actually has some more detailed steps you wouldn’t want to miss, so make sure to check our tutorial above to learn how you can make an awesome paper mache pumpkin for Halloween.
16. Tissue Paper Pumpkin – Easy DIY Halloween Decorations
If you liked the paper mache pumpkin in our guide but want more variety for your Halloween decorations this year, how about we offer you yet another project that involves both pumpkins and paper you could easily craft? Thrilled? We bet you are. Now for the project; it’s basically still paper mache (as it involves a mache technique), but this time you’ll be using some tissue paper, Elmer’s glue, and a bunch of other different materials than for the paper mache pumpkin.
However, the list of required materials is actually shorter, and the crafting process is less complicated than the other paper mache pumpkin project, but you’ll also have to use an actual pumpkin instead of a balloon, which should have you spend a little bit more. The good news about this project is that, as opposed to the paper mache pumpkin that was built around a blown-up balloon, this one is built around an actual pumpkin, which means that there’s no risk that your pumpkin will accidentally explode if one of your guests gets curious and tries to poke it.
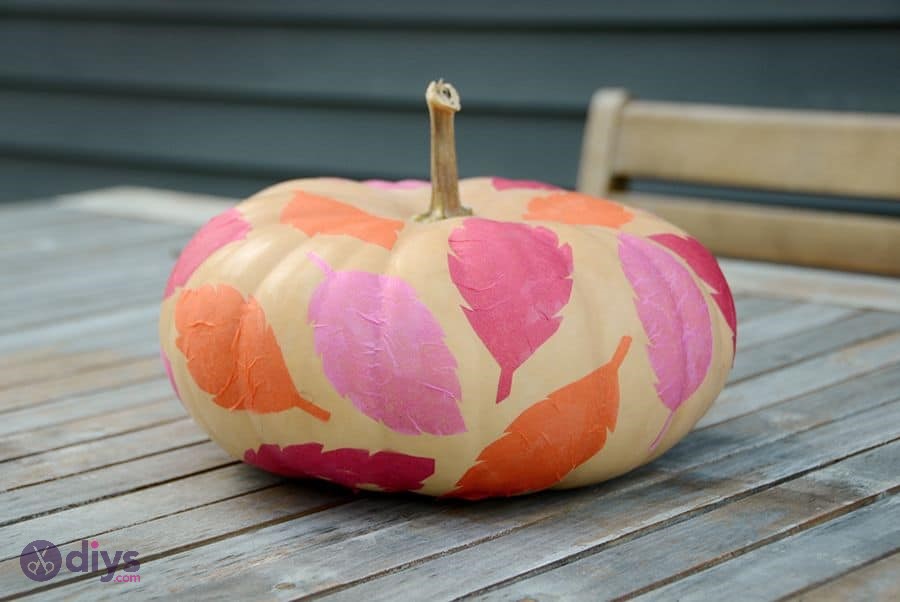
Furthermore, as opposed to the other pumpkin paper project, you won’t get to cover this one in paper mache, as you’ll simply craft a bunch of designs and glue them over the pumpkin. For this purpose, we recommend you use a pumpkin that’s lighter in color so that the designs you’ll be crafting from the tissue paper will contrast nicely. If you can’t find a light pumpkin, you may need to use darker colors for the paper parts, and/or draw some outlines using a black marker pen.
Here’s what you’ll need to craft a tissue paper pumpkin Halloween decoration: a pumpkin (we’ve already established that), a plastic cup, Elmer’s glue, a pair of scissors, some leftover (not necessarily) tissue paper, and a foam brush. The principle here is that you have to cut leaf shapes out of the multi-colored tissue paper and glue them all over your pumpkin. For more details on the actual crafting process, make sure you don’t miss our tutorial above.
17. Glamorous Beaded Pumpkin – Halloween Party Decorations
Well, we seem to be stuck in a pumpkin-themed loophole, but we can all agree once more that without pumpkins, Halloween is simply not as awesome, seeing as pumpkins have cemented their place in our society and they don’t seem to be going anywhere any time soon. Without further ado, here’s a nifty project you can try out for your next Halloween party if you’re into glamorous designs and really want to impress your guests this year.
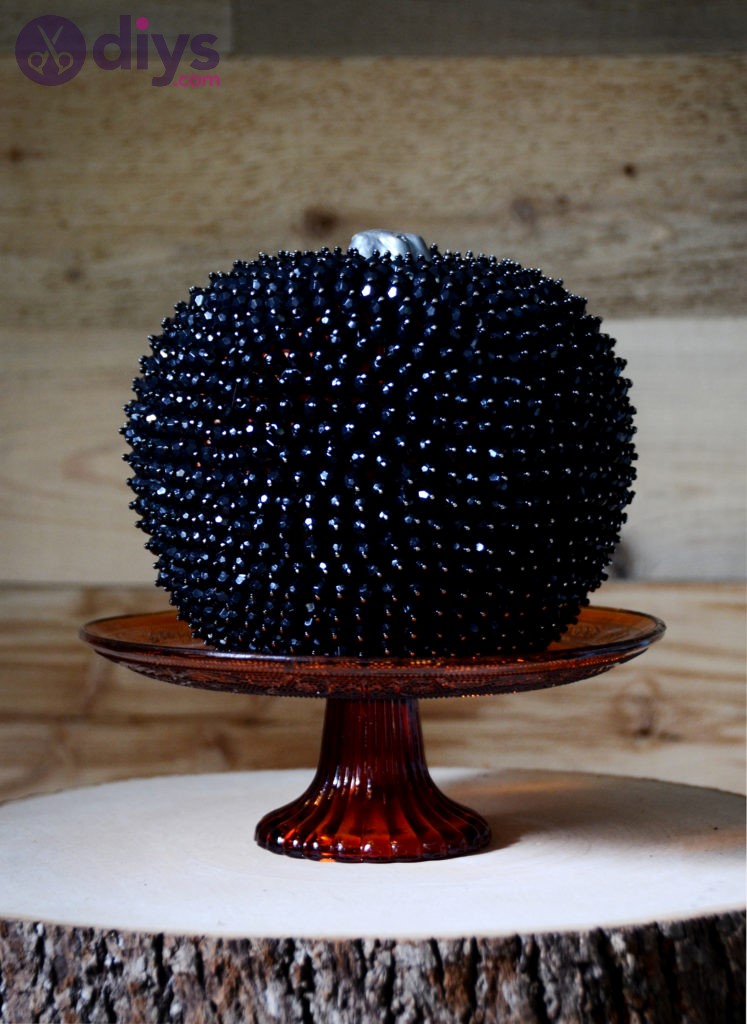
On the other hand, this project is quite time-consuming, as opposed to some other ones that we’ve included in our guide, so you’ll have to arm yourself with great patience and maybe a thimble (you’ll see why in just a bit). First of all, you’ll have to get a pumpkin. We suggest going for a smaller one since you’ll have to spend a lot of time to complete this project. However, the size of the pumpkin is completely up to you. Once you do that, make sure to buy a couple of packs of black faceted beads, and a package of small black seed beads.
Other things you’ll have to acquire include a paintbrush, some silver craft paint, a couple of packs of dressmaker pins, as well as a thimble (kind of optional, but not really if you don’t want sore fingers). Although the process of creating this project is ridiculously non-complicated, it will take you a lot of time, seeing as each bead has to be placed manually on the pumpkin, and merely judging by the photo above is enough to see that there are a lot of beads.
The first step would be painting the stem of the pumpkin silver, which is the easiest part of the project. Now for each bead, you’ll have to take a dressmaker pin, place one seed bead on it, and then place a large bead on it. With the needle running through both beads, drive it all the way through the pumpkin. Notice that the small bead prevents the larger one from falling. Now repeat this operation until the entire pumpkin is covered. Note that it’s far easier to start at the top and work in circles. For more details, make sure to check our detailed tutorial above.
18. Splatter Pumpkin Decor – Indoor Halloween Decorations
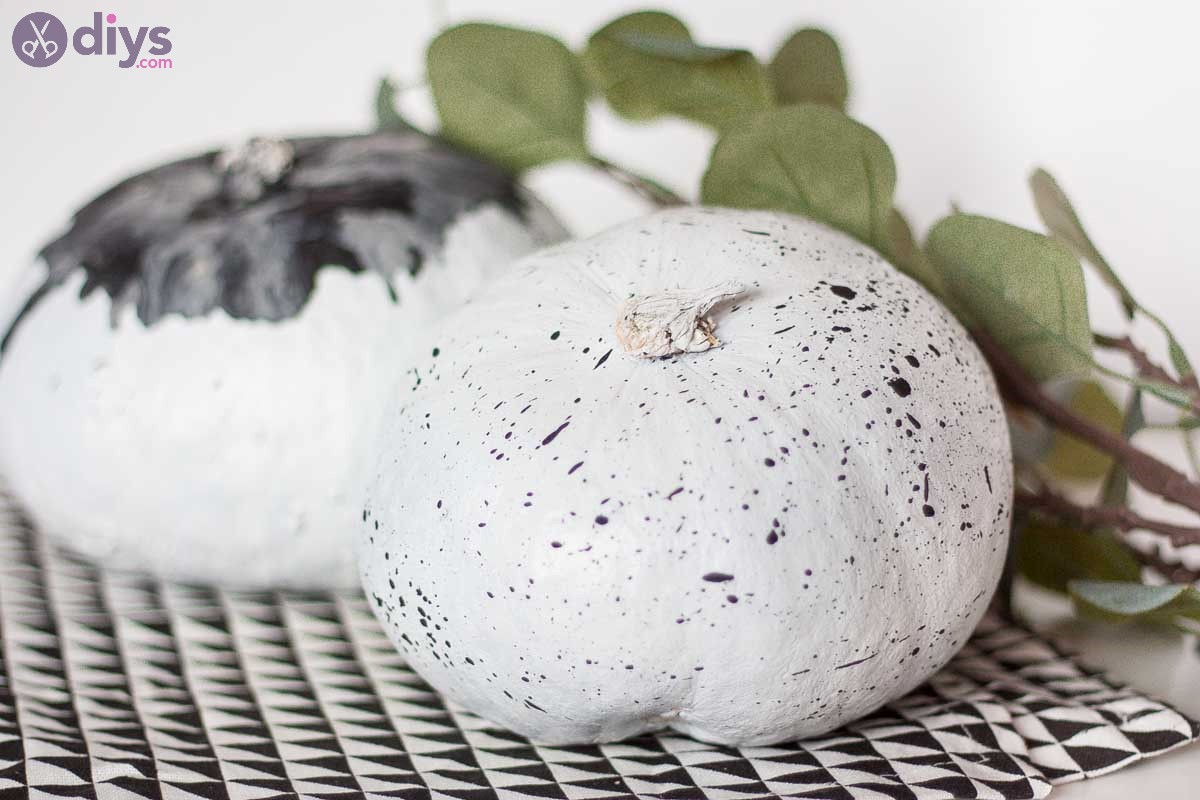
Splatter designs are quite popular when it comes to indoor decorations, so it shouldn’t sound completely ridiculous to want to apply it to pumpkins and showcase them around your house for Halloween, right? Right, so what we’re gonna do today is teach you how to bring this aesthetic to your house without too much effort, seeing as this is clearly one of the most uncomplicated projects we’ve included in our guide here.
The best part about it is that, although pumpkins are a pretty common symbol for Halloween, you could keep these decorations in your house even long after the Halloween season has come to an end without worrying that others will think you’re obsessed with this holiday. If you simply take a look at the example photo we’ve attached above, you’ll clearly understand why this decoration can fit in your house whether it’s Halloween or not: it’s neutral.
First of all, you’ll need to score a pumpkin (color doesn’t matter). Once you get that, you’ll also need a can of white spray paint, a brush, and some black acrylic paint. After getting everything on the list of the required items, place the pumpkin on a work surface (make sure to use sheet covers to avoid damaging other items with paint), and coat it with the white spray paint. You’ll have to apply two or three layers and make sure to let each layer dry before you apply the next one.
Once the pumpkin’s been covered in the white paint, create a 1:1 mixture of water and black acrylic paint, dip the paintbrush in it, and use your finger to pull the brush hairs back and release them to create the splatter effect. Here’s a tip: if you want this to be more Halloween-specific, you could use red paint instead of the black one, so that the splatter will resemble blood. If you’re having trouble understanding these quick instructions, check out the comprehensive tutorial we’ve included above.
19. Fabric Pumpkins – Homemade Halloween Decorations
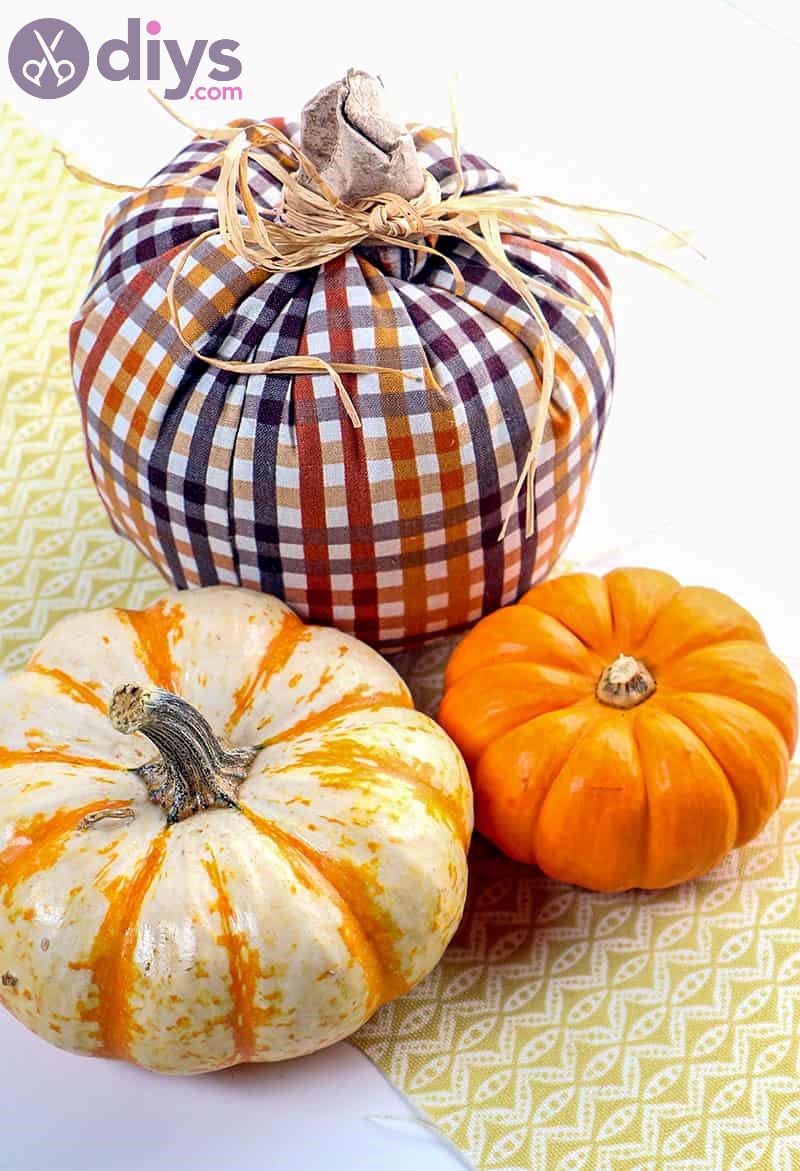
As you may have guessed (it’s pretty obvious), we have yet another pumpkin-inspired DIY decoration you could try out this Halloween, and this time it involves fabric and empty paper towel rolls. Excited yet? Well, you should be, since these decorations look absolutely marvelous, and the best part is that you can reuse them for as long as you want, as opposed to using a real pumpkin, which rots and becomes unusable after a while. In other words, fabric and paper rolls don’t rot if you don’t drench them in water or leave them in improper conditions, but you already knew that.
So, without further ado, in order to craft these cute fabric pumpkins, you’ll need raffia, some batting, a hot glue gun, some hot glue sticks, a needle and thread, empty paper towel rolls, as well as a piece of fabric (approximately half a yard). Once you have all that, you’ll have to stitch the fabric and create some kind of bag out of it, fill the bag with some of the stuffing you have (the batting), then slit the fabric two times halfway down starting from the top on opposite sides and use the two resulting pieces of fabric to create a knot on top of the stuffing.
While the crafting process is quite simple, you’ll need to know how to hand sew if you want your project to look nice. Furthermore, simply explaining it by text won’t help, so you’ll definitely want to check out the comprehensive tutorial that we’ve included above. We’re sure that once you’ll get the hang of it, you’ll be able to create a lot of fabric pumpkins in no time, and maybe even turn a profit or share them with your friends, considering that Halloween is nearing.
20. Mini DIY Pumpkin Place Cards – Halloween Party Decorations
Place cards are not exactly common for non-special occasions, so you might want to step this one out if you’re not planning a party in such detail that you need people to be seated in specific places. However, if your Halloween party sounds exactly like that, then join us and we’ll teach you how to create adorable tiny DIY pumpkin place cards without busting the bank. If you ever planned a party, you probably know that even such a tiny, seemingly unimportant thing as a place card can set you off a serious amount of money.
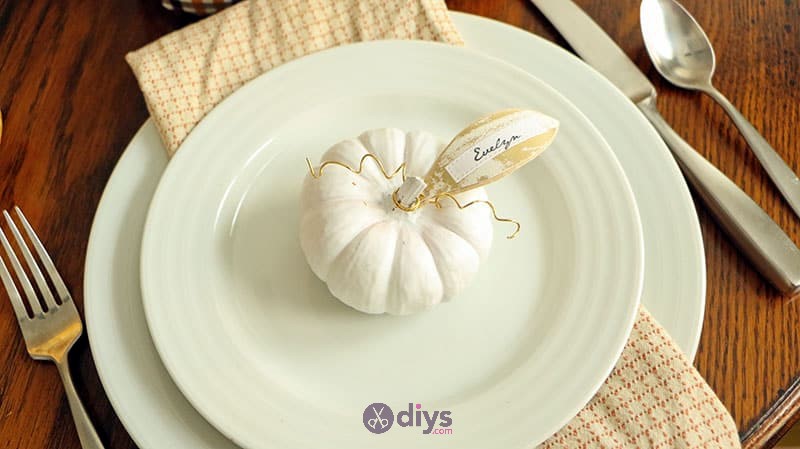
However, if you’re crafty and you like doing things on your own (not to mention save yourself from quite an expense), then our guide will definitely be right up your alley. In order to create one pumpkin place card this Halloween, you’ll need the following items: a white mini pumpkin, white cardstock, a hole punch, a pair of round nose pliers, some glue, patterned scrapbook paper, some gold metal flower wire, as well as a coordinating solid color of cardstock.
Yes, we know that these seem like a lot of items for just one place card, but aside from the pumpkins (which have to be 1:1 for each place card), most of the items here are often bought in bulk, which means that you can use them for more than just one item. Once you acquire all the required items, check out the tutorial above to learn how you can craft the place cards without too much effort. If you want to save yourself some more time and effort, you should consider investing in a set of rectangular cutting dies.
21. Simple Mini Pumpkin Decoration – DIY Halloween Decorations
Well, if the splatter pumpkin wasn’t the easiest decor from our guide that you could craft in a matter of minutes, then this one totally is. Trust us that when we say “simple,” we actually mean it, so you can expect that these simple mini pumpkin decorations should be a walk in the park to craft and hang around in your house. As a matter of fact, you don’t even need to craft anything about them, as you’re about to discover.
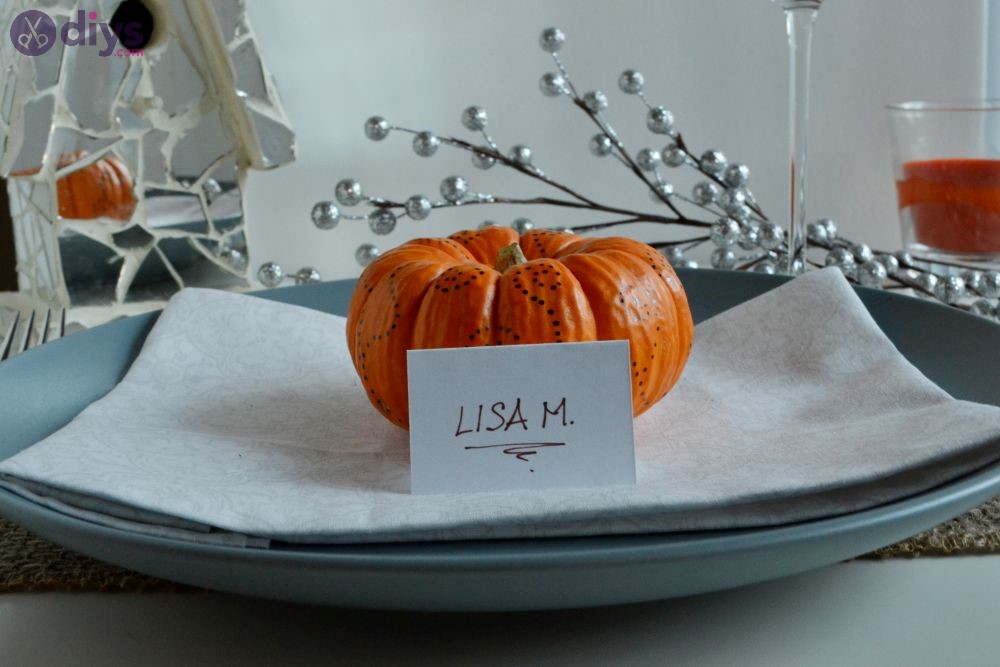
First of all, you’ll need to source some required items, but don’t worry, this list merely comprises two items: a bunch of mini pumpkins (depends on how many you want to create) and a sharpie marker. Now if you stick with “traditional” orange pumpkins, you’ll need to stick to a dark color so that the contrast is good. For instance, you can pick a dark blue, dark green, or even a black sharpie marker. If you prefer white pumpkins, then you can also pick lighter colors to decorate them.
Well, after you’ve managed to acquire both the pumpkins and the sharpie markers, you can start using the marker to create various patterns on the pumpkins. In our example, we’ve created dotted patterns, which seem to go great, but you could also try other patterns if you’re feeling inspired. Once you’re done decorating the pumpkins, you could either place them in various places around your house or you could attach name cards to them and use them as place cards.
22. Halloween Wall Art – Indoor Halloween Decorations
Phew, looks like we can take a break from all these pumpkins, right? This is one of those wall decorations that you may have glanced at in stores during Halloween seasons and maybe thought that their price is a tad too high for what it has to offer. Well, if you were in that situation, then this may come as a pleasant surprise to you since we’re teaching you how to make one without spending a fortune, and by using things that you may have laying around.
First of all, it’s worth mentioning that even though our design looks great, you can easily add to it or remove various things from it as you see fit so that the end result will be more suitable to your taste. The best thing about it is that you don’t need a lot of specific things (although you do need a few), which means that you can create spooky Halloween wall art on a budget, and one that actually looks nice, for a change.
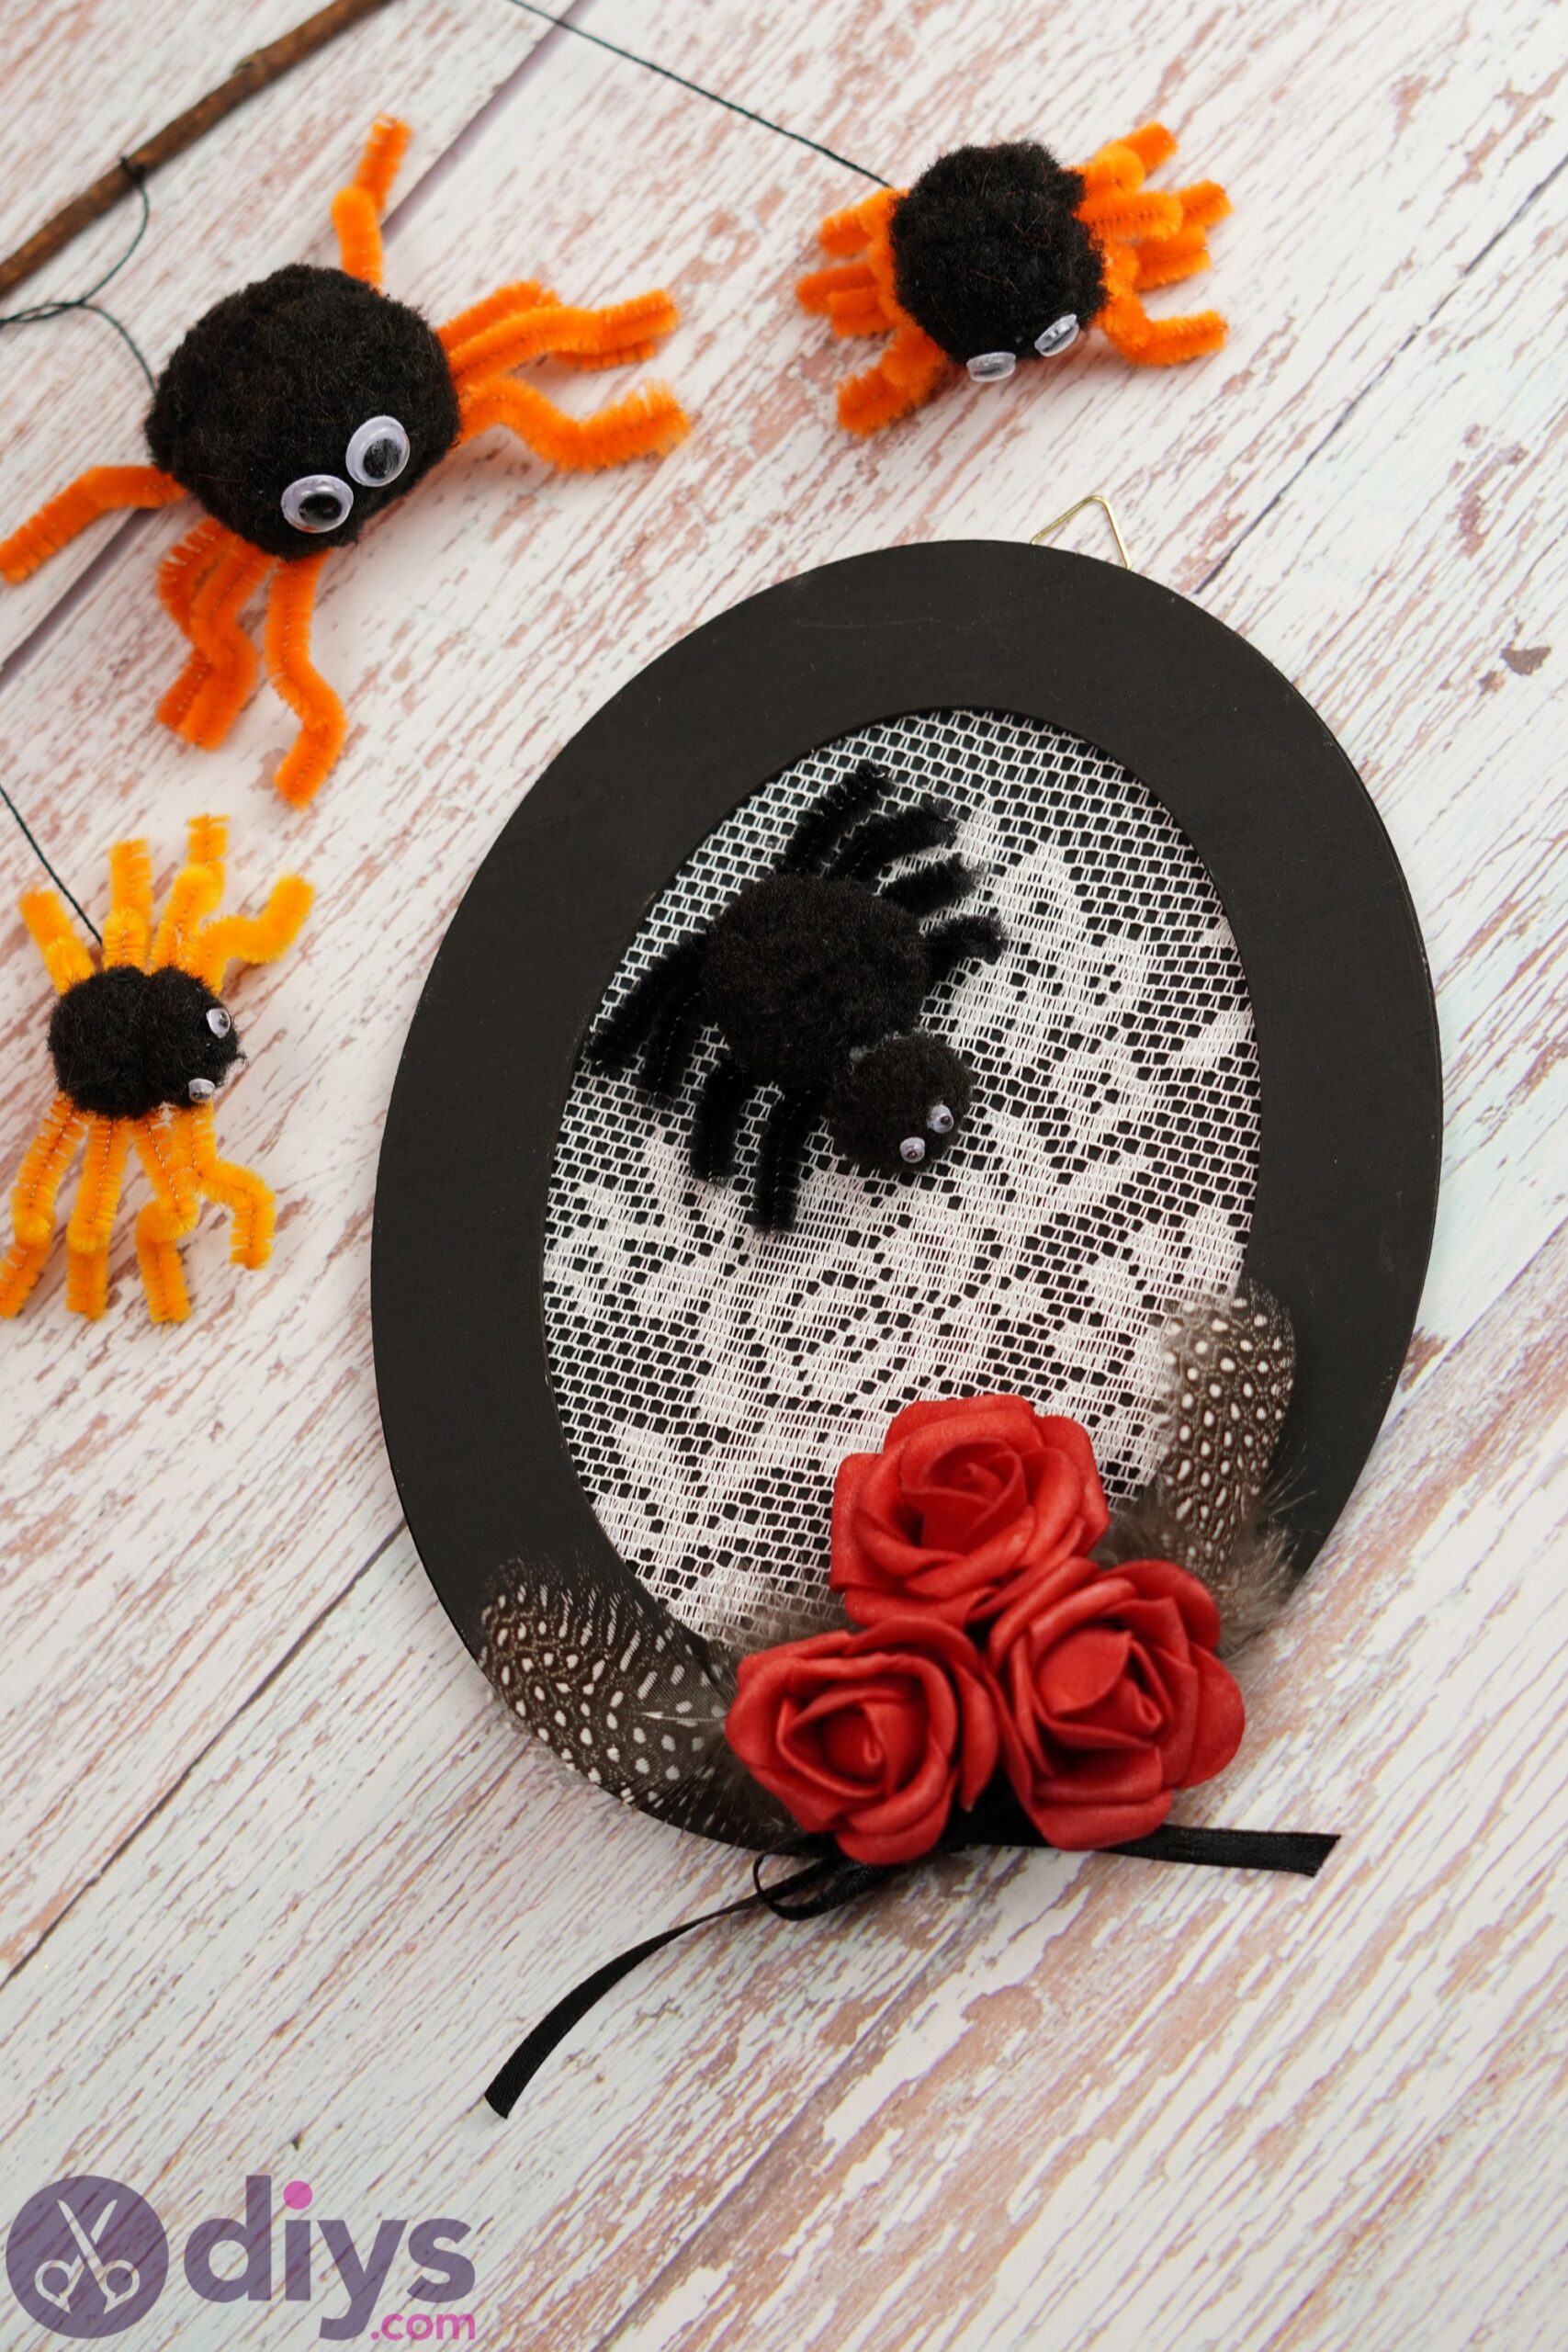
In case you’re wondering about the list of required items, you’ll need a glue gun, a pair of scissors, a paintbrush, a wooden frame, a hanger, a bunch of black pipe cleaners, some black acrylic paint, googly eyes, feathers, black pom-poms, some artificial roses, lace, and some black silk ribbon to recreate the design we’ve used as an example above. Naturally, the amount of materials will be different depending on how many decorations you want to make.
Once you sourced all the required materials, we suggest you gather them all around you, place the wooden frame in front of you, and treat it as if it were a canvas. We suggest you start with painting the frame (we’ve used black paint for this, but you could get creative and use whatever color you feel comfortable with), and then slowly add more and more materials (feathers, ribbons, spiders (make them from pom-poms, pipe cleaners, and googly eyes) until you’re happy with the result. Alternatively, you could try to create our design, but we believe you’ll have more fun experimenting and creating your own decor.
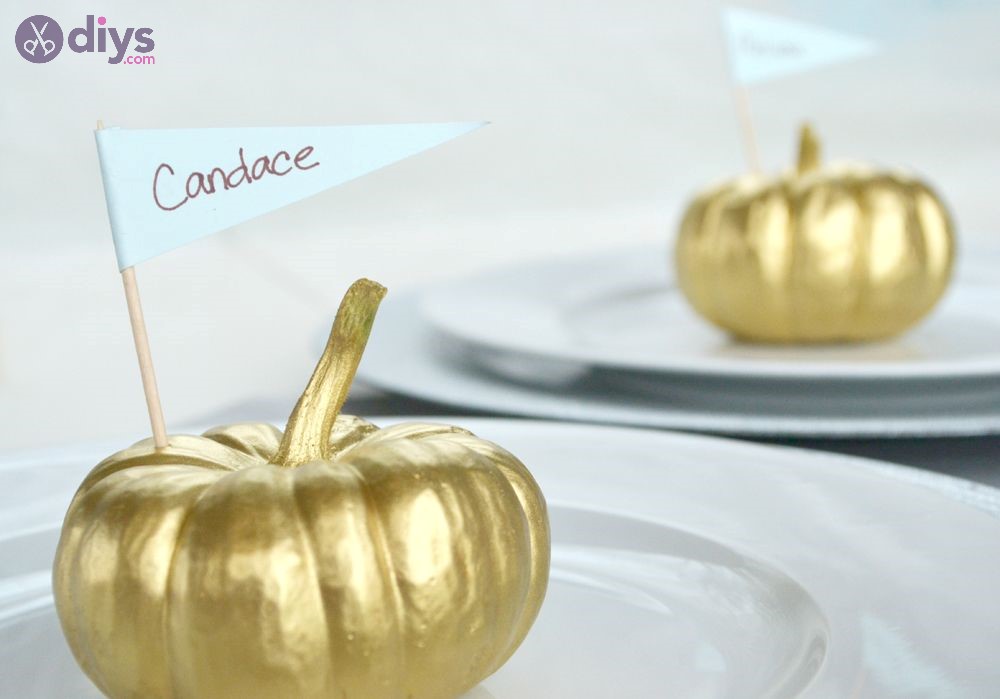
23. Golden Pumpkin Place Card – Halloween Party Decorations
If you thought you’ve seen it all when it comes to pumpkins, then we have the perfect thing to demonstrate how wrong you are: golden pumpkins. You might think that golden pumpkins aren’t scary, and you’d be right, but don’t forget that regular pumpkins are a terrific symbol of Halloween, so that’s the perfect reason to use them as party decorations. The golden part is a bit subjective, but I mean, if you’re having a fancy party with fancy guests, I guess it could draw a glance or two.
As you can see, in our example the pumpkins were cleverly turned into place cards by simply using small pieces of cardstock and toothpicks, but the way you’re gonna include them in your decor is entirely up to you. Oh, and don’t forget that the pumpkins in our examples are actual mini pumpkins, as they’re easier to handle, look extremely cute, and don’t take as much paint to be covered. Plus, the paint dries quickly on smaller surfaces, so that’s also a perk, as you’ll have to coat them in several layers.
So, you may have figured this one out, but for this project, you’ll need mini pumpkins, gold spray paint, a pair of scissors, some toothpicks, a sharpie pen, craft glue, a pencil, a ruler, and some cardstock. The process is quite simple: first, you’ll have to spraypaint the pumpkins, let them dry and maybe apply another coat of paint if the first one doesn’t cut it. After that, use your pen and ruler to create isosceles (acute) triangle shapes.
Try to make them so that the base (the one you’re attaching to the toothpick) is 1-inch long, and the other sides are 2-3 inches long (these sides should be equal in length). After drawing them, you can use the sharpie marker to write names on them, then cut them out, fold their bases around the toothpicks, and secure the whole thing with glue. If you have to write longer names, you can increase the length of the two identical sides. After creating the mini-flags, just stick them into your golden pumpkins and you’re all done! Check out our tutorial above if you’re having a hard time figuring it out.
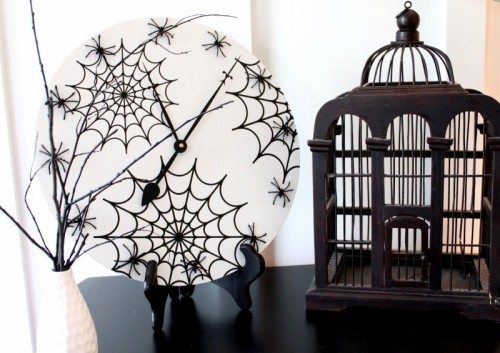
24. DIY Wall Clock – Halloween House Decorations
We promise, this time it’s not a pumpkin. In fact, the DIY wall clock is a nice project for just about anyone if you want to decorate your house in a nifty manner this Halloween. The best part about this project is that you can use any design you can think of when you decorate the clock, not just the one we’ve used in our example photo. If you feel like there’s not enough pumpkin in your life, you could even turn it into a jack-o-lantern design by painting over it.
Jokes aside, this is all you have to do to create a DIY wall clock. However, it must be one of those clocks that have no protective screen and are not built in a sturdy case, so if your clock doesn’t fall in this category, you might need to buy a new one for this project. If you can’t figure out which type of clock you own, just establish whether or not you can take apart the clock’s mechanism and be able to hold the clock face like a plate in your hand (and obviously be able to put them all back together and have a fully-functional clock at the end).
If the answer’s yes, then you can start working on your design. For our example, we used white spray paint to coat the entire face of the clock and added some spiders and webs using a cutting machine (such as Cricut, or Silhouette). However, instead of cutting your designs from vinyl or paper, you can paint them straight on the face of the clock once the coat of paint has dried. Alternatively, you could use some stencils and use spray paint to create the spiders and webs, as well.
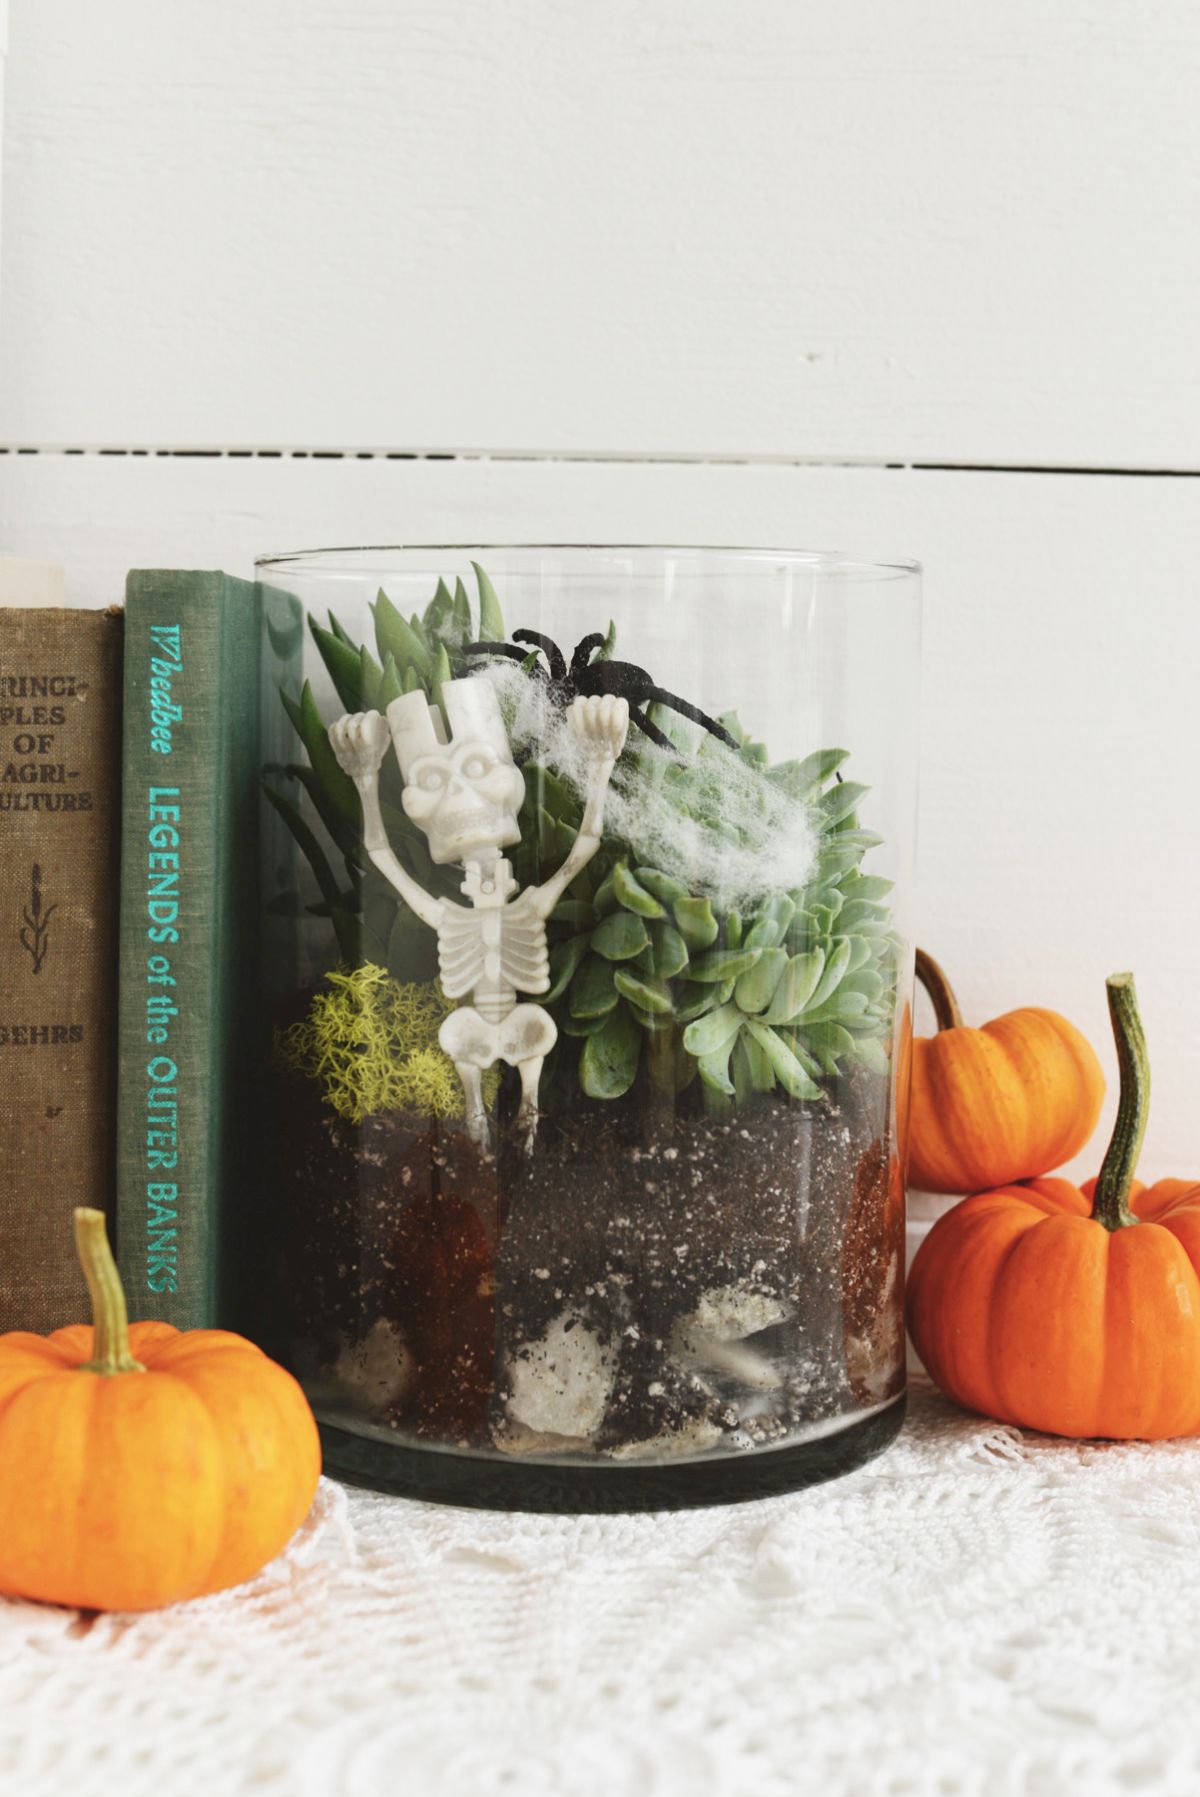
25. Spooky Terrarium – DIY Halloween Decorations
If you’re a fan of nifty decorations, then you probably gave tiny terrariums a thought or two before. Our spooky terrarium decoration will definitely catch a glance or two from your peers this Halloween, and the best part about it is that you can still keep it around long after the holiday comes to an end by simply removing the spooky components from it. Basically, this decoration is a simple tiny terrarium, but with added Halloween-themed components such as spiders, fake webs, and skeletons.
In order to craft this terrarium Halloween decoration, you’ll need some succulents (e.g., Aloe Vera, various species of tiny cacti, Echeveria Elegans, Jade plant, and Baby rubber plant), soil, rocks, moss, a spoon, a pair of gloves, some fake spider web, spooky plastic items (spiders, skeletons, black cats, tombstones), and last, but not least, a glass container that’s generous enough to fit everything mentioned above.
First things first, you’ll have to take the glass and place a layer of rocks at the bottom of it but be careful not to break the glass. After that, you’ll need to place the succulents by taking them out of the containers and rearranging the soil so that it fills all the gaps without actually touching the plants’ upper parts (leaves and stems). The next step is to use your spoon to place moss in the terrarium, and finally, you can add the spooky elements. There you go, you now own a spooky piece of living decoration that you can care for even after Halloween passes.
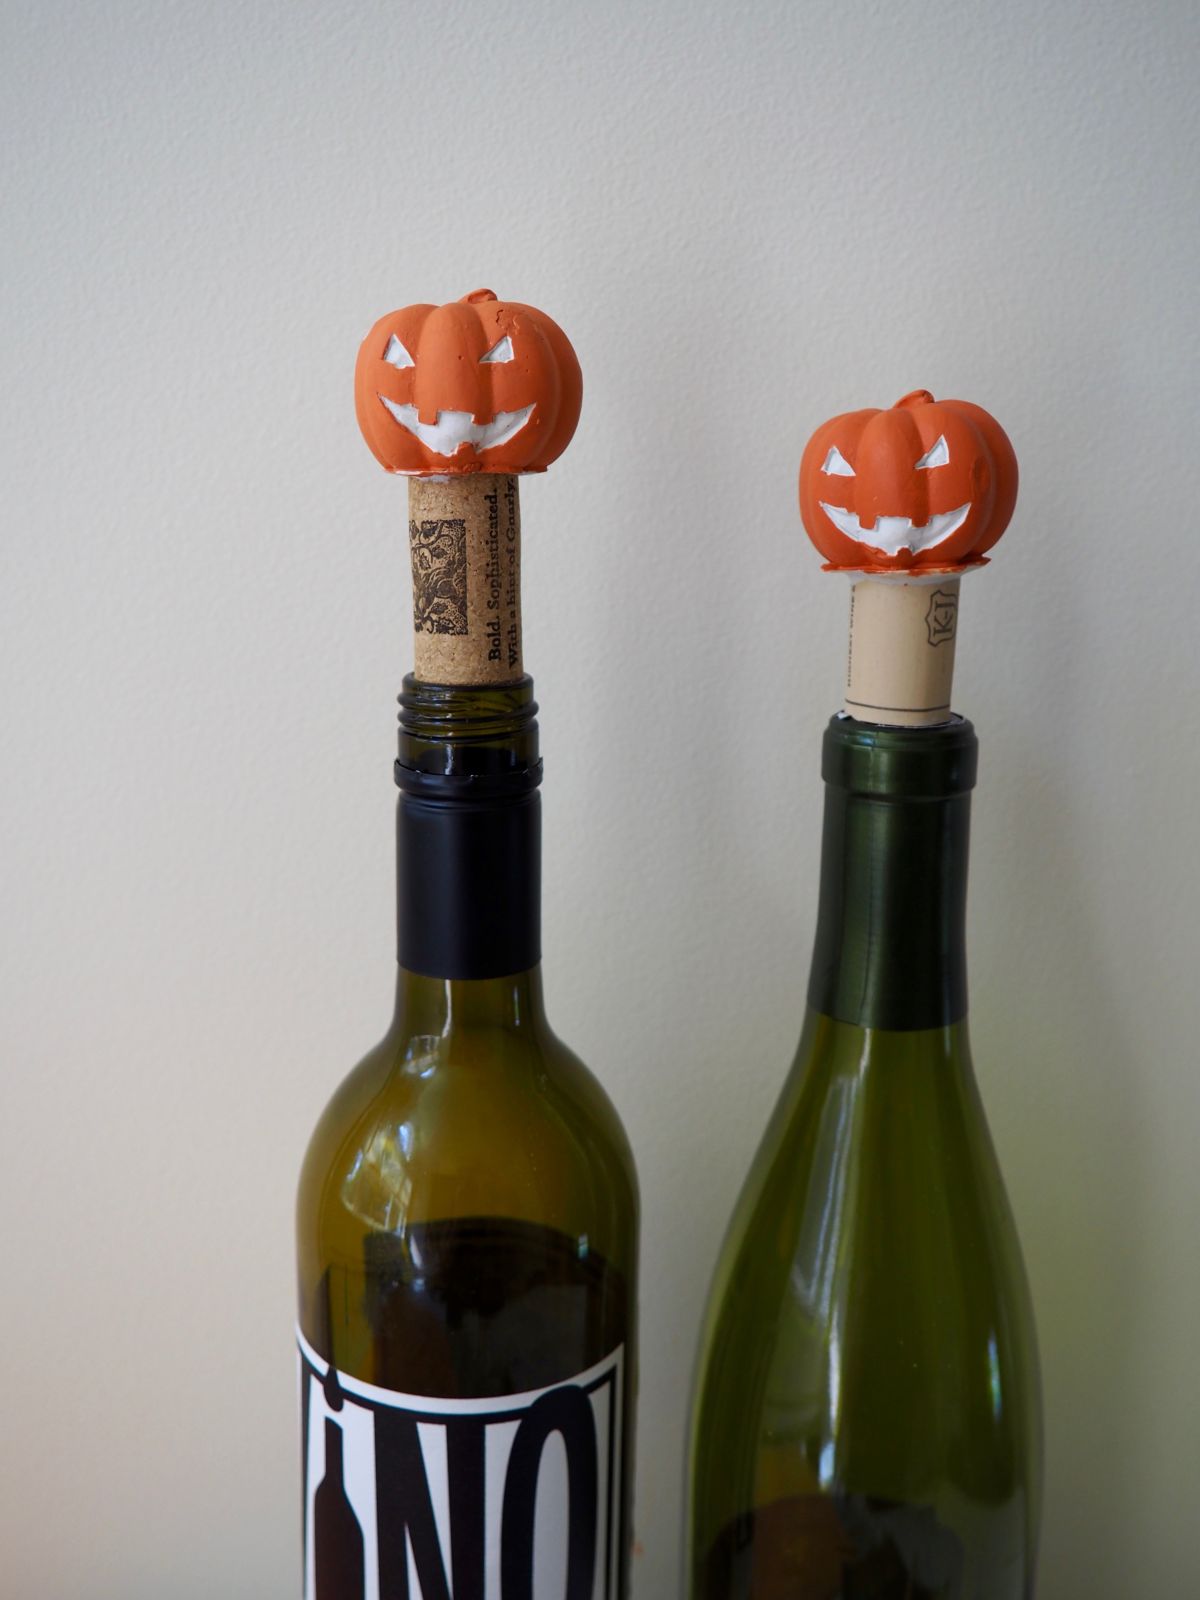
26. Jack-O-Lantern Wine Stopper – Halloween Party Decorations
Hey, I know you’ve probably had enough pumpkin in this guide to last you the entire Halloween season, but hear us out. Even though this design resembles a pumpkin, it’s not actually a real one, and you’ll have lots of fun crafting it for your next Halloween party. Enough covering your bottle of wine by reversing the cork and wedging it forcefully back in the bottle; after crafting our jack-o-lantern wine stoppers, you’ll have something even better to prevent your wine from going bad.
However, it’s worth mentioning that, as opposed to some other projects we’ve included and described in our guide, you won’t be able to make this one out of things that are simply laying around in your house. Not unless you just happen to have a jack-o-lantern mold and some plaster at your disposal, that is. So, aside from those two items, you’ll also need two fresh wine corks (those that are removed from actual bottles expand in size and don’t fit any longer), a plastic spoon, some water, a plastic or paper bowl, and some paint.
After sourcing all the required materials, prepare the mixture in the bowl by adding plaster and water and mixing them together until you get a nice consistency (not too thin), then pouring the mixture in the jack-o-lantern mold. Once you poured it, you can stick the wine cork into the opening of the mold and wipe any excess mixture that comes out of the mold. Now let the whole thing dry for an hour or two, remove the piece from the mold, and paint the wine holder in any color you see fit. We’ve decided to be old-school about it and painted them orange, but feel free to follow your creative side!
27. Black Feather Chandelier – Indoor Halloween Decorations
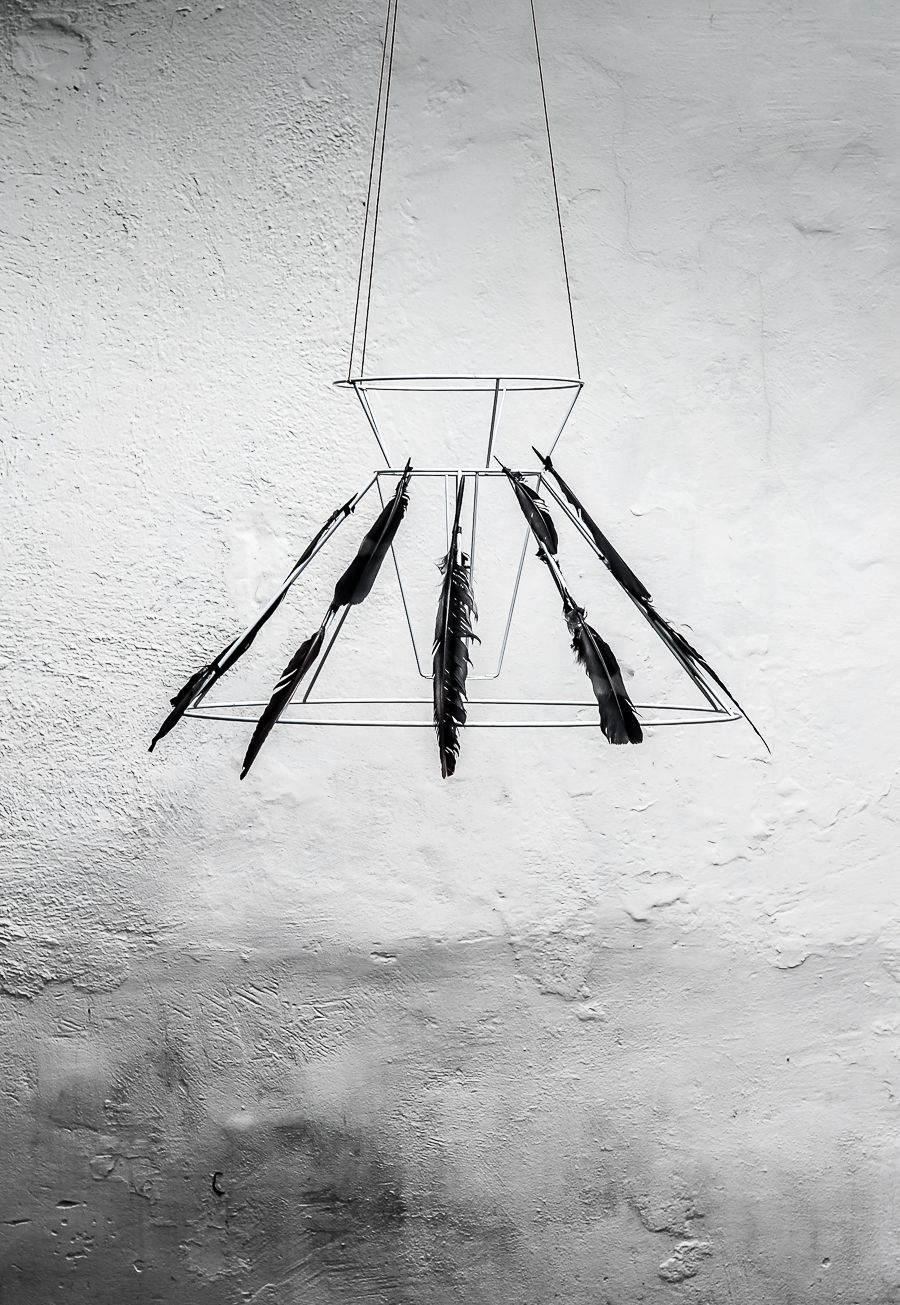
That’s a first for our guide, as we don’t have any other Halloween-themed chandelier (or even any regular ones, to be fair) to match this one, but we feel like you’ll absolutely love this one, especially if you’re the crafty type who loves to create stuff from scratch. This chandelier will definitely be a nice piece of decoration that will tie the room together nicely, especially if you go with the minimalist, goth aesthetic that this item brings to the table.
However, as opposed to certain items on our list, you won’t be able to just materialize this chandelier out of thin air. In fact, you’re gonna need a basic chandelier, to begin with. As you can see from our example photo, we’ve used a simple wire chandelier frame that is absolutely perfect for being used as a canvas to create awesome decorations.
Once you got the chandelier, it’s time to source the other materials you’re gonna use to create the chandelier. We kept it simple and only used a bunch of black feathers, but you can get as creative as you’d like with plastic spiders, webs, and whatever else floats your boat. If you can’t find black feathers, you can use any feathers and paint them black, but be careful not to ruffle them too much, else it’s gonna look like a crow just smashed into your chandelier and made a mess.
Long story short, this chandelier should fit nicely with various Halloween decors, but trust us that it’s gonna play much better if you’re planning a stylish party and don’t want to get too colorful with zombies, vampires, spiders, witches, and the such. The best part about it is that you can remove the feathers afterward and keep the chandelier around the house, or repurpose it for some other occasions if you feel creative.
28. Halloween Pillows – Halloween House Decorations
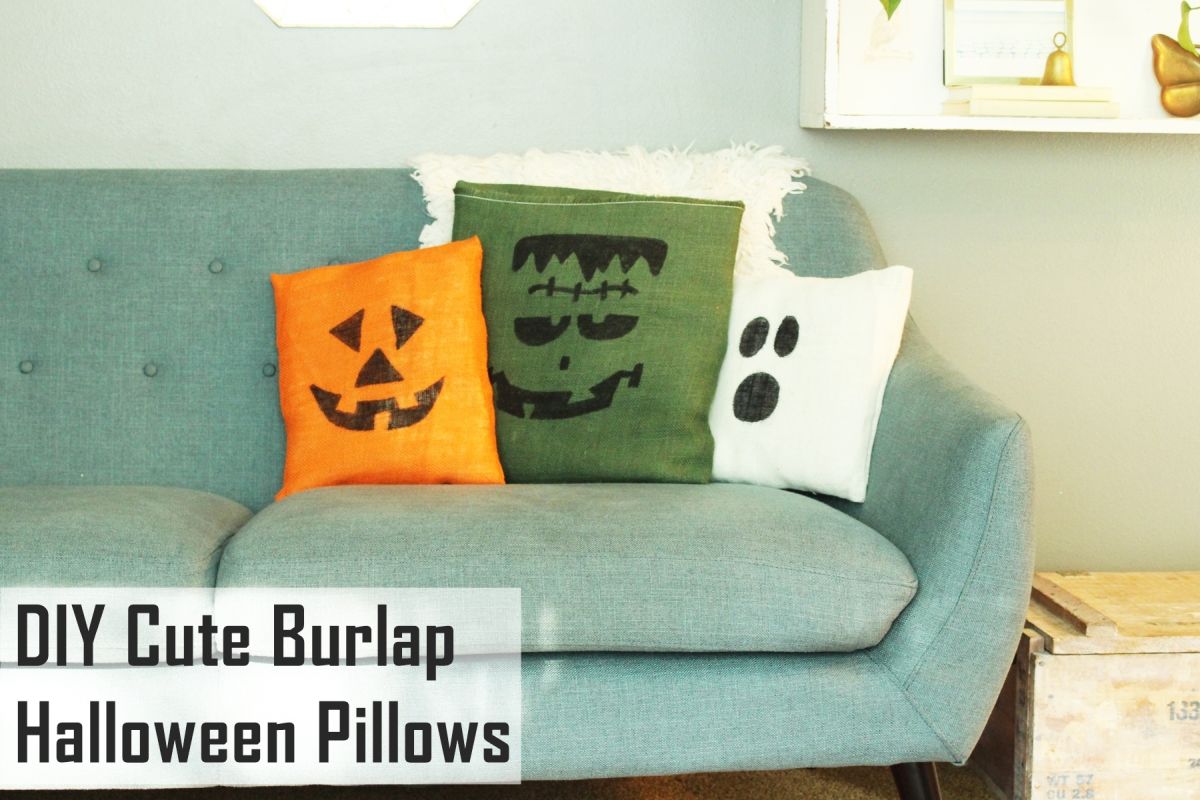
These cute Halloween-themed pillows made of burlap will definitely steal the show at your next Halloween party if you’re planning to decorate your house accordingly, and they’ll also make some cute decorations for your kids when the holiday comes to an end. Given their vibrant design, these pillows will definitely bring a splash of color into your house, and if you’re really into them, you could just flip them over and keep them long after the season’s gone.
Granted, if you like this project and want to do it for your house this Halloween, you’ll need to know how to sew, or have a sewing machine (that you know how to use, obviously). Now here’s the list of required items for these Halloween-themed pillows: pillow forms (or you can just use some old fall pillows), burlap in various autumn colors (orange, brown, scarlet, cream, green), a pair of scissors, an extra-large black permanent marker, some thread, pins. Optionally, you can use a sewing machine, but you can also sew these pillows at hand (it will be more difficult and will take you longer).
Now we won’t teach you about sewing techniques or show you the specifics of operating a sewing machine to create these pillows, so you’ll have to bring these skills to the table if you plan on making this project. Essentially, you’ll want to use the burlap to create pillowcases for your old pillows (or pillow forms, whichever you want to use), then use the marker to create your Halloween-inspired design on top of the burlap pillowcase.
You can draw a Frankenstein’s monster face, a witch face, a skeleton, or a Jack-O-Lantern, whichever you see fit. Alternatively, if you’re really creative and want to re-use the pillows when Halloween comes to an end, you could use velcro and patches to create designs on top of pillows, but that’s a lesson for advanced crafters. If you’re having a hard time with this design, you should check out the tutorial we’ve included above.
29. Creepy Key Holder – Indoor Halloween Decorations
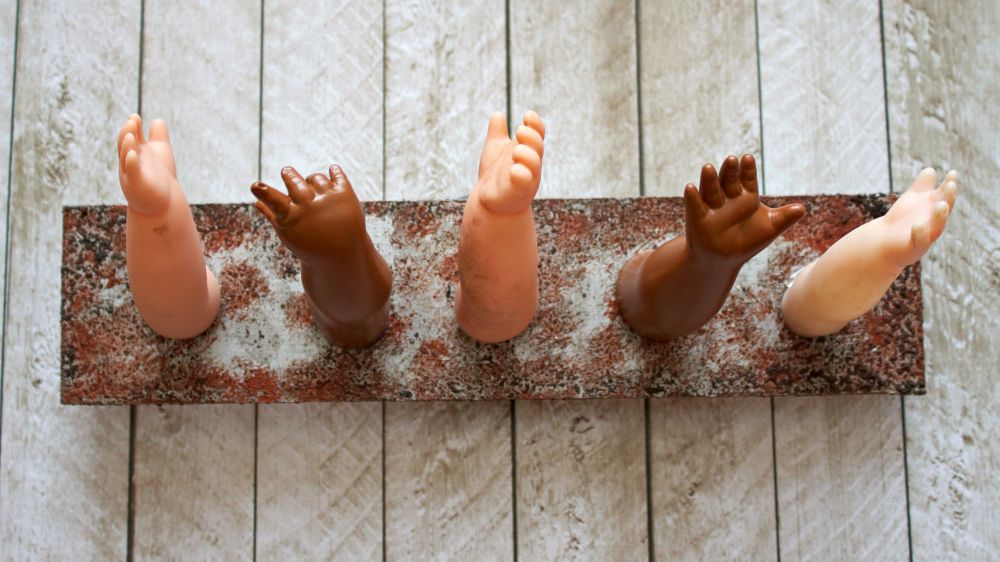
This one’s a bit realistic for many people’s taste, regardless that it’s Halloween season and being spooky is quite normal during this holiday, so if you’re feeling uneasy having several tiny arms reaching out of the wall for your keys, then maybe you should skip this one. It’s not exactly terrifying, but if you’re not exactly a fan of dolls and are easily spooked out by movies that portray haunted dolls that come to life and perform evil tasks, well, this one’s not for you.
As you probably figured out already, you can’t just create doll arms from objects that are just laying around in your house (unless they’re, you know, dolls), so you’ll have to buy them. Considering that no local store sells only doll arms, you’ll probably have to buy the dolls as a whole and rip their tiny arms out (you monster) to create this spooky design. One important thing: if you do decide to use dolls that are just laying around in your house, make sure they don’t belong to your kids, or that your kids don’t see you removing their arms. As a matter of fact, if you have kids it would be best if you didn’t create this project, to begin with.
If you took all cautionary measures and the coast is clear, here’s what you’ll need to craft this creepy key holder: a few doll hands (the number depends on how long you want the key holder to be), a wood pallet board, some silver paint, a bunch of wooden spindles (you’ll need one for each doll hand), wood glue, a can of rust texture finish, and a tube of E6000 industrial adhesive. Now the concept is pretty clear, you’ll have to make the doll hands stick to the wood pallet, which you’ll have to paint and finish before attaching it to the wall.
After you paint and finish the pellet board, you’ll have to drill some holes and attach the wooden spindles to it, as they’re gonna be the skeleton upon which the doll arms will be attached. Once the spindles are secured to the wood, use an X-Acto knife to carve a bit of each doll hand as needed so that they fit over the spindles. Don’t forget to use wood, and if you want your design to be truly effective, make sure that you don’t place the doll hands all in the same position. In other words, don’t be afraid to rotate them a bit so that your decoration looks more realistic. Happy Halloween!
30. Halloween Table Centerpiece – Halloween Party Decorations
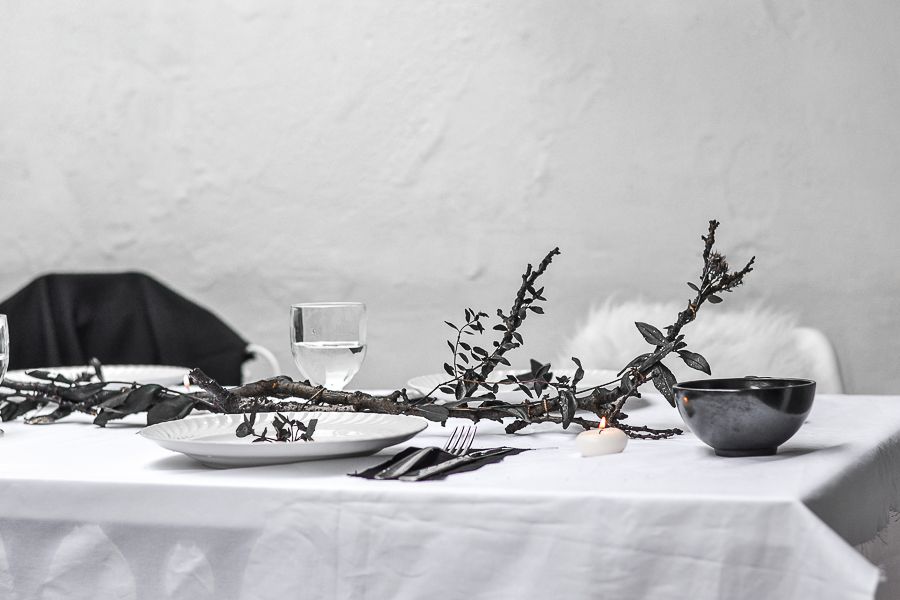
This table centerpiece is so easy to craft, you’ll think it’s absolutely ridiculous how you’ve never thought of pairing up these materials before in order to get this piece of decoration. As you can probably figure out from the example photo above, you can create this design by using various leftover objects from your house, or, worst-case scenario, things that you can probably find in your backyard or the local park.
To create this project, you will need a twig that’s long enough to become a centerpiece on your dinner table, but you can also use two smaller twigs and combine them in a clever manner. Aside from these relatively large twigs, you’ll also need to find some smaller twigs, and it’s better if you find ones with flowers (for added effect). Other materials include wildflowers (you get to choose which flowers you want to use), black spray paint, some wire, and some yarn or thread.
The process of crafting the centerpiece is quite intuitive. All you have to do is take the large twig, or unite the two smaller ones into a large one, then use twine and/or wire to attach other elements to it, such as the smaller twigs with flowers, and the wildflowers, to create a nice-looking shape. Once you’re done with that, place the decoration in a well-ventilated area and just use the spray paint to make it black.
As we’re sure you’ve already figured out, this decoration isn’t intended to be used at goofy costume parties where everybody dresses as their favorite TV character. Instead, this piece would fit much better at a classy Halloween party, especially if you choose to pair it with some other classy decorations on our list, such as the pumpkin place cards or the glamorous beaded pumpkin. As always, if you’re having a hard time crafting this piece of decoration, check out our tutorial above.
20 More DIY Halloween Decoration to Make
If you want even more inspiration, we have a bunch of extra things we think you can try making.
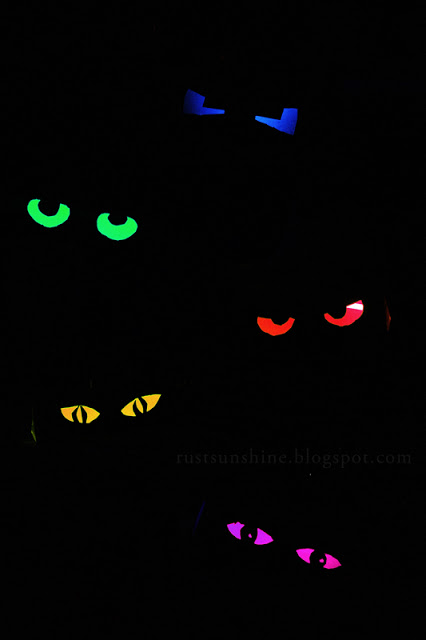
31. Easy DIY Halloween Decor – Glowing Eyes
The kids will love this one and they’re so easy to whip up. Get everyone in the mood for the holiday with this DIY from Rust & Sunshine.
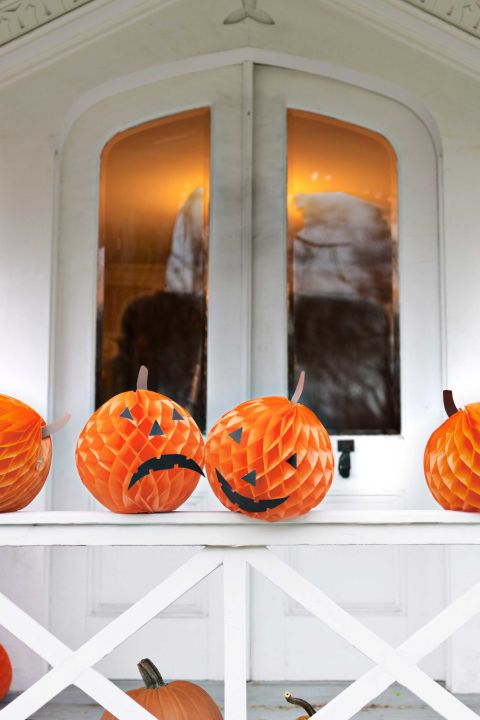
32. Halloween Decoration Ideas- Pumpkin Faces
Country Living gives us an easy DIY that you can make in a quick afternoon. Check out these adorable pumpkin faces that dress up the mantle or the front porch!
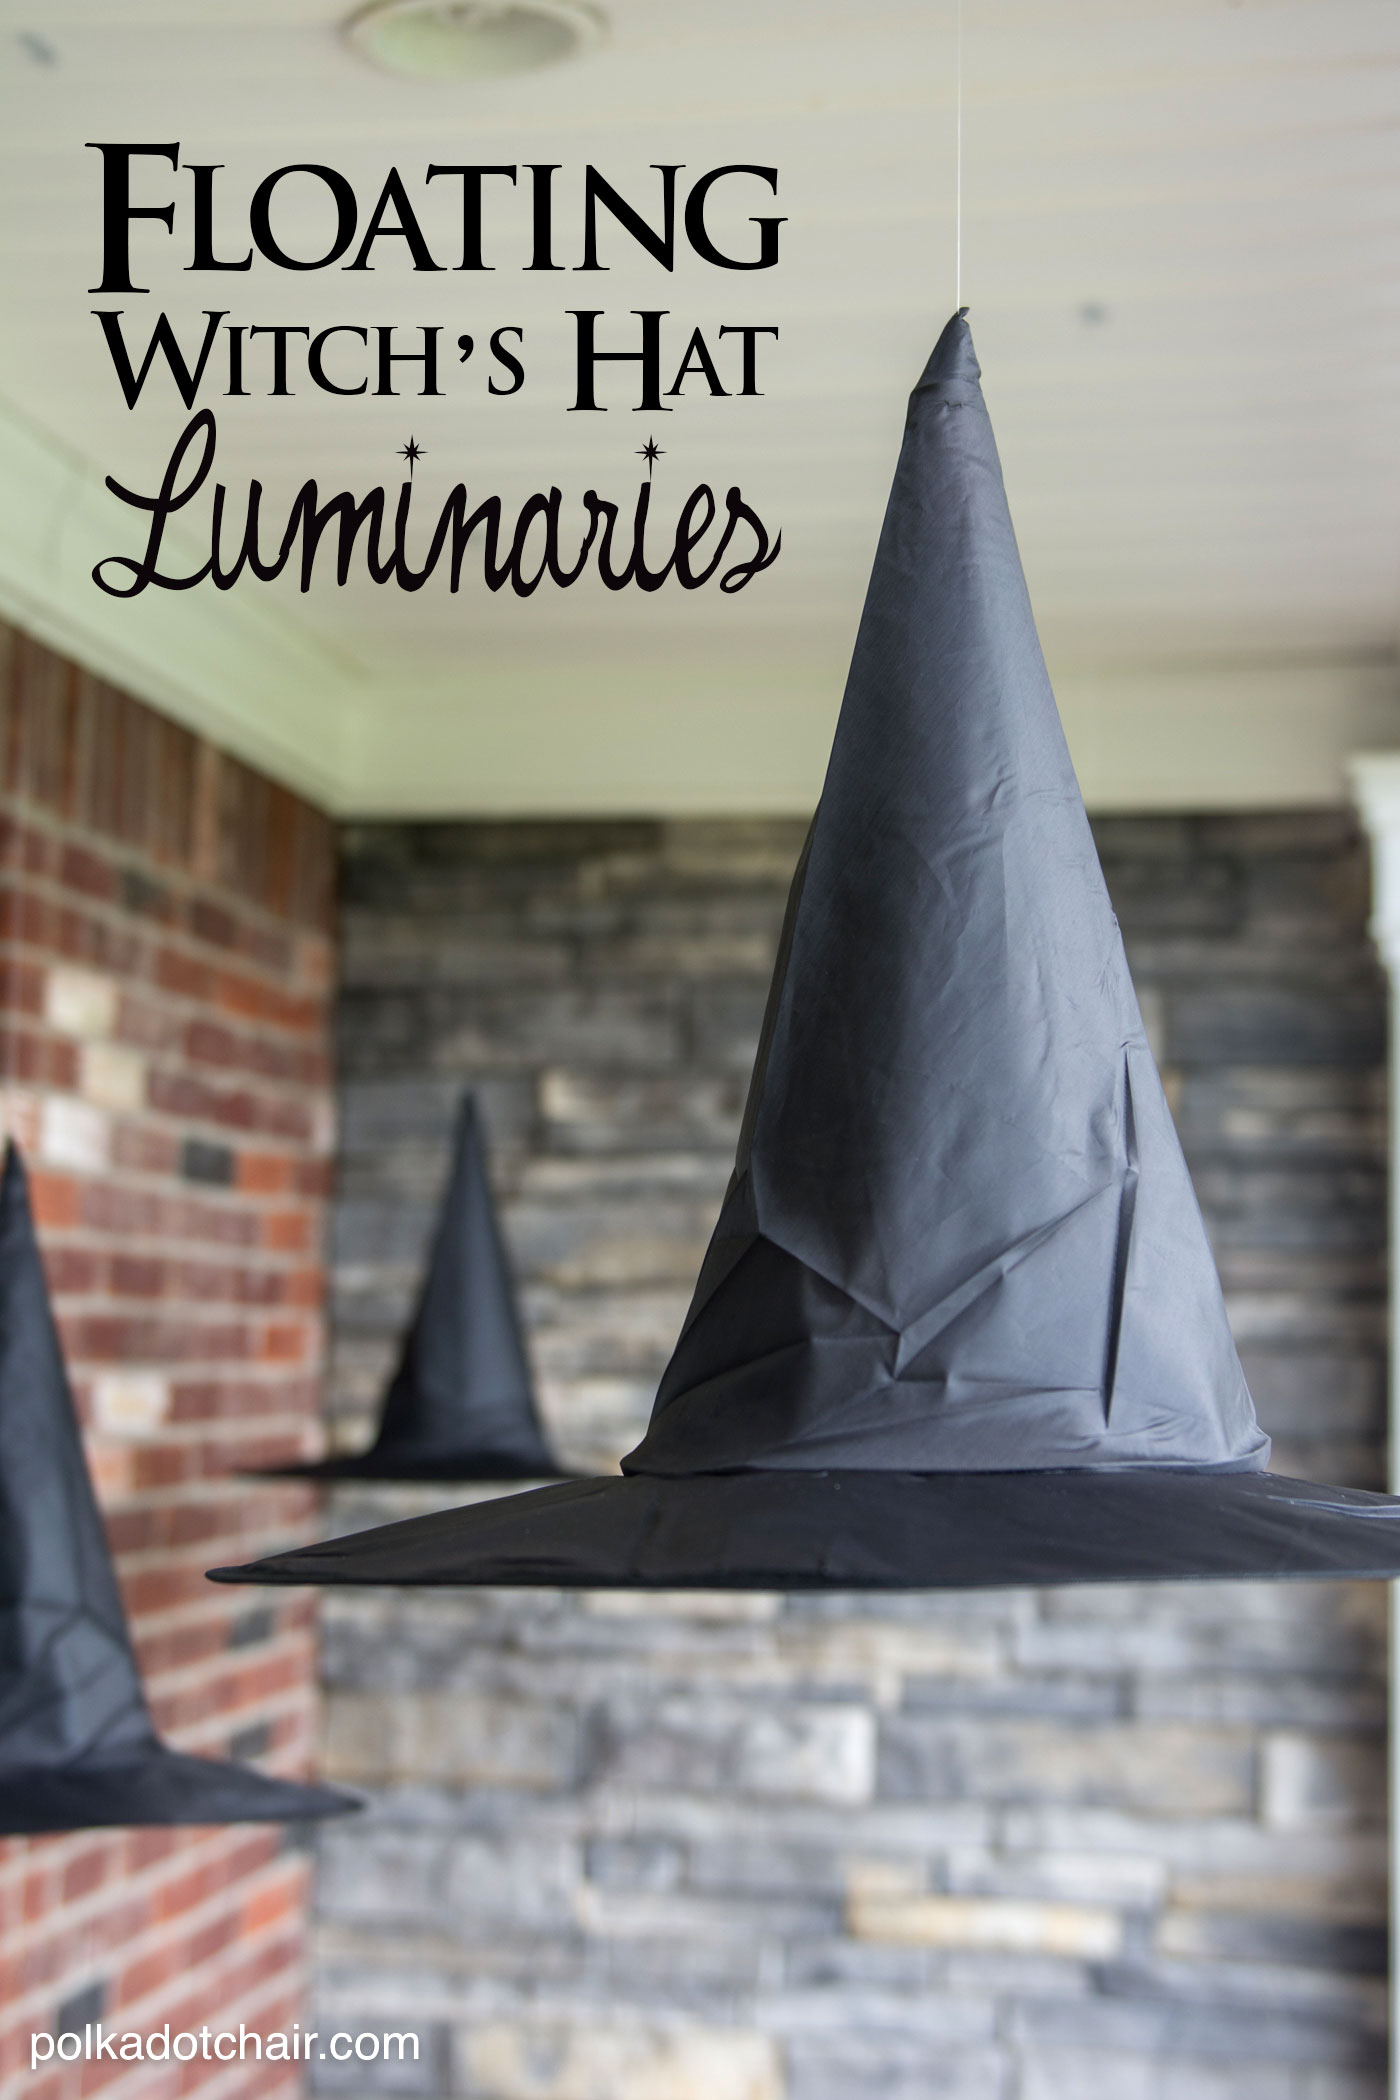
33. Halloween House Decorations – Floating Witch Hats
We’re swooning for these floating witch hat luminaries and we’re swooning even more for how easy they are to whip up. Grab the details after the jump at Polkadot Chair.
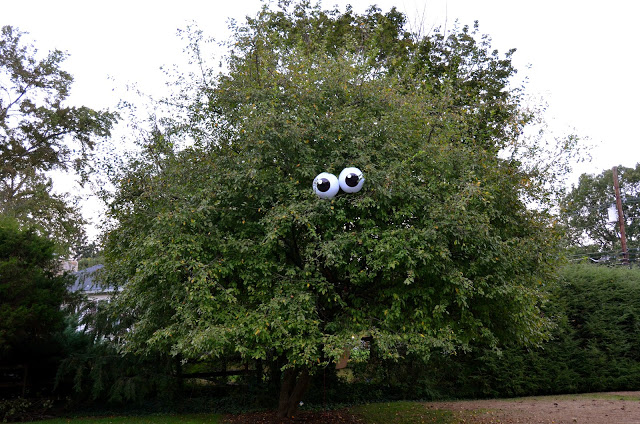
34. Eyes in a Tree Outdoor Halloween Decorations
Princess and the Frog Blog has all you need to know for creating these eyeballs in a tree. Greet all your trick-or-treaters its this little spook.
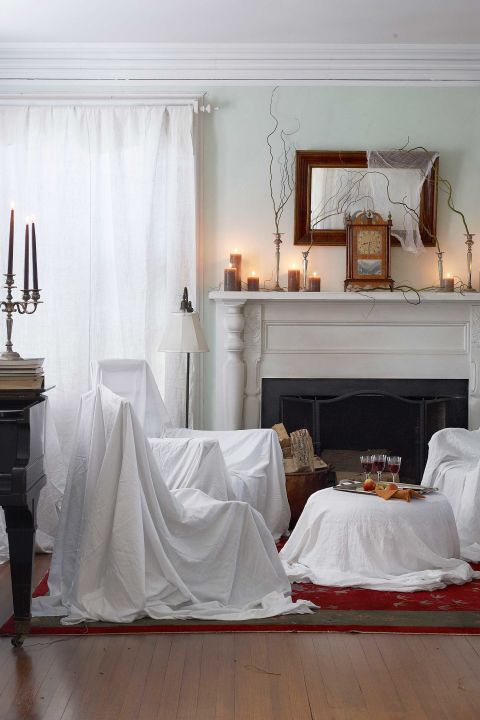
35. Indoor Halloween Decorations – Eerie Living Room
If you’re throwing a party and need a quick, eerie ambiance in a pinch, all you need to do is grab some white sheets. Throw them over your furniture and bam – haunted house feels! Thanks Country Living!
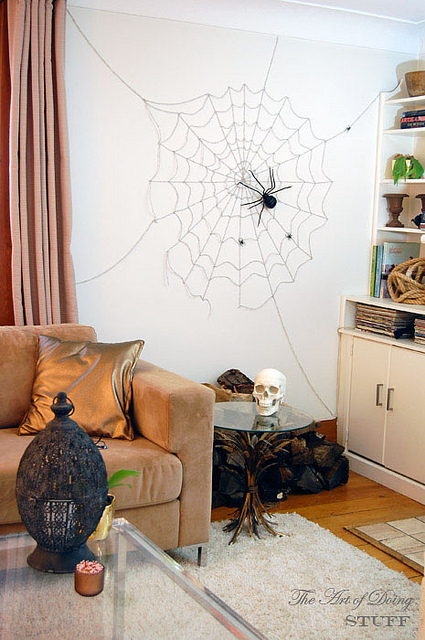
36. Spiderweb Wall Indoor Halloween Decoration
The Art of Doing Stuff teaches us how to create a spiderweb wall as an indoor Halloween decoration. Use it as the focus of the party and be amazed at how easy it is.
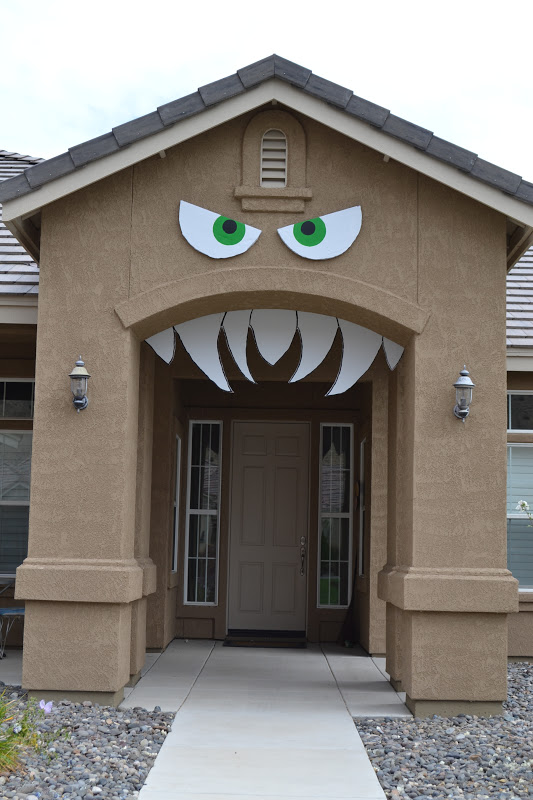
37. Halloween Outdoor Decorations – Monster House
Create a monster face right on your house with the help from Nifty Thrifty and Thriving. Do just your door and utilize the entire front as your inspiration.
38. Indoor Halloween Decorations Ideas with Lanterns
If you want to create an eerie theme, grab your lanterns. Use them to light the rooms and help give you that easy, spooky spirit. (via)
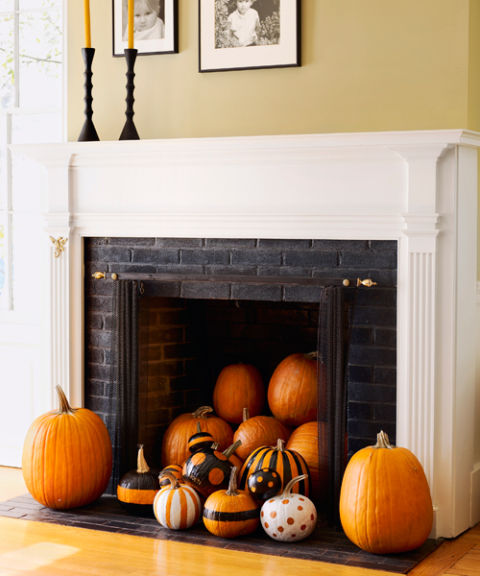
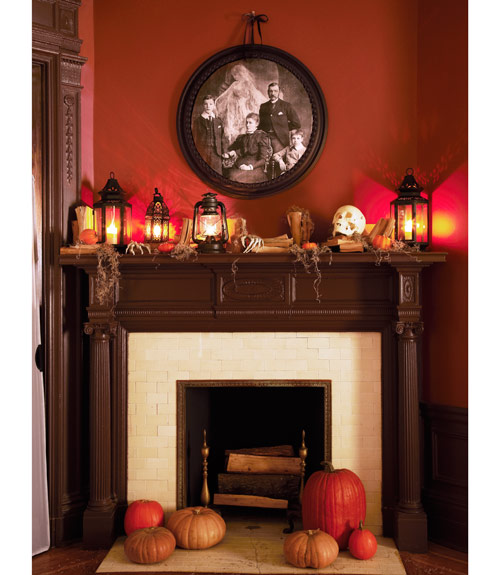
39. Homemade Halloween Decorations with a Pumpkin Hearth
Good Housekeeping gives us some extra inspiration with this easy idea. Fill up your fireplace with pumpkins for an extra pop of Halloween inside the house.
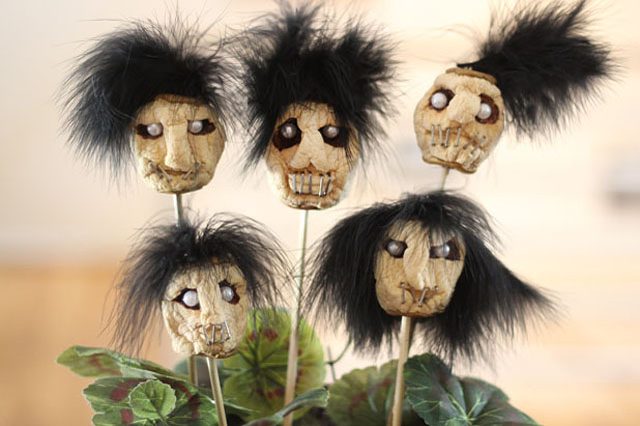
40. DIY Halloween Decoration: Shrunken Heads
Grab some apples and start shrinking! With the help from eHow you’ll learn how to create a super spooky centerpiece for the dining table.
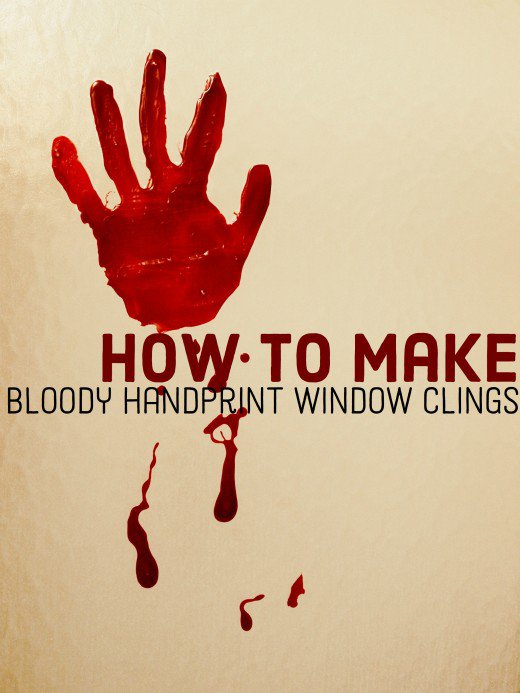
41. DIY Halloween Decorations – Bloody Hands
Fill up your windows with some bloody handprints. With help from Felt Magnet, you’ll grab all the details and making these by the afternoon.
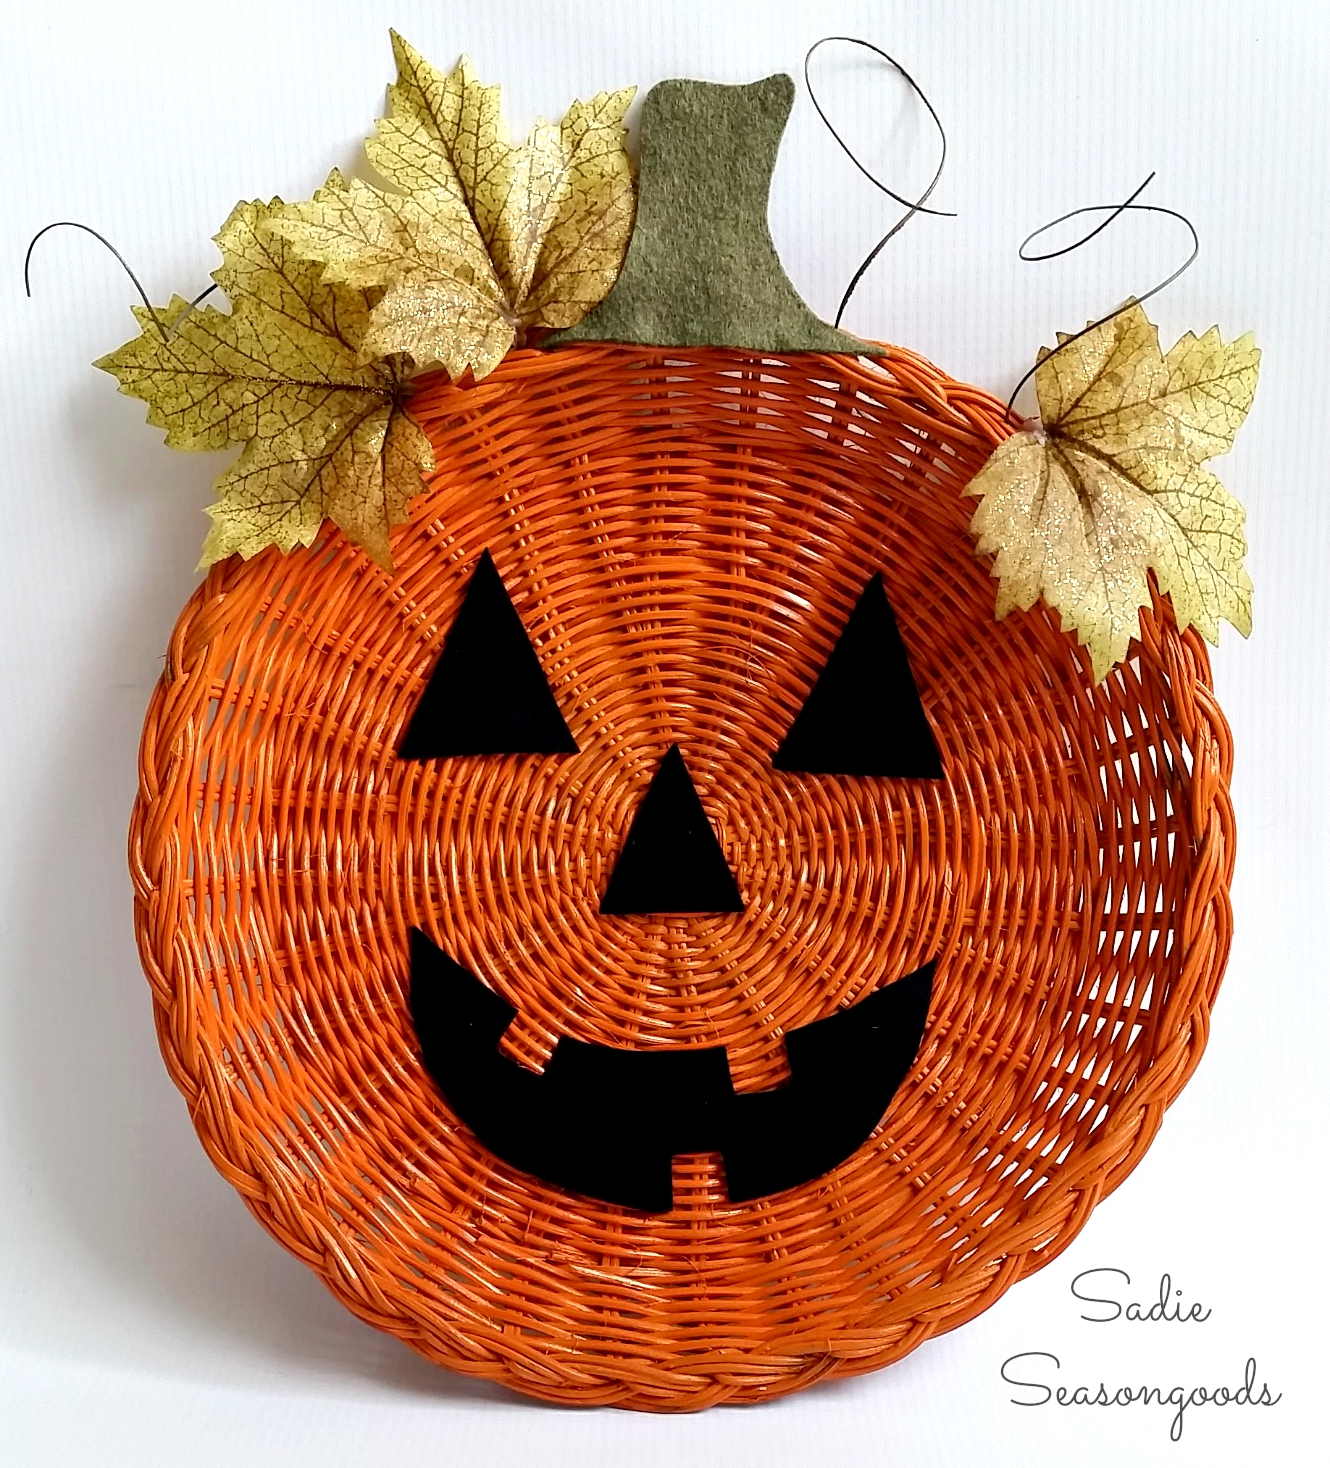
42. Jack-o-Lantern Plate Homemade Halloween Decorations
Sadie Seasongoods took a wicker charger and turned it into the most precious jack-o-lantern decor. Check out the easy tutorial now.
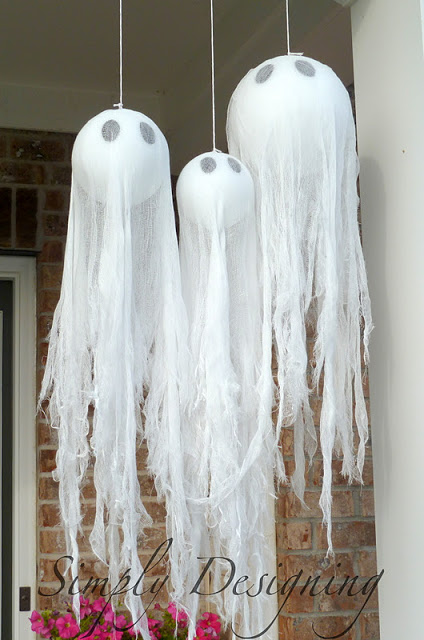
43. Hanging Ghosts DIY Halloween Decorations
Decorate your porch with some of these simple hanging ghosts fromSimply Designing. They were inspired by some Pottery Barn finds and we think they’re rather charming.
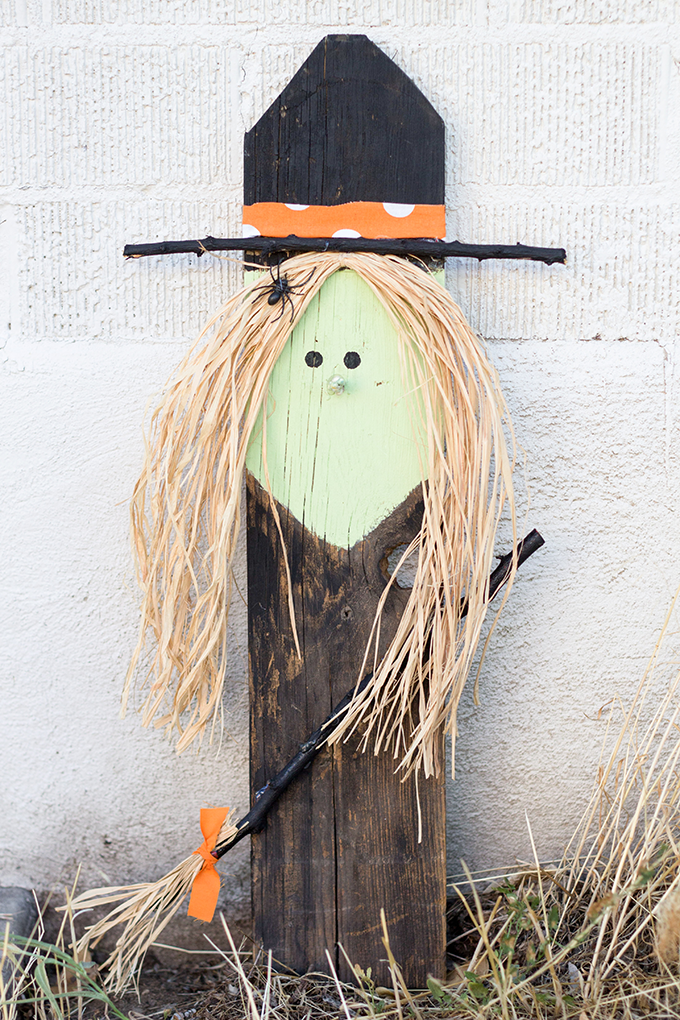
44. Cute Witch Halloween House Decoration
Not only is this witch easy to make but it’s also inexpensive too. Check out the details on this $5 investment over at So Festive!
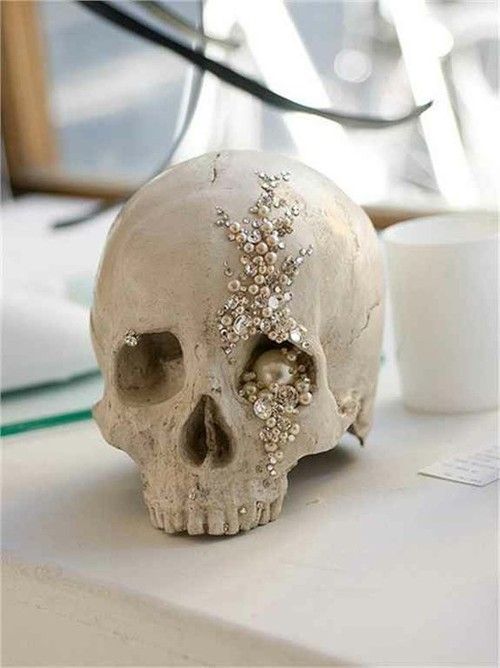
45. Chic Skull DIY Halloween Decoration
Add a bit of femininity to the Halloween decor inside the house with this glam and chic skull. Digs Digs has the tutorial to make it happen.
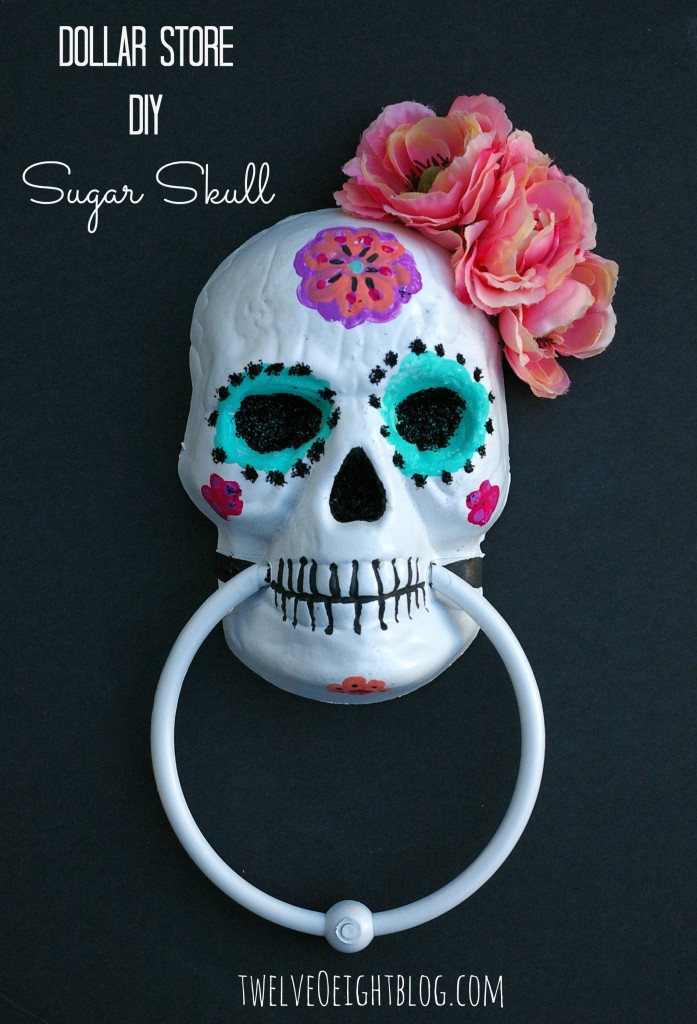
46. Sugar Skull Indoor Halloween Decoration
Or you could add a door knocker to your home in the shape of a sugar skull. Twelve O Eight provides us with the beautiful inspiration and directions.
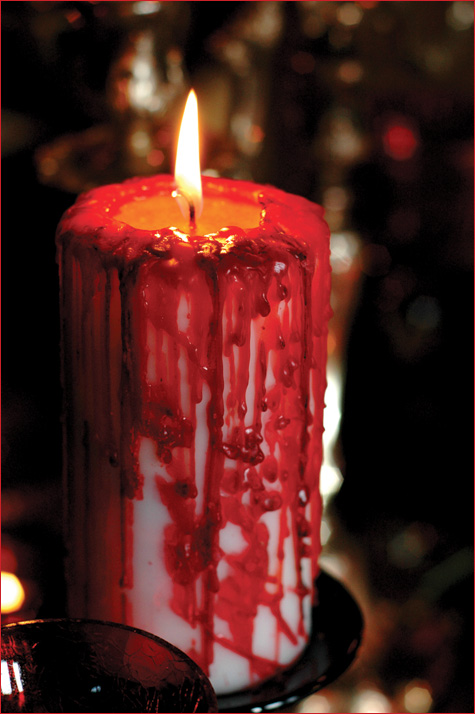
47. Bloody Candle Halloween Decoration Idea
Sprinkle some of these all around the house for extra ambiance. This too is quite easy to make right at home! (via)
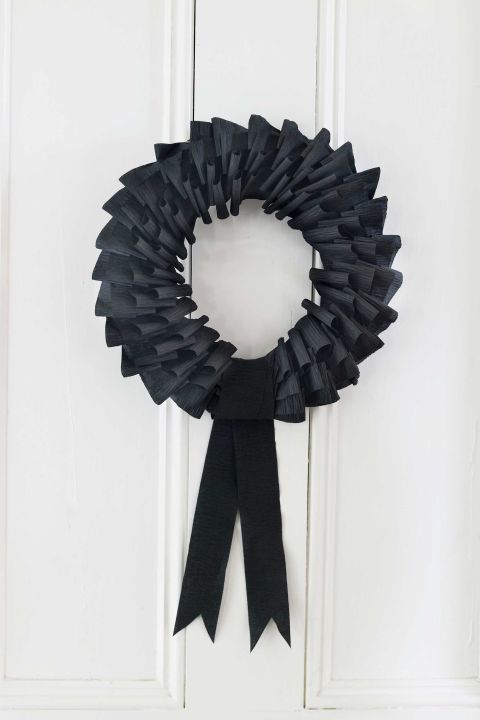
48. Black Wreath Halloween Door Decoration
Country Living does it again with this bout of inspiration. Great your guests with this super easy and festive black, Halloween wreath.
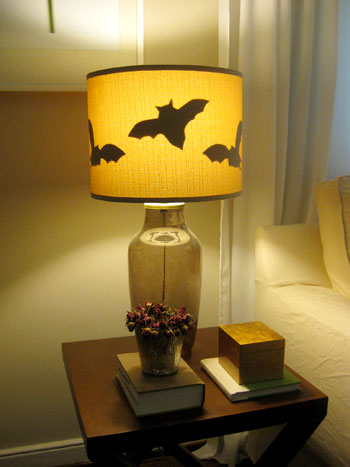
49. Bat Lamp Homemade Halloween Decoration
Visit Young House Loveto add some easy Halloween decor to some unsuspecting places. Even your lamps could add a touch of the holiday.
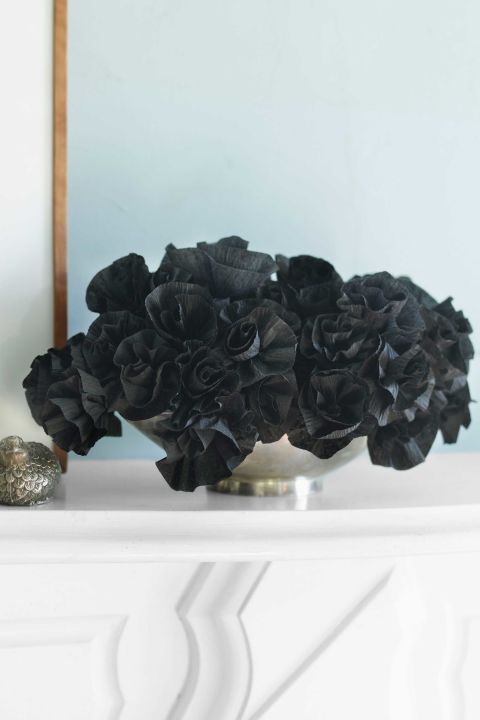
50. Black Flowers Halloween Party Decoration
And finally, visit Country Living just one more time and snag the tutorial for these black flowers. It’ll help enhance that haunted house theme!
Final Words on DIY Halloween Decorations
All things considered, Halloween can be a great way of spending your time making stuff (such as decorations), and a good enough reason to hone your crafting skills. Regardless if you’re planning a Halloween party for your kids, hosting a classy, adult party, or just want to get in the spirit, decorations are always a good way of turning your house from its boring old self into a place where Halloween enthusiasts are welcome.
Note that we’ve included a wide variety of decoration ideas on our list that you can do on your own, ranging from goofy, child-like decorations (such as candy holders, lollipop ghosts, and paper roll witches) to more sophisticated stuff (such as centerpieces, pumpkin place cards, and glamorous beaded pumpkins) that would improve the overall aesthetic for your stylish Halloween party.
Granted, some of the projects that we’ve included in our guides are easier to craft than others, and some of them even require stuff that you don’t usually just find laying around in your house. However, all projects are highly doable, and fit a wide range of needs and expectations from Halloween decorations, whether you’re a fan of colorful decorations, scary ones, or items that bring a more stylish aesthetic to your house.
