50 Unique DIY Thanksgiving Centerpieces to Make This Year
Thanksgiving centerpieces are typically placed in the middle of well-dressed tables to help make seating arrangements easier. They also serve as a lovely decoration for the room.
Although centerpieces typically include Thanksgiving-themed decorations around this holiday, feel free to think outside of the box! It doesn’t necessarily have to be turkey feathers and pilgrim hats to create an autumn centerpiece worthy of your dinner guests’ eyes.
There are many things that can be used around your house or around your backyard that would work just fine for creating a gorgeous Thanksgiving centerpiece. If you aren’t quite sure what to use, here are some easy suggestions.
Best DIY Thanksgiving Centerpiece Ideas to Try in 2021
We made a list and handpicked what we think are the best DIY Thanksgiving centerpiece ideas worth trying this year. Here they are:
1. Fabric Pumpkins – DIY Thanksgiving Centerpieces
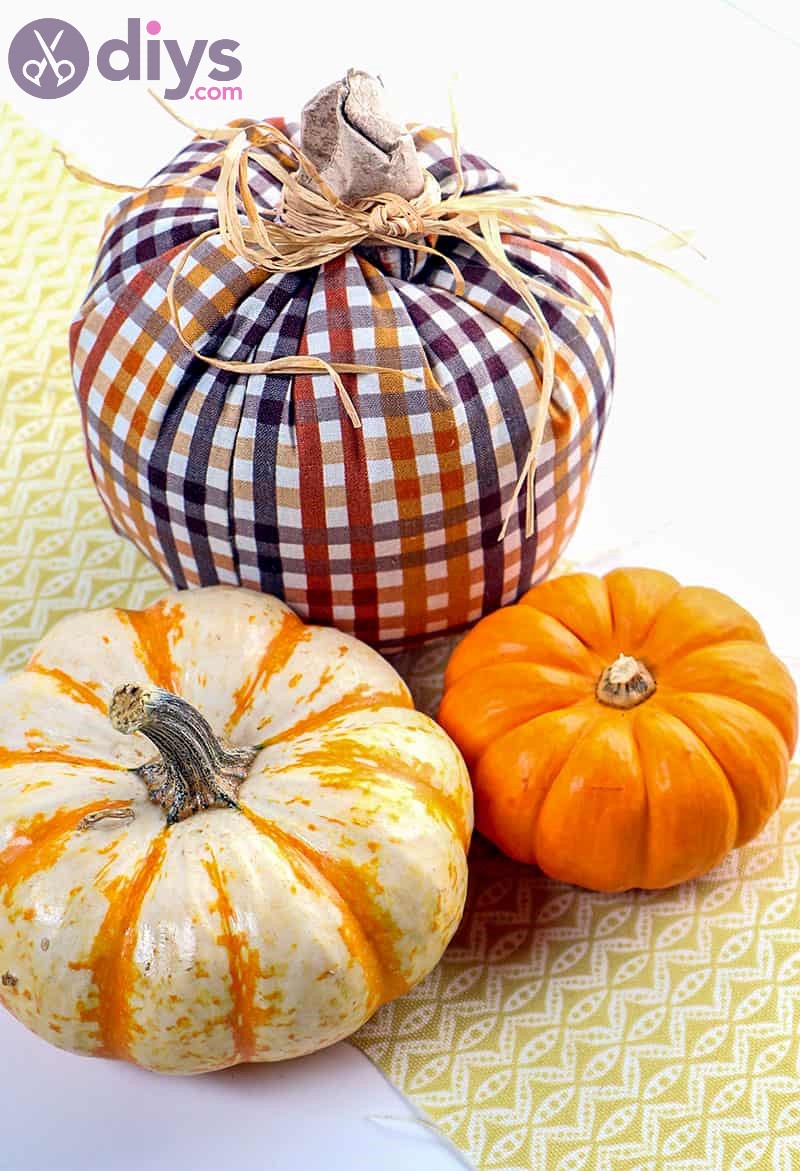
Good news for all you fabric lovers out there! You can use your old clothes, sheets, pillowcases, and table cloths to create fabric pumpkins and effortlessly turn them into DIY Thanksgiving centerpieces!
All you need is some inner tubes (old tires) or papers with pumpkins printed on them, scissors, pins, needle and thread or a sewing machine, and ribbons or torn strips of fabric that coordinate with the colors of your pumpkins.
It’s easier if you cut all the pieces first before assembling everything together later on. First, place the paper pumpkin inside the inner tube so that it stays in place while you’re working on it.
Then start by gluing or stitching both ends of one long strip of ribbon onto each side of your pumpkin. Make sure these are secured well. Afterward, glue the opposite ends of your ribbons onto the paper pumpkin.
Continue gluing or stitching two more pieces of ribbon on top of each other and repeat the steps you’ve already done until everything’s covered completely with fabric (including the inner tube).
Make sure that there is enough space left on each end for your ribbon loops! As for the stems, you can make them out of craft wire and attach them to your fabric pumpkins at a later time.
This is one easy way to transform old fabrics into unique Thanksgiving centerpieces! For more details, check out our full tutorial!
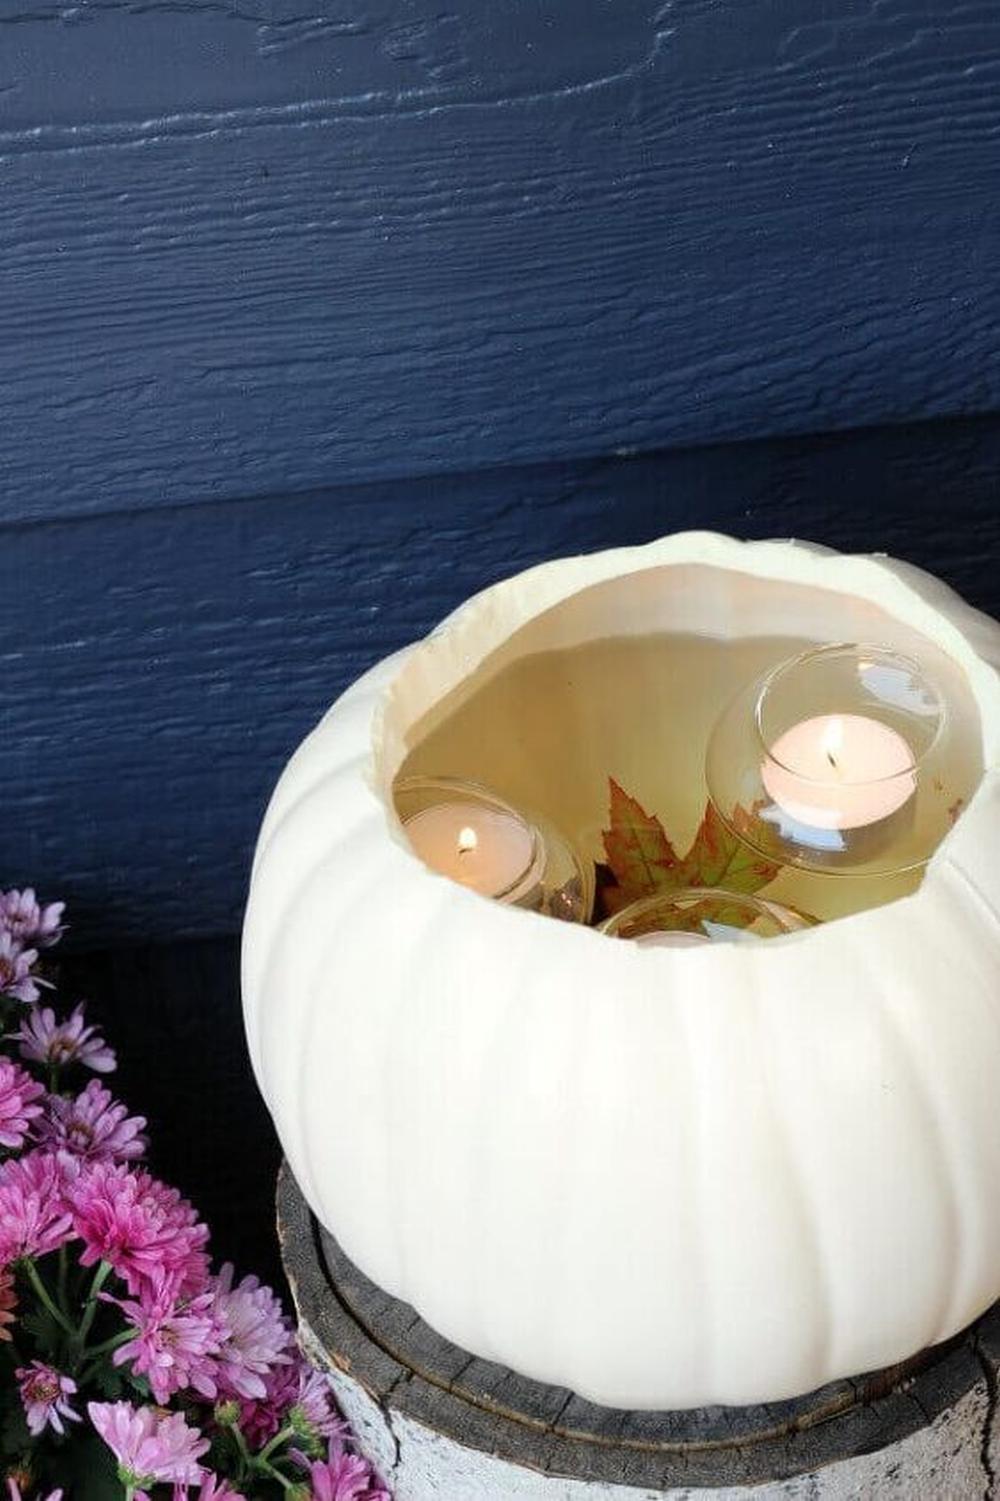
2. Faux Pumpkin with Floating Votives – DIY Thanksgiving Centerpieces
DIY pumpkin votive candle holders are a great idea for your DIY Thanksgiving centerpiece. Not only will they look beautiful and add a festive touch to the place settings, but they’re also easy to make!
All you need is some pumpkins (real or fake, it’s up to you), glass votive holders, and tea lights. You can paint the pumpkin stems if you want to add a dash of color or leave them plain white. Either way, add some autumn leaves in between for decoration. It’s that simple!
We also suggest checking out this fabulous tutorial we found on Hometalk about how to make a DIY faux pumpkin with floating votives. It’s not only easy to make but also really cheap!
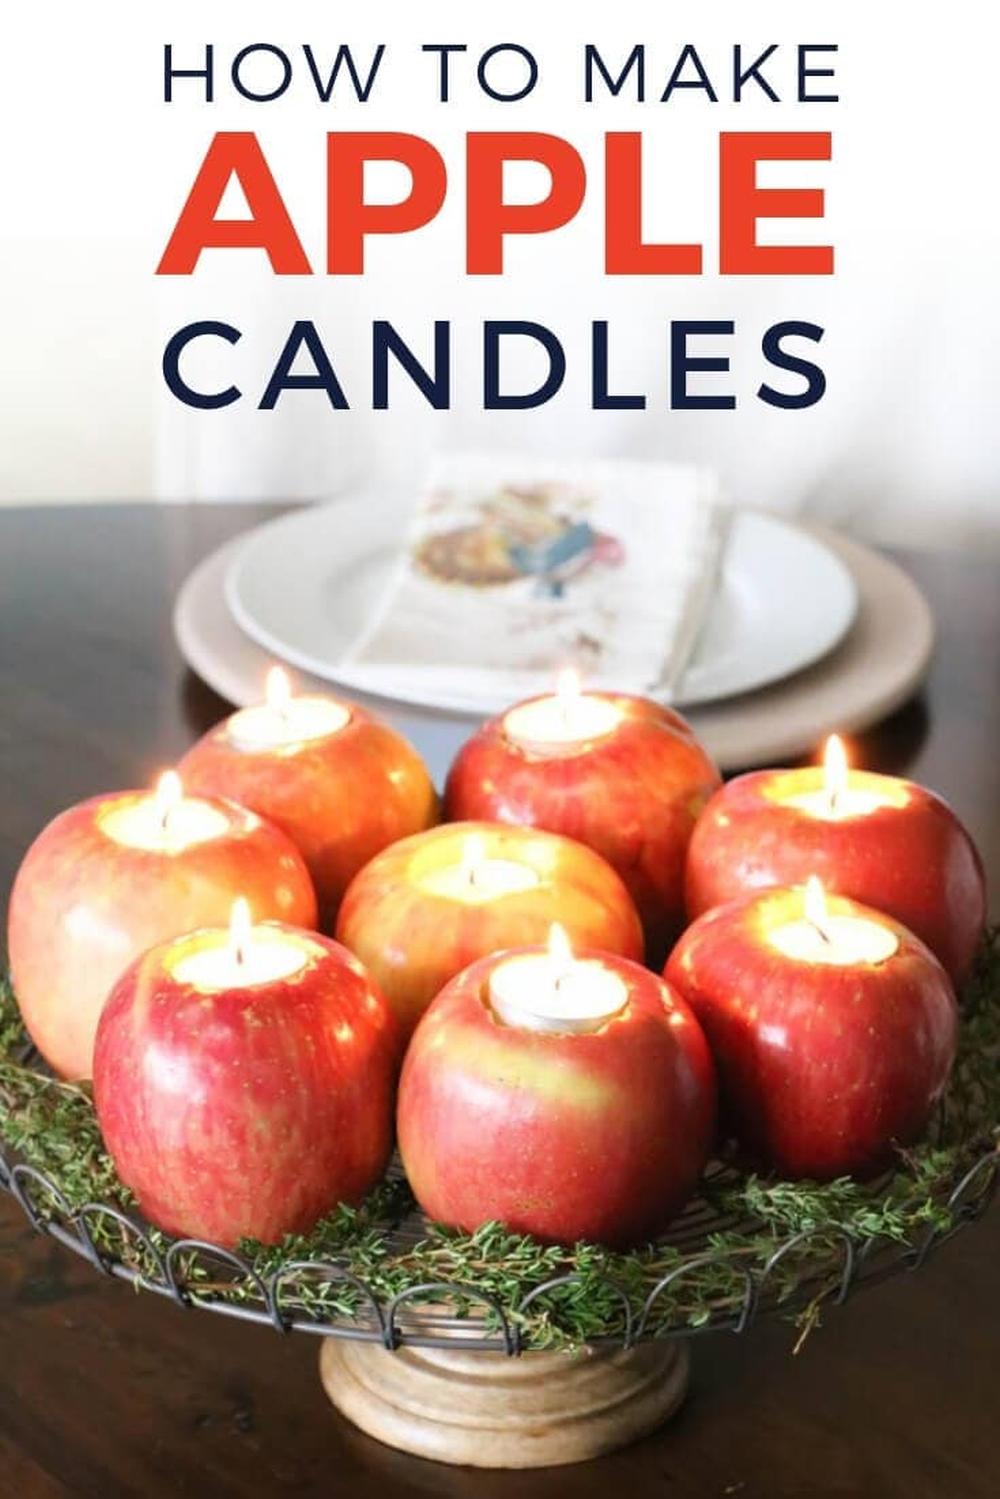
3. Apple Candles – Thanksgiving Centerpiece
If you’re looking for Thanksgiving centerpieces that are simple, rustic, and inexpensive, then why not try apple ones? They look fabulous and can be made using only three items: apples (Granny Smith works best), votive candles, and holders.
All you have to do is place the candles inside the apples so they stand upright and create an interesting way to carry candles around your house or guest room. Sure beats traditional candles in wine bottles or jars any day of the week!
Or, if you don’t want to risk tall candles falling off the apples and burning your tablecloth, you can use tealights instead. This amazing tutorial created by Designer Trapped demonstrates how to effortlessly carve apples and place tea lights inside. Kind of hard to believe we know, but it really is that easy.
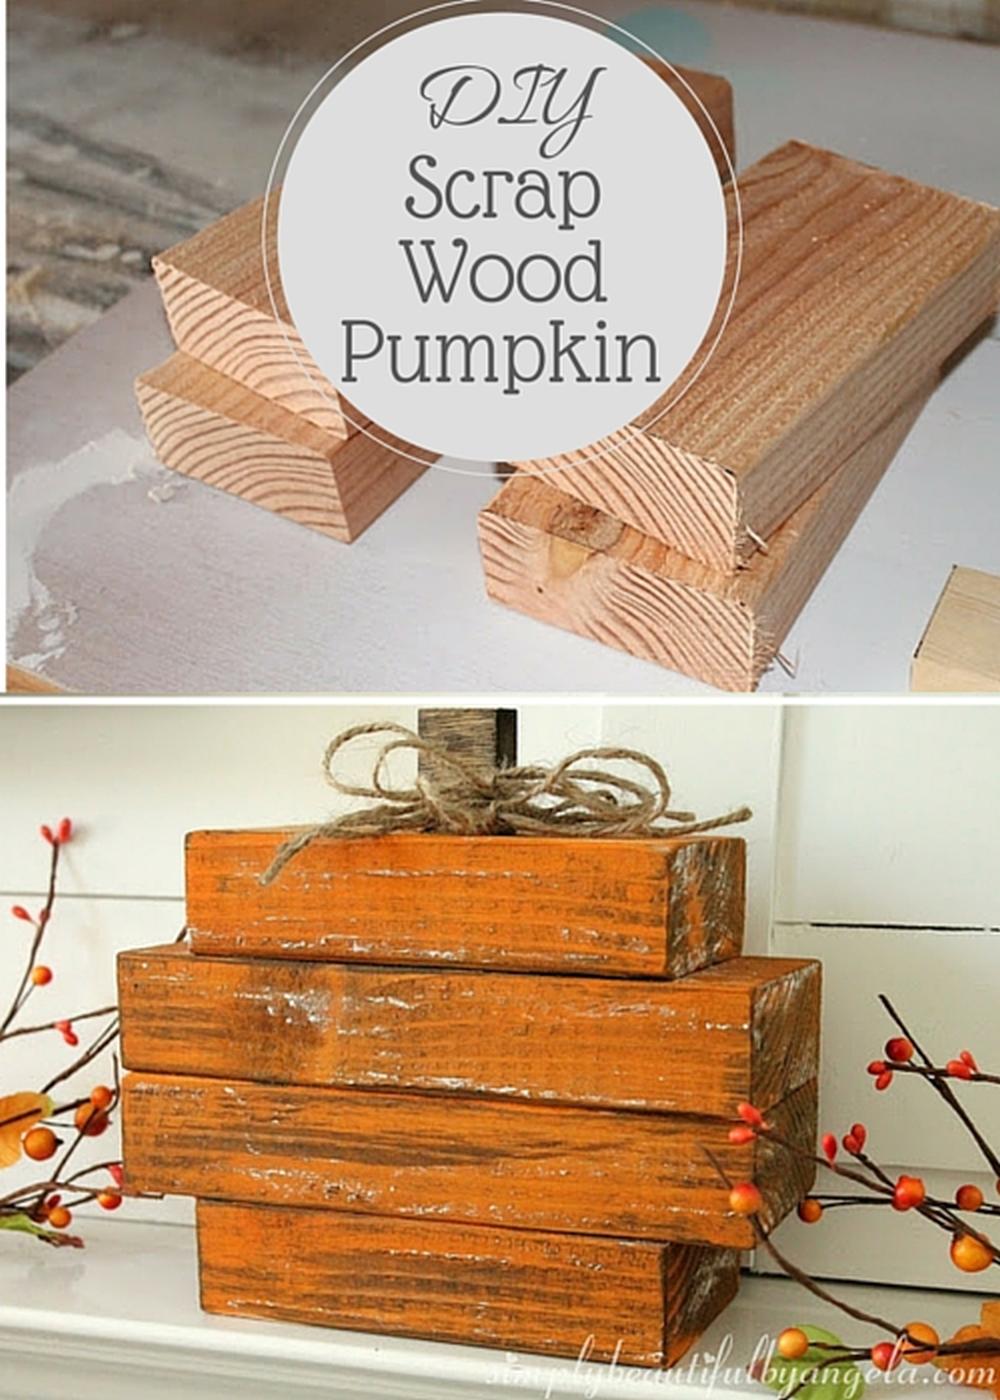
4. Scrap Wood Pumpkin – Thanksgiving Centerpiece Ideas
Fall is all about home decorating. You can do so easily by thinking outside the box, trying new things, and developing clever ideas to transform your house into a warm, cozy corner of autumnal coziness.
If you want to stand out this autumn and create a Thanksgiving centerpiece that’s totally unlike anything else on the market, then we suggest using scrap wood pumpkins. They’re easy and inexpensive to make and look great no matter which room in the house you place them in.
All you need is some scrap wood (just ask around at your building site), an angle grinder or jigsaw with a manual blade, paint (we recommend three coats), and plenty of patience!
You should also take a look at this fabulous tutorial we found on Simply Beautiful by Angela.
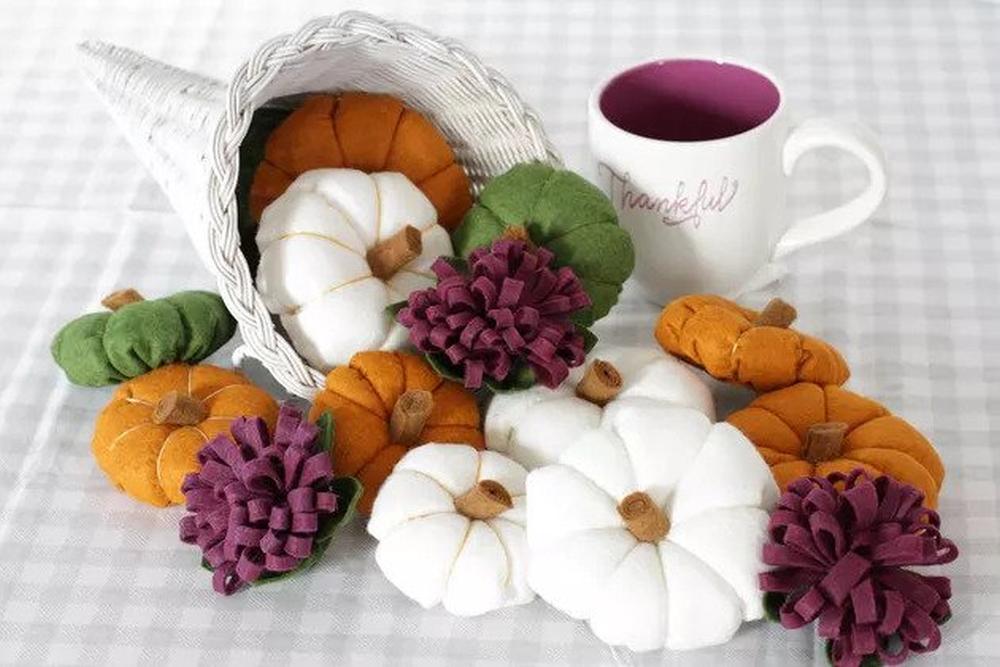
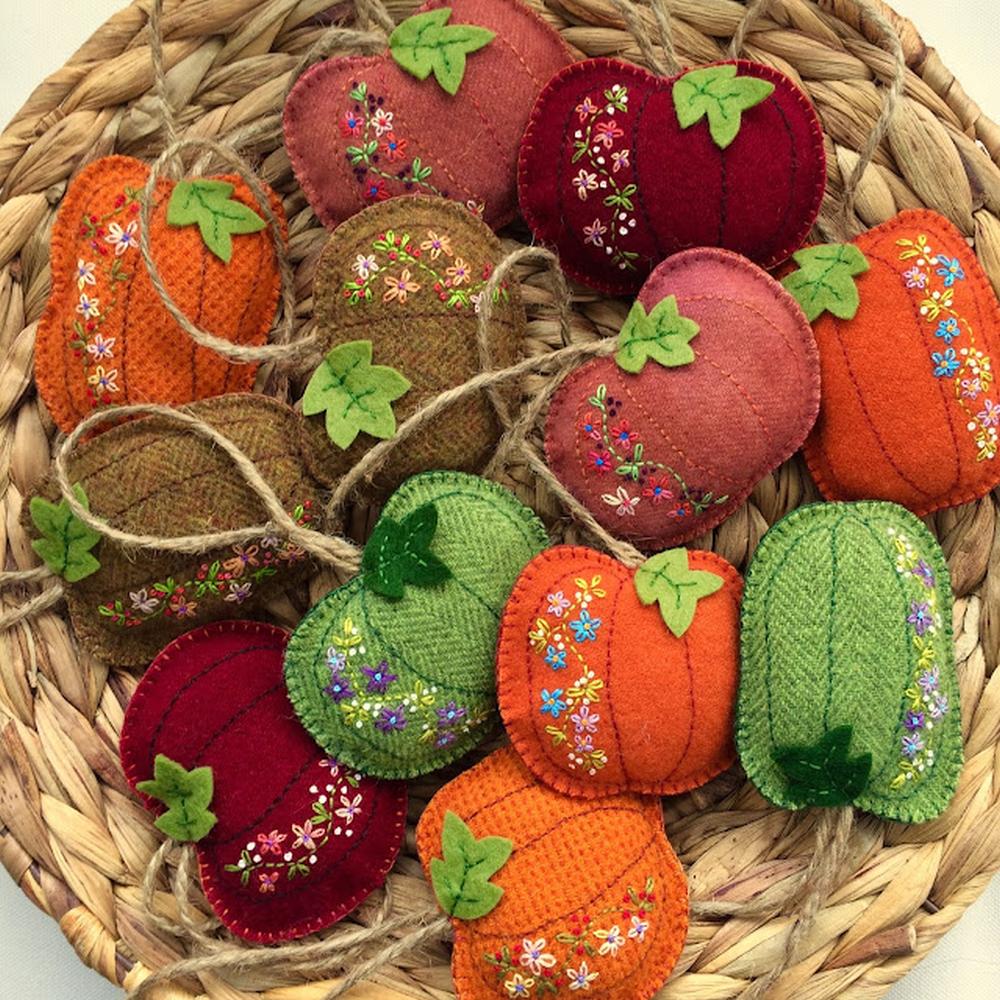
5. A Basket of Felt Pumpkins – Thanksgiving Table Centerpieces
If you’re looking for stylish, rustic Thanksgiving table centerpieces that won’t burn a hole in your pocket, then why not try making felt pumpkins? They look great everywhere and are simply perfect for this time of the year. But you need embroidering skills for this project.
Besides, sewing felt pumpkins is cheap. All you need is some orange felt, white thread, scissors, fabric paint (we highly recommend gold), black buttons, twine, or other decorative embellishments that complement your autumnal palette.
One of the best tutorials we’ve found on the subject is this one by Fabric and Ink. It’s really easy to follow the step-by-step instructions and create an original piece yourself at home.
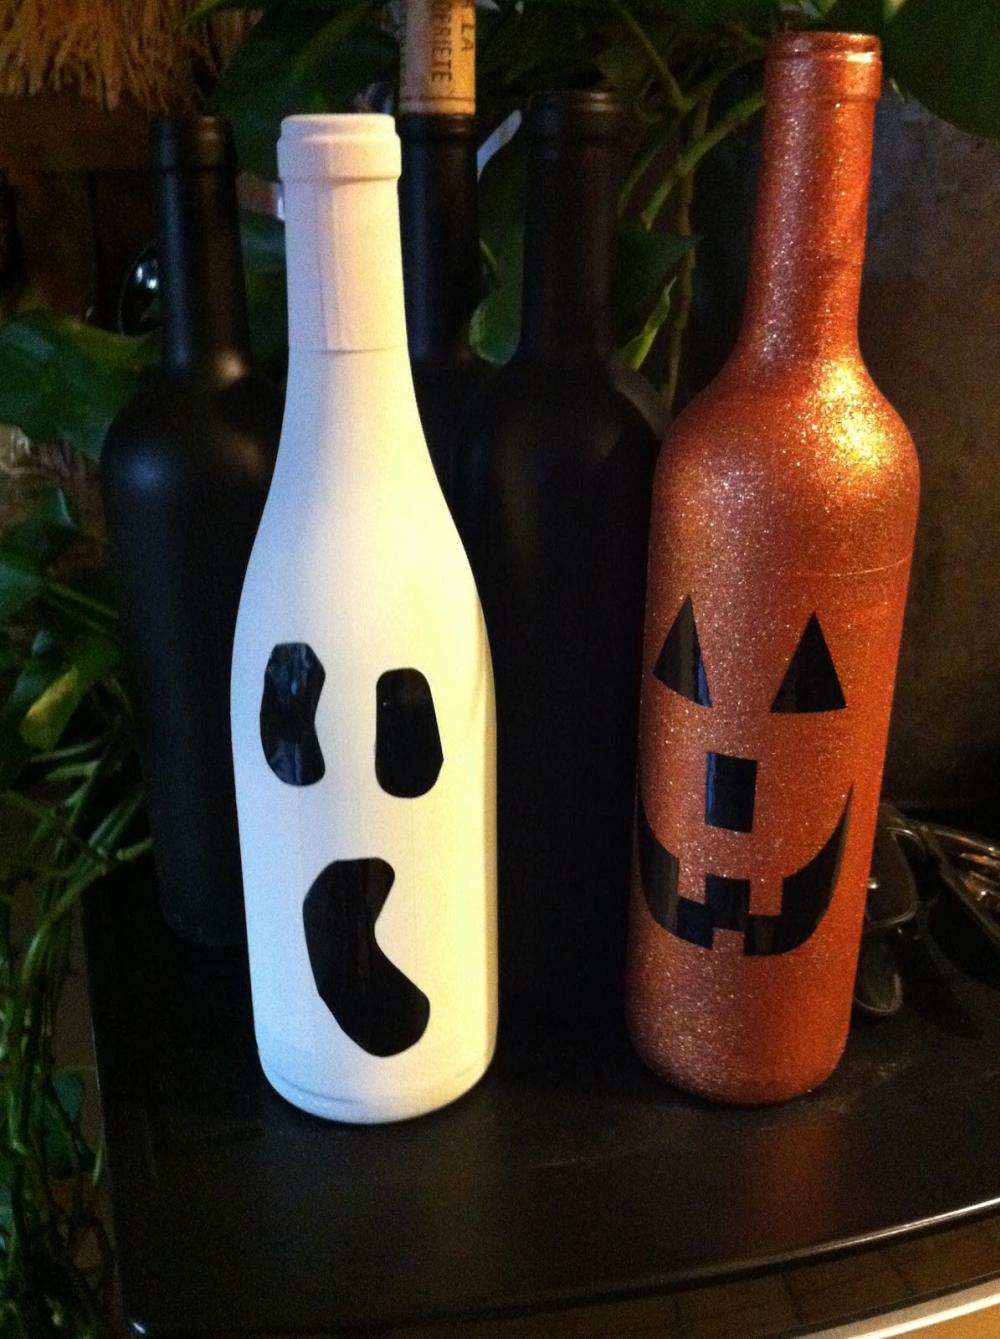
6. Recycled Wine Bottle Pumpkin Centerpiece
If you’re looking for a cool way to recycle wine bottles and create one fabulous centerpiece for this upcoming Thanksgiving, then we suggest trying a pumpkin wreath!
It’s a relatively new idea on the market but also really easy to replicate. All you need is a glass bottle, sharp scissors or craft knife, a glue gun, some fake fall leaves or flowers (or even real ones if you want), and some patience!
Here’s an awesome tutorial by Want to Get Crafty that will teach you how to create a stylish and sophisticated Thanksgiving centerpiece with just a couple of bottles and a few simple tricks!
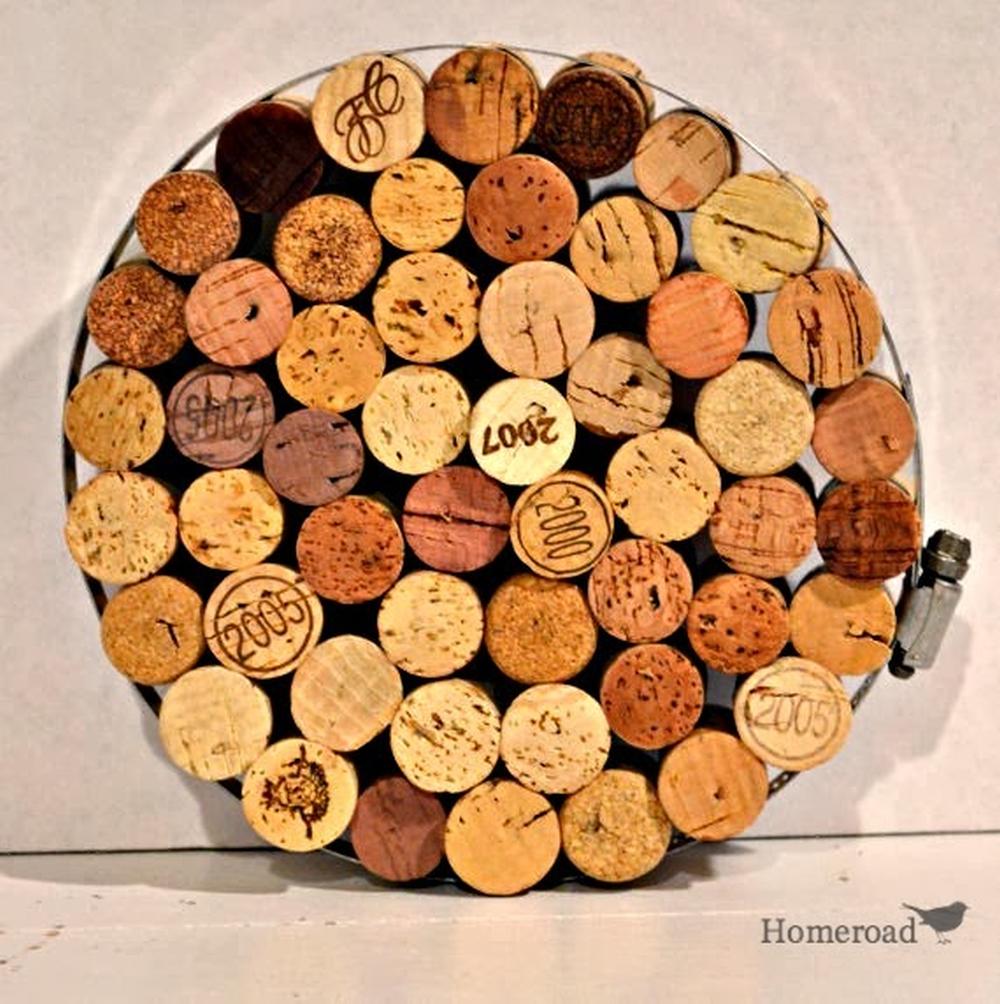
7. Pumpkin Wine Cork Trivet – Unique Centerpieces
If you’re looking for unique centerpieces for the Thanksgiving table that are also cheap and easy to make, then we suggest using making a trivet out of numerous wine corks. It’s such an amazing idea because wine corks can be used in so many ways: as jewelry, magnets, or even for scrapbooking.
Besides, they come in all shapes and sizes so finding the perfect match shouldn’t be hard. And you don’t have to limit yourself to pumpkins either – think about acorns or other woodland creatures!
Here’s one easy tutorial we found on Homeroad that will show you how to turn a couple of wine corks into a trendy trivet for your Thanksgiving table.
The best part is that this project costs next to nothing and is perfect for recycling!
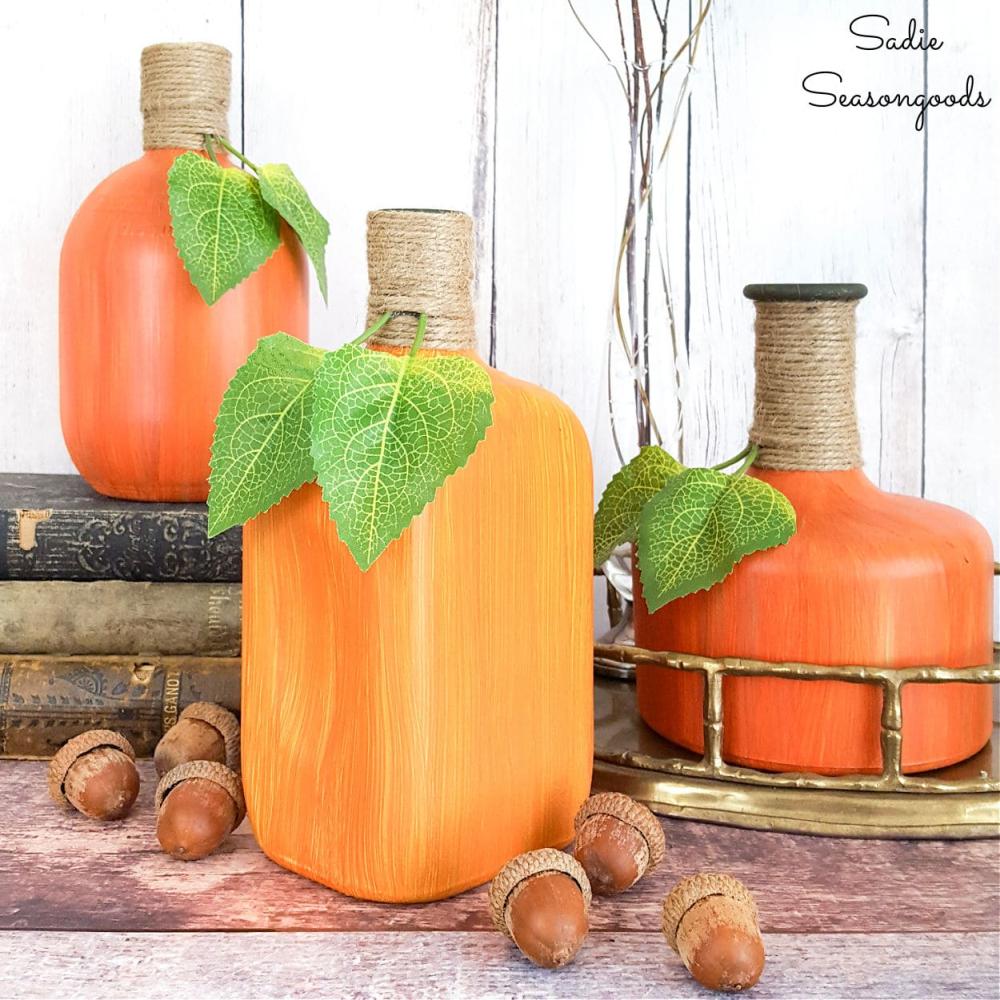
8. Bourbon Bottle Pumpkins – DIY Thanksgiving Centerpieces
If you want some homemade and eco-friendly DIY Thanksgiving centerpiece ideas, then we highly recommend trying bourbon bottle pumpkins. It’s such a cool idea because not only is it incredibly stylish but also very simple to create without the help of any tools.
All you need is some empty bottles (just search for one or two at your local spirits shop – they’re all over the place!), paint, paintbrushes, twine, faux leaves, and any other embellishments that will complement your autumnal theme colors, like buttons or candies.
Here’s an amazing tutorial we found on Sadie’s Season Goods that features step-by-step instructions so that you can see how straightforward the entire operation is. And don’t forget about downsizing this design for mini liquor bottles too – it looks equally adorable!
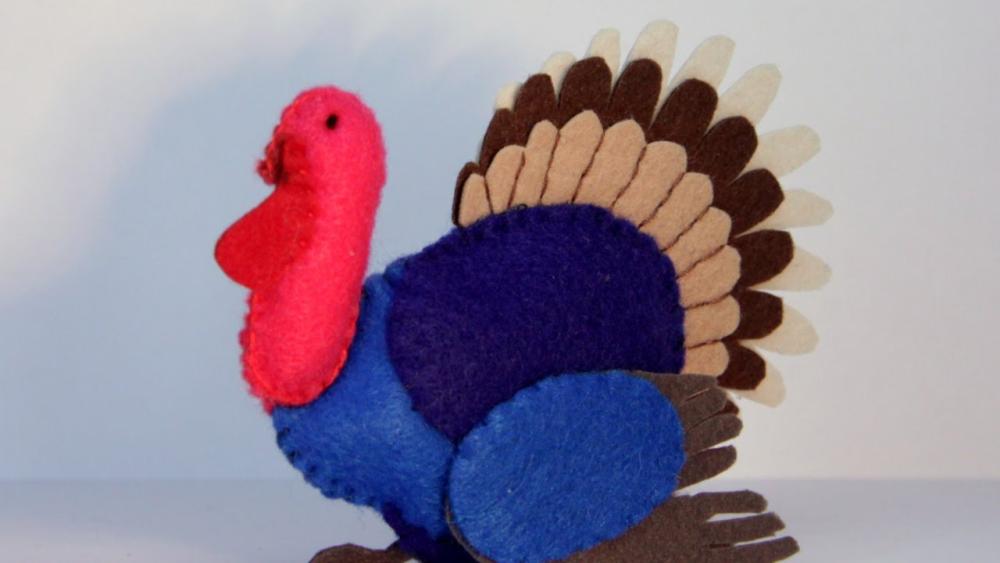
9. Felt Turkey – Thanksgiving Centerpiece
Here’s another DIY centerpiece idea for Thanksgiving that doesn’t requireany special skills and looks amazing! It is a stuffed felt turkey that will definitely add some unique style to your autumnal decorating scheme.
You need rubber cement, white glue, thread (in the color of your choice), embroidering needle, orange, brown and yellow felt in small pieces, three small googly eyes for each feather (the number of feathers depends on their size), straw or dowel rod (for making the feet), thick wire or coathanger, and a stuffing of your choice.
So, you can start by cutting out the main feather shapes from yellow felt, two for each plus one big one for the tail. Then glue the smaller feathers onto them with rubber cement. Next, cut out a circle from a straw or dowel rod and secure it to the backside of each feather using thread and needle (you might need to use white glue as well).
Now you need to make feet so that you could attach our turkey centerpiece to any flat surface: two legs and a base plate should do it – just turn the shape under and sew it together with needle and thread at their widest parts. To give those legs some life, bend them inwards just like those on an actual bird.
Then you might want to make the beak and round off its ends. To make it stand on its own, cut out a similar circle from wire or coathanger and glue the legs onto it using white glue. Now you can attach one googly eye per each feather on the tail’s circles – that way they’ll form some sort of pin feathers on the back of your bird.
Next up are two wings which are basically just triangles with rounded corners – don’t forget to add some feathers! The last thing is attaching all those components together by sewing thread through their centers, but first, you need to stuff them so that our turkey centerpiece looks plump and lively!
You can also check out this awesome YouTube video tutorial made by Guidecentral English.
10. DIY Felt Fall Cornucopia – Thanksgiving Centerpiece Ideas
Would you like to create a cornucopia centerpiece for your Thanksgiving table? This is such an awesome project that will definitely make your dinner table look festive and timeless.
What you need are some felt sheets (in one or several colors of choice), glue, scissors, dowel rods or something similar, yarn (in the color of your choice), and beads (optional).
First off, cut out circles of various sizes from different pieces of felt – this will be our “grain” filling. For the next step stick those circles together using rubber cement on their backsides only – don’t forget about your size preferences beforehand! You can attach them by gluing or sewing them if you’re not into rubber cementing – it’s a matter of taste.
Now comes the tricky part: you need to cut a strip from felt that is going to become your cornucopia handle, but you should make sure it stays at least double as wide as its length – otherwise it won’t be able to support all those round pieces of “grain”.
Once you’re done with cutting just attach the whole thing together by sewing a piece of thread through its center. Then, tie it into a bow. This way, your cornucopia centerpiece will look more natural. The last step should involve adding beads into your cornucopia by sticking them into the handle and adding some on top of your circles.
That’s it! It is that simple and easy to create a gorgeous Thanksgiving centerpiece by yourself – you will look like an expert in no time! Just choose any colors you feel like working with, add beads for something extra special, and make sure your stitching looks neat!
This tutorial we found on eHow gives some excellent pointers on how to make a DIY felt fall cornucopia, so be sure to check it out!
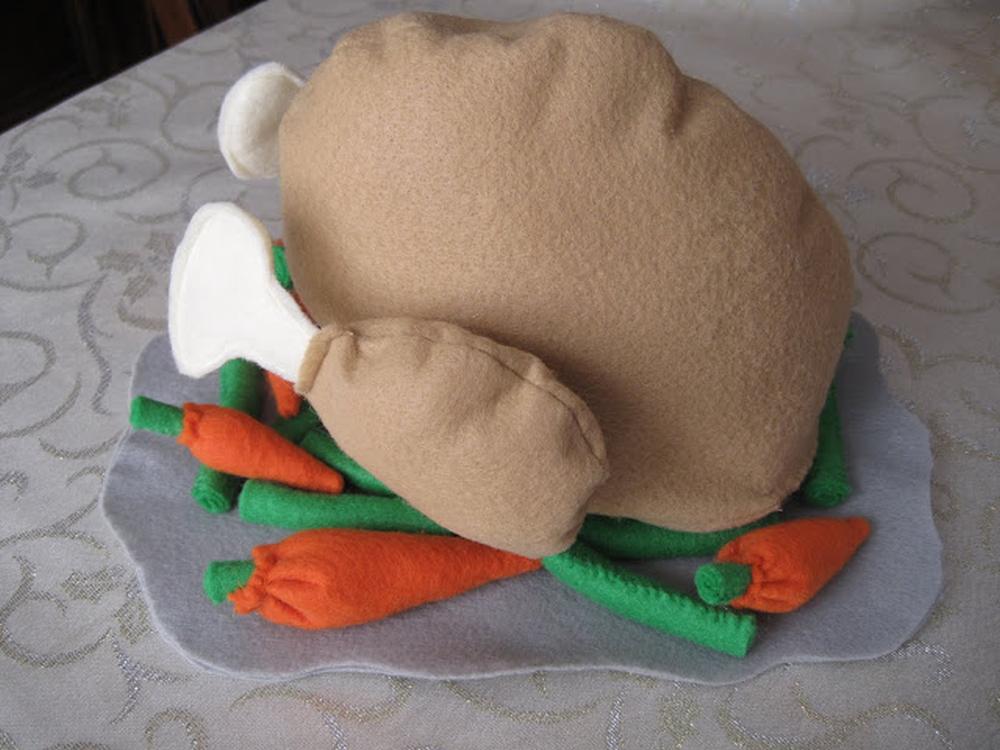
11. Felt Turkey and Veggies – Thanksgiving Table Centerpieces
This gorgeous felt turkey and veggies idea is one of the cutest Thanksgiving table centerpieces we’ve ever come across! It’s such a great way to make your kids the star of this special holiday by letting them help you create their very first Thanksgiving decoration.
It requires several pieces of felt (in different colors). But if you want to make it simpler, feel free to use only two or three colors of choice since all turkeys are beautiful birds. What’s more, some paint might be required for creating those little vegetables that will be attached to our turkey.
First off, take one white piece of felt and cut out an oval shape which will become our turkey’s body (you can leave its legs as long as you want them to be). Then, create a neck by cutting out a strip from whatever color of felt you have chosen. Attach those two together using adhesive tape or glue and stuff the turkey’s body with plastic bags – this way it will look plumper.
The next step is creating our cute little vegetables: just draw circles of different sizes on solid-colored pieces of felt, cut them out, and stick leaves on them which you’ve previously cut from another piece of felt! You can also add some dots for something extra special – so creative! Glue everything together and your centerpiece is ready to shine at your Thanksgiving table.
For more information, take a look at this fantastic tutorial we found on Smashed Peas and Carrots!
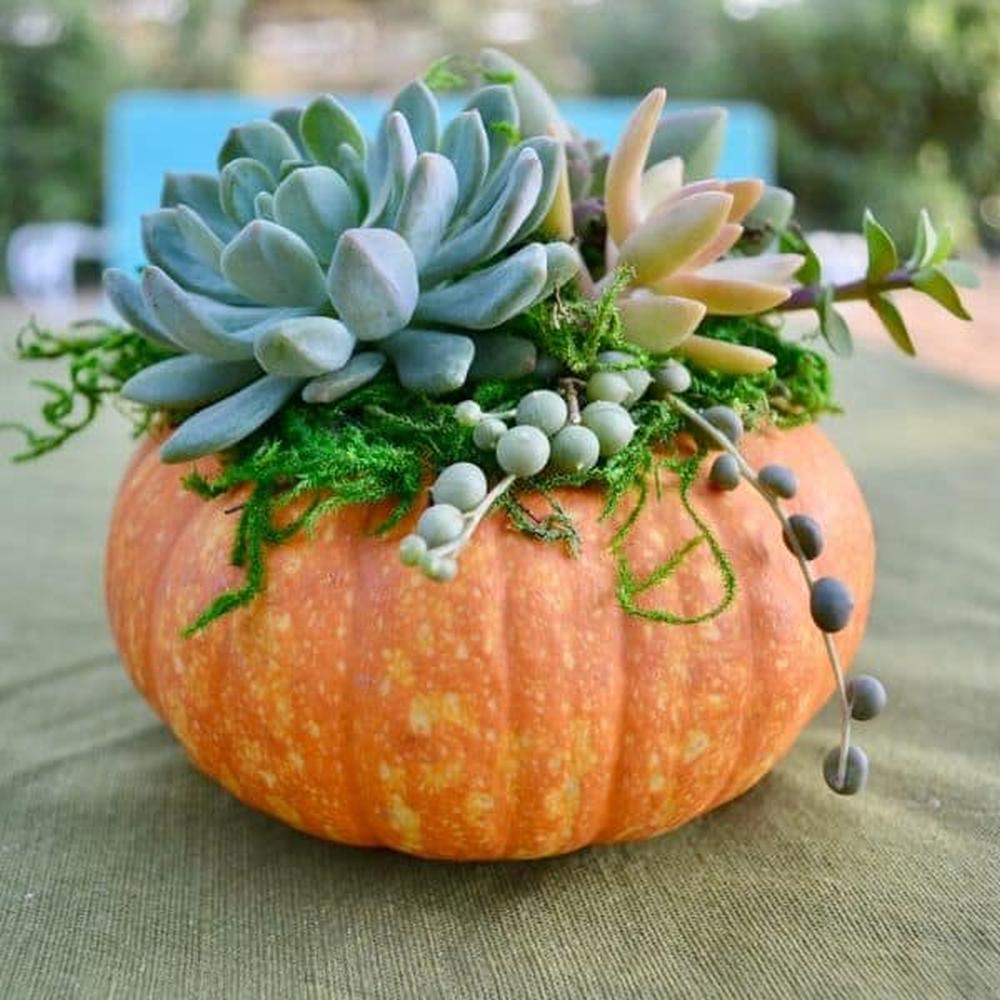
12. Succulent-Topped Pumpkin – Unique Centerpieces
If you are searching for unique centerpiece ideas for Thanksgiving, we suggest making a succulent-topped pumpkin! It might be the best idea you can come up with if your family enjoys gardening.
In addition to pumpkins and succulents, you will need some thread or twine in green or any other color of choice, regular glue, paint in black, white and orange, a small piece of cardboard, a pen, broken pot pieces in various shapes (optional), and plastic plant pots if you want to make more than one centerpiece.
Start by cutting out holes in the lids of plastic plant pots – this is where our plants are going to go. Once done with that step, stick the plants into them and add a bit of soil.
Next, paint the rim of the pumpkin’s lid orange. It’s now time to make our centerpiece look more interesting by drawing a face on your pumpkin using a piece of cardboard as a stencil and white paint. Then, create two tiny holes on the sides of the pumpkin for placing twine or thread through later on.
Now, glue plants to lids and hang them by sticking pieces of the broken pot into each plant pot (optional). If you want to be able to change your decorations from time to time then these little planter pros might come in handy – they’re all over Amazon.
And finally, start the plants inside the pots before attaching them to the lids. When you are finished attaching them all, you will know that your new Thanksgiving centerpiece is ready!
For a simpler variant to the succulent-topped pumpkin, check out this amazing tutorial we found on Audrey’s Little Farm!
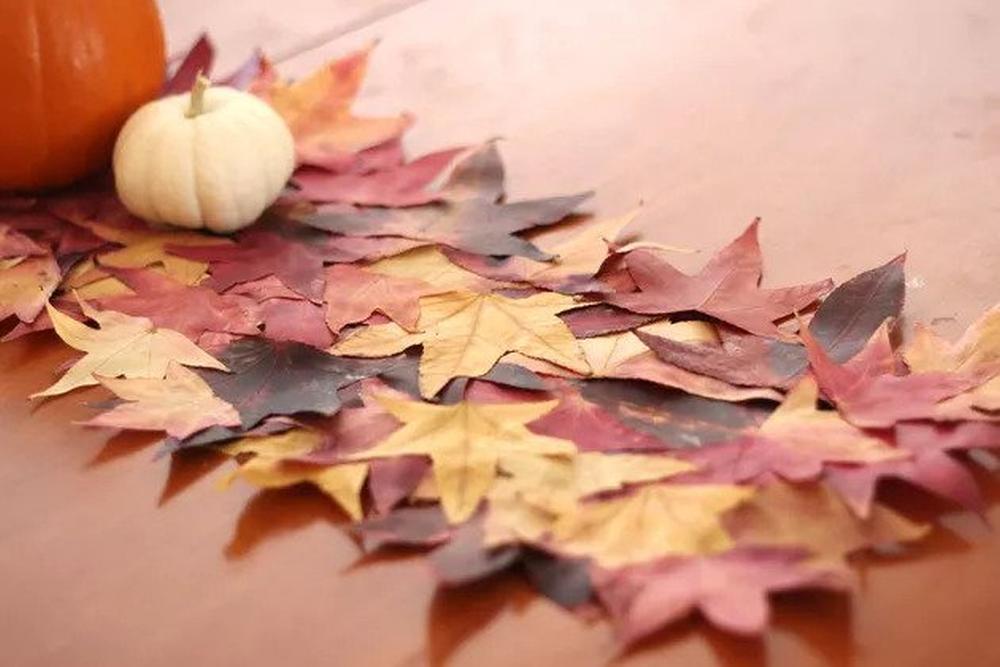
13. Fall Leaves Table Runner – DIY Thanksgiving Centerpieces
We believe this is one of the sweetest and easiest Thanksgiving table runner ideas you can find online! After all, who doesn’t like leaves? Their beauty cannot be compared to anything else in nature. And you can effortlessly turn a table runner into a DIY Thanksgiving centerpiece.
Let’s get started by gathering materials: fresh fall leaves (in different colors), scissors, double-sided tape or an adhesive that won’t damage the leaves, and a piece of cardboard (optional).
If you plan on making more than one centerpiece then it might come in handy if you prepped beforehand – just use whatever spray paint is capable of hiding your cardboard.
Start by laying down your used but clean leaves on a flat surface and trim off any dried-out pieces before proceeding. Next, use double-sided tape to attach the leaves to the cardboard so that they will look flawless and won’t fall off.
If you want to add some sparkle to your centerpiece, then write some inspirational words on the leaves using a silver or gold marker pen – it will be just as beautiful as the rest! And if you’re more into giving than receiving, this is one of those Thanksgiving ideas that can easily save you lots of money.
For more details, feel free to check out this excellent tutorial we found on eHow!
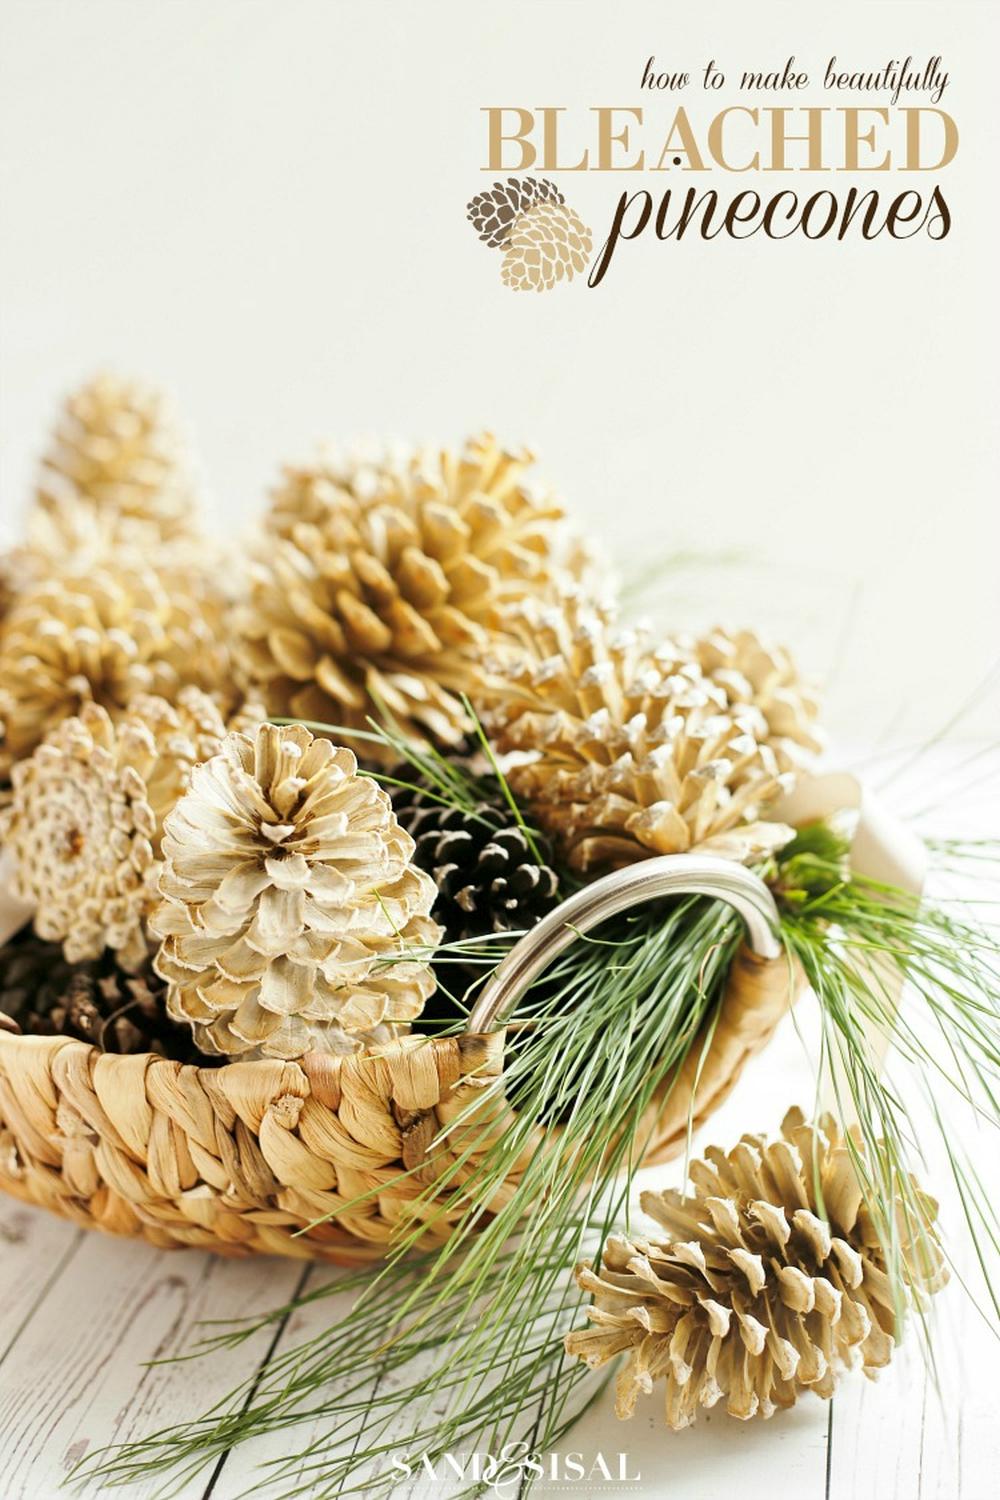
14. A Basket of Bleached Pinecones – Thanksgiving Centerpiece
This is a darling Thanksgiving centerpiece idea that your family and friends will surely love. After all, there is nothing like pine cones to adorn our home around the holiday. And you can use it not only for Thanksgiving but also for Christmas!
Not to mention that they are relatively easy to get your hands on – either collect them yourself or buy them from a local craft store (or even Amazon). Bleaching the pinecones will make their appearance more eye-catching and festive.
Although bleached pinecones look amazing when placed in plain wicker baskets, we think it would be extra cute if you spray-painted them gold – it goes perfectly with the traditional Thanksgiving color scheme.
After finishing with painting your basket, just add some white cotton for an elevated feel and arrange your freshly bleached pinecones on top of it.
Take a look at this fantastic tutorial we found on Sand and Sisal to learn more!
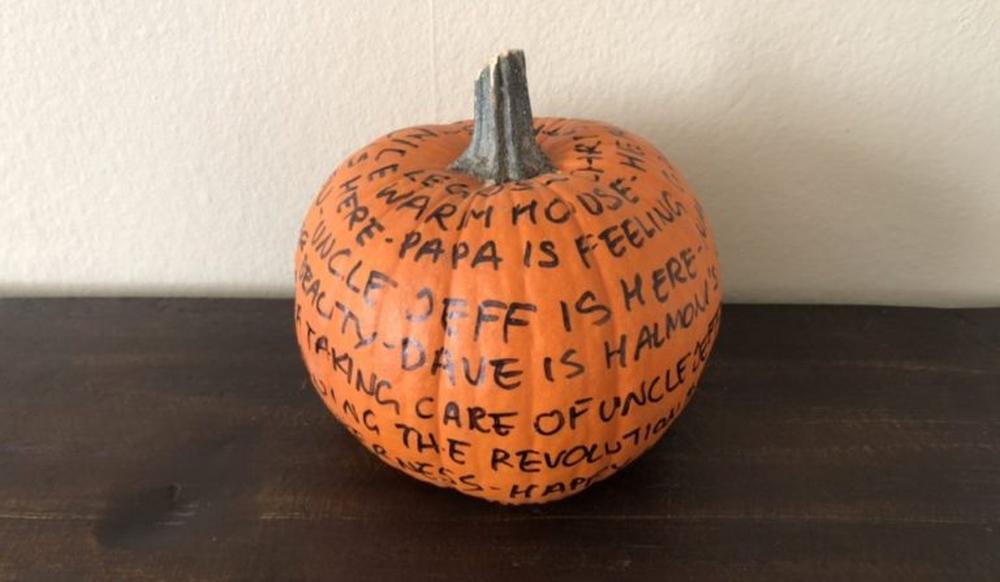
15. Gratitude Gourd – Thanksgiving Centerpiece Ideas
The Thanksgiving season is the time of year when giving thanks to everything that happened over the past year is more important than ever. So why try to reinvent the wheel?
Just grab a large pumpkin off your front porch steps, get a Sharpie marker, gather your friends and family around, and have them write the things they are grateful for.
It’s a simple and effective last-minute solution when it comes to Thanksgiving centerpieces. Plus, since everyone can chip it, it will make the centerpiece extra special!
Check out this brilliant tutorial we found on Eco-Friendly Mama to learn how to celebrate Thanksgiving with DIY gratitude gourd!
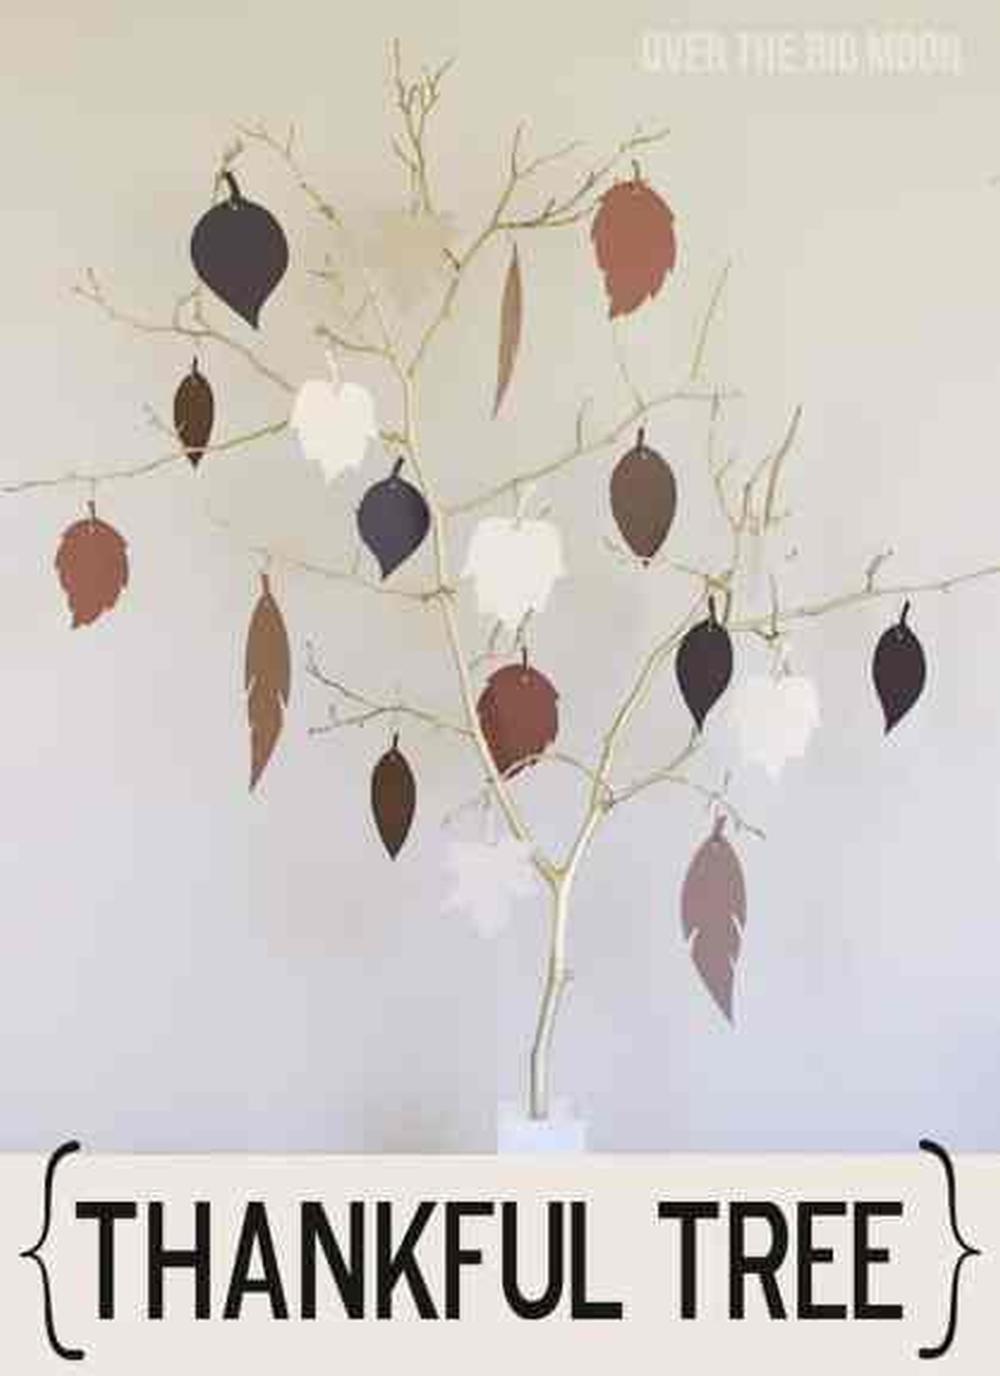
16. Thankful Tree – Thanksgiving Table Centerpieces
This gorgeous Thanksgiving table centerpiece idea is so easy to recreate that you may actually have more fun making it than decorating your home.
For this project, all you need are some branches of whatever tree you find most beautiful in the forest behind your house, gold spray paint, and a cute little cloth sack – it can be anything from burlap to velvet!
When creating the thankfulness tree design, all you have to do is tie one end of the sack with twine or yarn onto one of the branches. Then take a marker pen and start writing down what you are grateful for on paper leaves.
Arrange them around the tied bag. To create an even more enchanting feel, place votive candles inside lanterns throughout various spots of your backyard or inside your living room.
Not only will this project be a great way to express gratitude, but it’ll also fill the house with breathtaking scents of autumn!
If you have a cutting machine, you can use it to design the leaves with a more polished look, which works great with a classy Thanksgiving dinner. Find out more details in this tutorial made by Over the Big Moon!
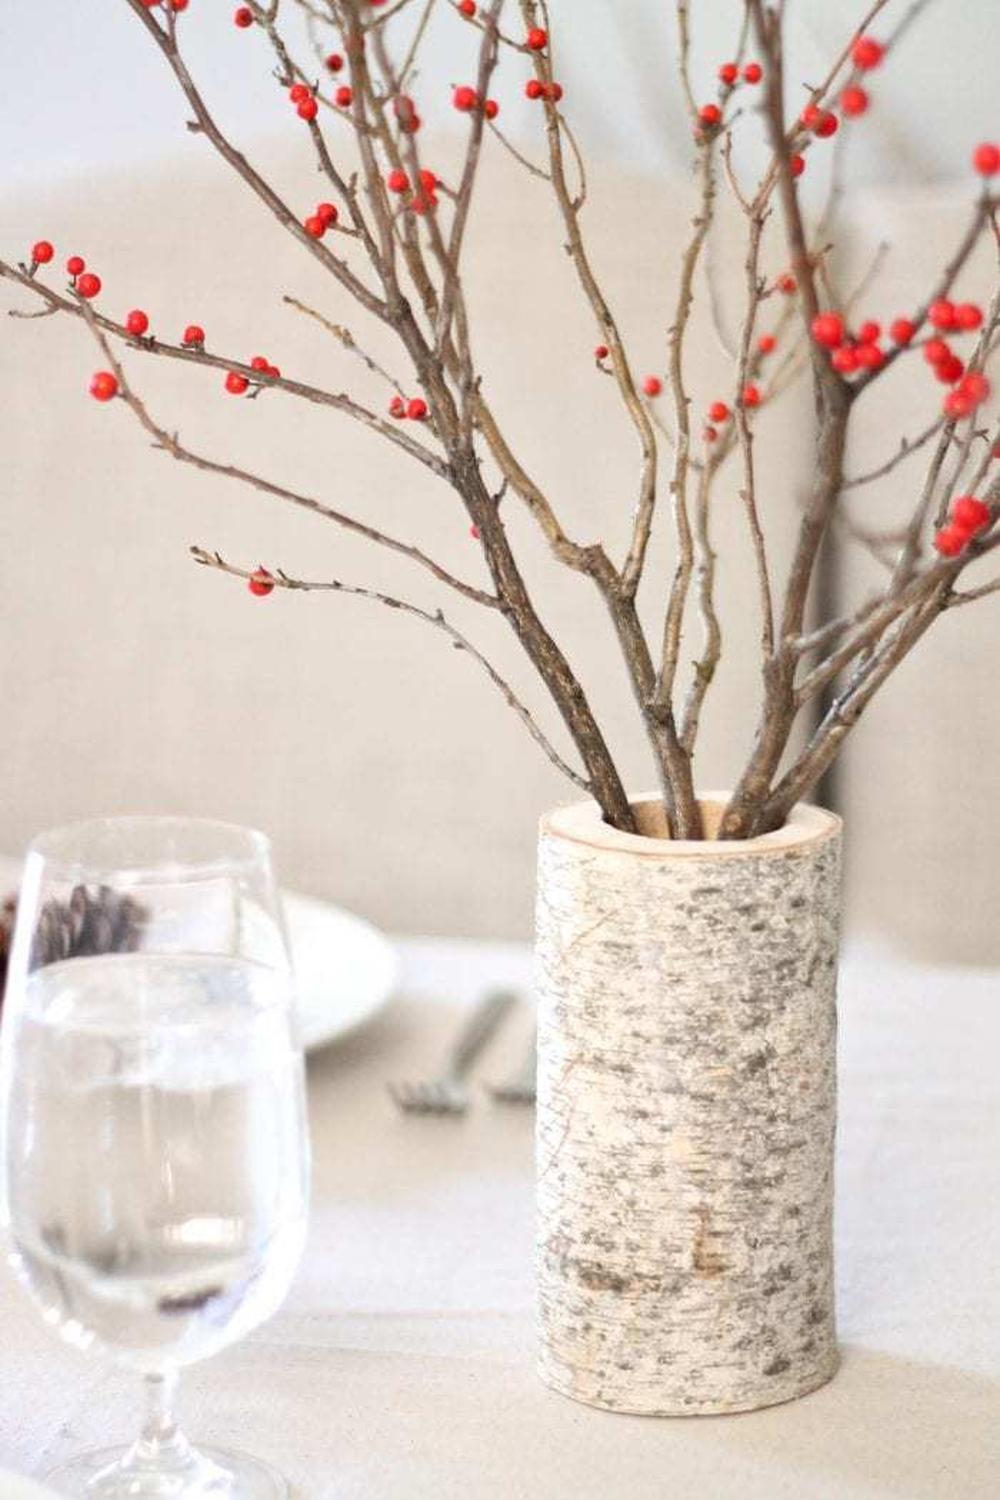
17. DIY Birch Vase – Unique Centerpieces
Don’t you just love the look of elegant birch vases? Not only do they perfectly match any decor, but also add a touch of freshness and natural beauty to any room.
That being said, it’s definitely worth taking some time to learn how to make one – not only for unique Thanksgiving centerpieces but basically for any other occasion. It will leave a strong impression on your friends and family!
All you have to do is take a log from your backyard or go outside and look for one that catches your fancy. Then grab a handsaw and cut two circles out of this wood piece – which will be the container’s base and lid.
Once you’ve done that, use sandpaper to smooth all the rough edges out. After you’ve finished working on the rough spots, go over them with a paintbrush to coat them in a thin layer of primer. When this dries out, use your favorite color and paint the bottom part of the container.
It’s time to move on to decorating! Just take some berry birch branches or artificial flowers or even real flowers (in case you want them to be extra-authentic) and place them inside.
Voila! You now know how to make unique Thanksgiving centerpieces that will definitely turn heads! Find out more details in Julie Blanner’s blog post!
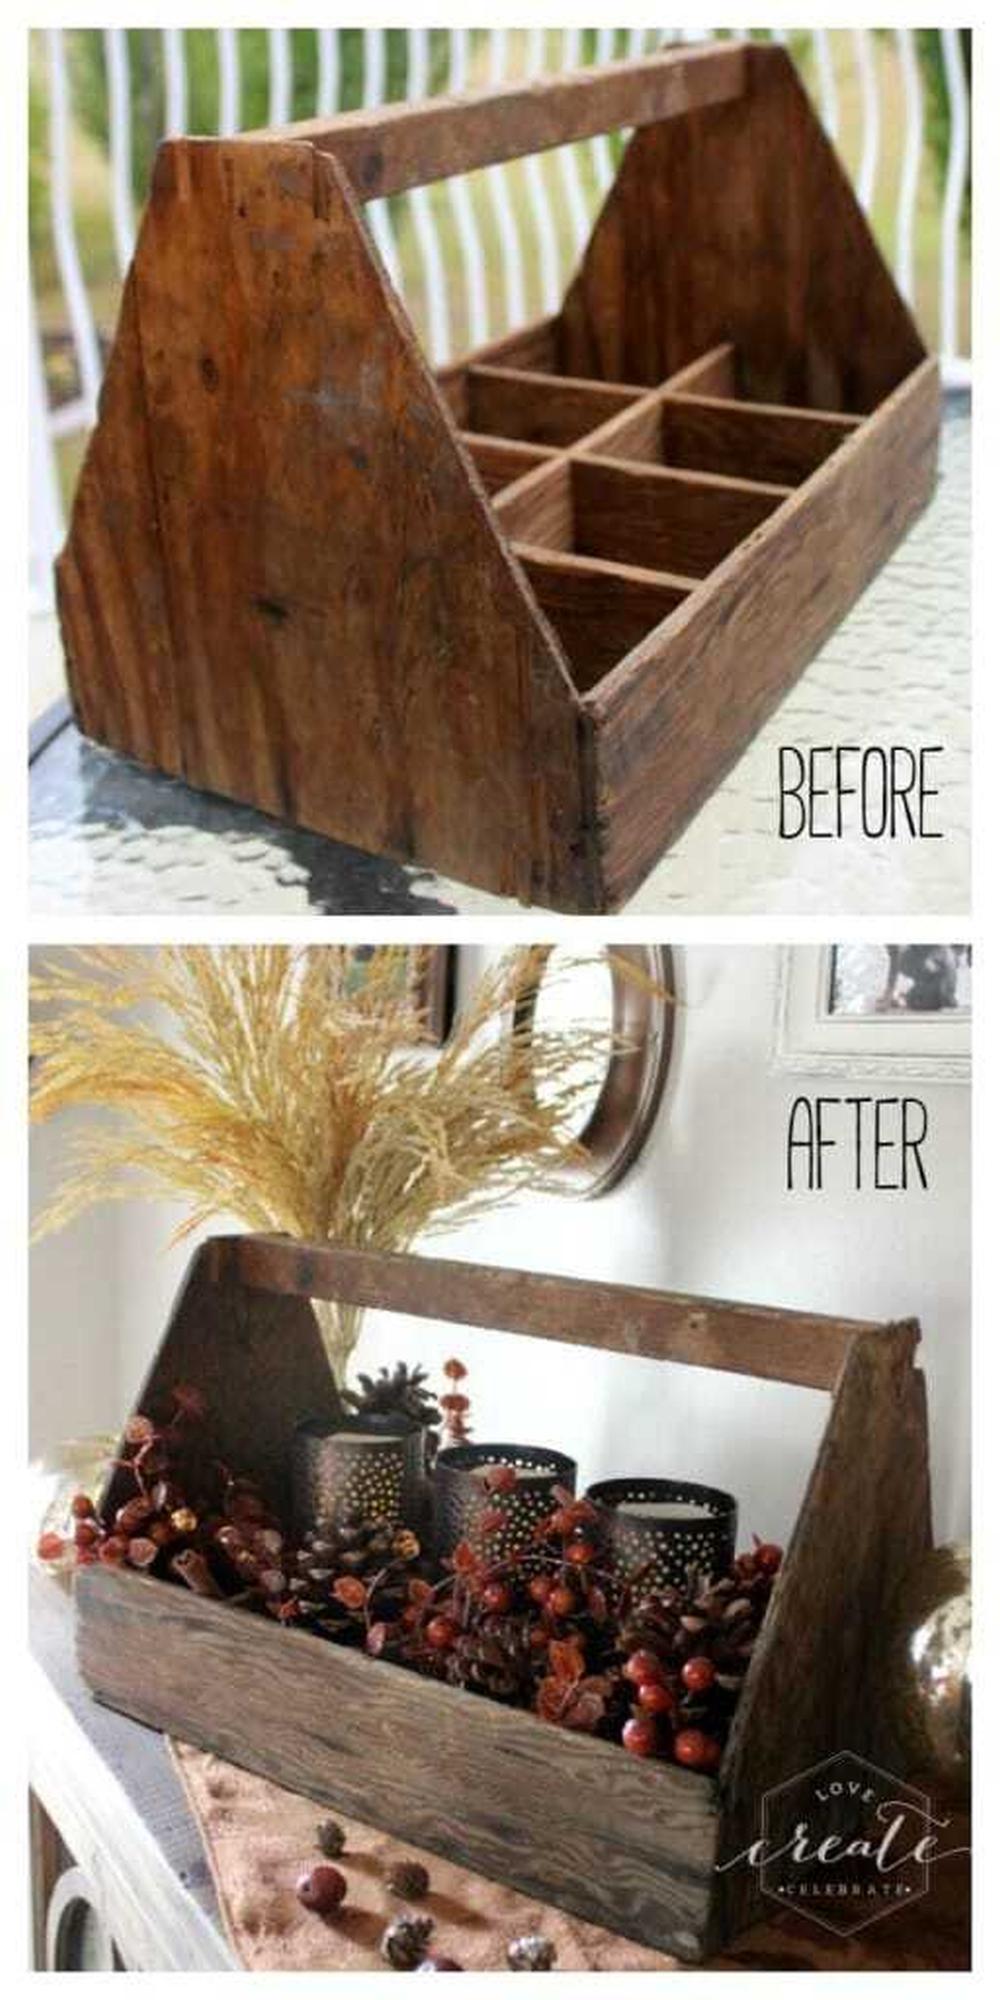
18. A Toolbox with Fall Foliage – DIY Thanksgiving Centerpieces
If you have an old toolbox lying around your house that you don’t need anymore, consider transforming it into a DIY Thanksgiving centerpiece! You can fill it with fall foliage to create an elegant look and place it in the middle of your table.
For this project, all you need is an old toolbox, some faux leaves, and a ribbon. Start by finding an old wooden toolbox to use as your container.
Then head outside and pick up some pretty autumn foliage to place inside – if you want to go the extra mile, spray paint these leaves gold beforehand!
When it comes down to decorating the box with ribbons and autumnal elements, feel free to improvise: add whatever color or pattern that compliments your personal style best!
If you’re open to buying faux fall foliage from the dollar store, check out this cool tutorial we found on Love Create Celebrate to learn more about putting together natural fall decor using an old toolbox!
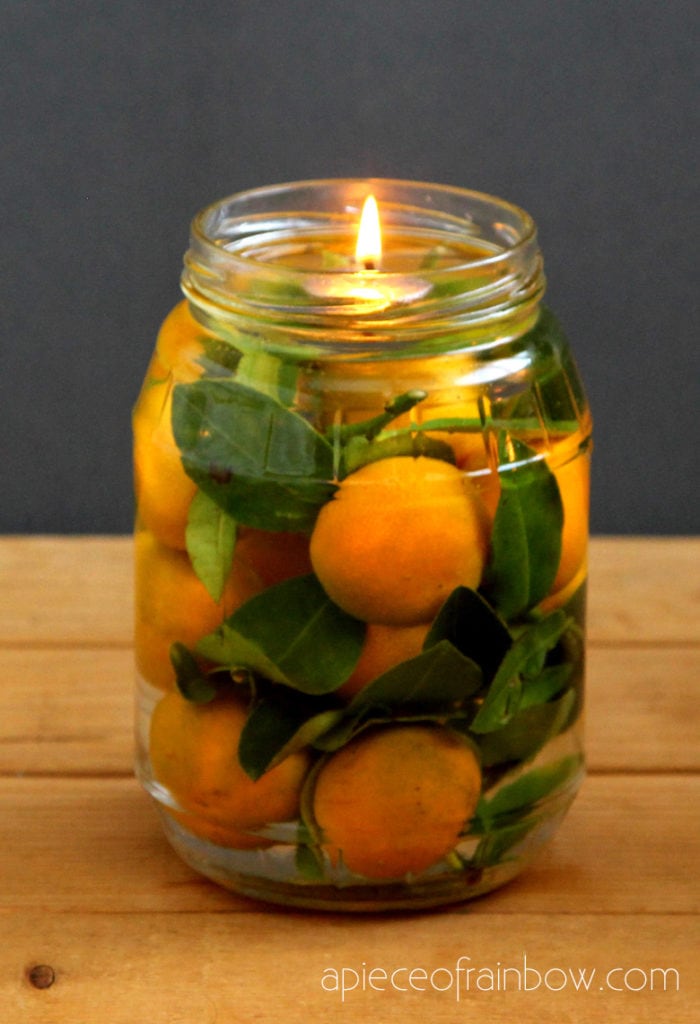
19. DIY Mason Jar Oil Lanterns – Thanksgiving Centerpiece
Transform mason jars into DIY lanterns to use as Thanksgiving centerpieces! It’s a unique way to light up your table and create a warm setting for your guests.
Plus, the best part is that these lamps are easy to make. You’ll need simple supplies like mason jars, vegetable oil, cotton wicks, and some twine or rope if you prefer not to use a lighter.
Fill up the base of your lamp with vegetable oil (make sure it doesn’t overflow) and attach a wick dipped in oil onto the inside of the jar lid before placing it on top of the jar’s opening. Then just tie everything together using twine or rope.
You can fill the mason jars with lemons, pinecones, fall leaves, berries, and other decorative elements that remind you of autumn. Discover the complete recipe in this awesome tutorial made by A Piece of Rainbow!
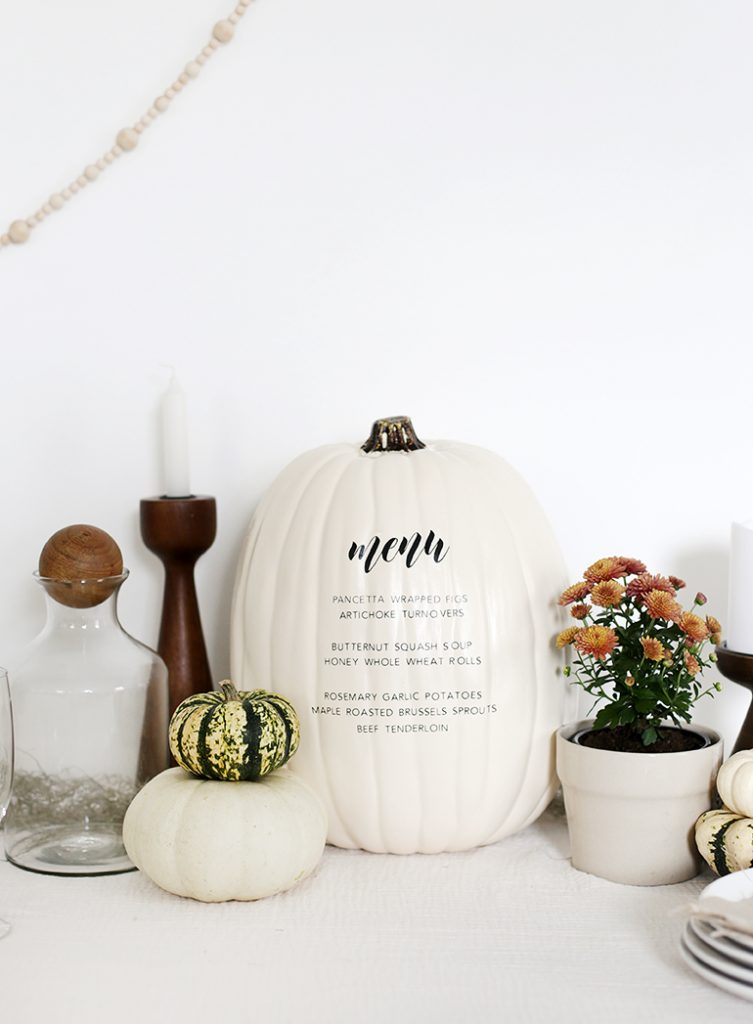
20. Menu Pumpkin – Thanksgiving Centerpiece Ideas
Transform a pumpkin into a gorgeous menu pumpkin to use as a Thanksgiving centerpiece! You can carve out an elegant message or create fun patterns with paint. It’s also a fun way to let your guests know what’s on the menu on Thanksgiving Day.
This project only requires a pumpkin, some craft supplies you probably already have at your house (like paint, markers, and thread), and some inspiration for design! Just make sure you clean the surface of the pumpkin before starting this DIY because it’s going to get messy!
When you’re ready to start decorating your pumpkin, take a pen and carefully trace out words or shapes that inspire you. Then add color using acrylic stainers or oil paints. And if you want to go the extra mile, choose glittery colors for a fancy effect.
If you’re hosting an elegant Thanksgiving party and have a cutting machine, get inspired by this fabulous tutorial we found on The Merry Thought!
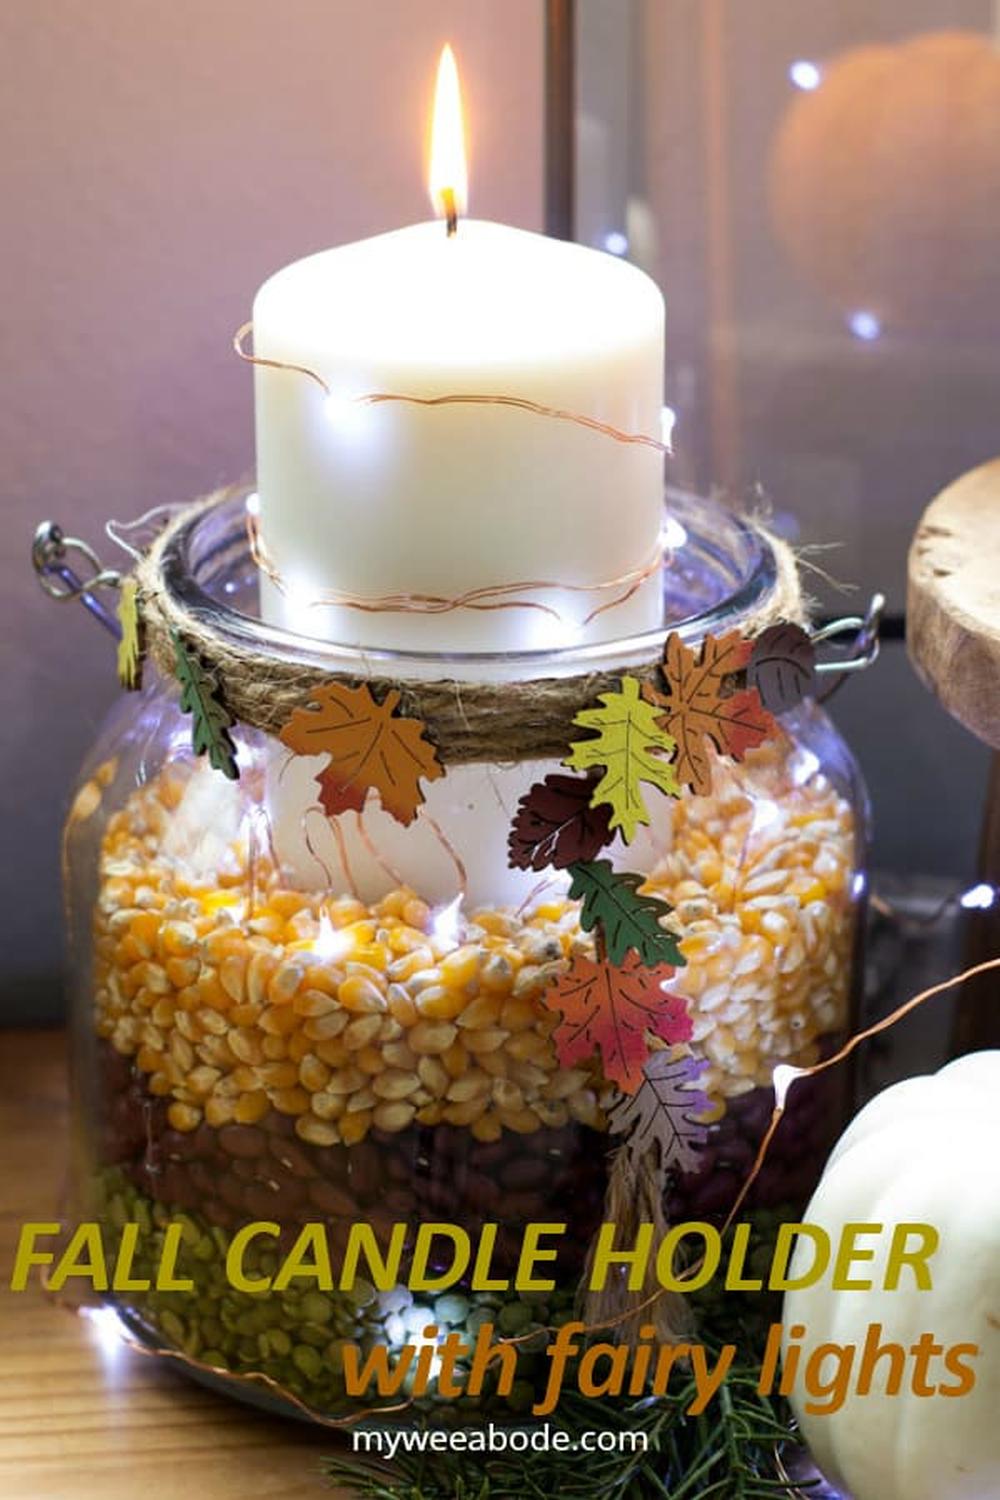
21. Fall Candle Holder with Fairy Lights – Thanksgiving Table Centerpieces
Transform a basic candle holder into a stunning Thanksgiving table centerpiece with candle holders and fairy lights! You can also use this idea to light up your Thanksgiving dinner table.
This project is super easy if you have a candle holder on hand, some fairy lights, and a drill! Just place the cylindrical part of the candle holder inside of a pitcher or vase that has an opening larger than its circumference. You can even use two different sized pitchers depending on how big or small your cylindrical piece is.
Then fill the space between both containers with soil and add some pretty foliage elements so they pop out from behind the glass. Finally, drape the fairy lights around the edge for some extra flair.
For more information, don’t hesitate to check out this tutorial made by My Wee Abode!
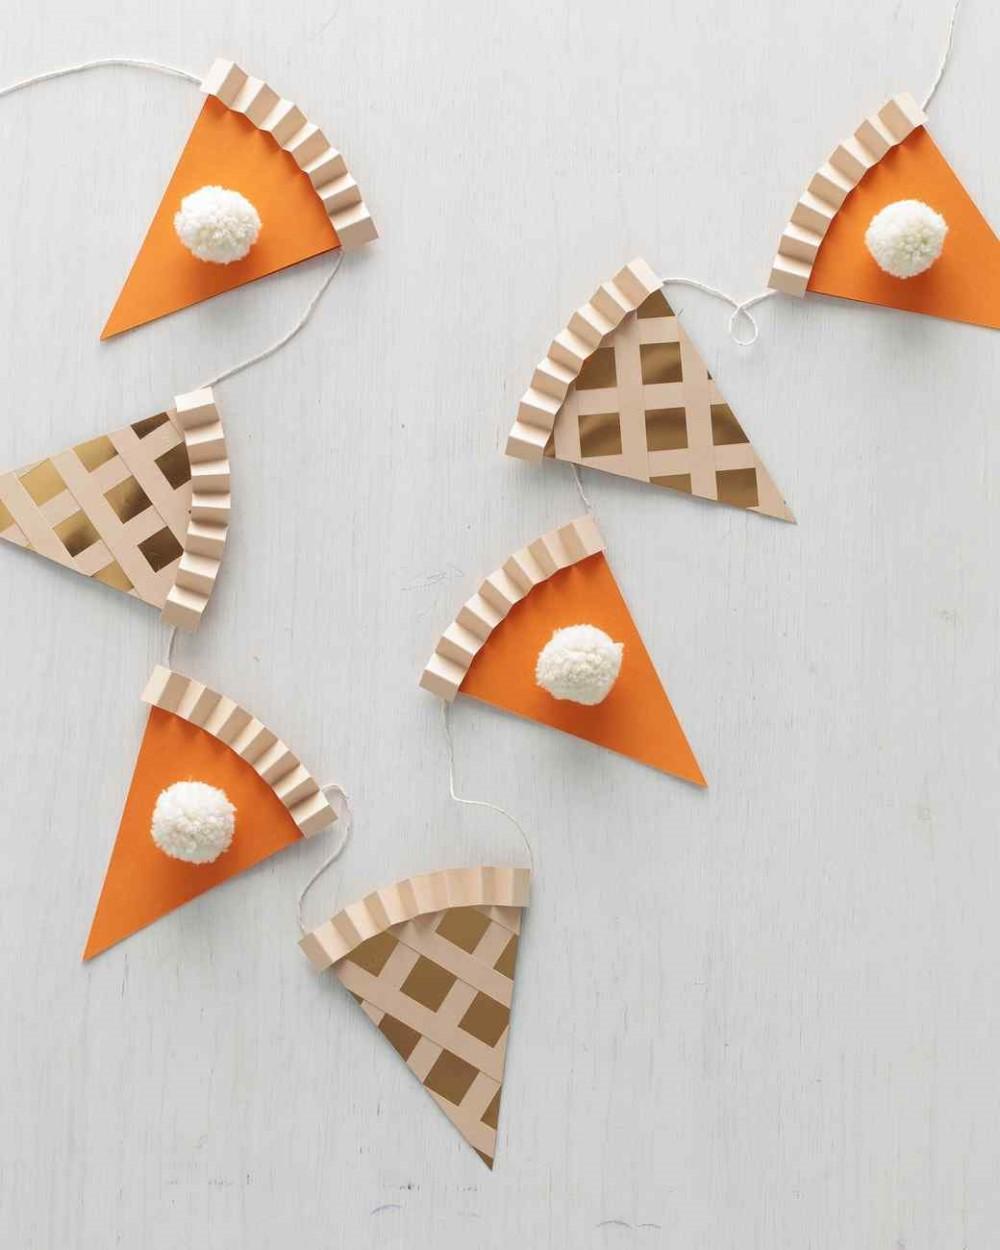
22. Thanksgiving Pie Garland – Unique Centerpieces
Create a pie garland for Thanksgiving unique centerpieces to add the essence of homemade pies at your dinner table! At least until the real pumpkin pie is ready!
This easy DIY is entirely made out of paper, and you could also throw in some white pom-poms to make several pie pieces stand out. So if you want to make your Thanksgiving table stand out, this is the way to go!
First, cut some plain colored cardstock in the shape of circles. Then slice each circle into four with a craft knife so that they resemble pie slices. Cut slits on one side of each slice and attach them together with paper straws for added stability.
Continue doing this until you have enough pieces to form a garland or at least enough to cover your centerpieces.
If you’re hoping to obtain a more polished look, then you need a cutting machine. And this tutorial we found on Martha Stewart’s website guides you every step of the way!
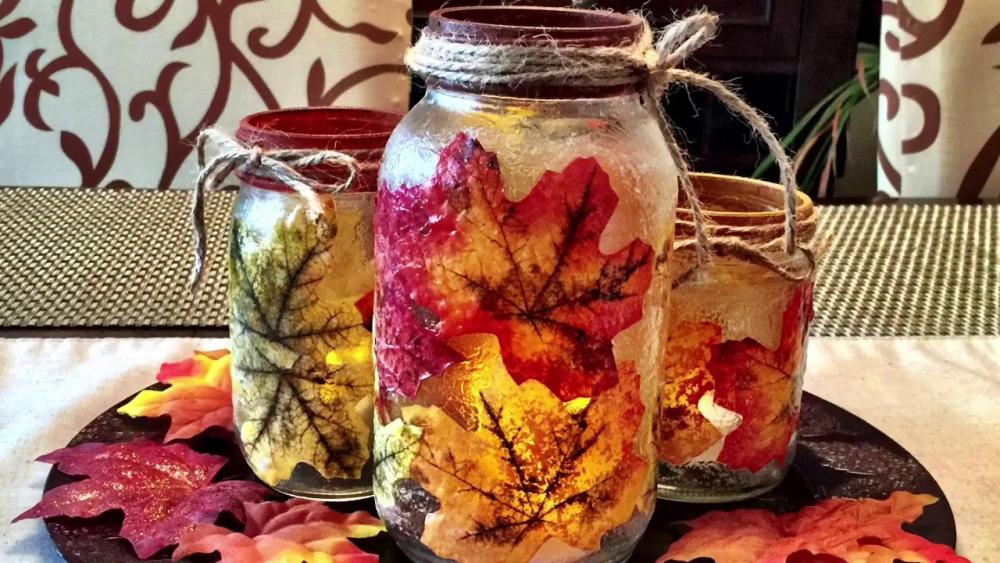
23. Mason Jars with Maple Leaves – DIY Thanksgiving Centerpieces
Transform mason jars into adorable Thanksgiving centerpieces with maple leaves! They’re easy to make, and they also have a rustic feel, so they can be effortlessly transformed into DIY Thanksgiving centerpieces.
This DIY is super simple as long as you have the right supplies on hand: watercolor paper, white paint, leaf stamps (or stencils if that’s easier), and rubber cement (for added stability).
First cut several pieces of watercolor paper in different shapes like circles or ovals. Then create some beautiful leaves using leaf stamps, stencils, and acrylic paints! While waiting for your paint to dry, adhere each leaf shape onto each circle piece using rubber cement.
Finally, attach a string and use it as a hanger so you can easily display these cute mini-centerpieces wherever you want. How easy was that?
If you’re looking for more information, we suggest watching this video tutorial by Mags Baylan on YouTube!
24. DIY Fall Magnolia Leaves -Thanksgiving Centerpiece
If you’re looking for a fancy Thanksgiving centerpiece idea, you can put together an elegant flower arrangement using magnolia leaves! You can use these DIY decorations for Thanksgiving centerpieces because they’re very easy to make.
As far as materials go, you will need magnolia leaves, a vase full of stones, and a glue gun. Start by placing your magnolia leaves inside the vase so you can determine how many you will need to fill it up until it looks sufficiently full.
Then glue each leaf alongside each other until your design is complete! This plant has such lovely colors, and the best part about it is that you don’t have to water them much because their leaves are naturally resistant to combat environmental stressors. And they grow fast, too!
To learn more about this classy project, we suggest going over Home Talk‘s tutorial.
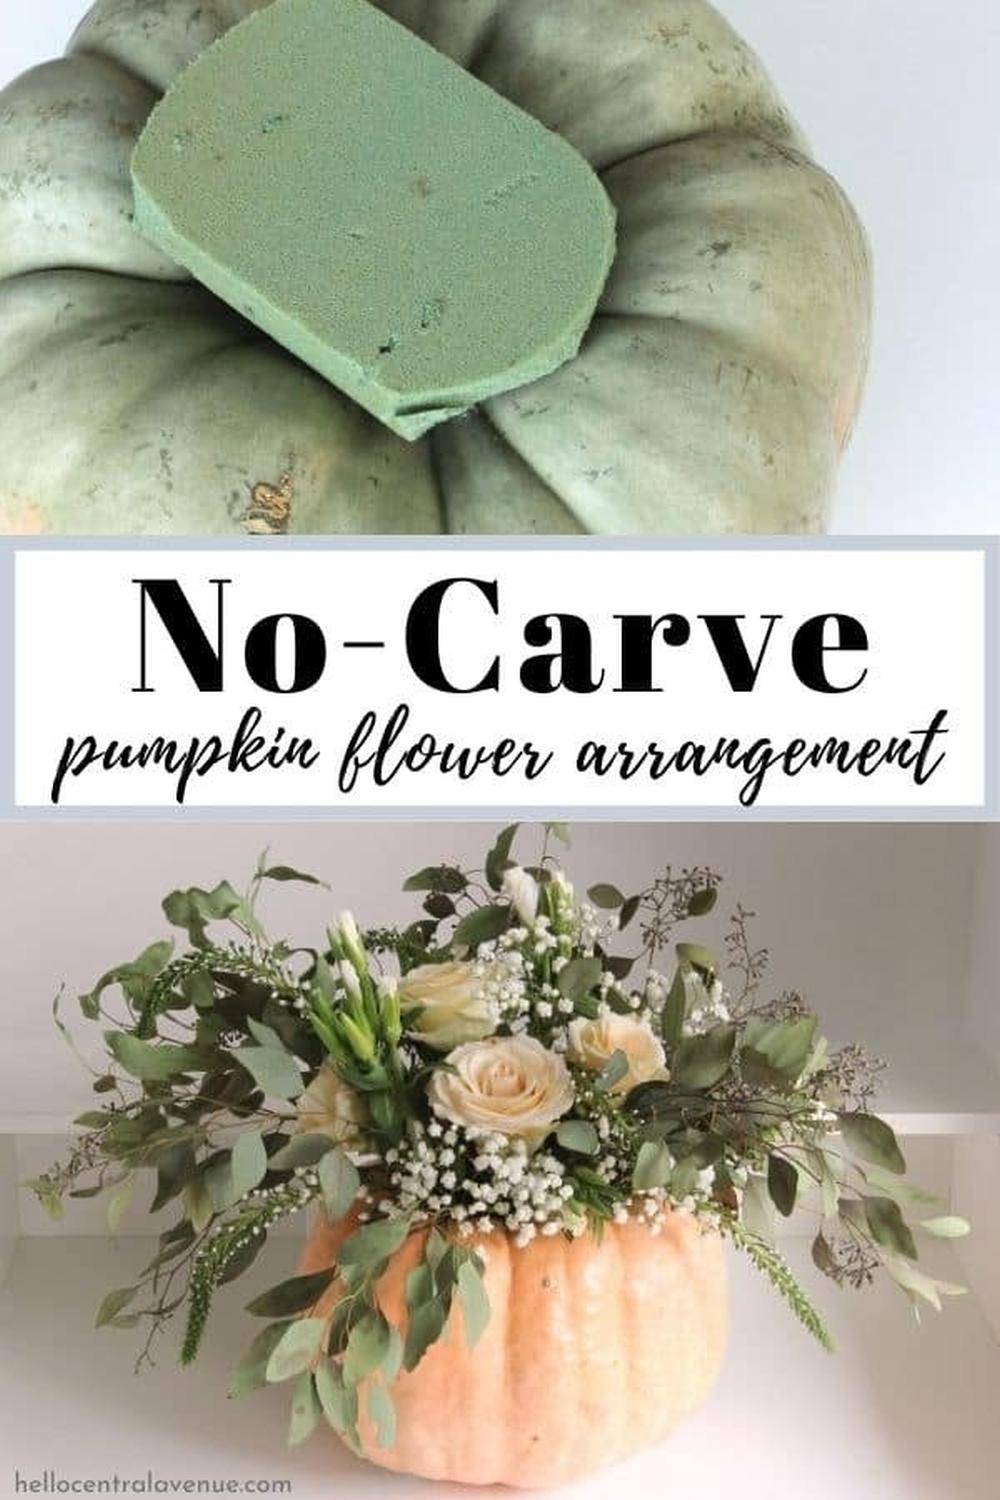
25. Pumpkin Flower Arrangement – Thanksgiving Centerpiece Ideas
Pumpkins aren’t just for carving and pie-making. They can also be used to make beautiful Thanksgiving centerpieces! These are so easy to make, you can easily recreate them at home.
Hello Central Avenue has an excellent tutorial on how to make a pumpkin flower arrangement by carving and not carving the pumpkin. For the carving method, you will need a pumpkin, florist foam (like blocks and cylinders), three coordinating flowers, a sharp knife, a pair of scissors, and two filler stems.
The instructions are straightforward, so you don’t have to worry about making any mistakes. It is important to note that the flowers they’re using in the tutorial are real. However, if you want your arrangement to last several days or weeks, then use fake ones instead.
The most time-consuming part of this project is carving the pumpkin (which shouldn’t take more than 20 minutes), and you can easily outsource this task to someone else if you can’t do it yourself. You don’t have to worry about getting cut since the pumpkin is already scooped out anyway!
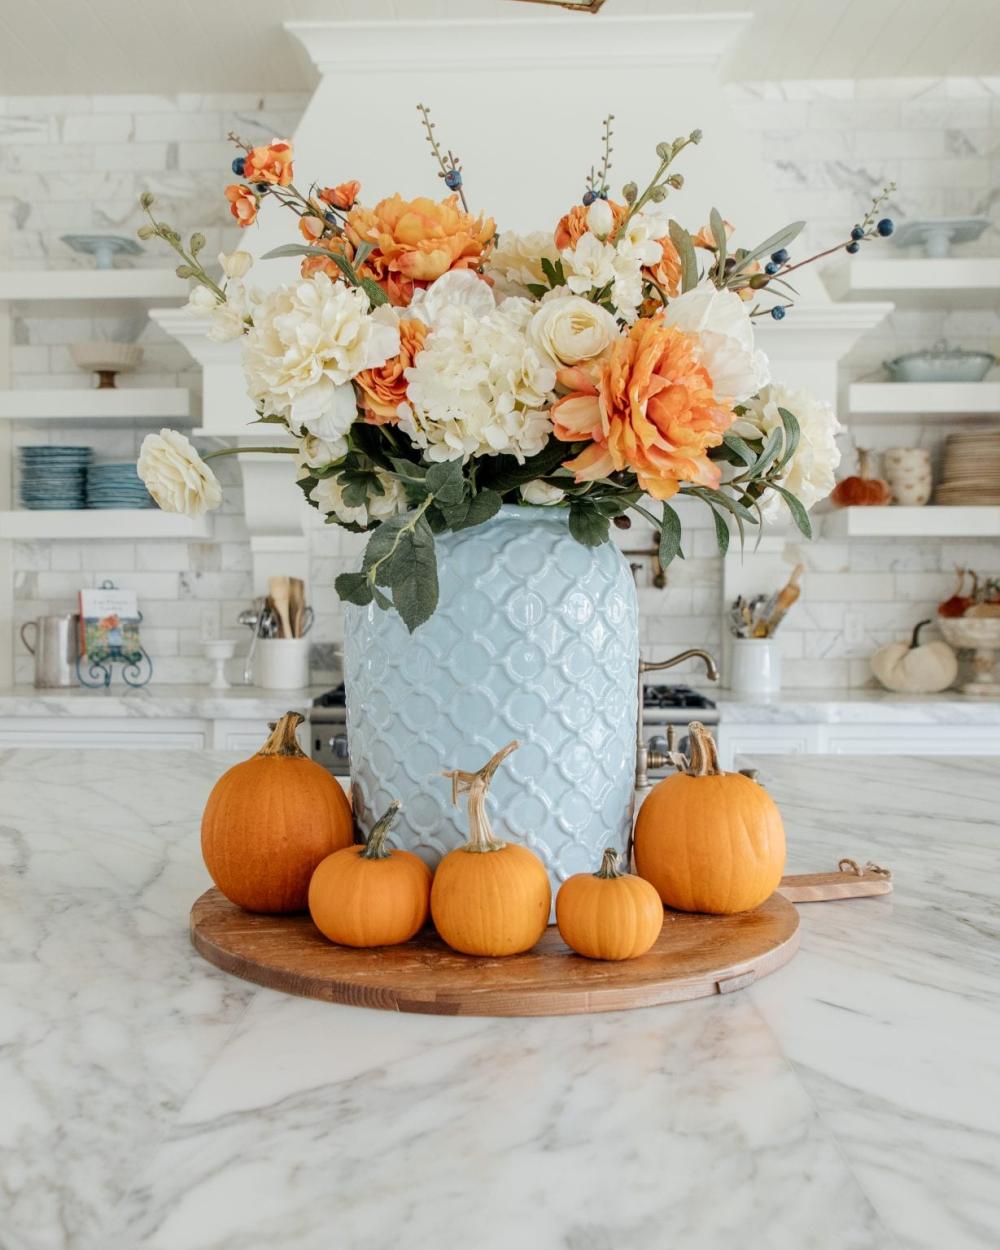
26. Blue and Orange Floral Arrangement – Thanksgiving Table Centerpieces
Looking for Thanksgiving table centerpieces that are colorful and festive? Try this blue and orange floral arrangement idea.
This is an easy way to highlight your autumn decor because you can just pick up some flowers at the local flower shop, assemble them at home, place them in jars or vases of your choice, and voila! You have a beautiful Thanksgiving centerpiece!
To keep costs low, save the recycled glass bottles with spouts so that you can use them as containers for your homemade decoration later on. All you need to do is fill each container with water and add several stems of different colors. Then, once everything’s ready, it’s best to display them right away before they start to wilt.
For more inspiration, check out this blue and orange DIY fall centerpiece idea we found on Home with Holly J!
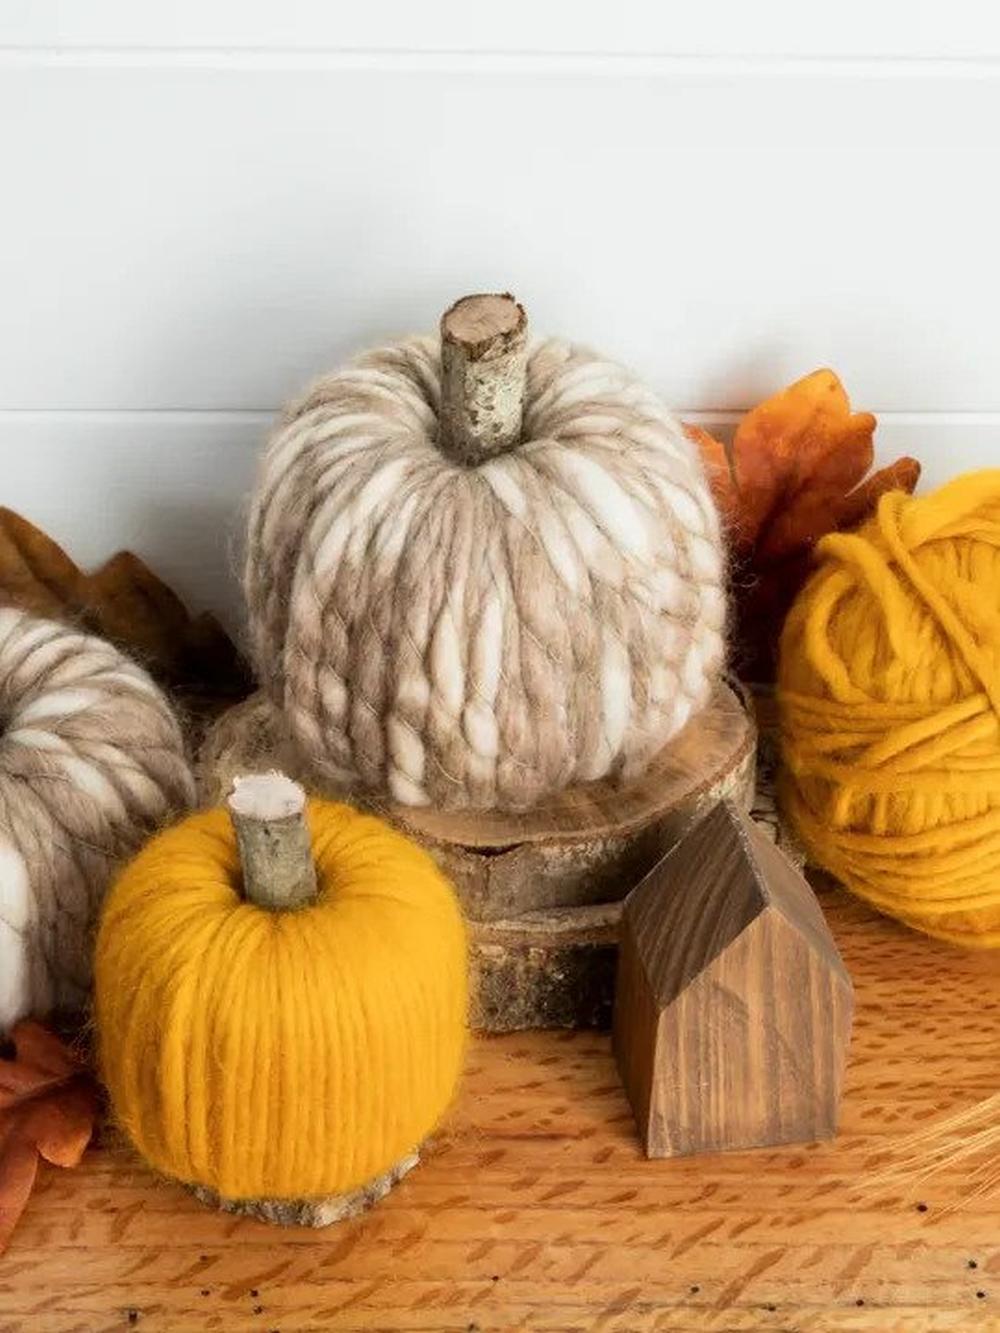
27. DIY Yarn Pumpkins – Thanksgiving Centerpiece
If you’re a big fan of yarns and don’t mind putting in the time and effort, then we have just the DIY project for you to design a beautiful Thanksgiving centerpiece – yarn pumpkins!
Wrapping all those tiny pumpkin parts with yarn may seem like a difficult task at first. But once you start doing it, it will become easier. You can make this as your family’s Thanksgiving activity or spend some time crafting before the main event.
To simplify things, divide up your work because covering each part with yarn takes a lot of time and patience. So before wrapping everything up, prepare several bowls to hold different colors of yarn balls and use rubber bands to separate them into smaller groups. This way, you won’t get confused when picking up the right color.
Start with the stem and work on it first so that you can use it as a guide for placing your knots and weaving in your yarn ends. Afterward, move on to the pumpkin caps and continue until your yarn pumpkins are finished!
You can also check out this tutorial by Olivia OHern if you need more help making these adorable DIY Thanksgiving centerpieces.
28. Pilgrim Hat Centerpiece – Thanksgiving Centerpiece Ideas
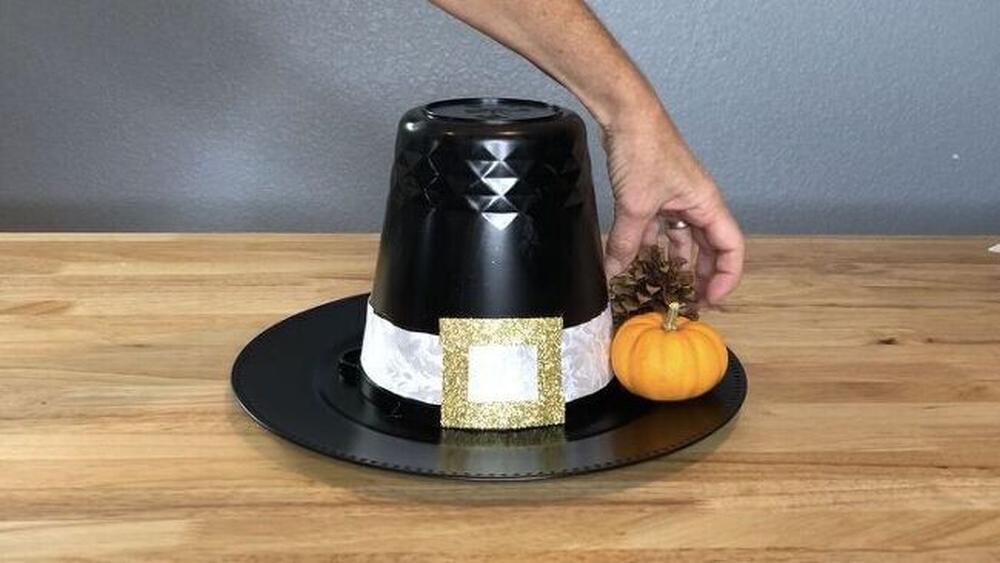
What you need is metallic spray paint, cardstock or poster board cut to the size of your ice bucket lid, pencils, markers, or crayons, scissors, glue sticks or double-sided tape, and empty cardboard egg cartons.
Use this as your template first before drawing on it with your crayons or markers then cut out the shape. You can stick it inside the lid of your ice bucket so that you won’t have any problem tracing its outline later on. Afterward, trace another circle a little smaller than the previous one and cut this out as well.
Lay a sheet of silver star foil over the bigger circle then use a pin to make holes all around it. Place your charger upside down on top of this to create an outline for your pattern. Once you’re happy with how everything looks, carefully lift up the foil and transfer its pattern onto the ice bucket lid using a pencil.
Afterward, spray paint everything black then let it dry before carefully peeling off your foil stencil from the surface. As for the handle, you can either leave it as is or cover it up with some ribbon to match your other decorations.
If you’re looking for an alternative way to create a festive pilgrim hat for Thanksgiving, check out HomeTalk‘s full DIY tutorial!
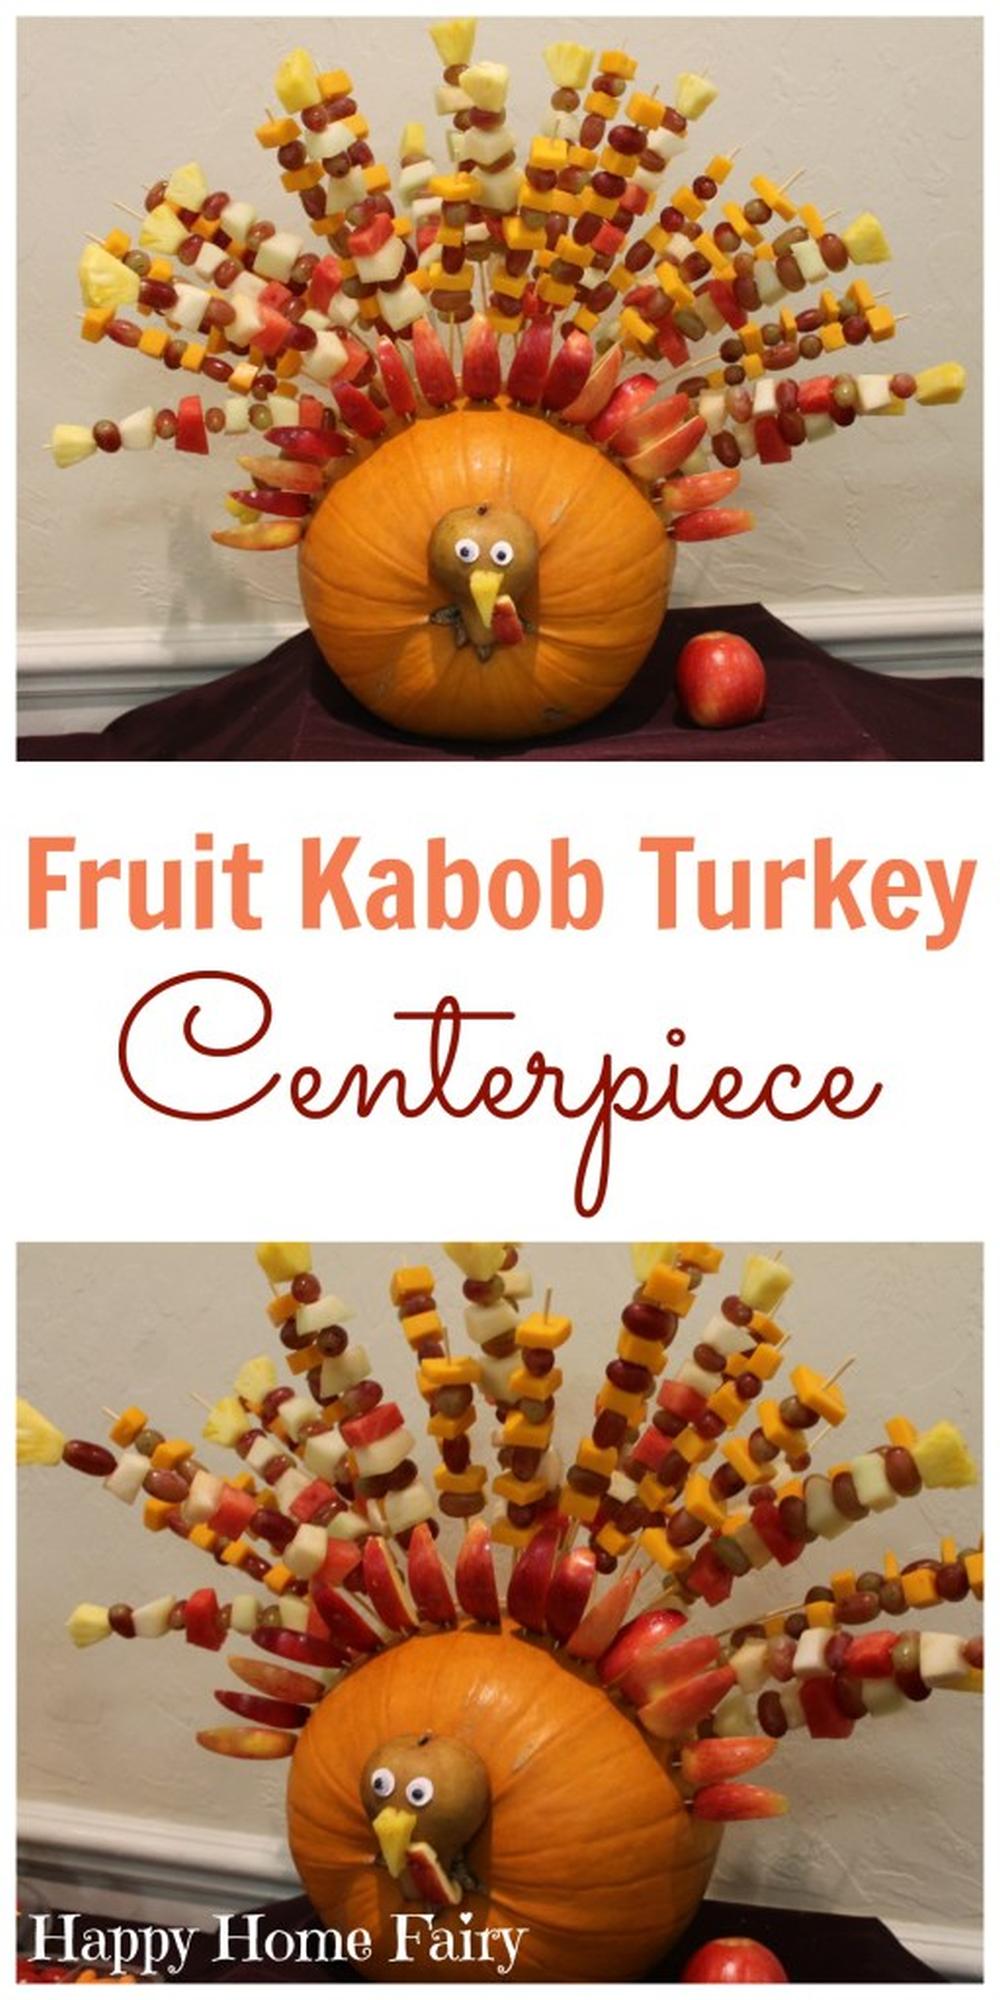
29. Fruit Kabob Turkey – Thanksgiving Table Centerpieces
If you’re looking for a creative Thanksgiving table centerpiece idea that’s also edible, you should make a fruit kabob turkey from scratch. It will delight your guests and keep them entertained until the real turkey is ready.
To make this, grab a grapefruit, watermelon, pineapple, and apples, and set them aside. Cut out two small turkey shapes from cardstock paper then trace them on top of your apples before cutting them out with scissors. To give each one dimension, cut partway along its outline and then fold up one side to create a 3D effect when attached to the skewer.
Afterward, add googly eyes and orange feet to your turkey figures then attach these to the sticks using glue dots or double-sided tape. Arrange everything on a platter then insert skewers on each piece of fruit.
For those who’d like a simpler version, just skip the large turkey figures and use toothpicks to attach your fruit kabobs together instead! They’re equally cute and festive for this time of year – without all the extra fuss.
For more details, check out this stunning tutorial we found on Happy Home Fairy!
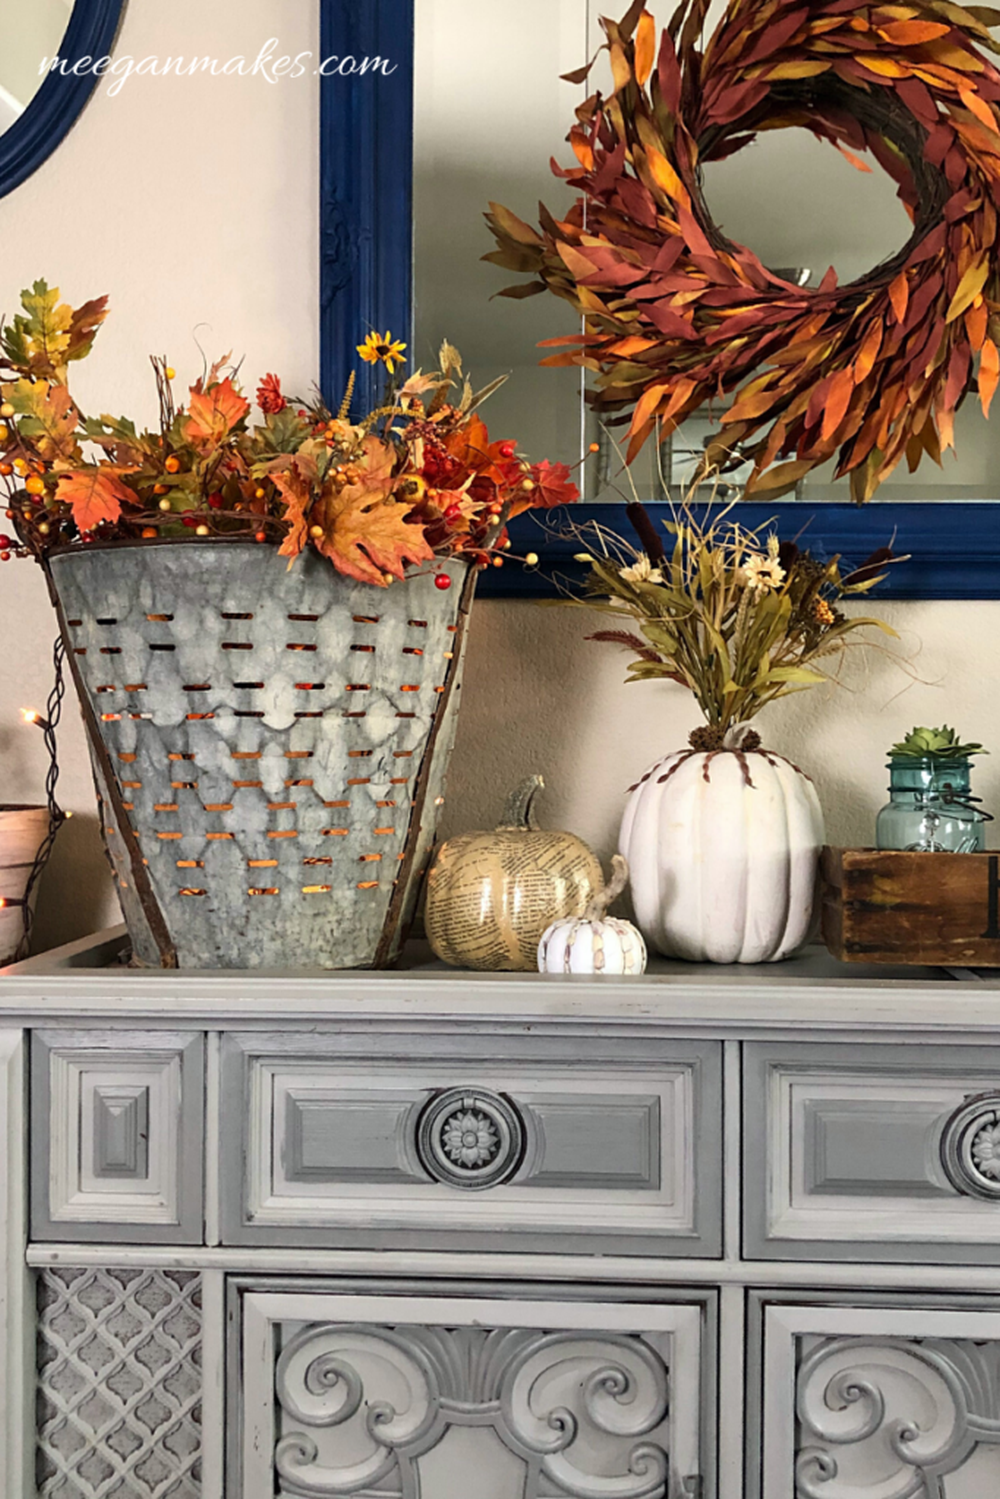
30. Fall Olive Bucket – Unique Centerpieces
If you are interested in unique centerpieces for Thanksgiving, bring home an olive bucket and transform it into the perfect focal point of your dining table! This
What you need is metallic spray paint, faux grapevine (found in craft stores), silk leaves and berries (optional), wire mesh or chicken wire cut to the size of your olive bucket lid, scissors, wire clothes hanger or clothespin, and hot glue gun and sticks.
Metallic spray paint everything silver first then let it dry overnight before attaching the faux vine all around it. Assemble everything else by fastening them with hot glue then allow some time to pass before using this as a table centerpiece for your Thanksgiving dinner.
You can also take a look over this amazing tutorial we discovered at Meegan Makes.
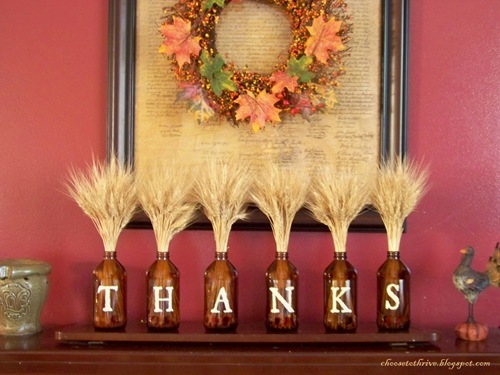
31. Thankful Jars with Wheat Bundles – DIY Thanksgiving Centerpieces
Need cute DIY Thanksgiving centerpieces that are easy to make? Start with these thankful jars! They’re inexpensive to craft and even easier to display, making them a wonderful centerpiece for people of all ages!
What you need are clean mason jars, wheat stems, watercolor paints or acrylics, permanent marker or paint pens in various colors, small pumpkins (optional), a glue gun, and sticks.
Start by painting the mouths of your mason jars with watercolors. Let it dry before drawing on details like leaves, vines, and berries. Afterward, draw your designs on paper to get a better idea of where exactly they should go before actually transferring them to your jar.
Once everything’s ready, attach your wheat bundles by twirling them around the base of pumpkins and then wrapping them around the jar mouths. Secure everything with hot glue, thus finishing up your thankful jars for Thanksgiving!
If you’re looking for a simpler variant to thankful jars with wheat bundles, we suggest checking out this tutorial at Choose to Thrive.
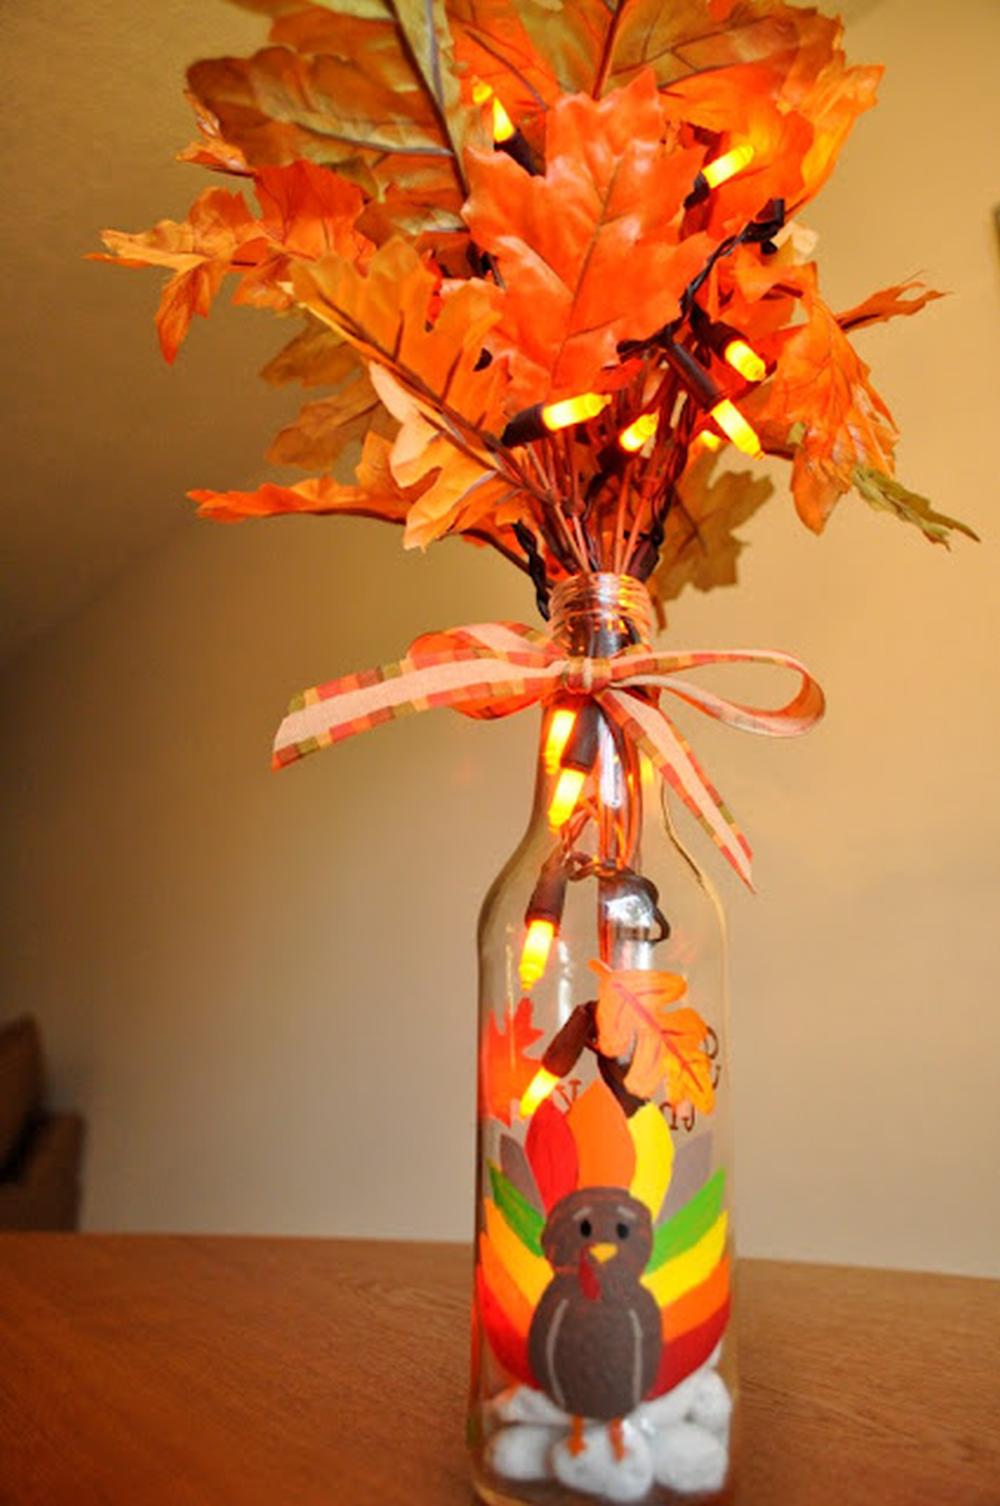
32. Colorful Turkey Wine Bottle – Thanksgiving Centerpiece
Glass wine bottles make perfect Thanksgiving centerpieces for the most thankful day of the year! Decorate them with feathers, leaves, and flowers to transform them into gorgeous pieces. They also make excellent gifts if you’re visiting someone who is hosting Thanksgiving dinner.
What you need is glass paint in multiple colors, a paintbrush, a ribbon, mini orange lights, a clear wine glass bottle, a faux floral arrangement with pumpkins and berries, and white rocks.
This project requires you to put your painting skills to the test, so be sure to experiment with a piece of paper if you’re not confident about how the turkey will look on the bottle.
For a complete tutorial, be sure to review this fabulous tutorial we discovered at Share Creativity!
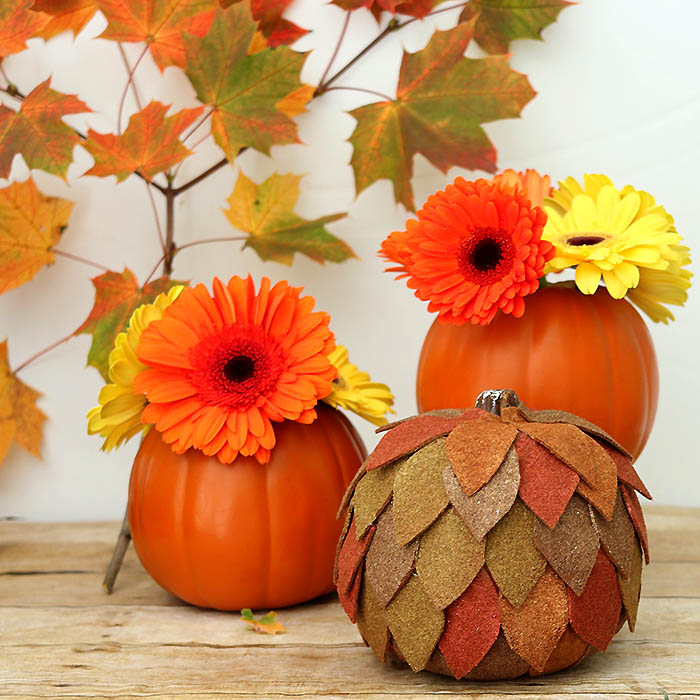
33. Layered Felt Pumpkin – Thanksgiving Centerpiece Ideas
It’s Thanksgiving and that means it’s time to bring out the pumpkins – but this year instead of carving them, try decorating them with felt. It’s an authentic Thanksgiving centerpiece idea that everyone will love!
What you need are different shades of green and orange felt (including light and dark colors), an artificial pumpkin, a white marker or pen, scissors, glue gun and sticks, and buttons (optional).
Simply cut the felt into the shape of leaves and use the glue gun to attach them to the artificial pumpkin, starting at the bottom and working your way to the top. Feel free to add some buttons if you want a little more detail! For a final touch, you can write Happy Thanksgiving on your pumpkin with a white marker or pen.
For more inspiration, check out this stunning tutorial by Gina Michele!
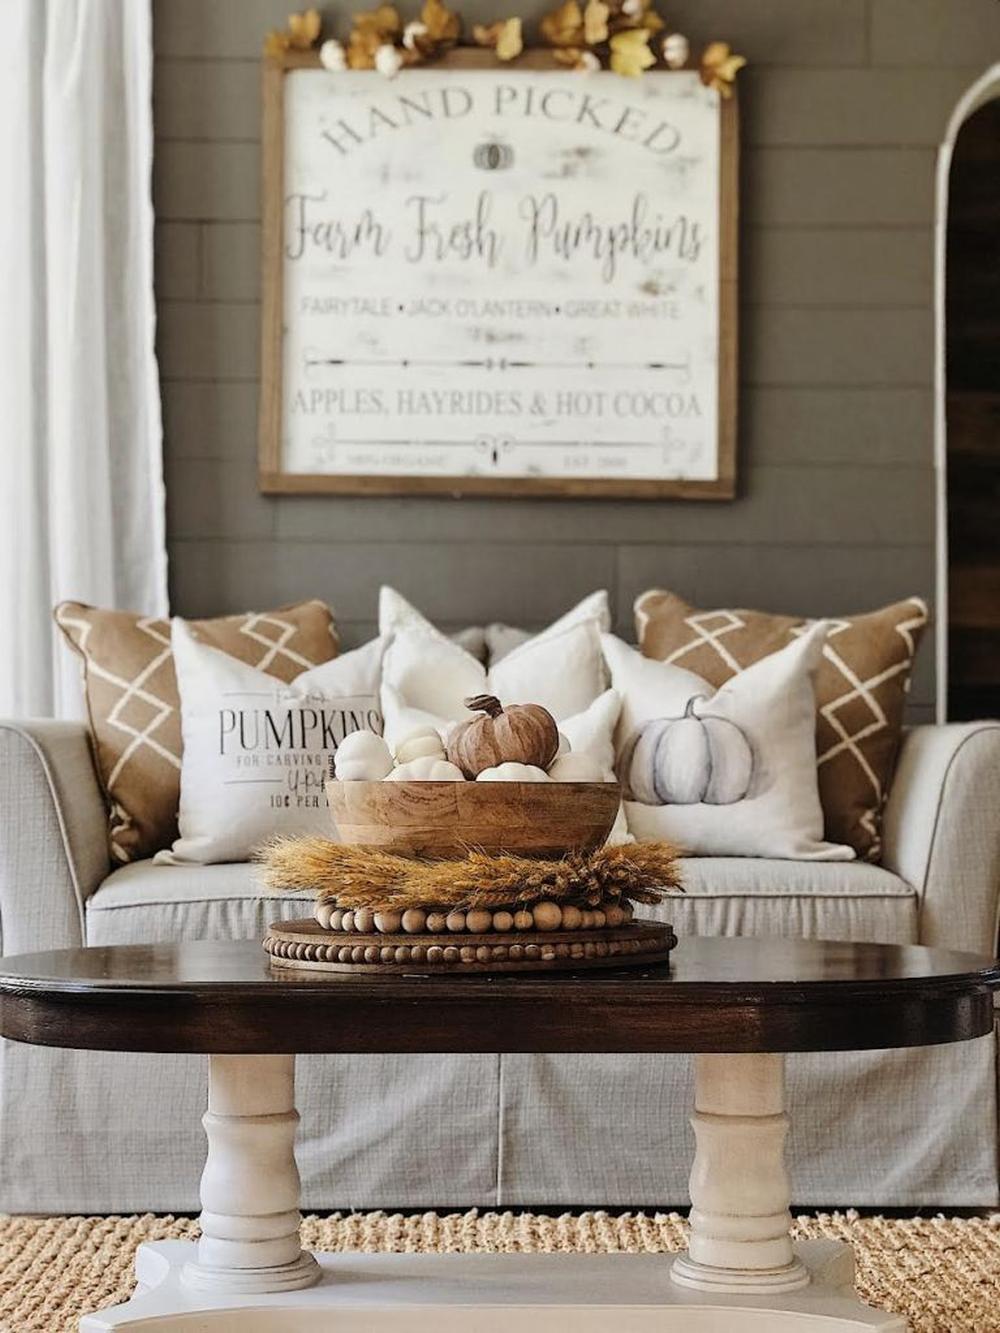
34. Beaded Tray with a Wheat Wreath and a Bowl of Mini Pumpkins – Thanksgiving Table Centerpieces
A beaded tray can make for an elegant Thanksgiving table centerpiece, especially when you place a wheat wreath on top of it and add a wooden bowl with mini white pumpkins. This particular one is surprisingly easy to complete and results in a charming display.
You should be able to find a beaded tray in stores. Otherwise, you can use a simple wooden tray and attach wooden beads around it using a hot glue gun. Just make sure to evenly distribute the beads or the results will not be as classy.
Next, get a wheat wreath the size of the tray and place it on top. After this step, get a wooden bowl that’s slightly smaller than the wreath. Its color and texture should match the breaded tray. And, for the final touch, insert a few white mini pumpkins into the bowl. Your centerpiece is now ready!
It’s not our idea, though. We found this fabulous tutorial at Jannelle Trinette, so be sure to check it out!
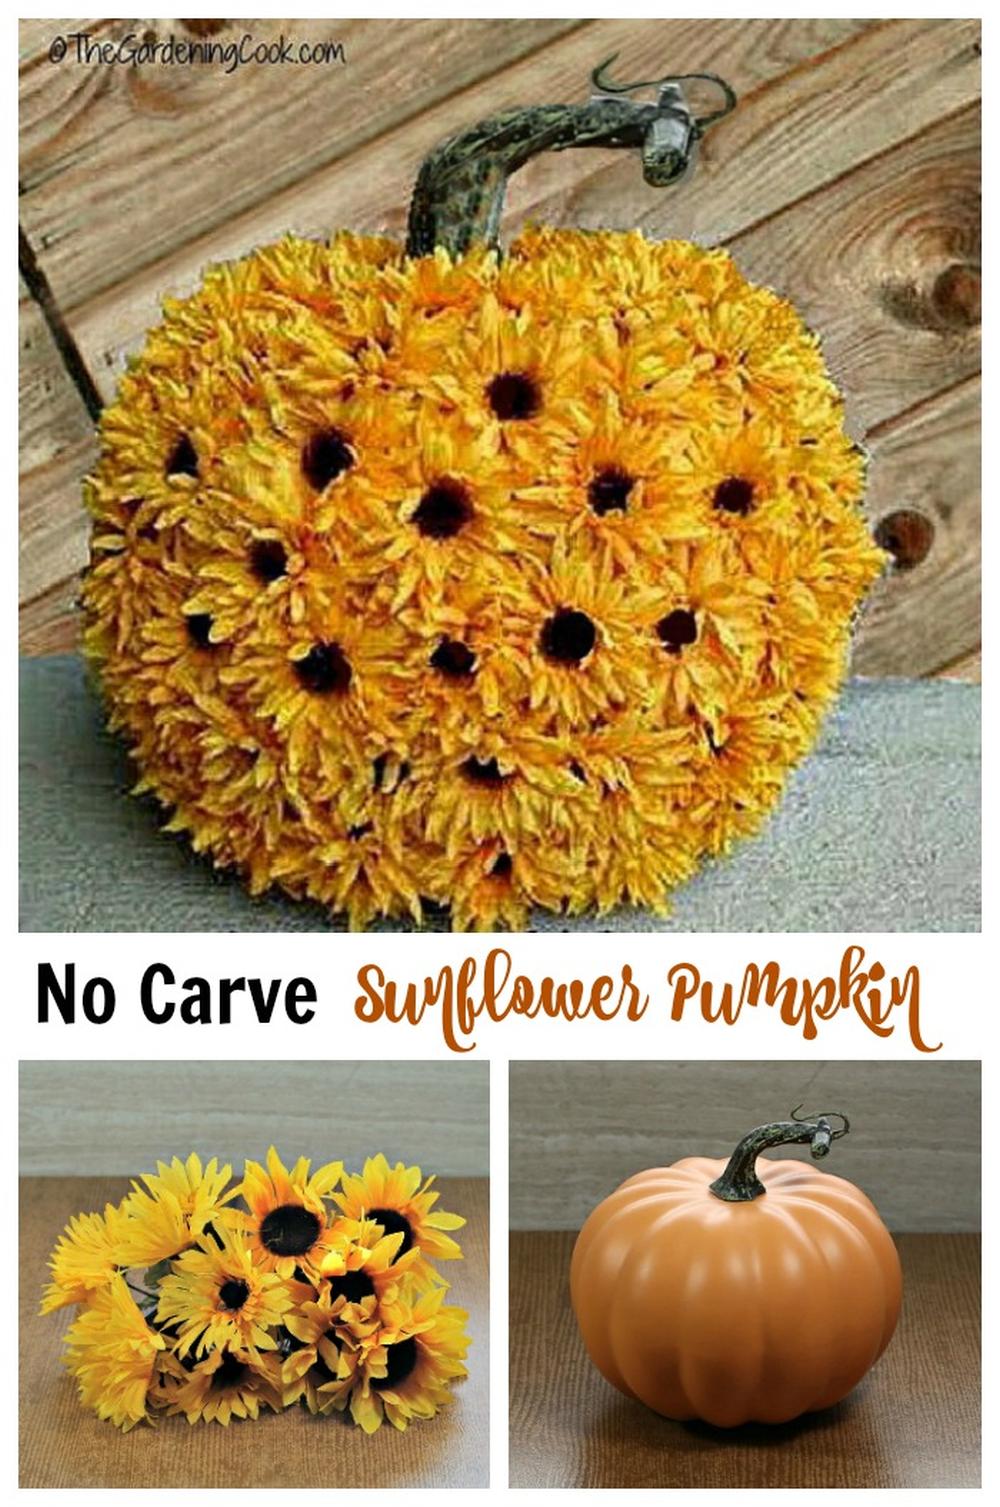
35. Sunflower Pumpkin – DIY Thanksgiving Centerpieces
This sunflower pumpkin is a clever and elegant DIY Thanksgiving centerpiece idea! The stunning combination of these two fall staples looks classy and festive, and it is easy to make.
We found an amazing tutorial at The Gardening Cook that we think you will enjoy! All you need is a bunch of silk sunflowers, floral pins or fine gauge wire, and an artificial pumpkin. The sunflowers can be either real or fake, depending on your preference. However, the fake ones will last longer.
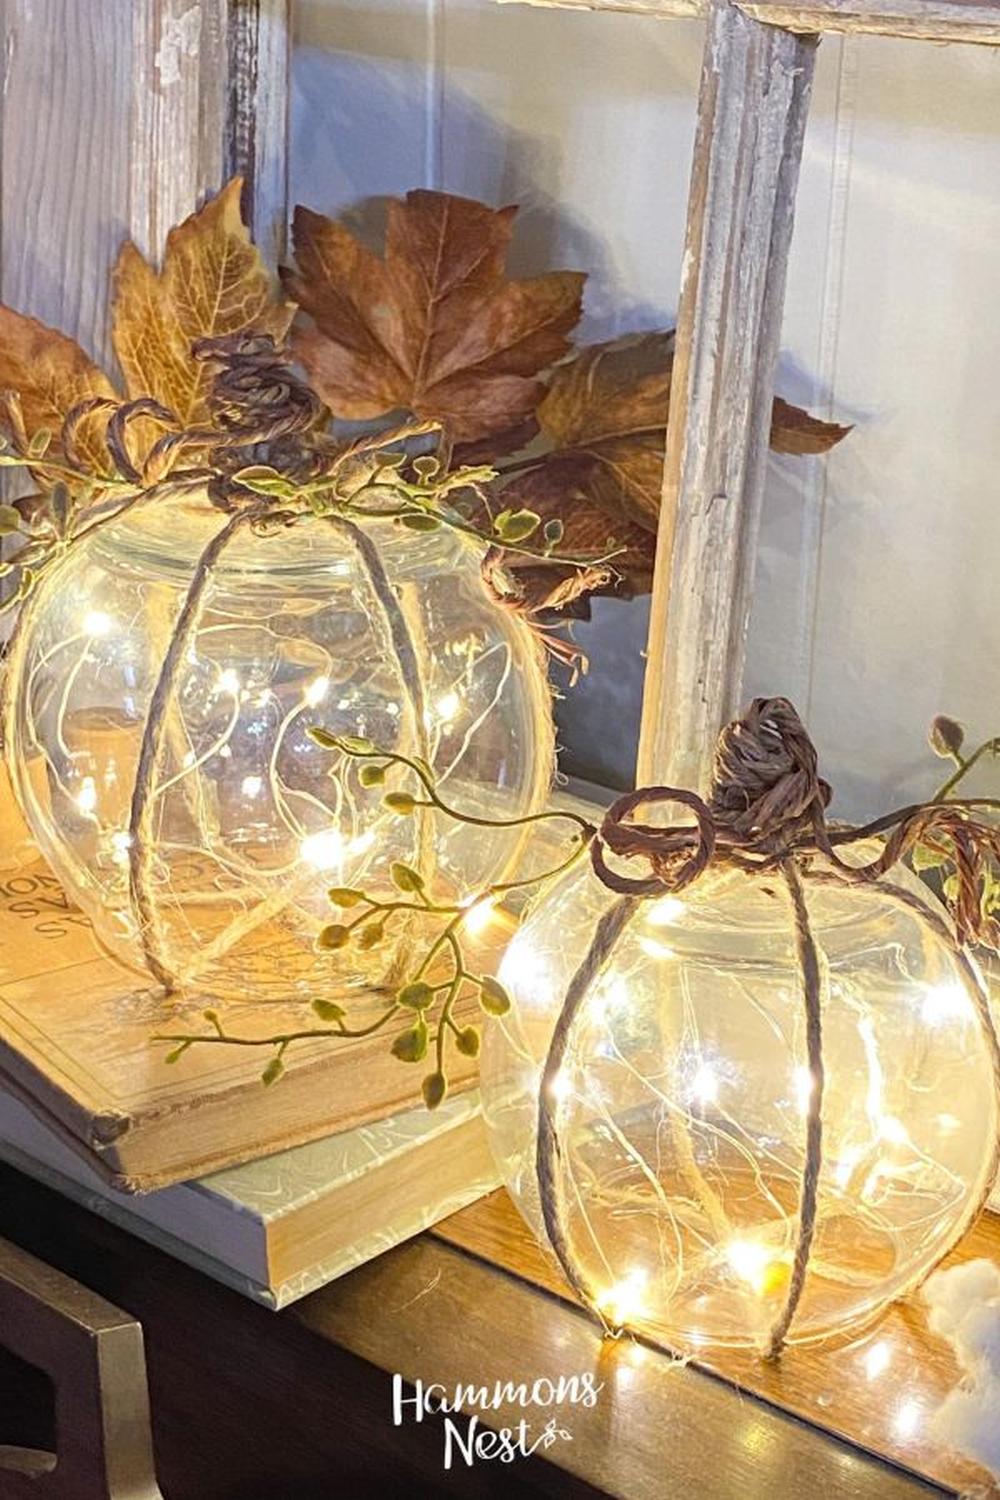
36. Glowing Glass Pumpkin – Thanksgiving Centerpiece
This glowing glass pumpkin is a stunning Thanksgiving centerpiece idea that is appropriate for both children and adults. It is not difficult to make, either, which makes it perfect for DIY beginners!
All you need are two different green shades of paint (one lighter than the other), a larger clear glass jar, an artificial pumpkin with light bulbs inside, green garden twine or raffia, a hot glue gun with sticks, pliers, tweezers, and scissors.
Start by painting the glass jar using the two shades of green paint in parallel lines so they create stripes when you combine the two together. Be sure to leave some white space at the top.
Next up are the artificial pumpkins. Paint them in contrasting colors so they stand out, making them perfect for the centerpiece.
After everything dries completely, you can proceed with the assembly! First, glue the two pumpkins together face-to-face (not on top of each other). Wrap them in green garden twine or raffia and tie it up with a bow at the bottom to hide where they are connected. Weave this string through toothpicks that will act as support for your pumpkin arrangement.
Next, position these supports inside the painted glass jar and use pliers to crush them into place so they’re secure. Finally, plug in the artificial pumpkins and turn on their switches – now your glowing glass pumpkin is ready!
Alternatively, we recommend checking out this stunning tutorial we found on Hammon’s Nest, which doesn’t use any kind of pumpkins.
More Unique DIY Thanksgiving Centerpieces
We have even more cool ideas you could try out for next Thanksgiving since we know you’re already preparing.
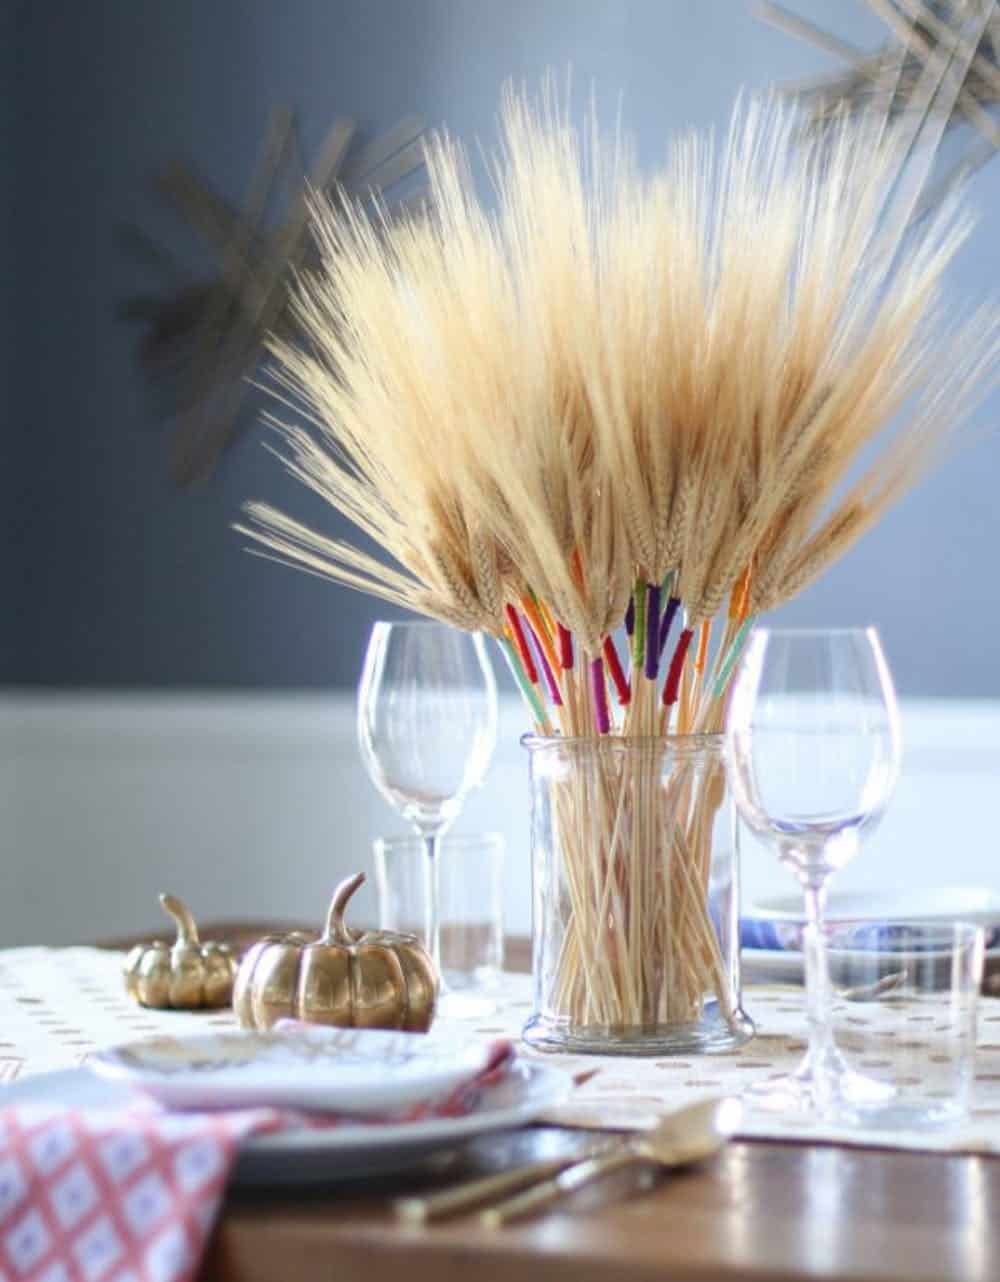
37. DIY Thanksgiving Centerpieces – Color-Wrapped Wheat
Inspired by Charmwill show you how to take your wheat to the next level. We’ve seen these bits of fall arrangements before but with some colorful thread, you can easily create a new look for your table this year. And the kiddos can get involved in this DIY!
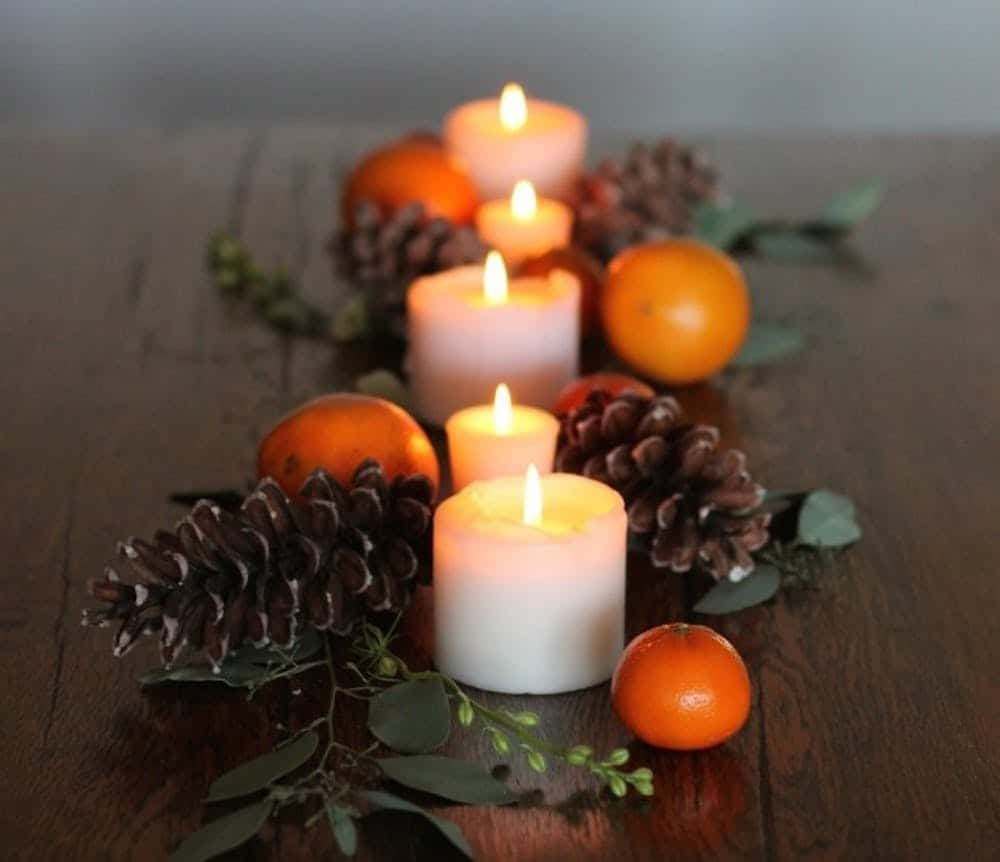
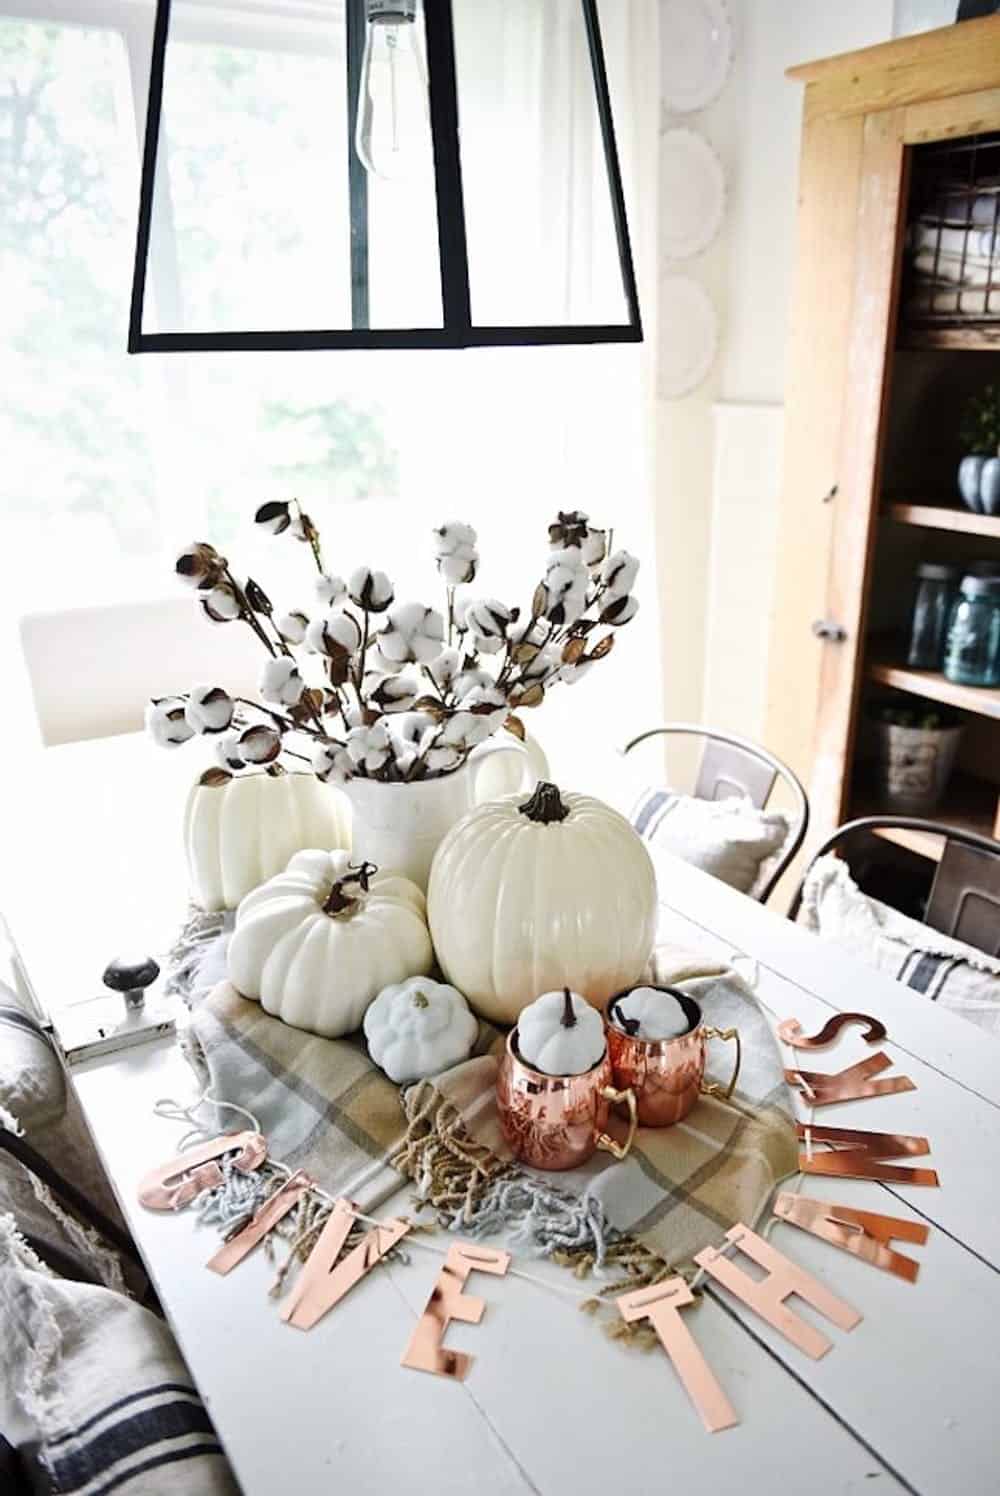
38. Thanksgiving Centerpiece Idea – Copper & Neutral Combo
We’re loving how beautiful the copper tone and neautral colors are blending here. Liz Marie Blogtook some things from around the house and make a unique centerpiece that can be utilize throughout the holiday. Take notes and see what you can do with what you’ve already got lying around
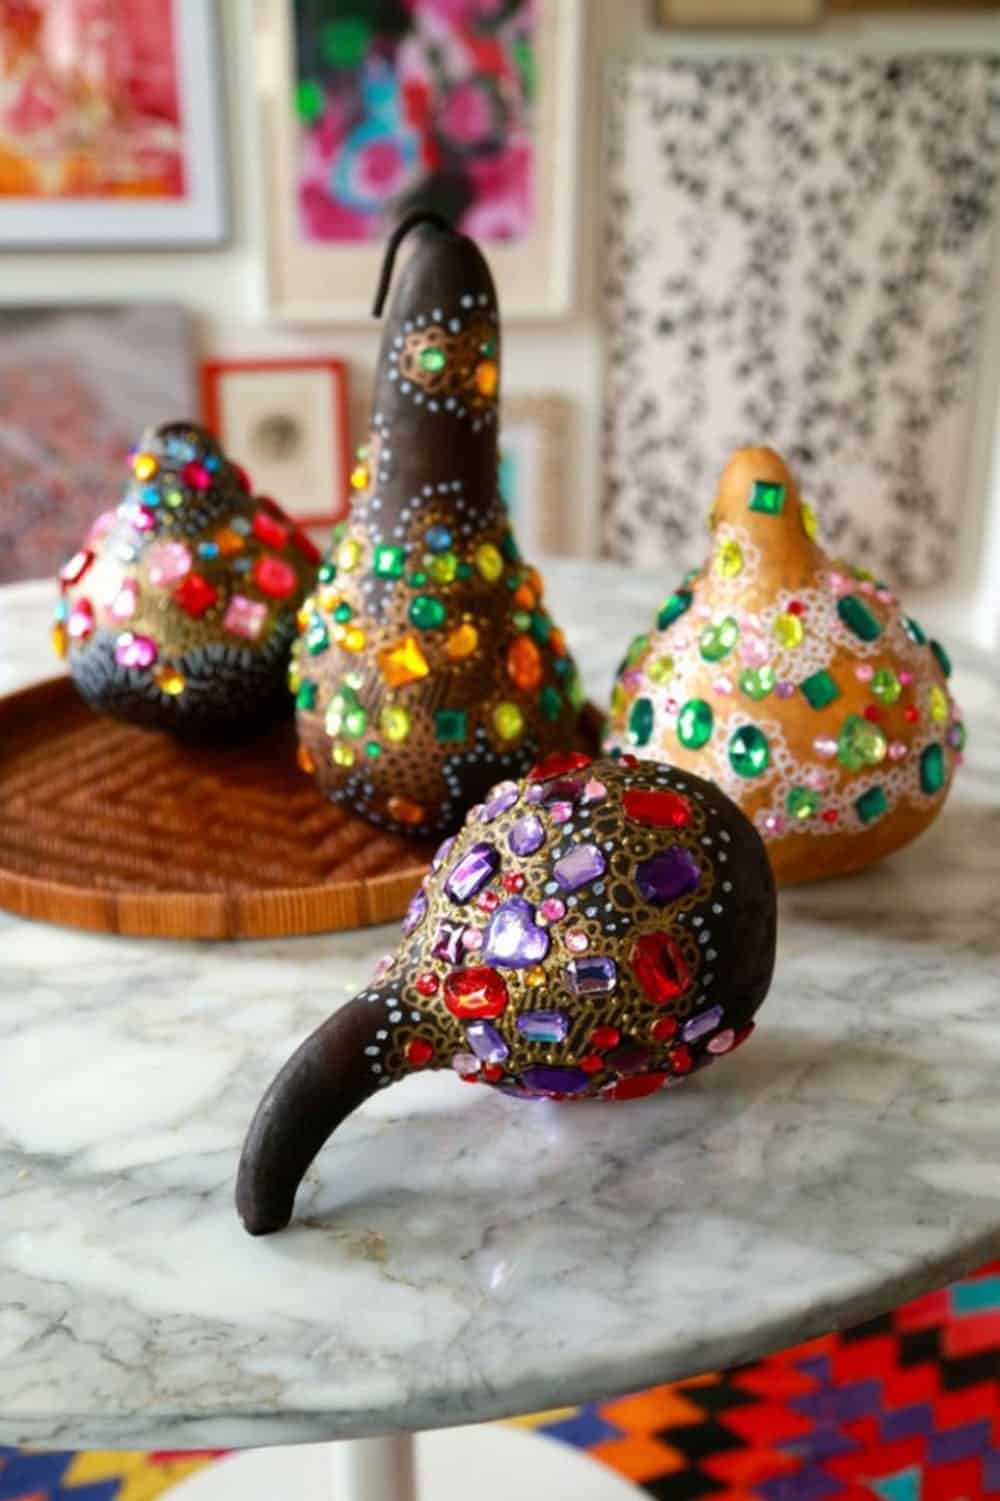
39. Jazzy Gourds – DIY Thanksgiving Centerpieces
Aunt Peachesbedazzled some gourds and we’re in love. Crystals, glitter, stickers and more, there are so many ways to go about jazzing up your fall veggies. It can become a family project!
40. 5-Minute Put-Together Thanksgiving Table Centerpiece
Coordinately Yoursshowed off this simple centerpiece and we love it. But why exactly do we love it? It only takes about 5-minutes to put it all together, that’s why.
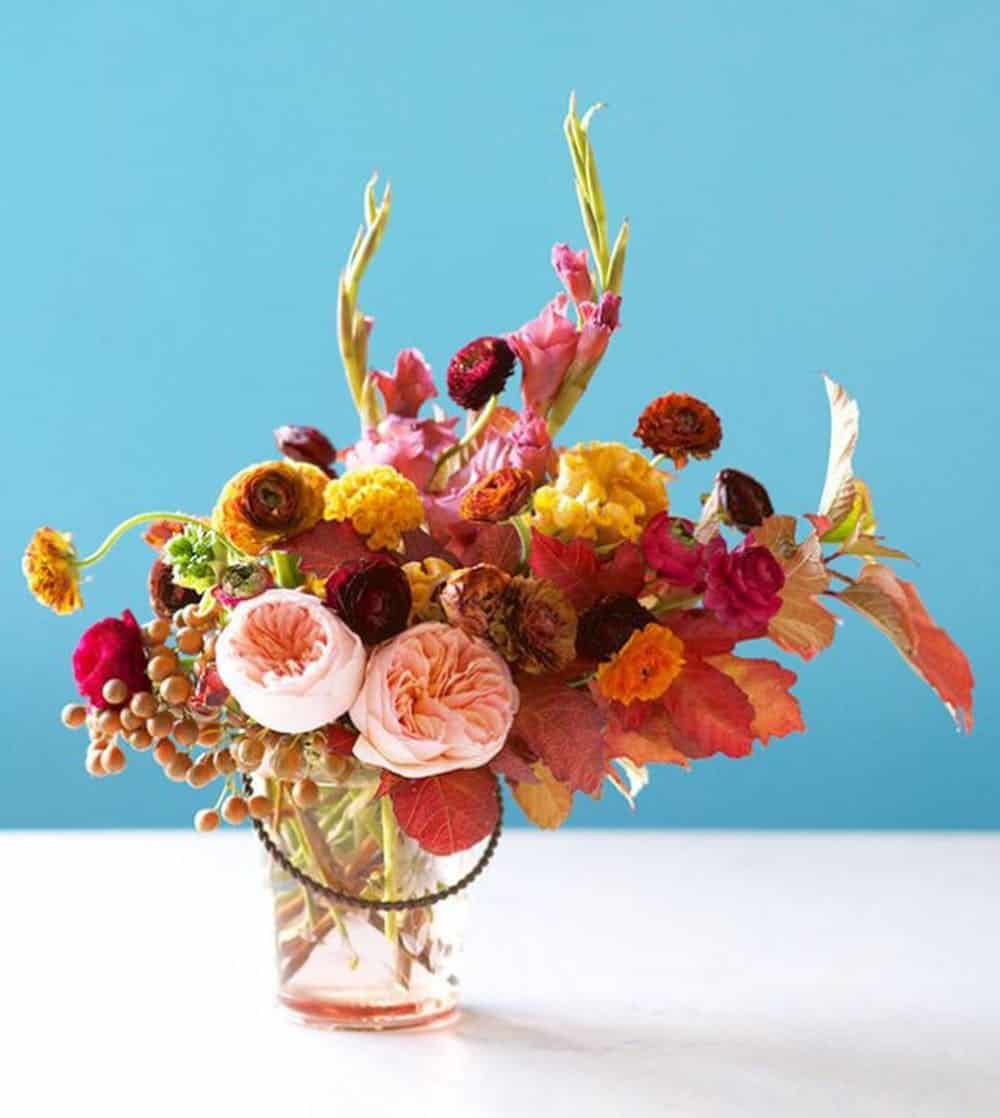
41. Fall Floral Arrangement – Unique DIY Thanksgiving Centerpiece
Green Wedding Shoeswill give you some good pointers on floral arrangements as well – for all seasons. But this one specifically will speak to our autumn-loving hearts. Take the jump and grab the details.
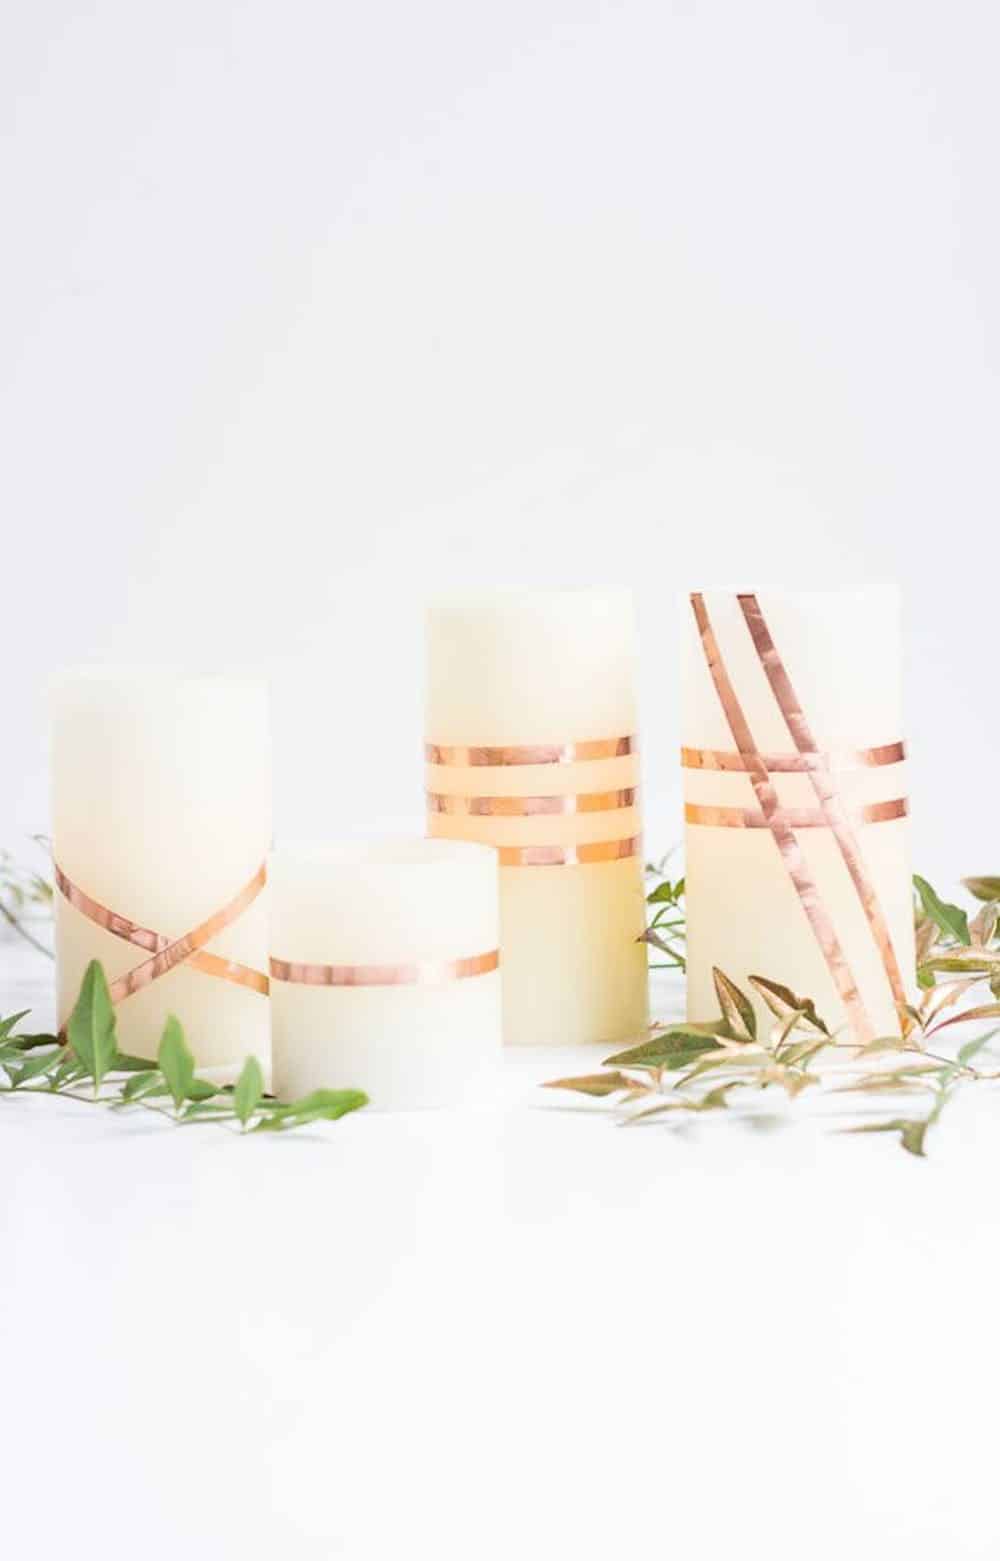
42. Copper-Wrapped Candles – DIY Thanksgiving Centerpiece
Design Improvisedwrapped some simple candles with copper for easy, trendy appeal. This is both simple in DIY ability but it’s also an inexpensive way to create some decor for the table. We love the subtly.
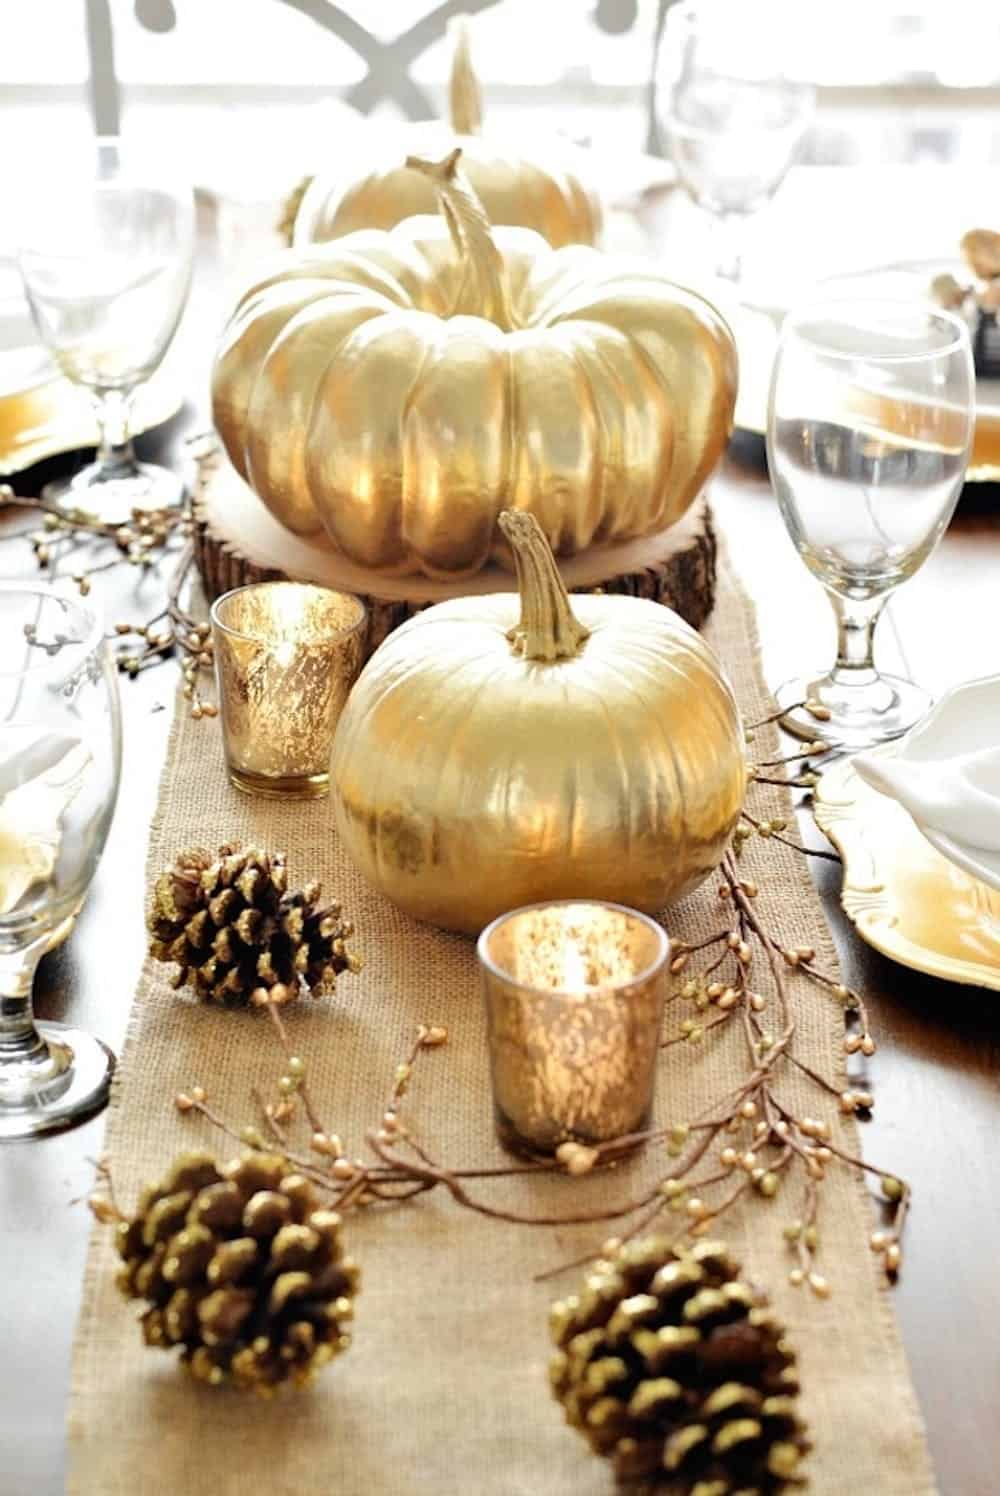
43. Gilded Everything – Thanksgiving Unique Centerpiece
A Pumpkin and A Princessgilded everything in her path to make a Thanksgiving table fit for royalty. The pinecones and the pumpkins got an equal amount of love and the burlap contrasts nicely underneath it. This too is a simple centerpiece to create with little fuss.
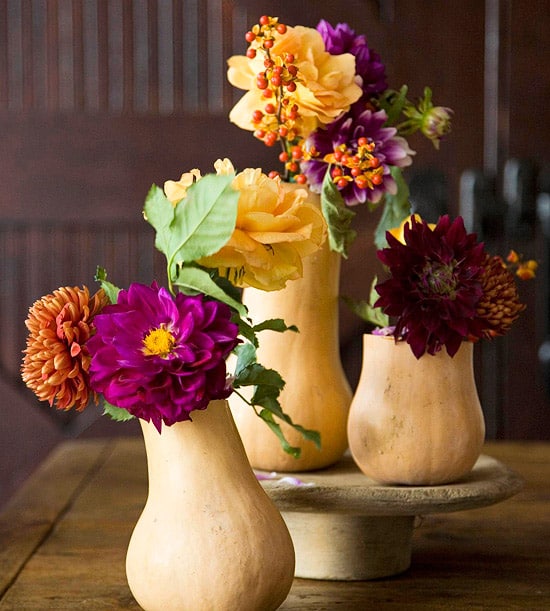
44. Gourd Vases – DIY Thanksgiving Centerpieces
Create vases out of your gourds! Look how beautiful they look with some flowers inside. Check out the details by visiting BHG.
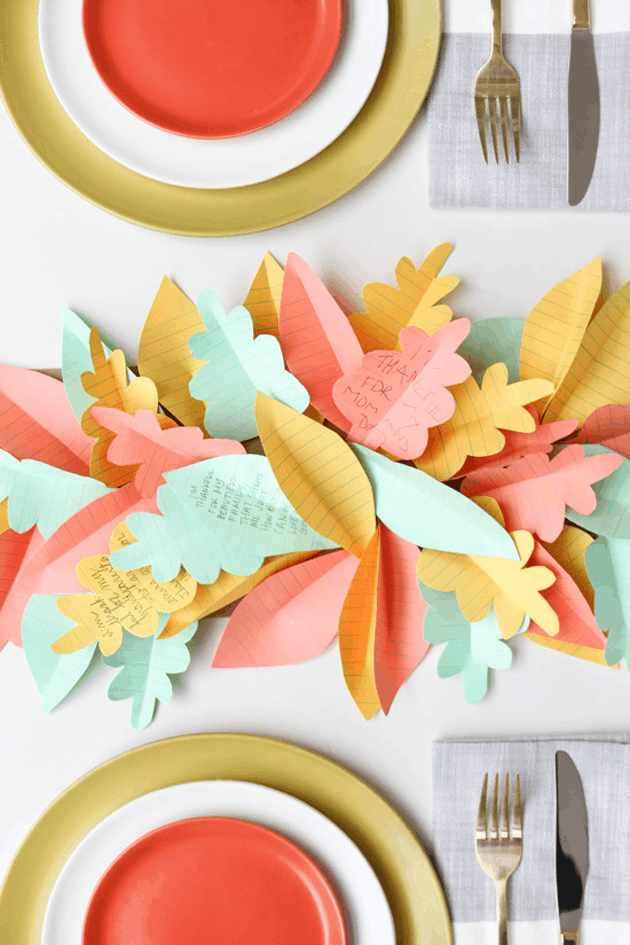
45. Kid-Friendly Paper Table Runner – Unique Centerpieces
Grab the kiddos, we’ve got a project for all of your. Check out Momtasticfor the instructions behind this fun creation. And then the entire family can get involved filling out their own bits of gratefulness.
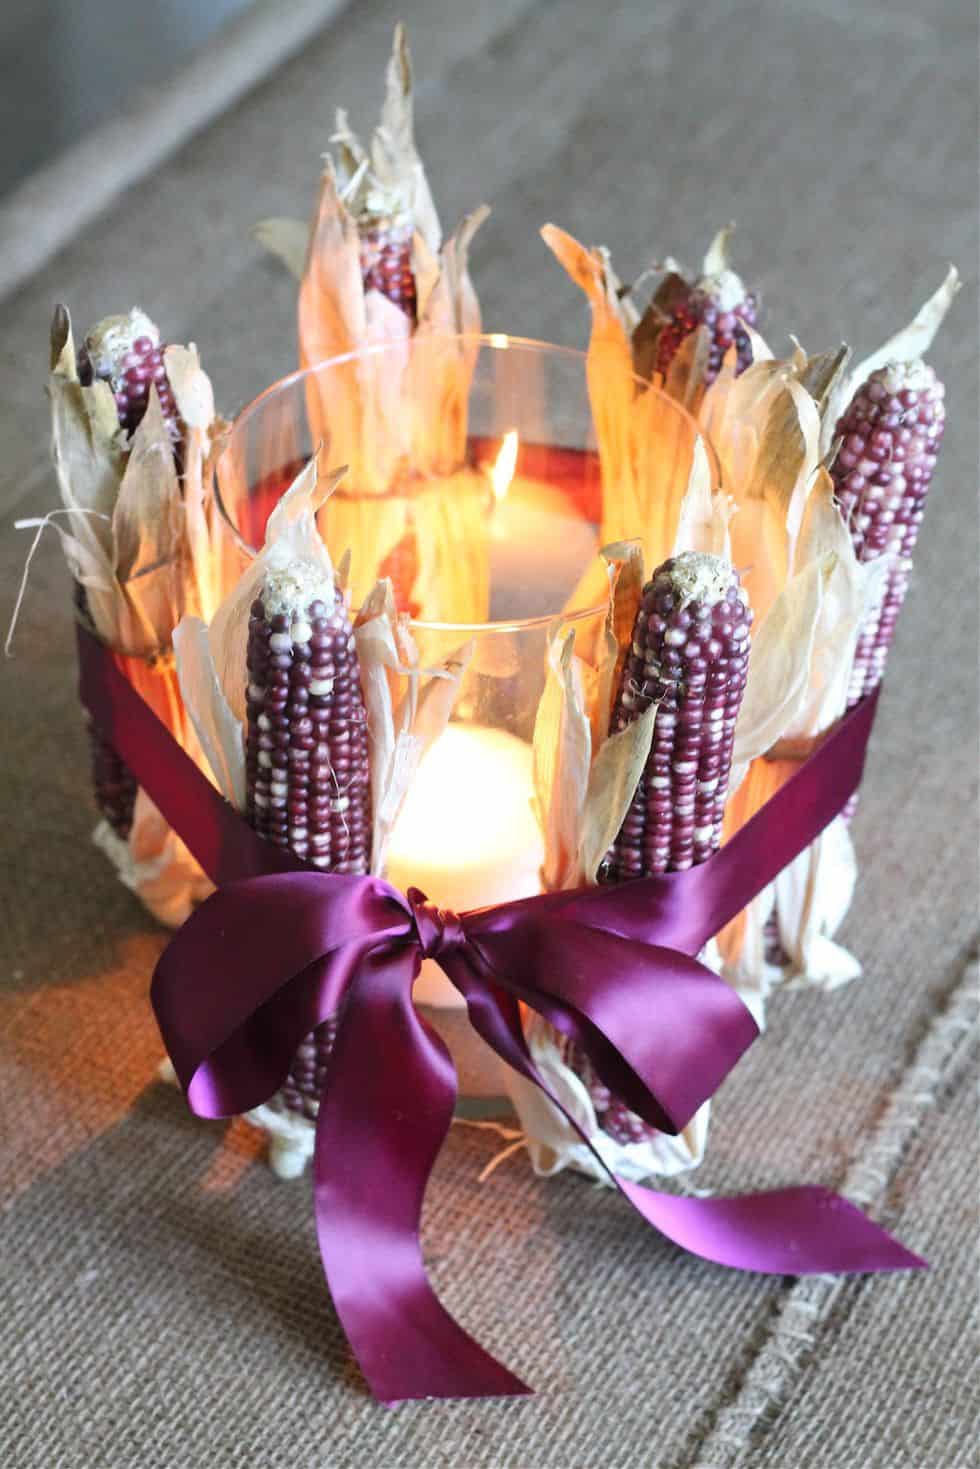
46. Purple Corn – Unique Thanksgiving Centerpiece Idea
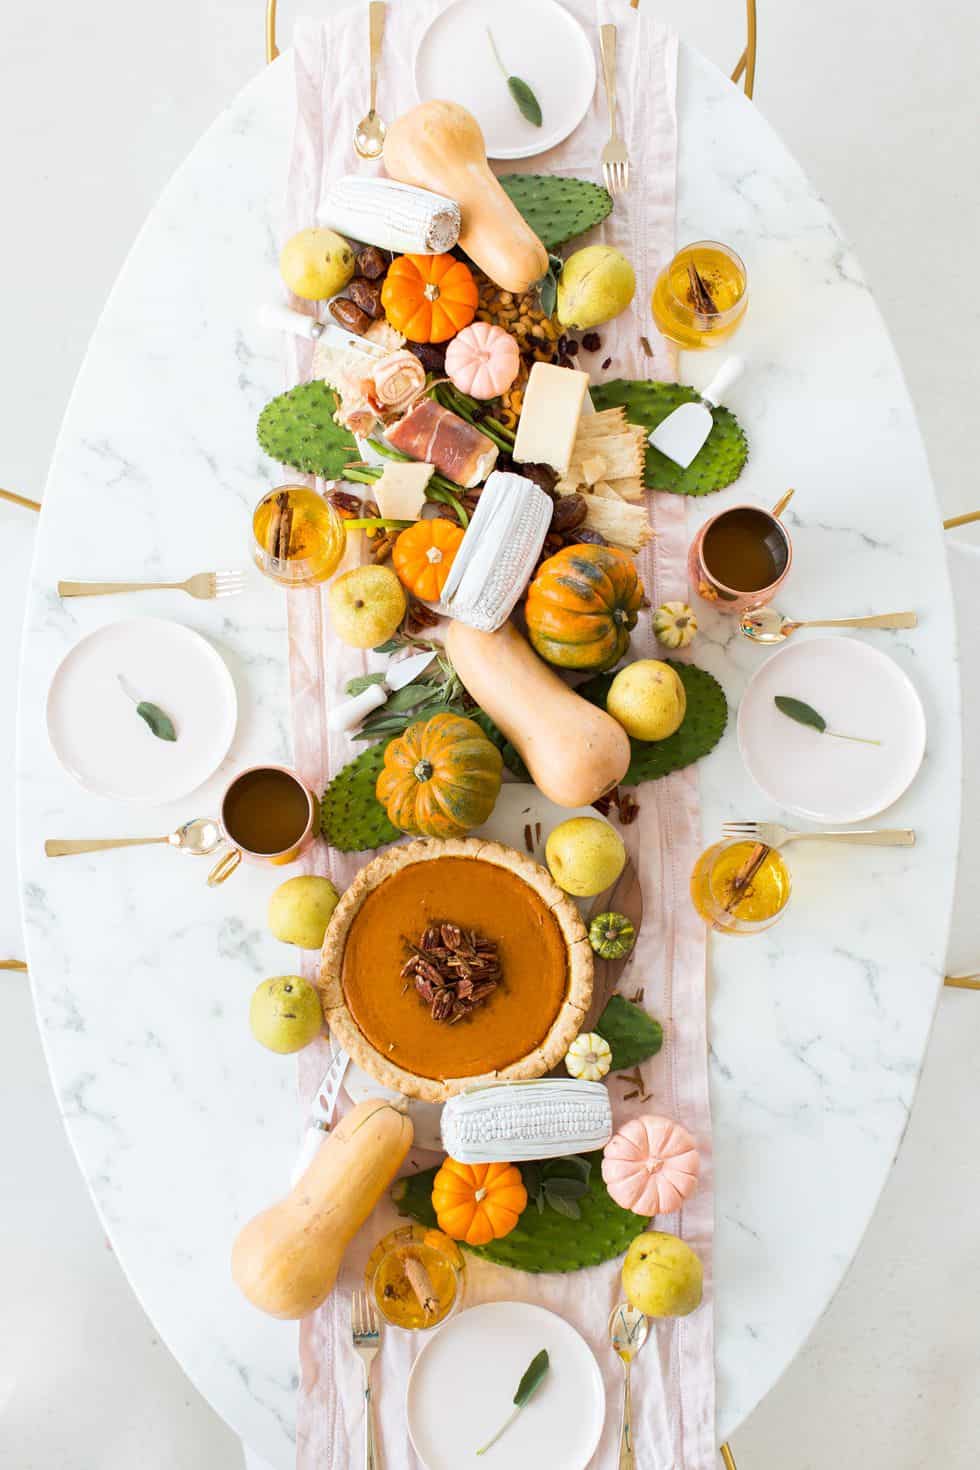
Purple corn at the center of the table seems like a fun idea! Add some color to the table that’s a bit outside-of-the-box, like this beautiful purple and it contrasts nicely with what we’re used to seeing throughout autumn. Thanks for the idea Julie Blanner!
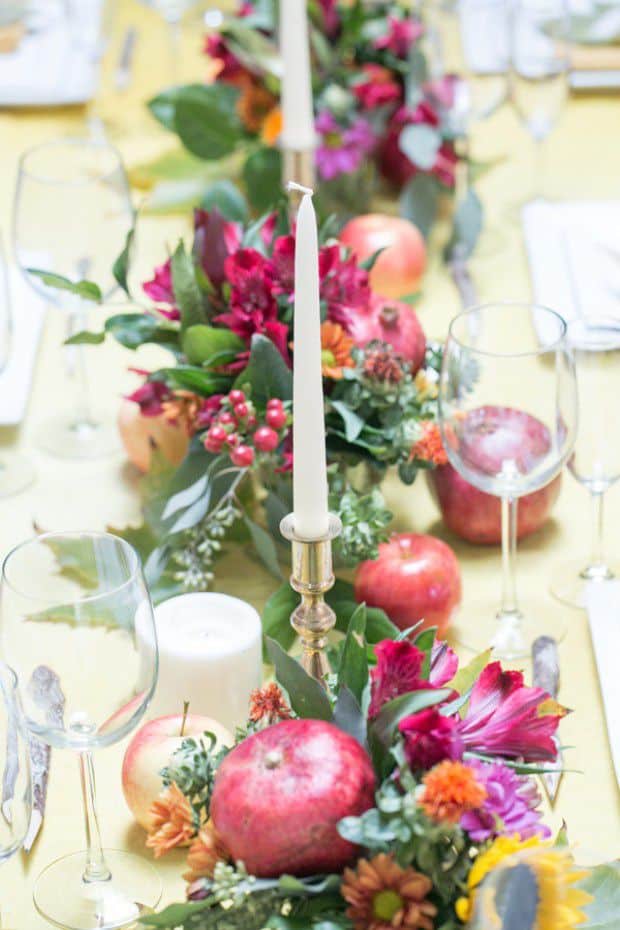
47. Pomegranates & Greenery – Unique Centerpiece
Sugar and Charmwent a different route for fall decor as well. Grab some pomegranates, you can create a natural and colorful spread with these fruits too. They contrast nicely with green.
48. Multi-Colored Gourds – DIY Thanksgiving Centerpiece
Sometimes all you need to do is gather some gourds. Different colors and textures can come together to create something quite artistic. Just check out this creation from Sugar & Cloth!
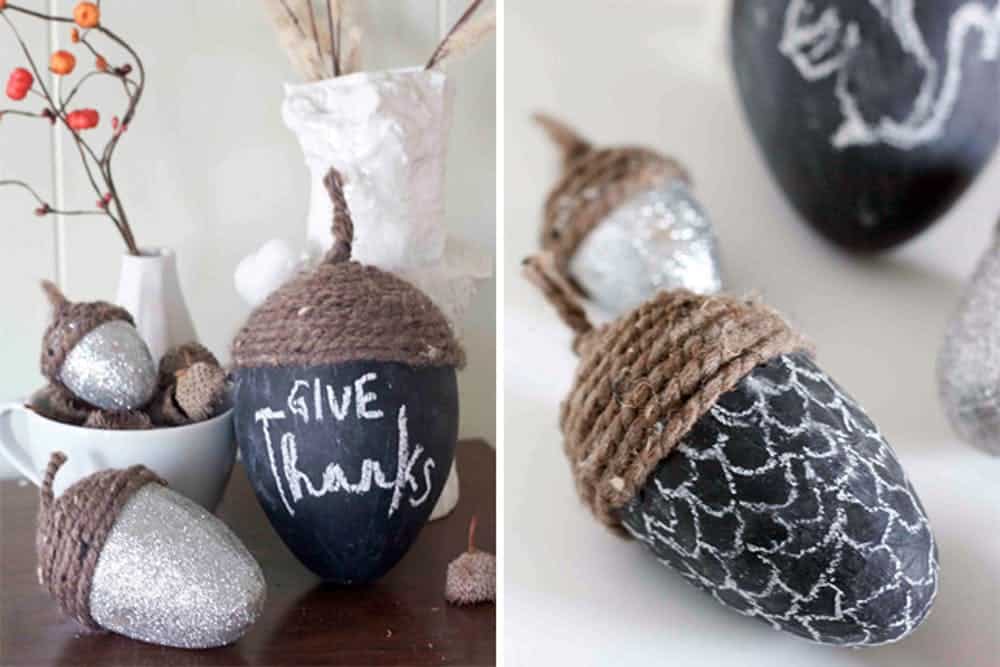
49. Chalkboard Acorns – Unique Centerpieces
We’ve gushed about these before because we love the innovation so much. Create some giant chalkboard acorns and then get creating. Grab the idea from Julep!
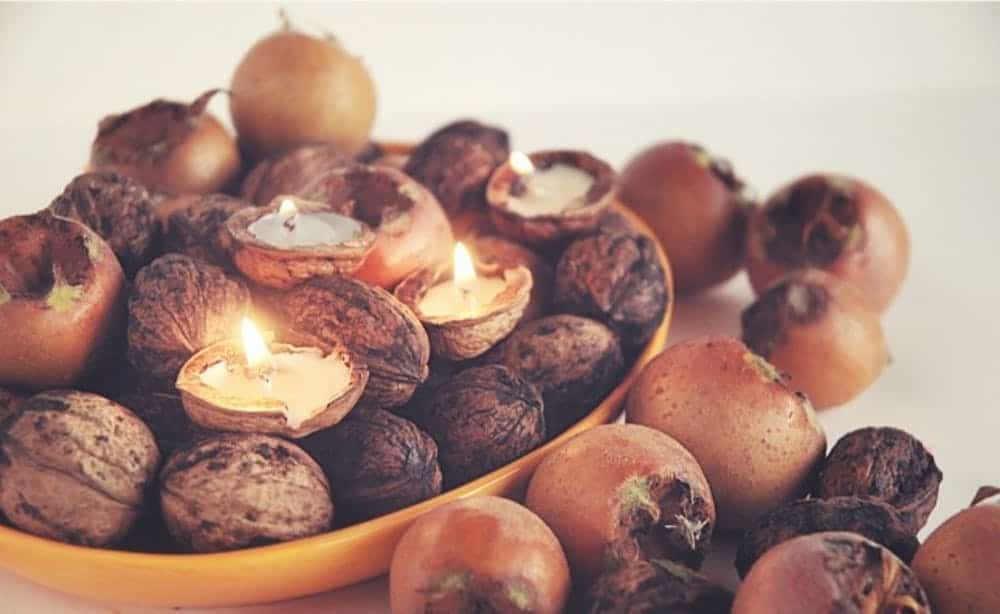
50. Tealight Nuts – Thanksgiving Table Centerpiece
Finally, over at One O, you’ll learn how to turn nuts into something special as well. A bowl and a lighter, they’ll bring in the right kind of rusticism, texture and romance too with the lighting. Take the leap and grab the details.
Final Thoughts on DIY Thanksgiving Centerpieces
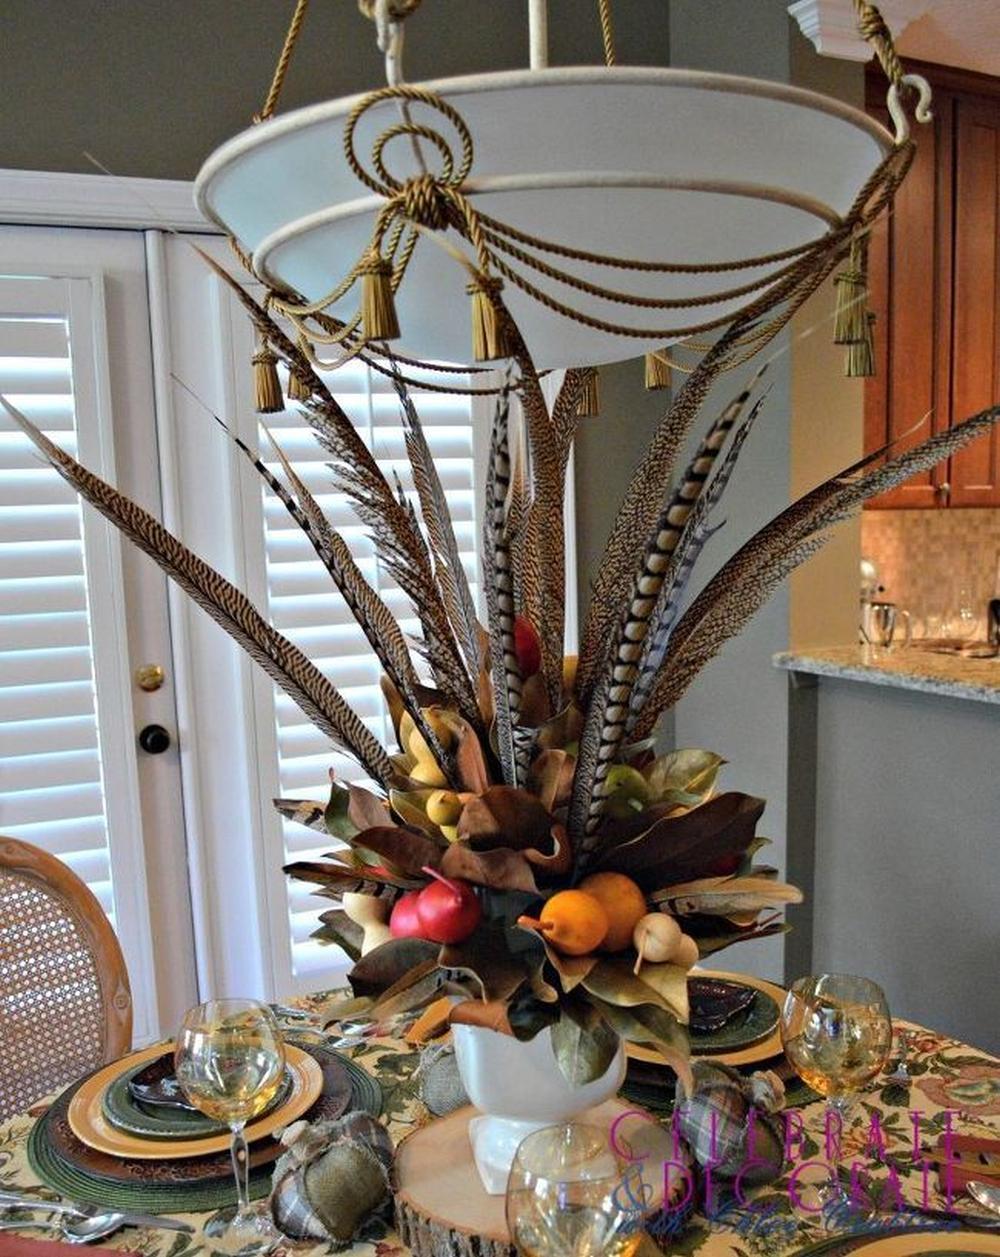
Many different types of elements can be used to create beautiful Thanksgiving centerpieces. You can combine them in interesting ways to make innovative designs that will stand out at your holiday table. If you want to keep things hands-on, but not too complicated, tutorials like the ones mentioned above are perfect for you!
What are your favorite DIY Thanksgiving centerpieces? Let us know in the comment section below!
