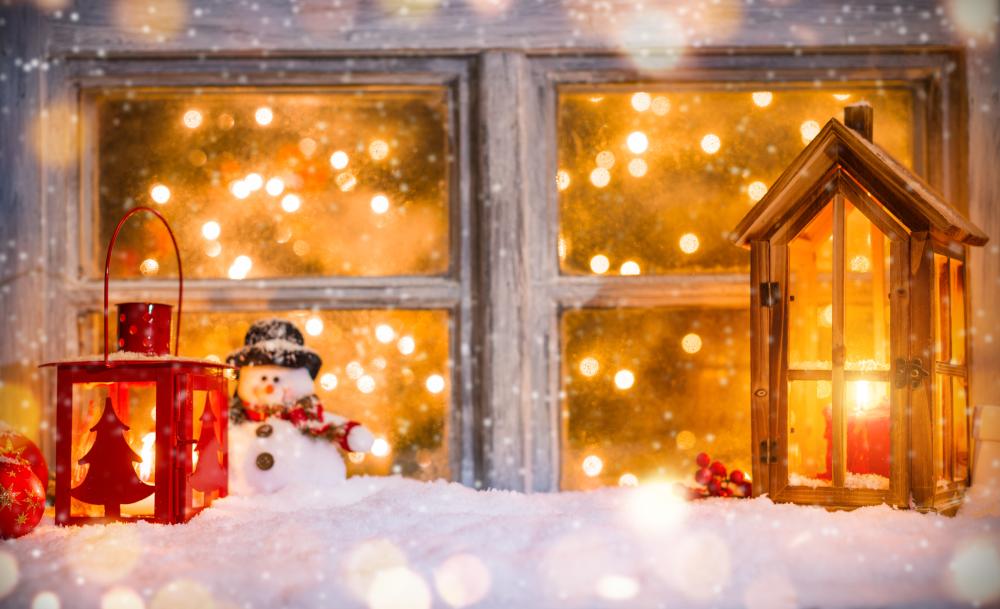
50 Christmas Window Decorations: DIY Projects That Add Magic to Your Home
Now that Christmas is just ’round the corner, we can’t wait to see all the lovely, festive lights decorating various places all around the town. The excitement is almost palpable and people like you and me are already stocking up on various pieces of gear to make the whole atmosphere extra Christmassy.
Oh, you know what else is really fun? Instead of admiring the work of others during this season, you can start making your own Christmas window decorations!
Don’t go running to the store right away, though. We’ll give you all the creative ideas and instructions for a merry time crafting a cozy homely setting for your family and friends while they visit over the holidays!
Christmas Window Decorations
We, here at DIY’s have put together a list of 50 Christmas window decorations you can make yourself to really get into this year’s festive spirit! If you are anything like us, you will thoroughly enjoy decorating your windows with these lovely additions!
Our suggestions are numerous and varied enough that you can easily use them to decorate for Christmas no matter how little time you may have!
You can even use some of the ideas to decorate for other occasions if you so wish! Most of the time it’s simply a matter of replacing one or two key components of the decor, such as using pumpkins instead of reindeer.
We have everything from snowmen and Santas to wishing wells and reindeer, so there is no lack of inspiration here. What’s more, we provide both written instructions and tutorials to make each craft that much easier to manage.
With that in mind, let’s start with some creative window display inspirations:
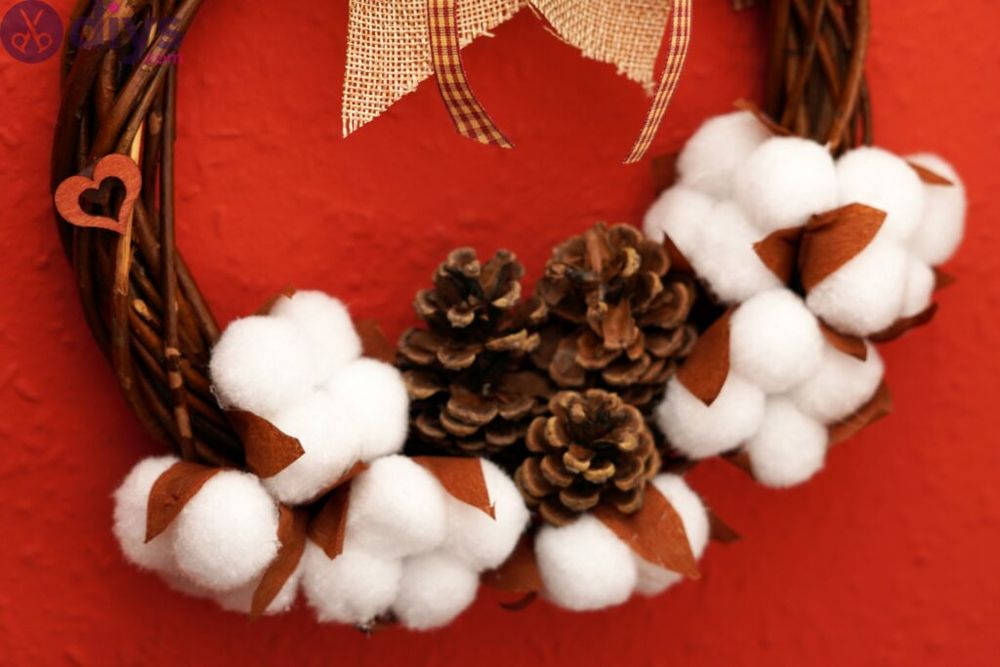
1. Cotton Flower Wreath – Christmas Window Decoration Ideas
While we’re fully aware that wreaths are not exactly the first choice when it comes to things you can use to decorate your windows, we’re gonna challenge that with a hearty “Why not?”.
After all, you can use garlands, lights, fake frost, and artificial snow to spice up your windows so that your house looks like some kind of fairy tale resort, but wreaths are usually a no-no since they’re mainly used to decorate doors.
We think that no matter how you look at it, a cotton flower wreath is just too beautiful to be left behind. This means you can get creative and use the basic idea of this decoration but change some details around so that you get a more personalized result.
Our tutorial for this project will show you how to make a cotton flower wreath from scratch. We’ll also give you some advice on how to choose the materials and tools.
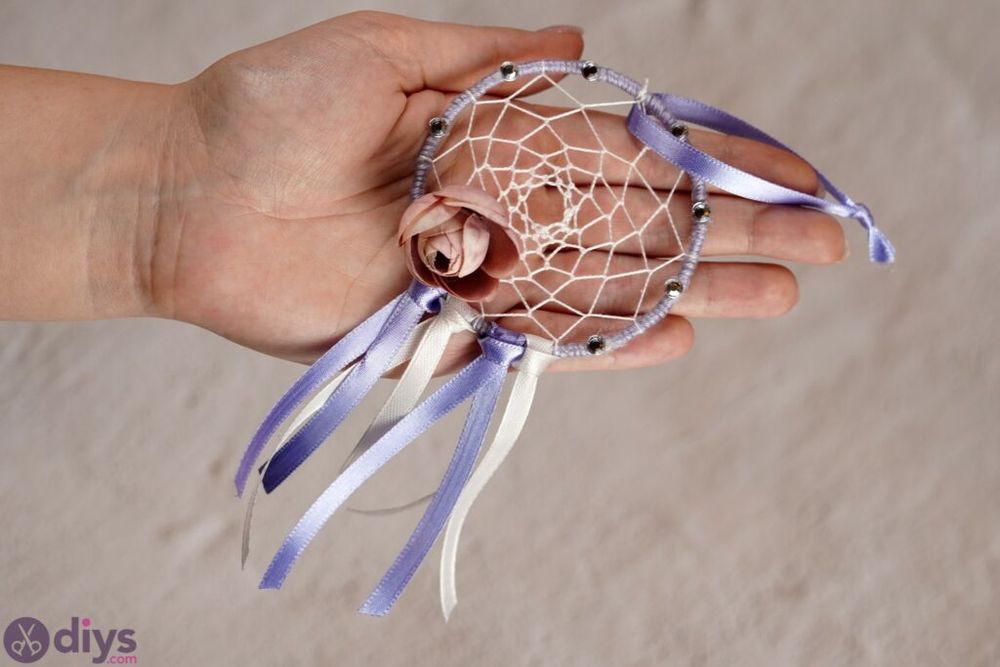
2. Dreamcatchers – Christmas Window
If you’re into traditional Christmas decorations to prepare for your windows, then it’s only fair to assume that you wouldn’t be interested in dreamcatchers. However, if you’re ready to go outside the box for once and try something new, this suggestion could be right up your alley.
If you’ve never thought about using a dreamcatcher as a Christmas window decoration before, then we might have some new ideas for you. Dreamcatchers are all-natural decorations that use the shapes and colors of nature to create something quite unique.
We’ll tell you how to make a cotton-and-linen dream catcher with teardrop embellishments, but if this variation doesn’t strike your fancy, there are more ideas in our guide! We have some other tutorials on how to make various versions of these traditional yet modern pieces of art so feel free to check them out as well!
Just check the tutorial to learn how you can make a dreamcatcher without significant effort. Note that the “hanging it on your window” part is entirely up to you, but we’re confident you’ll figure something out.
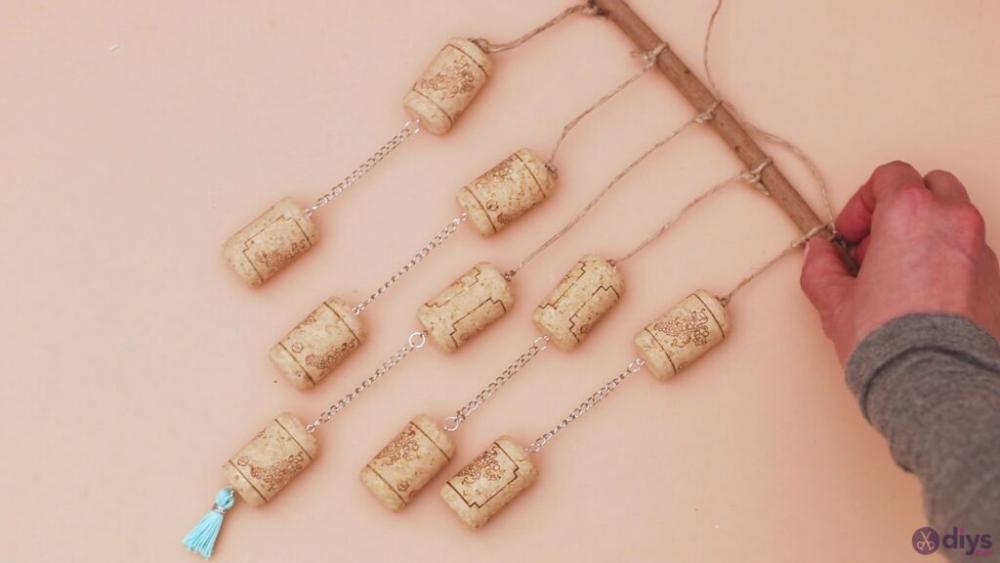
3. Hanging Wine Cork Decoration – Christmas Window Display
Since you’re currently reading this guide, we’re gonna go ahead and make a bold assumption that you’re into DIY projects, even a tiny little bit. As you may know, DIY involves not only crafting stuff on your own but also repurposing stuff that’s lying around your house.
This project is a nice piece of craft you could certainly use as a Christmas window decoration by simply hanging it on your window once it’s done. You can also use it as Christmas decor for your living room or any other space that’s in need of some holiday cheer.
Once you’re done with this decoration, you can either hang it on your window or use it as a Christmas decorating item to be displayed elsewhere.
If the picture above isn’t enough for you to get your creative juices flowing, feel free to check out the full guide above. You’ll find some detailed instructions and photos about how to make these wine cork decorations by repurposing the corks themselves!
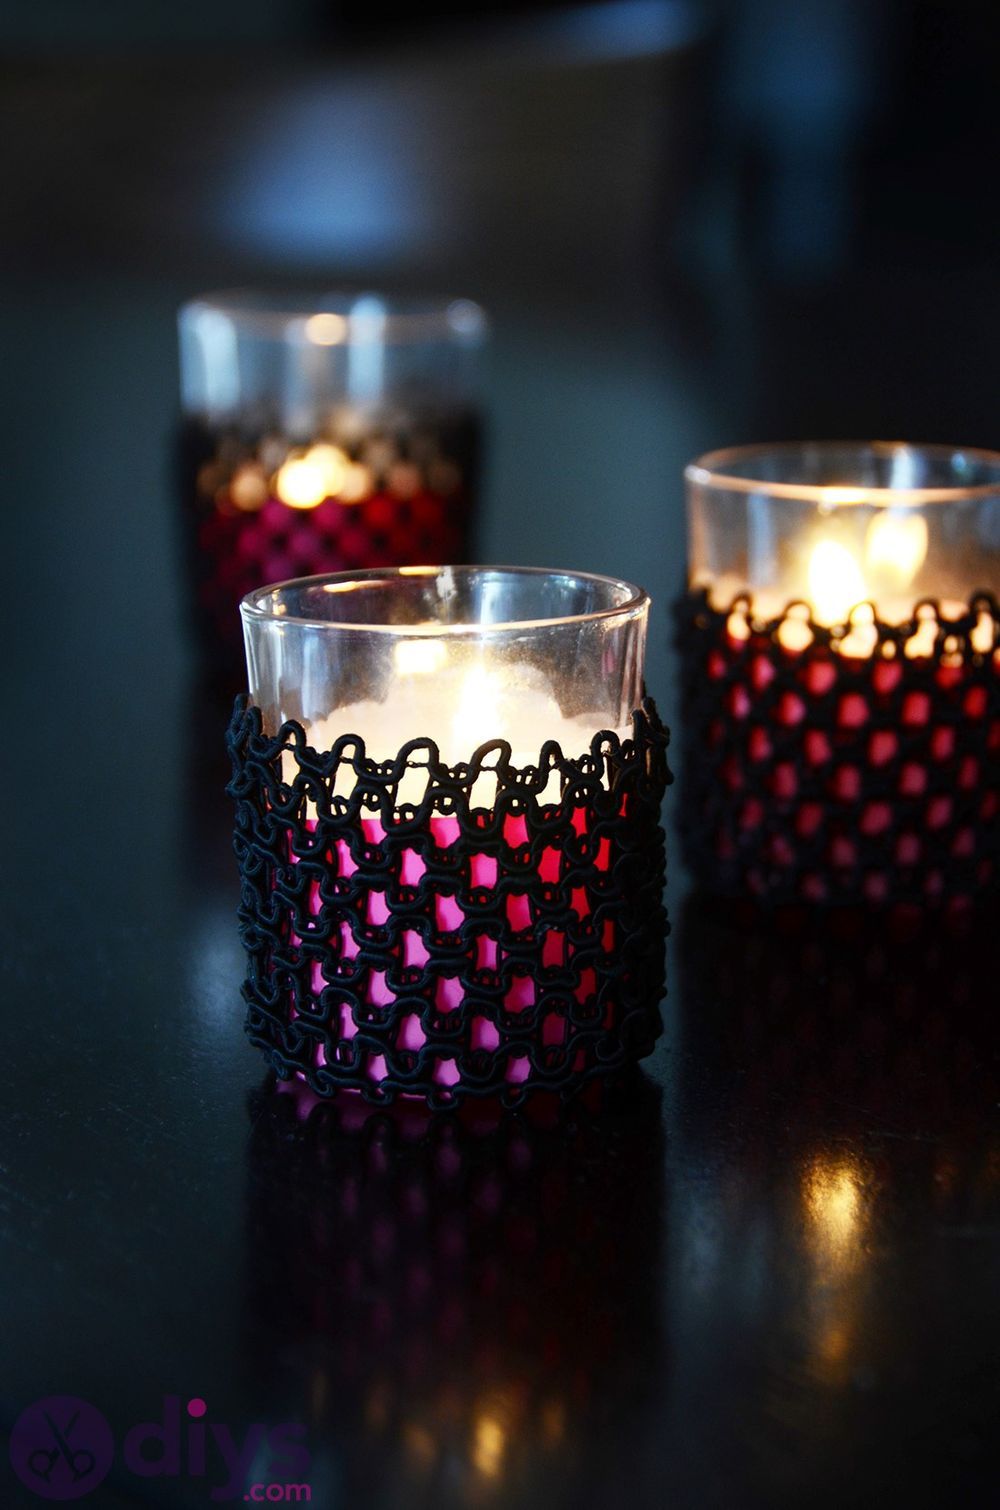
4. Glass Votives With Lace Cover – Lighted Christmas Window Decorations
This project is easy enough to do even if you have never tried anything similar before in your life, so it’s perfect for beginners.
Essentially, what you’ll be doing in this guide is upcycling old votive holders by covering them with lace fabric. We opted for black lace because it adds a nice touch of elegance to the final product, but feel free to choose any other color you want.
After that, all that’s left is to add candles and hang them on your window during the holidays! See how simple it is? This might not seem like much at first glance, but don’t forget about the huge impact these small things can make when combined together.
In fact, you don’t even have to hang these glass votives at your window this Christmas. Instead, you could simply place them on a wooden slab just on top of your windowsill and let the soft, warm light of the tea candles you’re obviously gonna place inside them fill your house.
Read through our guide above if you need additional details and think these votive holders with lace fabric would look perfect in your Christmas window.
You can even use them as decor for a totally different occasion if you want because the color scheme would work well for weddings, bridal showers, and other festive occasions where you need candlelight!
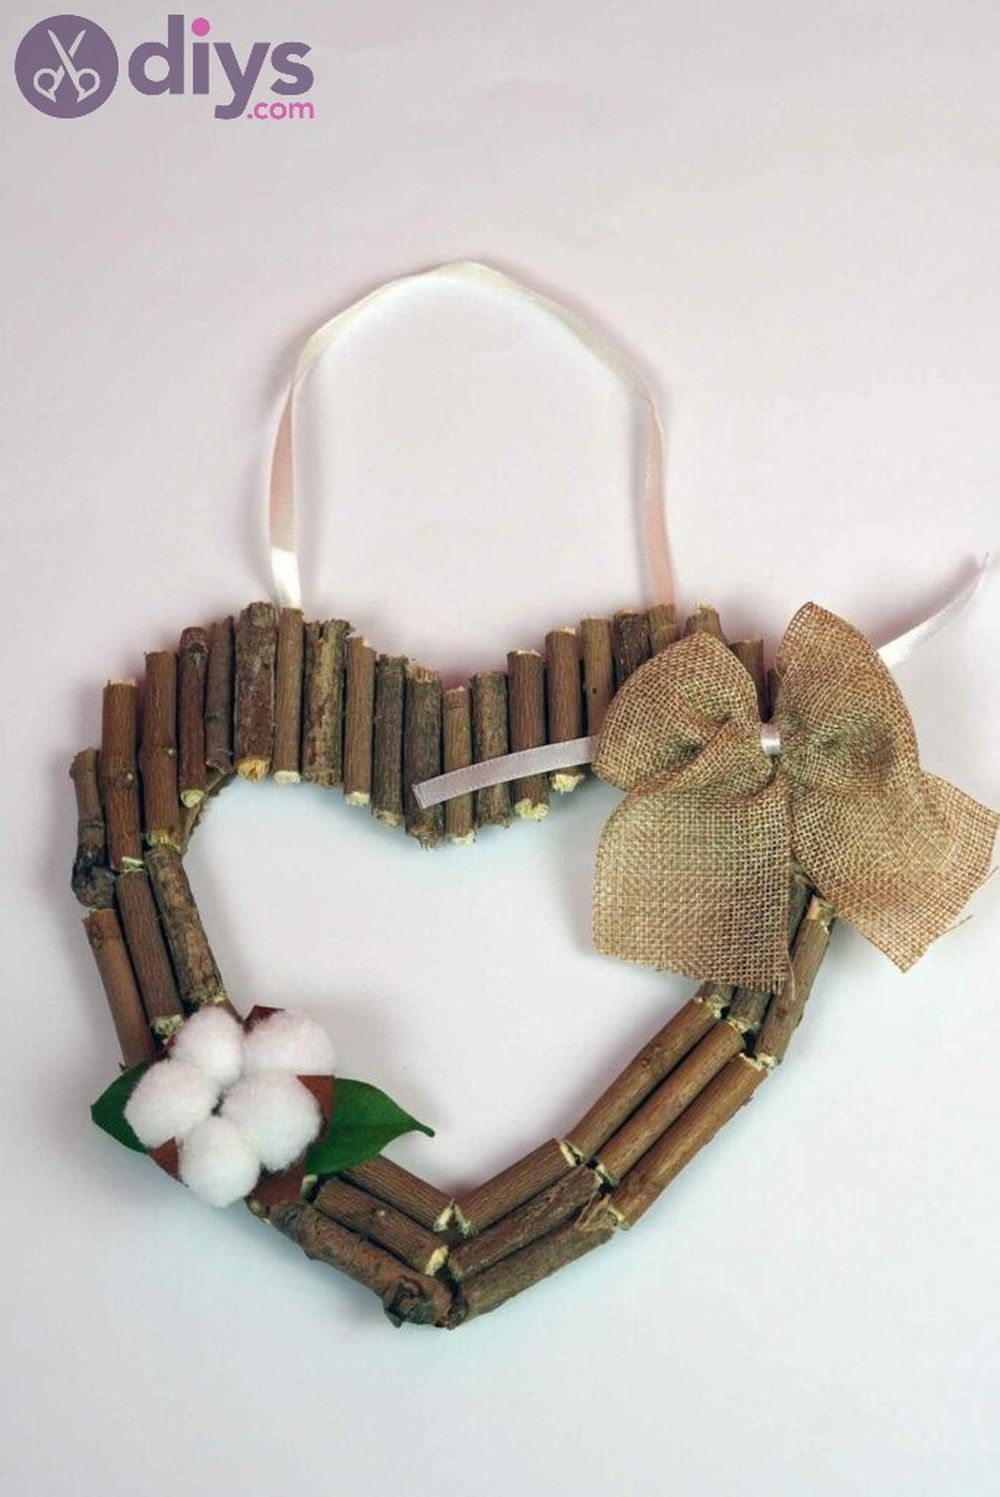
5. Rustic Twig Heart Wall Art – Christmas Window Decorations
Yes, we know that this rustic twig heart decoration is actually meant to be used as wall art – it’s in the actual title – but we’re simply gonna ignore that bit of information and sell it as an excellent piece of decoration for your windows this Christmas.
All you need is some burlap, a bunch of twigs and sticks (try breaking or cutting them in approximately equal sizes), a couple of cotton flowers, and some ribbon. After getting these done, they’ll serve as excellent indoor Christmas decorations.
Better yet, you can also leave them outside your house until next year without worrying they’d get all dusty or anything like that because nature would eventually claim them as part of herself anyway.
If you’re wondering what kind of wood twigs you should use for your rustic heart decoration, feel free to check out our detailed guide above. You’ll find some useful tips on which twigs look best and how to make sure they don’t break while you’re working on the decoration.
You can certainly use this project as Christmas window decor by simply hanging it in front of your windows once complete, but feel free to place them on a wooden slab just on top of your sills instead. The rustic design is perfect for wood surfaces since it will blend in seamlessly with that general tone.
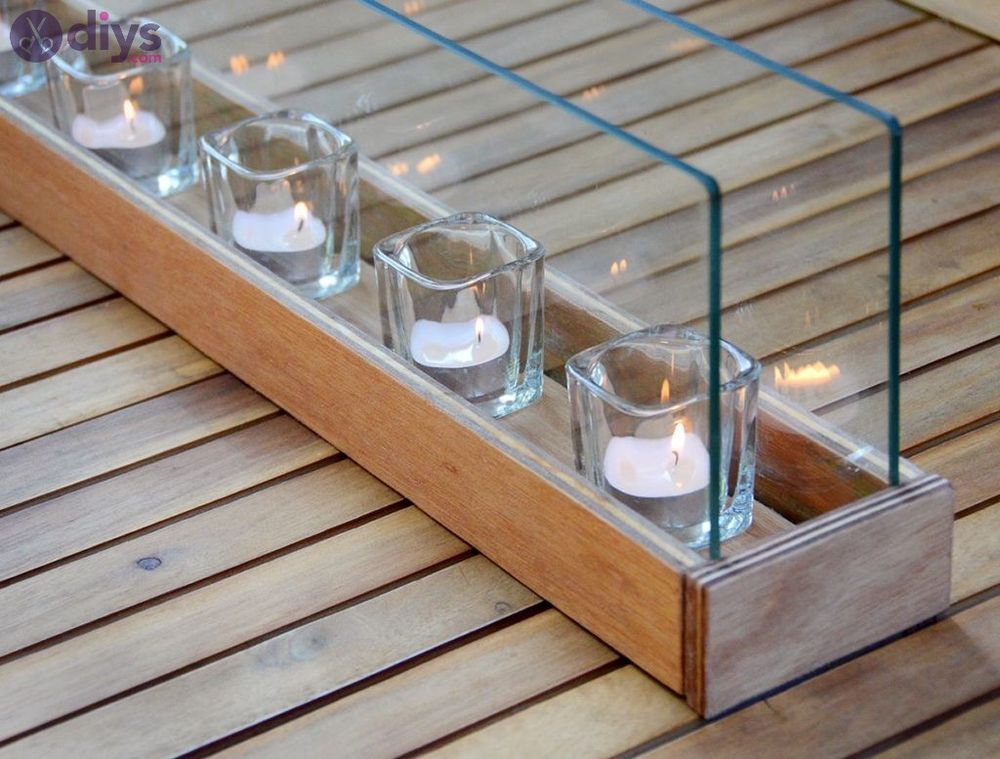
6. Votive Candle Holder – Lighted Christmas Window Decoration
As you probably know, votive candle holders are extremely easy to make. That’s why this holiday decoration idea is perfect if you don’t have much money but still want to decorate your home in a sophisticated way during the holidays.
All you need to do is place the candles inside some glass votives, place the candle holders on a wooden slab, and then either hang them on your window or place them gently on your windowsill.
This kind of decoration is not only simple and inexpensive, but it’s also perfect for smaller spaces since you won’t need much distance between the candle holders. However, if you want them to look more spread out and less clustered, feel free to use a slightly larger slab or simply place votive holders next to one another with enough space in between.
Don’t forget to place tea lights inside these votive candle holders if you want them to glow brightly during the night! You might even combine multiple colors on top of each other for unique effects, but that’s entirely up to you.
Once they’re all set up, just let the warm light fill your apartment/house during the holidays!
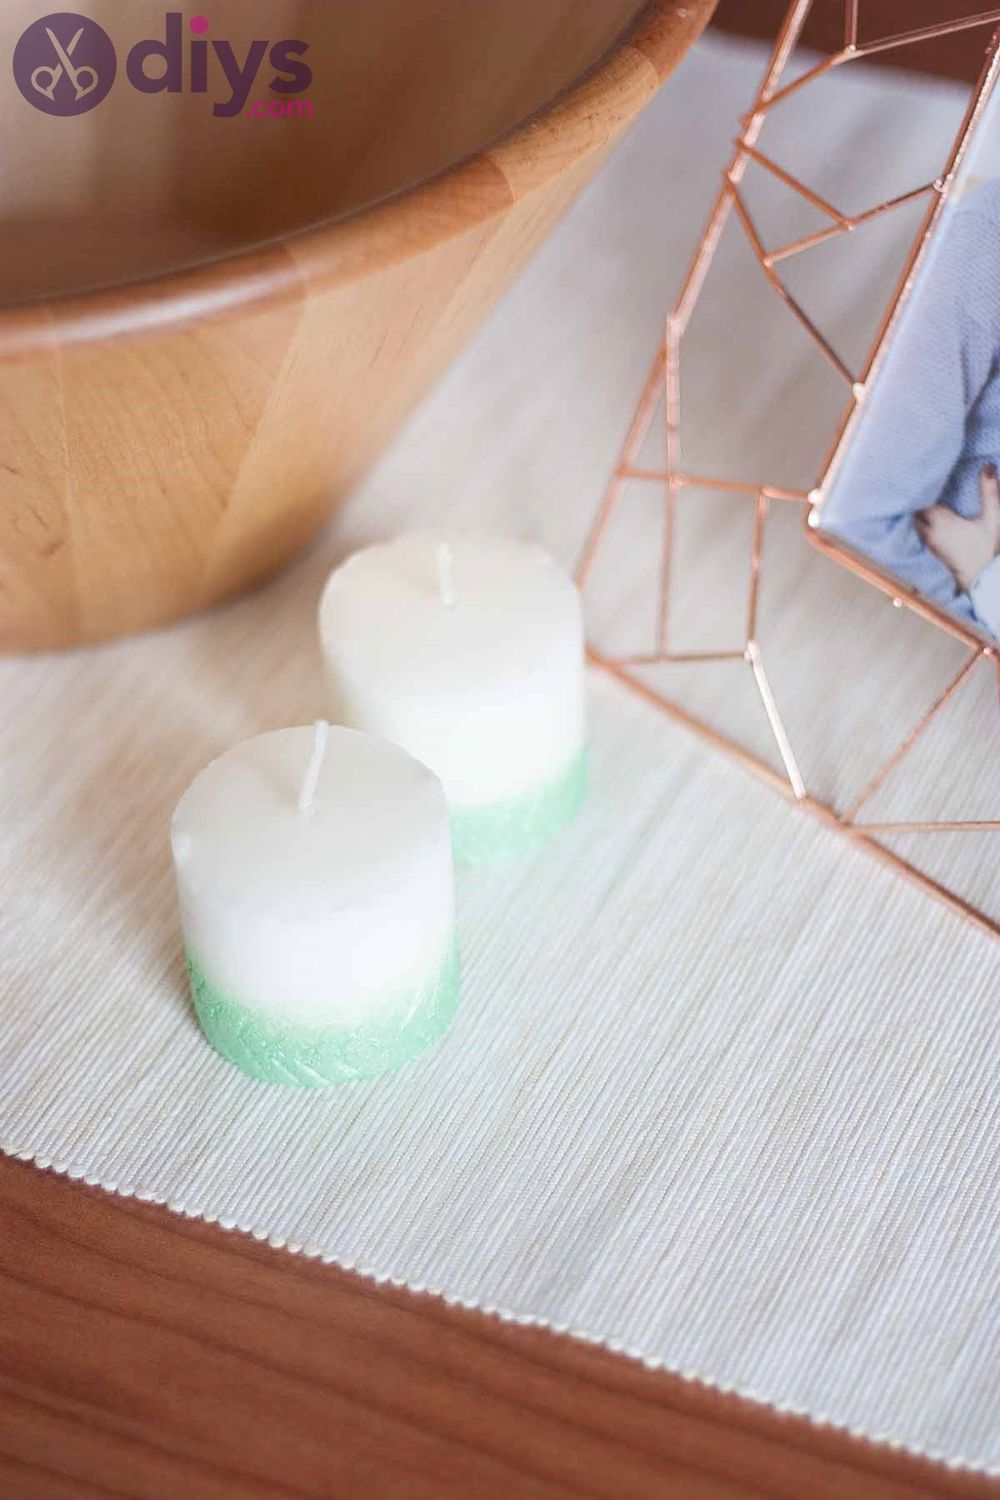
7. Chevron Candles – Window Lights Decorations
Chevron patterned candles are another cheap yet beautiful way to dress up your windows this Christmas.
To make them, simply place two-column candles next to each other inside a glass jar and secure the wicks with hot glue. Once this is done, just use some fabric or paint in order to get an intricate chevron pattern on the candle jars!
This simple project will definitely look impressive when placed on top of your window sills or even on your window itself if it’s big enough for the candle jars to fit.
It’s not only extremely cheap but also easy to do so you can try out new ideas without worrying they’ll turn out wrong in the end – which is pretty much what every creative person needs!
Last, but not least, light them up and enjoy the soft light they fill up your home with. However, you should keep in mind that live flames are dangerous around decorations, so you might want to keep a close eye on them.
But lighted candles are also perfect for creating a romantic atmosphere during the holidays!
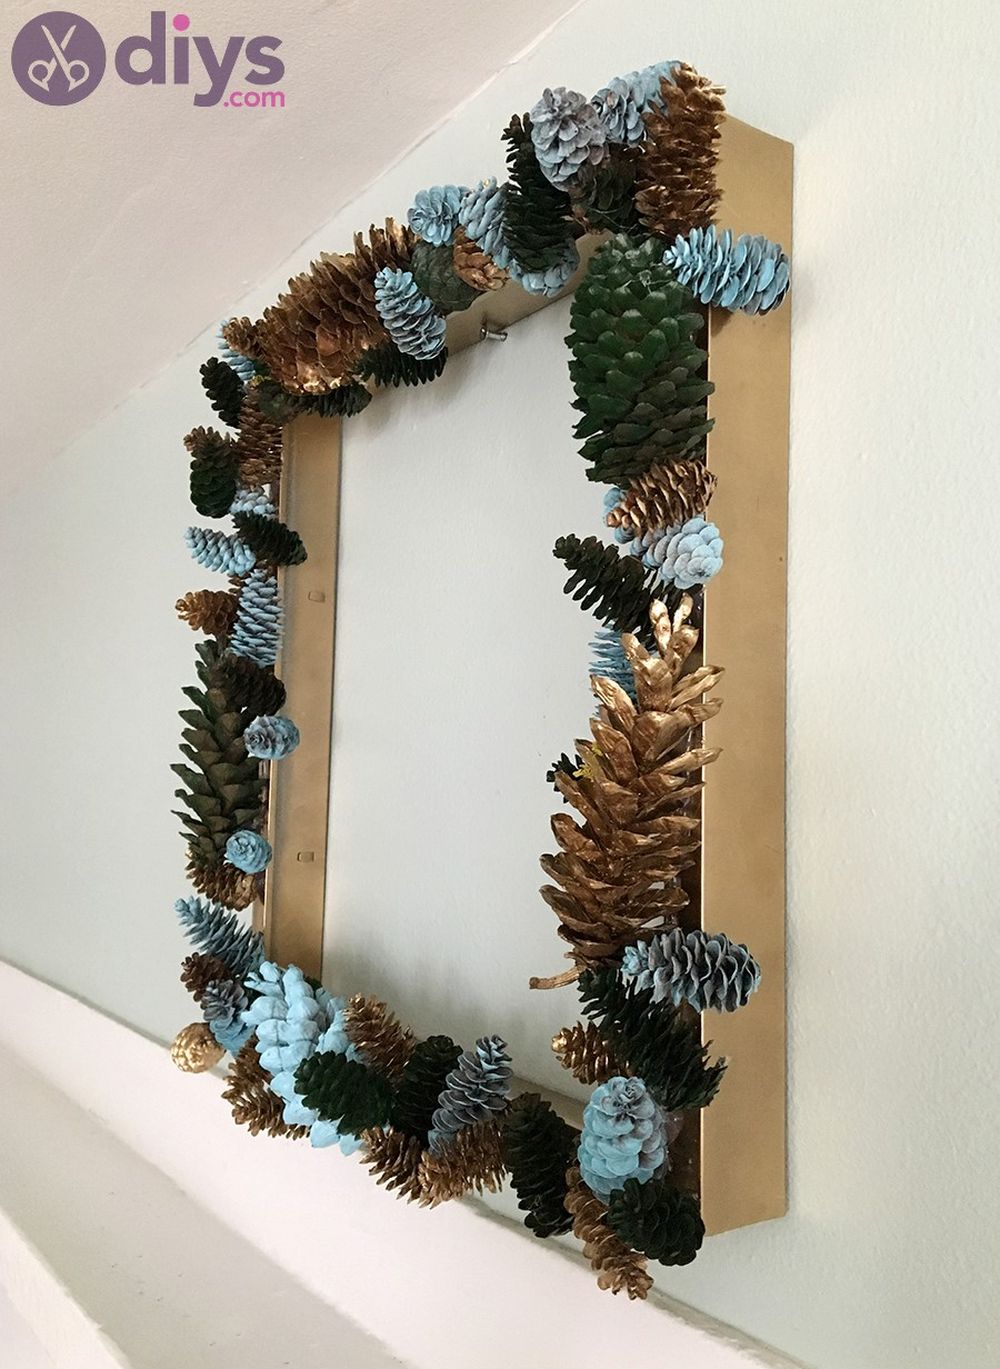
8. Square Pinecone Wreath – Christmas Window Decorations
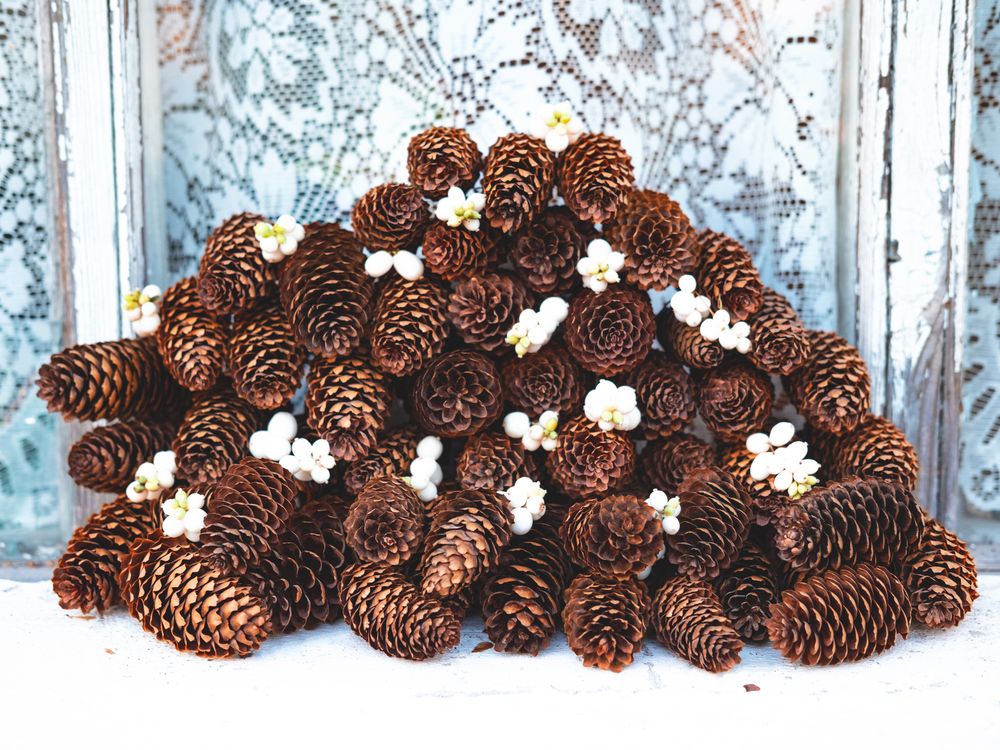
Pinecone wreaths are another simple yet beautiful way to decorate your windows this Christmas!
All you need to do is cut out a square of construction paper and secure it with two thumbtacks on either side of the window. Then, place pinecones in between them by using glue or attaching them with string or twist ties or simply placing them freely on the background paper if that’s what you want for your design.
This is perfect as outdoor window decorations since pinecones will blend in perfectly with nature as soon as they fall off the branches during wintertime, but they’re also perfect indoor decorations since all you need to do is to choose a backdrop color that matches your room’s tone, place the pinecones freely on top of it, and you’re done!
Just remember to clean up your pinecone wreath after Christmas since they are bound to scatter all over the floor when people walk in front of the window. It might also be wise to keep them out of reach from pets who might think they’re made for chewing purposes.
You could use the guide to learn how to make a wreath, but instead of making one, you can just decorate the frames of your windows as if they were a giant square- or rectangle-shaped wreath.
9. Holiday Fabric Banner – Christmas Window Decoration Ideas
Fabric banners are another simple yet beautiful way to decorate your windows during the holidays! What makes them great this season is not what they look like, but their versatility.
This means that you can make different kinds of banners depending on your preference and the fabrics available, whether it’s a snowflake pattern, an ornament pattern, or anything else!
While fabric banners are perfect for outdoor window decorations since they blend in perfectly with nature (just like pinecone wreaths), they also look great on indoor windows.
All you need to do is cut out a fabric pattern you like from some felt or fabric and sew it onto a ribbon. Then, use thumbtacks to attach it above your window, and voilà!
You can also decorate the banner with beads for a more stylish look. However, if you don’t have any ribbon then simply stick Christmas-themed stickers onto construction paper and stick that over your windows instead.
You can add some lights to them if you want to get festive for Christmas, but keep in mind that these kinds of decorations need more care than others due to their flimsiness.
10. Simple DIY Tassel – Christmas Window Display
The tassel is a less-popular type of window decoration, but we feel that it could work just as great as painting over your windows with fake snow, or hanging Christmas lights around your window frame this year.
While it’s mainly used for floor decorating since it can be draped over almost anything (such as doorknobs or table legs), you can also use them to make beautiful Christmas window decorations.
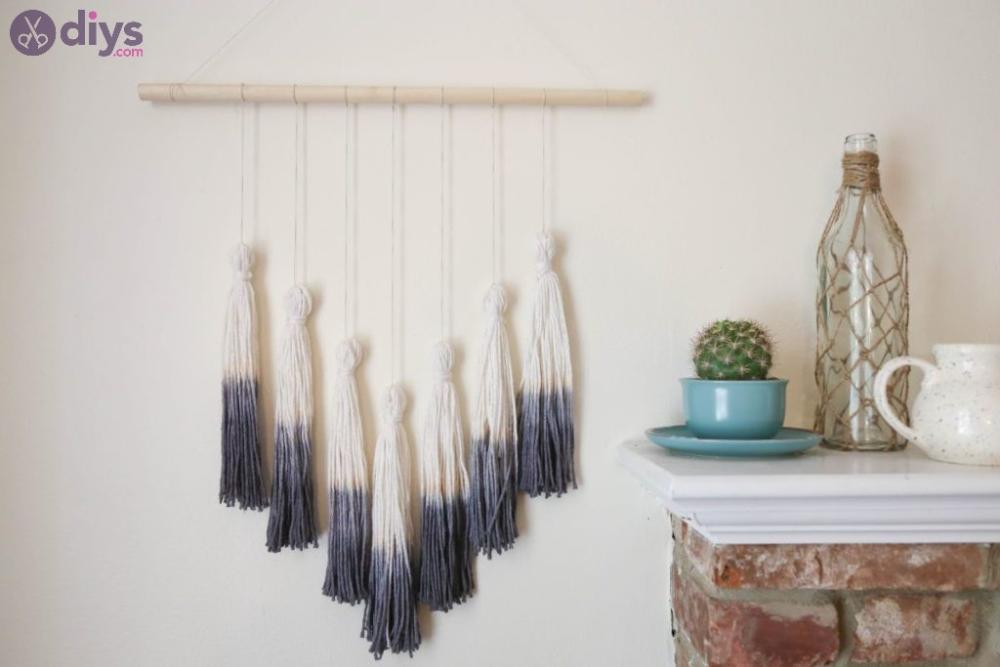
To start off with, all you need is a bunch of small (preferably twine) tassels and some string. Attach the string to one end of each tassel and attach two strings together at the other end using a knot or any decorative hardware that comes to your mind. Then just hang them up around your window!
However, if you don’t want to go through the binding process then simply gather several tassels together and tie them onto the string to make one large tassel. Then, hang it up next to your window frame and leave the rest of the string loose for visual effects.
Check the guide above to learn how you can make a tassel you can use as a Christmas window decoration without breaking a sweat.
11. Snowflake Art – Christmas Window
If you don’t want to cover your entire window with fake snow this year, then another good idea is to use snowflake art pieces instead!
Snowflake stickers are popular enough that you don’t really need detective skills to source them regardless of where you currently live. You just go to the local market, or arts & crafts store and ask for some snowflake stickers.
Most of the time you’ll find a lot of them, in varied colors, shapes, and sizes, so you can simply use them to decorate your window. However, if you’re not a fan of simply buying stuff and sticking it to your window, you can make some snowflake art pieces by yourself.
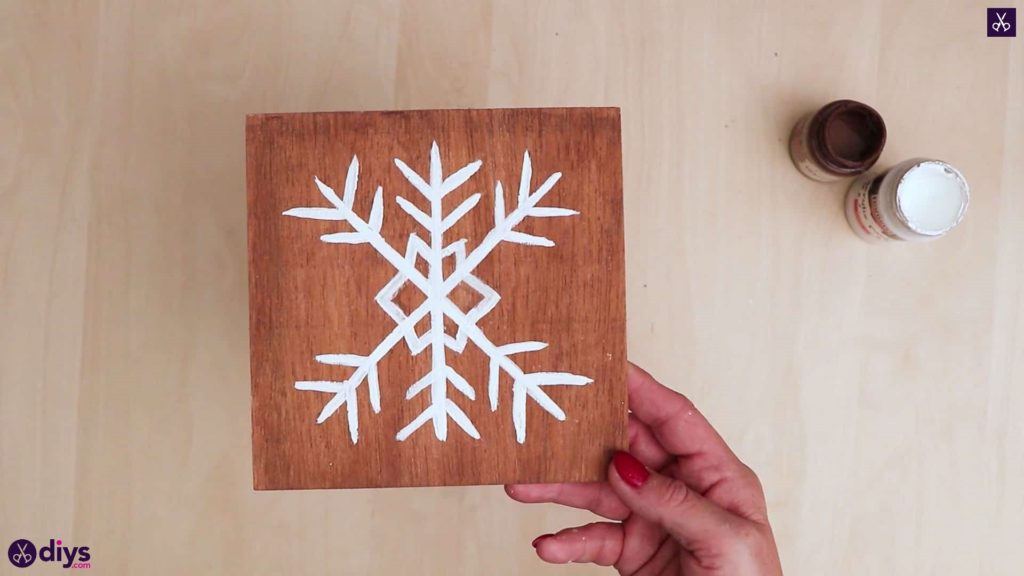
For instance, you can take a thin piece of matboard and paint a snowflake over it, then hang it on your window and use it as a decoration. You can freehand the snowflake, but there are also stencils you could use and spraypaint all over them if your artistic side is simply not there yet that you can freehand entire snowflakes.
If you want some inspiration as well as some detailed instructions on creating awesome snowflake art to use as Christmas window decorations this year, all you have to do is check the guide.
12. Winter Wood Slice – Christmas Window Display
If you want a simple and fun DIY project to do this December, then you can make a winter wood slice window decoration.
All you need for this is some old or scrap wood that you can find anywhere. You can even go as far as cutting out a tree branch from the woods outside as long as it’s not poisonous and follow the same steps.
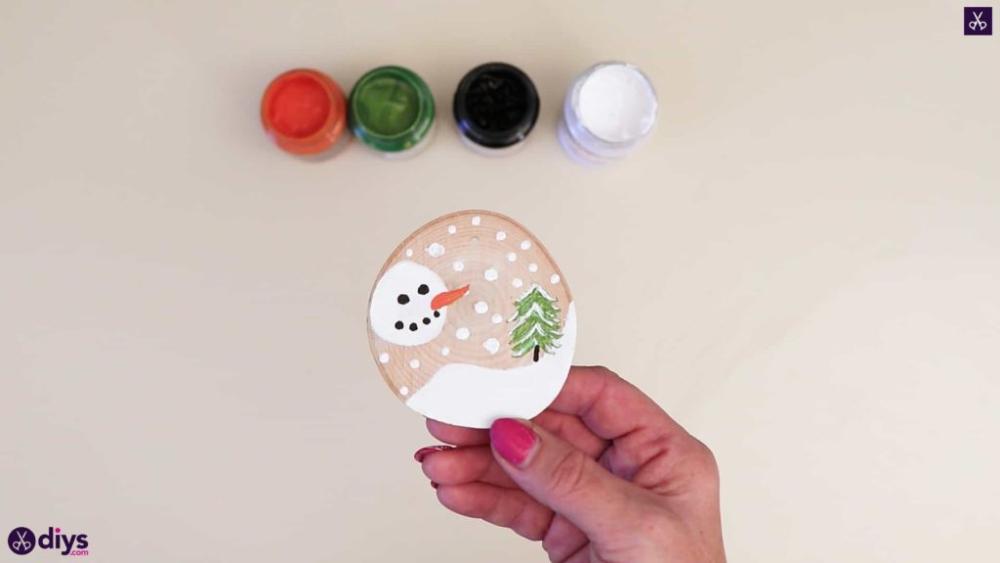
Once cleanly cut, simply paint over your wood slices with some acrylic paint in autumnal colors such as red, yellow, orange, and brown so that it looks more like a fallen leaf on the ground instead of an actual tree branch.
Instead of using these colors, you could think of your own design and just paint it over the wooden slice. For instance, in the example above we painted a winter-themed scene, but you’re free to express yourself in any way you see fit!
After making sure they’re dry enough to touch safely (which may take several hours), attach them onto any window surface using strong tape so no one gets hurt.
If you want to know how to make a winter wood slice decoration for your home without breaking too much of a sweat, check the guide above!
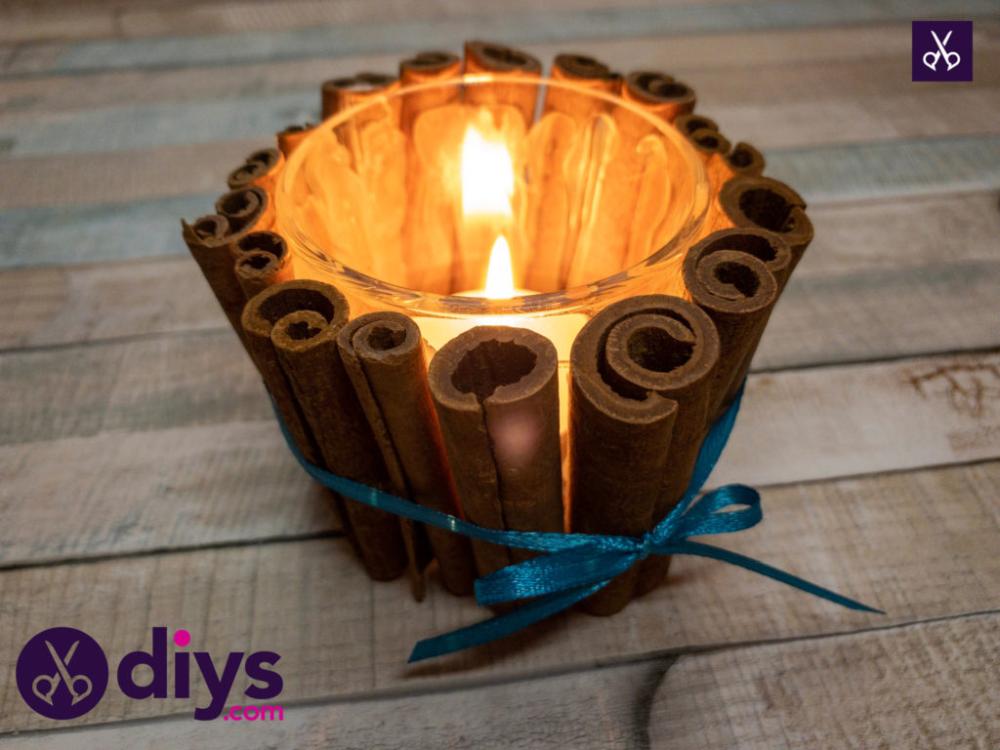
13. Cinnamon Stick Candle Holder – Christmas Window Decorations
If you’re looking for some simple and quick Christmas window decorations, then you can just use a cinnamon stick candle holder as your anxiety-relieving activity.
You can find these candle holders at most arts & crafts stores as well as grocery stores during the months of November and December, so finding them is not hard.
However, if you’d much rather prefer crafting them by yourself, all you have to do is buy a plain candle holder (those that are shaped like glasses work best), as well as a bunch of cinnamon sticks.
You’ll also need a glue gun or another method to make the cinnamon sticks adhere to the candle holder. Once you have everything prepared, simply take the cinnamon sticks and glue them one by one vertically against the outside of the candle holder.
Make sure to leave no space between the cinnamon sticks, so that the light won’t come through the empty spaces and make your decor look flimsy or cheap. After you’re done gluing the sticks, simply put a candle in the holder and light it.
For obvious reasons, it won’t be possible to stick this decoration against your window, but you can still place it on your windowsill. Trust us, it will still make your house look like a fairy tale retreat!
If you need further instructions, the guide above should give you all the information necessary to make your own cinnamon stick candle holder Christmas window display!
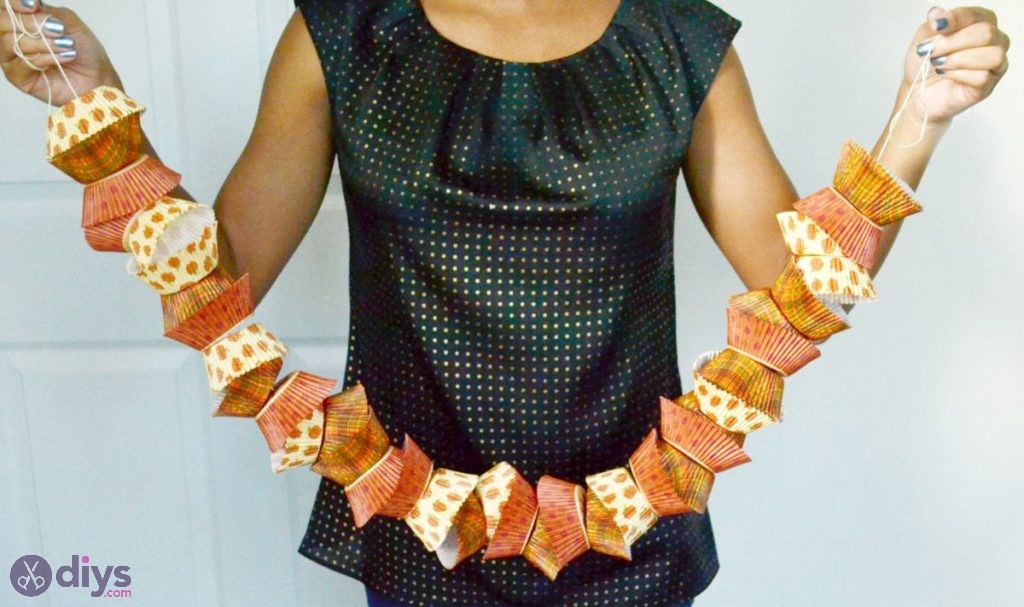
14. Cupcake Liner Garland – Christmas Window Decoration Ideas
If you want to make a garland for your Christmas windows, but don’t have much time and resources (or simply don’t feel like stringing together ribbons and other ornaments), using cupcake liners is one way to go.
All you need for this project are some cupcake liners as well as a ribbon. After that, all you have to do is attach the liners onto the string (preferably in an alternating manner such as having one pink liner then another pink liner, blue liner, blue liner, etc.), securing them with hot glue if necessary.
The colors of the liners you’re gonna use for this garland are entirely up to you, so make sure to pick some colors that will give a nice contrast with your other decorations.
The best part about making these garland decorations is that not only will they look cute hanging on any window of your choosing at home or at work, but you can also reuse them later on by erasing the liners and drawing new designs onto them!
To find out more about making this nice Christmas window decoration, check out the step-by-step guide we attached above.
15. Christmas Joy Holiday Wreath – Christmas Window Decorations
If you’ve always dreamt of making your own Christmas window decorations, but don’t know where to start, making a Joy Holiday wreath is the perfect activity.
All you need for this craft are some green construction paper or felt fabric, hot glue, sticks (you can find these at any craft store), and crayons.
For those who can’t draw well enough to make their own design for this project, another great idea would be using cloth ribbon embroidery tape since it comes in all sorts of different colors.
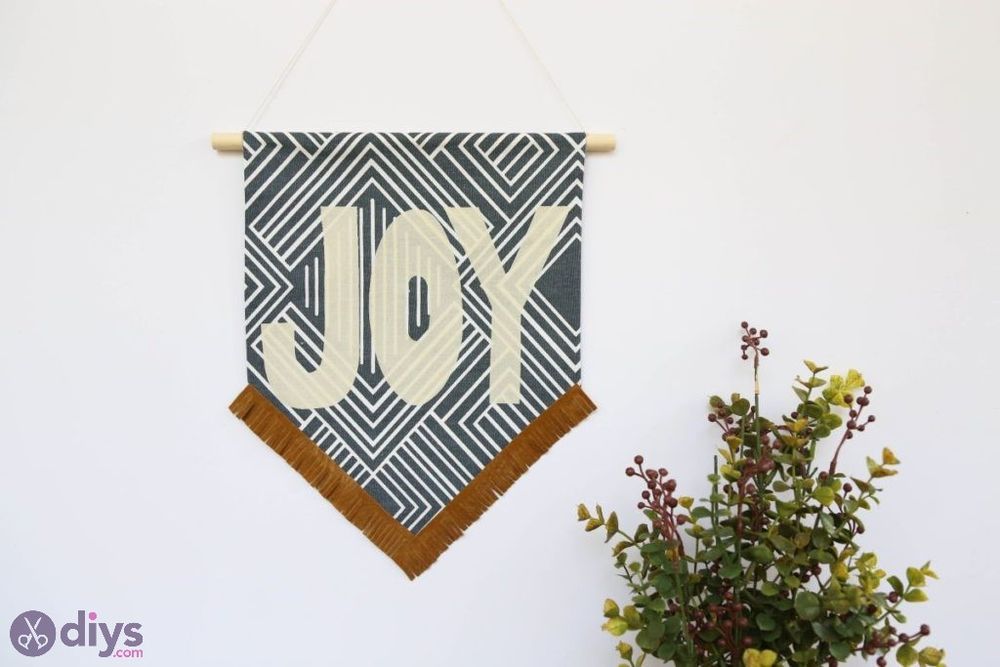
Once you’ve got all these materials together, simply cut the green sheets of paper or felt fabric into letters (we spelled out “Joy,” but feel free to choose your own word). Then, starting with your construction paper, draw whatever designs you want to on them (we recommend drawing Christmas trees), and voilà! You now have Christmas window decorations.
Then, once you’re done decorating all of the pieces of paper or fabric that will be used for this project, just glue them onto the sticks in a way that creates a wreath shape. Also, attach some ribbon onto it if you happen to have any cloth ribbon embroidery tape handy.
For more information about making a nice wreath that spells out your love for Christmas, check out the step-by-step guide shown above!
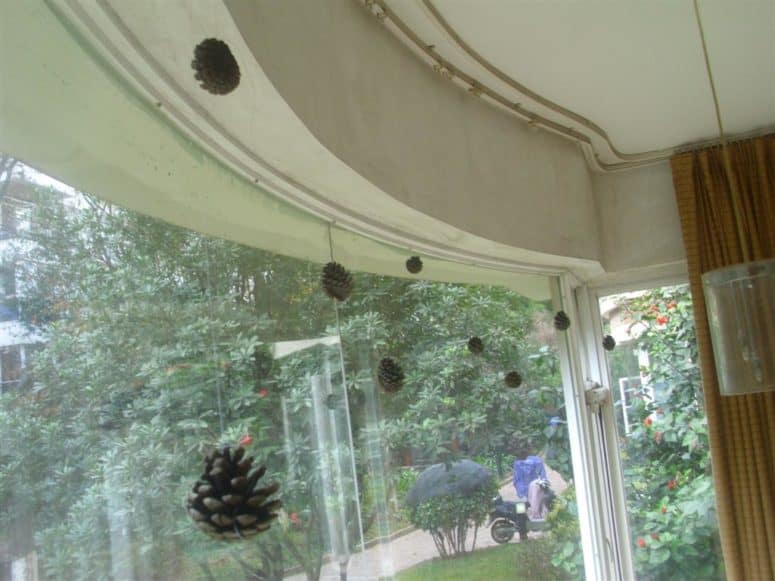
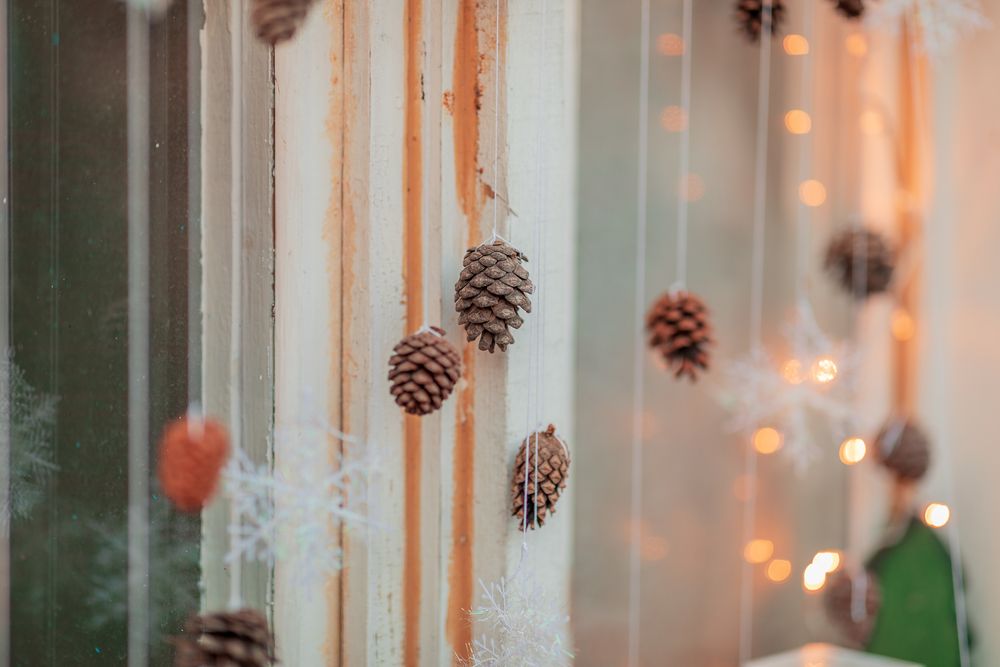
16. Simply Hanging Pinecones – Christmas Window Display
If you’d like to have beautiful Christmas window decorations without having to do too much work, using pinecones is a project that won’t take up too much of your time!
To make this project, you’ll only need some pinecones and enough string to hang them all from your window. You’ll have to attach some string to each pinecone, and then use transparent tape to glue these pinecones to your windows.
Make sure not to use too many pinecones for one window, or else you’re gonna end up with an opaque-ish window. Furthermore, people may have a hard time figuring out the decoration, and that’s somewhat counterintuitive, don’t you believe?
Furthermore, you may also want to use some Christmas lights and run them casually between your pinecones. Just make sure not to overburden them, else they’ll come right off your window.
Although it might not seem like much in terms of decoration, hanging these cones in front of your windows is certainly more pleasant for visitors than having bare glass. As such, when you have friends crying out “Christmas decorations, please!” you’ll now have something to put up!
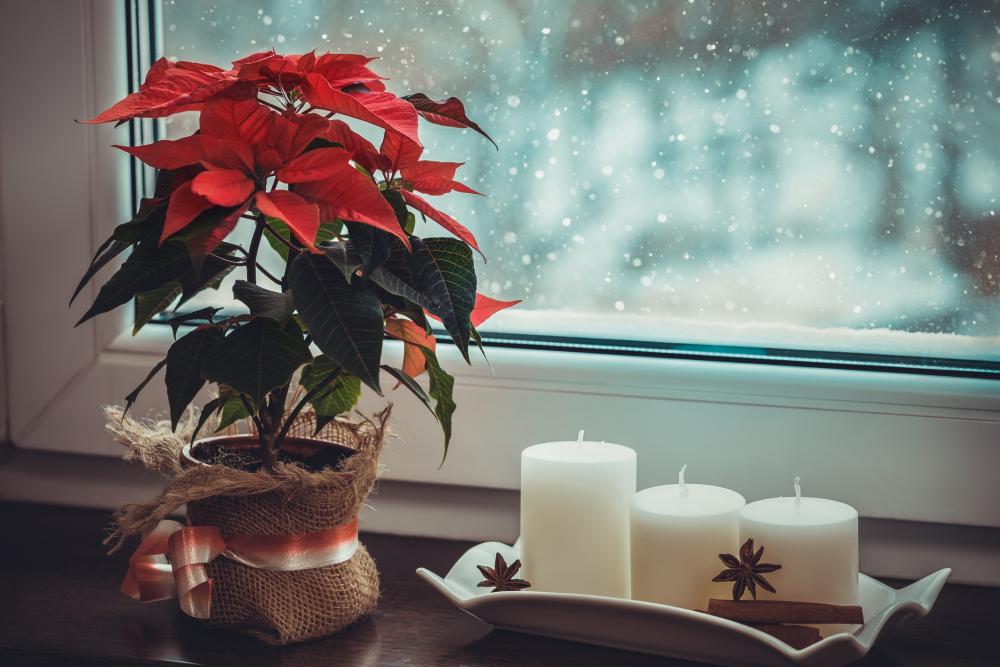
17. Poinsettia & Candles – Christmas Window Display
Do you want Christmas window decorations for your house that are easy to make and simple? If so, then making a poinsettia and candles arrangement will get the job done!
To make this project, all you need is a Poinsettia, some ribbon (green preferably), floral tape, candles, glue sticks of any color, and some fabric. Also needed would be some scissors and a little bit of patience.
For those of you who don’t know what a poinsettia looks like: it’s basically like a small Christmas tree with red leaves. To make one, simply take the decoration that comes on top of your poinsettia when you buy it from the store at Christmas time, then cut away all but six fronds from the stem.
After this, wrap your Poinsettia in ribbon and secure it with some floral tape (this way the poinsettia won’t move around while you hang it up or move it). Next, you’ll want to get the candles ready by putting them on something that’s heat-resistant.
After all of these preparations are done, simply put your Poinsettias where your other Christmas window decorations go and light up your candles! You can even add little things like snowmen figurines and such if you want! Ornaments would also work well for this project if don’t have any candles at home.
As a final step, just be sure to take regular care of your Poinsettias so they don’t wilt and die before Christmas comes!
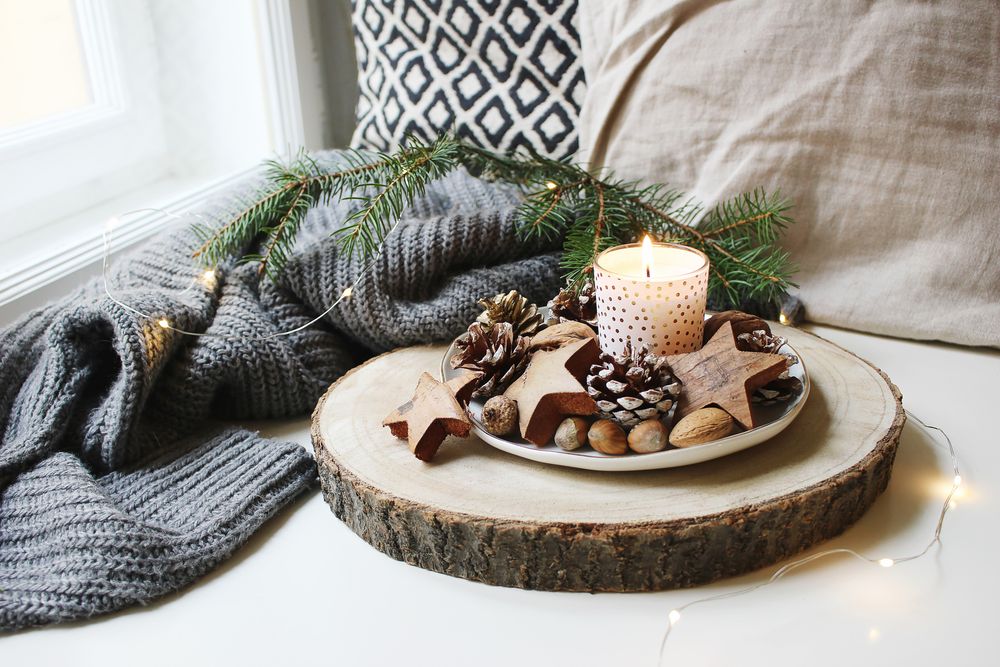
18. Pinecone, Nuts & Candles Decor – Christmas Window Decorations
A great and simple way out of making your own Christmas window decorations is by using pinecones, nuts, and candles!
To make this project, simply gather some wooden stars of any shape or size that you want. Next, glue them to a base of your choice (e.g., an old picture frame). Now for the centerpiece: get yourself some candlesticks of any color and secure them on top of your wooden stars with glue sticks. Then hang up your new decoration near a window in your house!
After all these steps are complete, all you’ll have left to do is put the nuts in the middle of a candle holder with a string around it or something similar. You can even keep adding more if they start to look sparse.
As for lighting candles, that’s completely up to you! You could light them all at once or just one at a time. Whichever you personally prefer! Although if your candles are scented, it might be best to do this project on the night of Christmas Eve so you can get yourself some nice house fragrance.
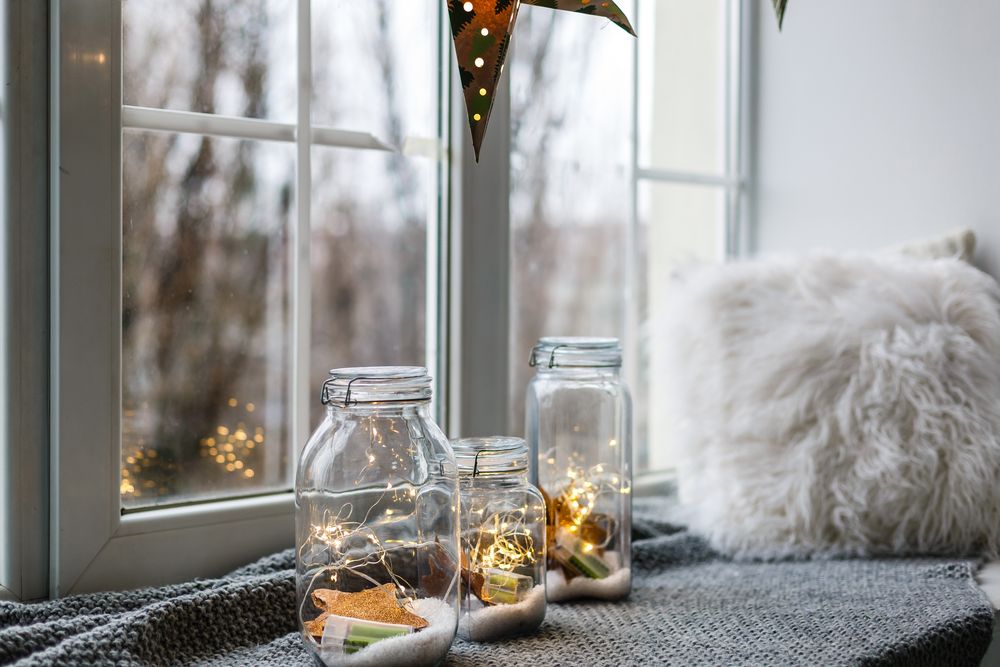
19. Lights In Jars – Lighted Christmas Window Decorations
If you’re looking for a quick and easy way to add Christmas window decorations to your house, this next project will do just the trick!
To make it, simply take some glass jars of any size or color. Then cut up some LED lights in different lengths and put them in the bottom of each jar. Next add beads, snowmen figurines, toys, anything that is small enough to fit inside a jar but big enough so that when you shake it around it makes noise.
After these steps are completed, all you’ll have left to do is hang your new decoration on a window in your house or even outside depending on what’s safe to do where you live! Since LED lights don’t get hot as regular light bulbs would, you could even hang these lights outside if it’s safe!
As for decoration ideas, just look at your little objects that are inside the jar and use whatever is plentiful to decorate with. If you have a lot of toys, put them on top of your Christmas tree or simply set them around your house wherever they’ll fit! These decorations are so simple to make yet they can look very festive when done right.
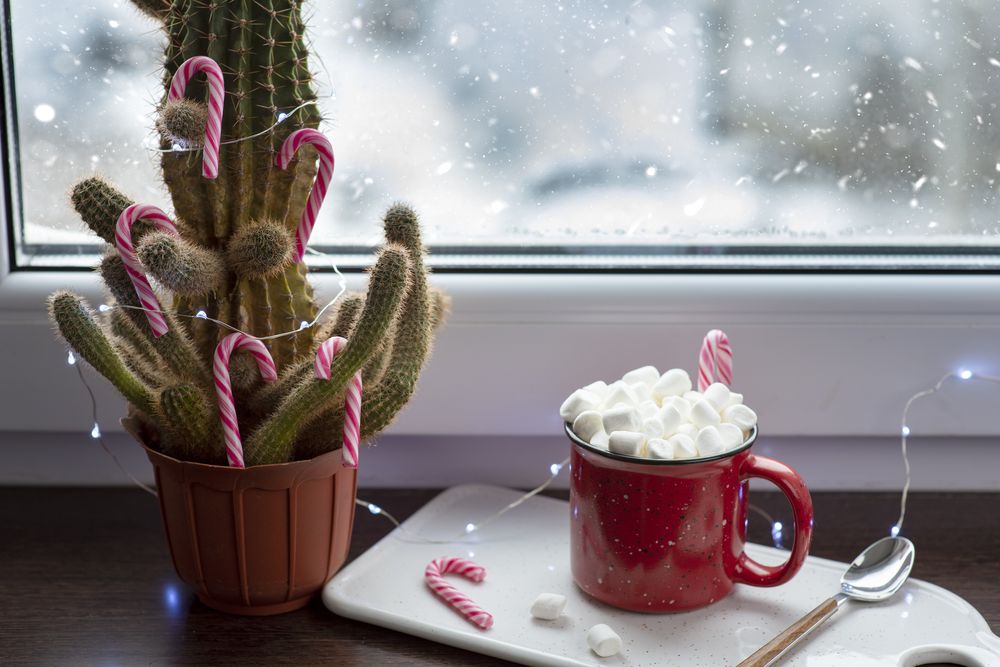
20. Cactus Christmas Tree & Candy Canes – Christmas Window
A very easy yet effective-looking Christmas window decoration for this next project is to use cacti!
To make this, all you’ll need is a cactus plant that’s tall enough to be mistaken for a tiny Christmas tree and some candy canes. We know this one is pretty specific, but trust us that if you manage to pull it off, it will be worth it.
Now take the candy canes and hang them all over your cactus plant, provided that the plant is the one with the various hooks like in the example photo above.
Make sure not to take the stick off of the candy canes so that you can later take them and eat them if you’re feeling like it.
After that, simply put your cactus wherever you want in your house and enjoy! We recommend you place it on your windowsill next to some other pieces of decoration, such as wreaths or Christmas lights.
This decoration really is that simple to make! Just remember not to overwater the plant since cacti don’t hold water long.
Also, be sure to keep them away from pets and kids who may want to eat them or play with them when you’re not looking, especially seeing as your tree will be showcasing quite a lot of candy canes.
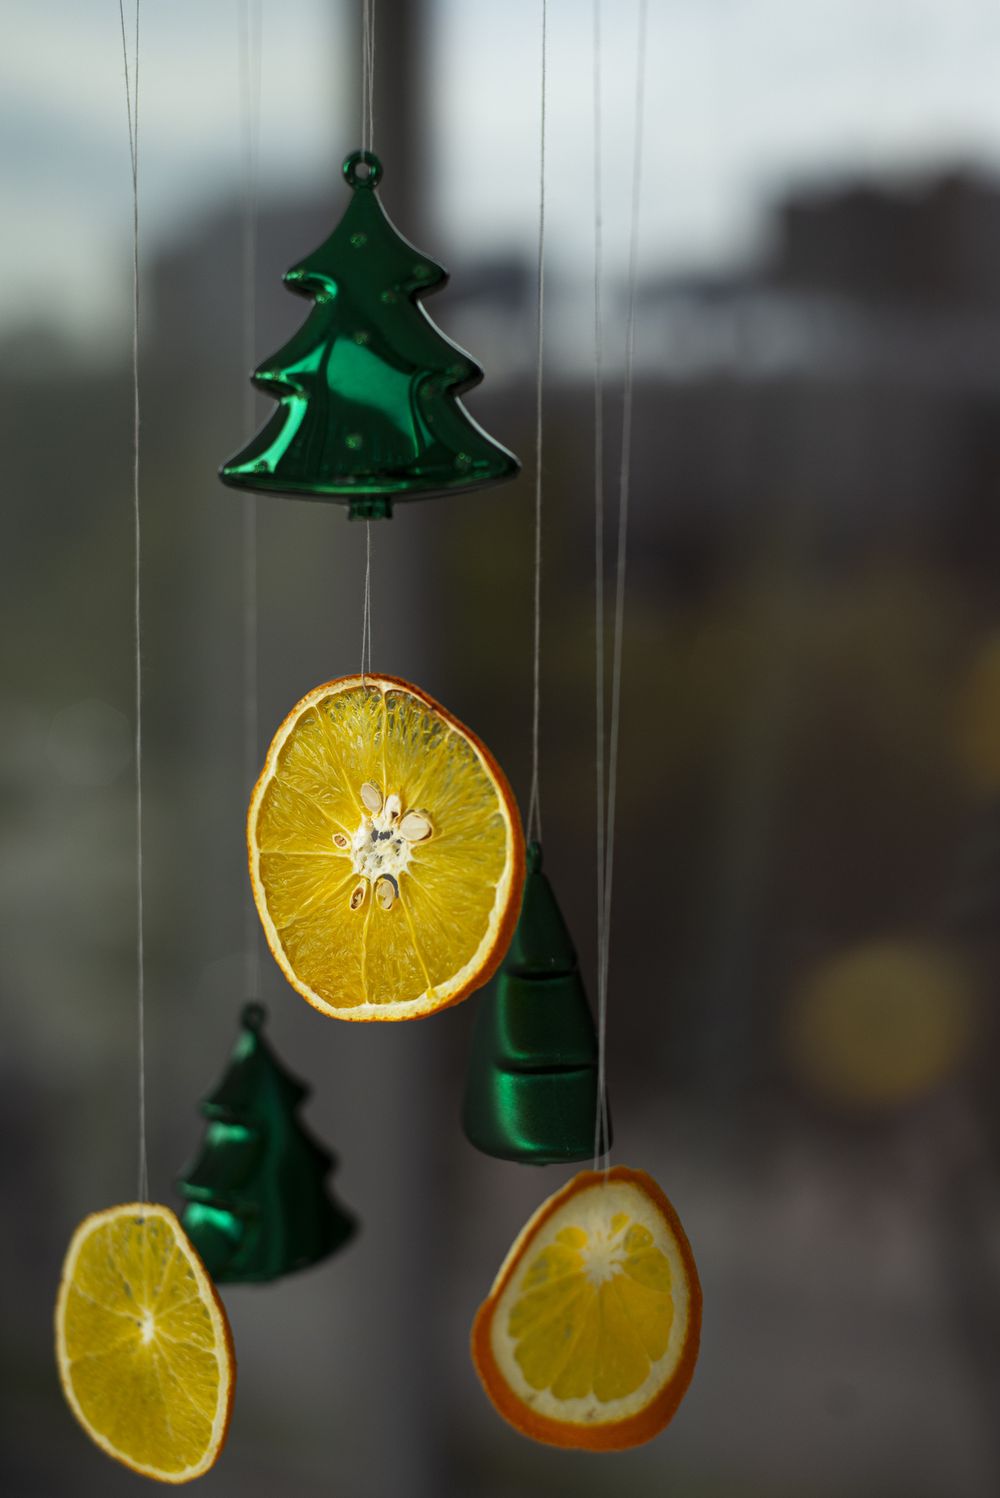
21. Dried Orange Circle Decorations – Christmas Window Decorations
Here’s one more Christmas window decoration idea for you: dried orange circles! To make this decoration, simply take a few large oranges and cut them into thin slices. However, you’ll want to make sure that the slices aren’t too thin, else they’ll collapse without too much effort.
If you want variety in your decorations, you can use slices of different sizes. Otherwise, we suggest you only use the center three slices (the middle one, and the ones on its sides).
Now that you have your orange slices all nice and cut, you’ll have to dry them up, which can be done in various manners: you can either place them in the oven, use a food dehydrator, or just place them on a paper towel and let nature follow its course.
Obviously, drying slices of orange on a paper towel can sometimes lead to mold, which is perfectly natural, but not exactly decoration-worthy. After the orange slices have dried up, use twine or other types of thread to tie them up and create nice Christmas window decorations out of them.
You can either use only orange slices or mix them up with various other plastic decorations such as plastic Christmas trees, stars, and baubles. If you want your orange slices to last longer, you could cover them in a thin coat of transparent varnish or use hairspray.
22. Tangerine & Spruce Branches – Christmas Window Display
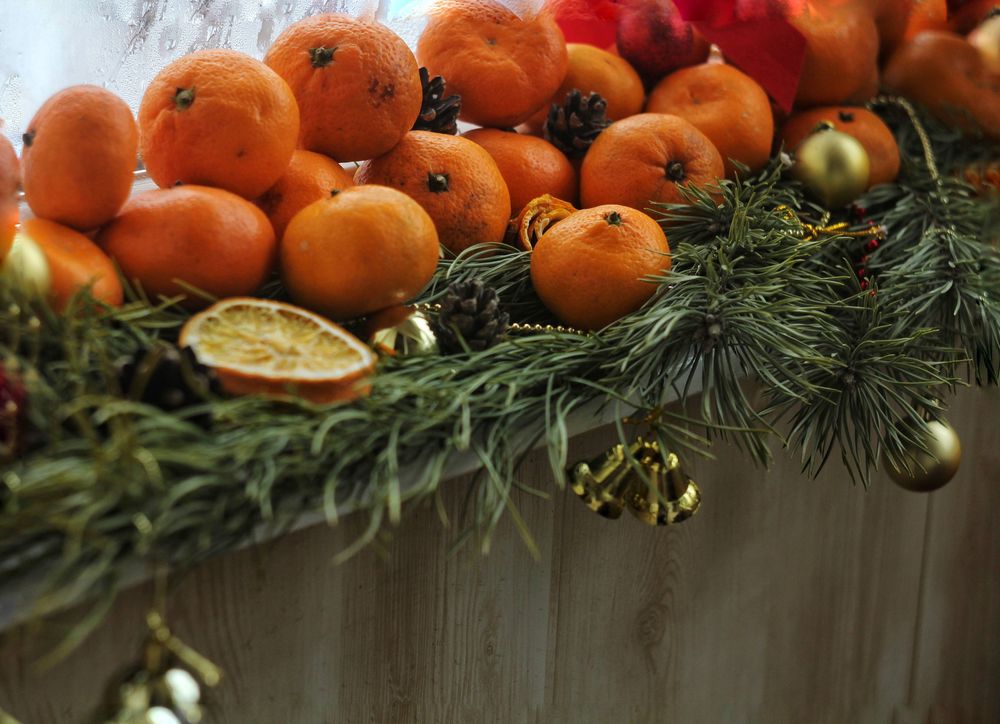
Here’s a simple yet very commanding window decoration for you: a Christmas tree made of tangerines and spruce branches!
For this project, all you’ll need is a bag or bowl full of tangerines, some spruce branches from outside if you have them, and some wooden skewers.
First off, remove the stems from your spruce branches so that they’re shorter in height. Next up, cut out the leaves from the branch by cutting at their base.
In case there aren’t any spruce branches available to you outside, we suggest looking inside your closet for fake ones; they might really come in handy!
Now put one end of each skewer into a tangerine and stick it inside a spruce branch. At this point, all you have to do is string the whole lot together with some fishing wire so that they’re firm enough, then simply add a star at the top if you want to complete your decoration!
The final result has a real impact, which is what we love about window decorations. The great thing about this specific decoration is that it will last for several days before you’ll have to re-freshen up both the branches and fruit.
After five days or so, most of our display had lost its color, but no fear since we were ready with a new one!
23. Handmade Christmas Tree Paper Garland – Christmas Window Decoration Ideas
Here’s yet another Christmas window decoration that will definitely make your peers green with envy! The thing is, you can do this project on a very tight budget and in no time at all.
First things first: print out some white artificial Christmas trees on a nice piece of paper or cardstock and cut them out once you’re happy with the result. Then, take a needle and some thread and simply sew them onto your background paper until it looks like the picture.
The reason why we chose to use white Christmas trees on a red background is that it helps add depth and contrast, but if you want different colors or patterns for this project, feel free.
Once you’ve finished sewing up your garland, be sure to add some extra glitter around the edges using yellow or gold paint for an even greater effect! Finally, attach some twine so that you can hang it on your window later on.
And there we have it! You made a homemade paper garland that’ll look great hanging up in your front window or anywhere else you might think of.
24. Felt Christmas Tree Garland – Christmas Window Display
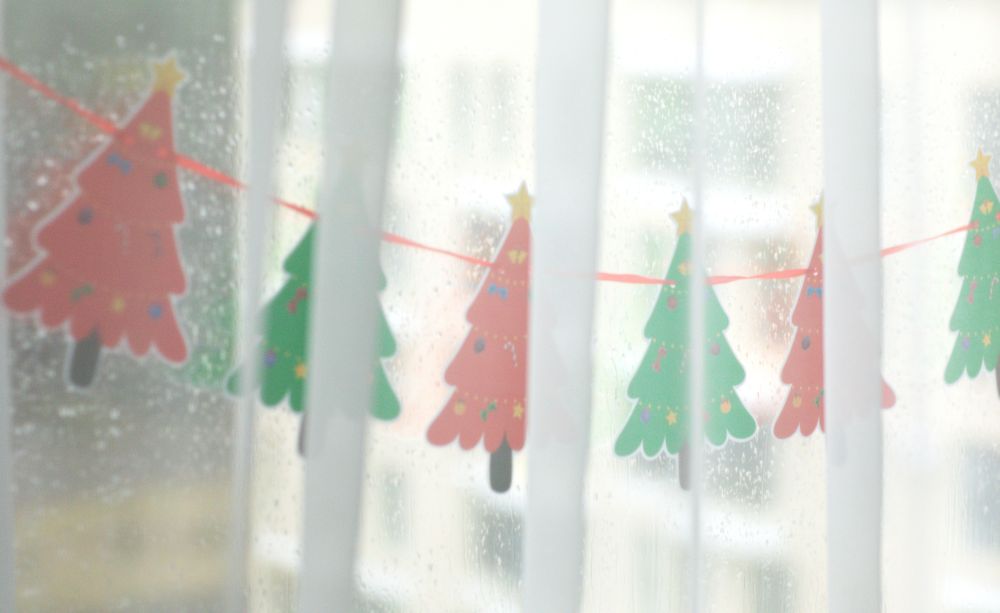
If you’re looking for an easy project to do with kids, why not try making felt garlands? They’re really nice and even adults can enjoy doing them.
The first step is to cut out your green and red felt squares and triangles so that they look like Christmas trees. Use a pair of pinking shears to give the edges a decorative finish and if you want, you can also paint on some little white dots using fabric paints.
Once you’re happy with the result, put on some festive tunes and enjoy the spirit of Christmas slowly seeping into your house.
The next step is to simply attach some thread or twine to all of your pieces so that you can hang them up later. Attaching several different lengths of string means you’ll be able to create a really nice garland effect across your window.
To create the hanging garland we used doubled-up thread since it’s thicker than regular thread, but as always, use whatever sort of string or twine you prefer.
Once your garland is complete, cut out a star from gold felt and glue it on top! That way at least one of the projects has a star on it.
And there you have it! You made some pretty garlands for Christmas out of felt that everyone will love. Don’t be surprised if people start asking where they can buy one like yours; it’s bound to happen!
25. Christmas Lights Garland – Lighted Christmas Window Decorations
This is another great DIY project that you can do with your friends or family, especially during the holiday season. The trick is to collect the right materials beforehand, all of which should be easy to get at any store.
First things first, cut out your green paper to look like Christmas tree branches and white lights. You can either print out some patterns onto festive paper or just freehand it yourself.
Take a needle and start sewing on the white lights so that they actually look like little bulbs shining bright against your dark green background. If you want, you can use several different shades of green mixed with other types of yarn, but in our case, we thought one solid color looked better since it helps add depth to the scene.
Once your light strings are done, glue them onto both sides of your garland. Add any extra embellishments that you think might look nice, but try not to go overboard since otherwise, it’ll overload the scene.
To finish the garland, glue on a hanging string so that you can hang up your creation after it’s done.
And there you have it! You made some beautiful Christmas light garlands that are bound to brighten up everyone’s mood during the holiday season. Get started on these projects now and you’ll be finished before you know it!
26. Plasticine Toy Train – Christmas Window Decorations
Making Christmas window decorations can be a great way to let your creativity loose, and if you’re looking for an easy project that even kids can help with, try making this toy train.
All you’ll need is some modeling clay, a paintbrush, and two paper cups. The first step is to use the cup as a mold so that you can shape your train’s body.
You can either use one solid color or mix several different shades of clay together to create a more interesting effect. Once your base shape is done, it’s time to move on to the wheels! Make sure they are round enough before painting them on using thick black paint.
Once everything has dried up overnight (or in around 24 hours), paint on some windows using white clay and a tiny conical paintbrush. To make it look as realistic as possible, you can even create the effect of curtains by drawing on vertical lines next to each window.
And there you have it! You’re finished with your toy train for Christmas. If you think it turned out well, why not try making a whole set? Just remember that if you choose to work in a group, everyone needs to help out during the collection process beforehand.
Now that your project is complete, you can place it on your windowsill and have everyone visiting admire your (or your kids’) creativity! Merry Christmas!
27. Pinecone Bundle – Christmas Window Decoration Ideas
These beautiful pinecone bundles are perfect for making Christmas window decorations because you can place them just about anywhere, and they look absolutely stunning!
All you need to craft these beauties are a bunch of pinecones (as many as you want) and some form of greenery. Think ribbon, garland, tinsel, etc. You could even use Christmas lights if you don’t mind them being slightly visible.
After gathering everything, cut the ribbon into two equal pieces, then tie one end around both your bundle’s branches. If necessary, secure the knots with glue or tape.
Bend back all but the last row of pinecones on each branch before tying the other end of the ribbon to that row. Make sure that the tips of your pinecones are pointing down, and that the branches are relatively close to each other.
After you’ve tied both ends together on each branch, you can go ahead and place your Christmas window decorations wherever it suits you best! These bundles look especially great when placed under windows or in front of large mirrors.
28. Bottle Cleaner Christmas Tree – Christmas Window Decoration Ideas
Creating make-believe Christmas trees out of bottle cleaners is (or at least should be) one of the most popular go-to projects you could try this season, mainly because converting a bottle cleaner into a fake Christmas tree is so easy!
All you have to do is buy a bunch of bottle cleaners of various shapes and sizes (however, make sure you buy ones with longer bristles) and have a pair of scissors and some spraypaint nearby.
Start by cutting the bristles of the bottle cleaners from top to bottom, so as they start to look like Christmas trees. You’ll want shorter bristles at the top and gradually longer ones as you advance to the bottom. Make sure not to touch the ones at the bottom at all.
Now that your bottle cleaners look like Christmas trees, use some green spray paint on them. If you want, you can use different colors for more variety and fun.
Use some pliers to cut the handle of the bottle cleaners so that it’s short enough to resemble the trunk of a Christmas tree. In lack of pliers, you can simply cover it in a rag and try to bend it slowly onto itself.
Once the handle reaches an appropriate size, you can leave it as it is, or cover it in some brown sticky tape (or white one that’s painted brown), or colored paper. After all, we want the trunk to look Christmas-tree-like.
Lastly, find some wood slices to stick your fake Christmas trees on (using a glue gun works great) and place your awesome Christmas window decorations on your windowsill for everyone to admire!
29. Burlap Vase & Christmas Tree Branches – Christmas Window
Creating a Christmas window decoration with some branches and a vase is not only an easy project to follow but also one that you can do in just a few minutes. To begin, simply buy some cheap branches to use as your main base for the project (you can use twigs, too) and place them inside the vase using hot glue.
As far as the vase goes, you can choose whatever strikes your fancy in terms of shape, size, and color, as it won’t matter too much. Our suggestion is to go with the cheapest vase you can find, and you’ll soon understand why.
After buying the vase, take some burlap and wrap it around the top of the vase. You don’t have to be very neat with this, as that’s what gives your Christmas window decoration that rustic-style look.
Glue some more branches on top of where you’ve placed the burlap and use a hot glue gun to place some red berries in between them. That’s about it! If you want, you can add some bows or ribbons for an extra touch of festive cheer.
Now comes the beautiful part: adding flowers! You can choose whatever kind of flowers you want to include in your project, we find tulips look best so we chose them to add inside the vase.
If you decide to go this route, make sure you don’t add anything else in the flower pot aside from flowers so it doesn’t look cluttered and unappealing.
And there you have it: an awesomely easy and cheap project to try out during these holidays and put on display for everyone visiting your home (or workplace) to admire!
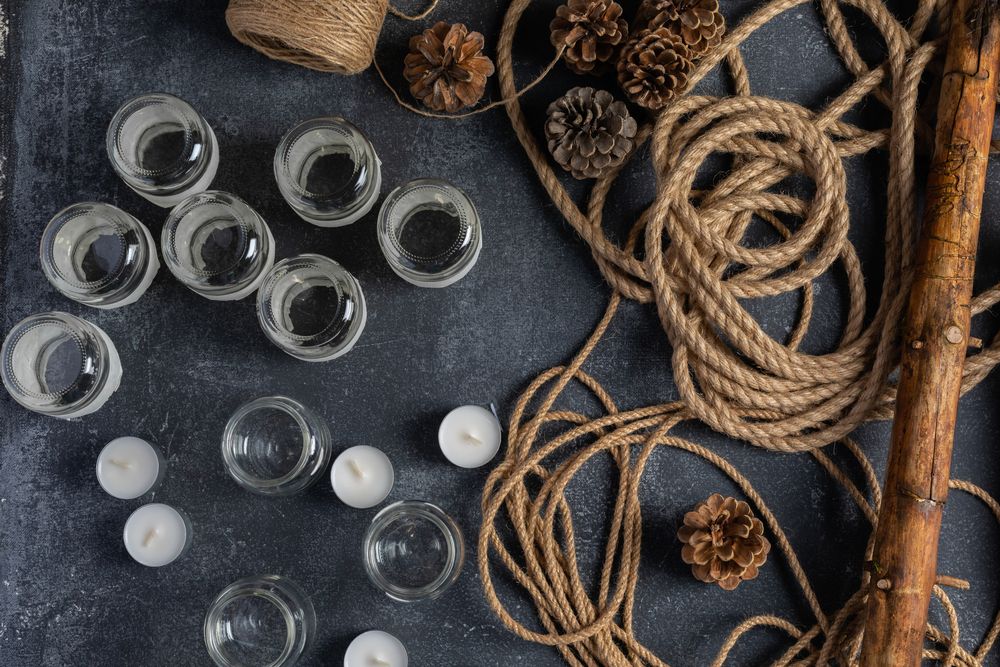
30. Light Garland With Glass Jars & Rope – Window Lights Decorations
This is a great project for those of you who want to add some special lighting effects to your home without having to spend a ton of money just for Christmas. All you have to do is buy some cheap glass jars from the dollar store, some wood discs from the craft store, and rope or whatever else strikes your fancy.
Once you have these items on hand, paint the bottom halves of the glass jars black and attach the wooden discs with hot glue. After doing so, simply run your rope through each jar so that they all are hanging at equal distances apart.
Arrange the jars as you want, then use a hot glue gun to keep them in place. You can also paint your jars with whatever color you want, but that’s entirely up to you. As for the wood discs, just use a saw to cut out some circles from those and attach them at the top of each jar using a hot glue gun.
The next step involves hanging them up on your window or wherever else you desire. You can either use thumbtacks or regular nails if don’t have any tape hanging around, but you can also use a hot glue gun to do the trick!
When everything is done, simply position your awesome window decoration under a lamp or next to a lightbulb so it catches all the light and reflects it beautifully throughout your home!
31. Gingerbread House – Christmas Window Decorations
The gingerbread house is a neat decoration to try out this holiday season, as it’s both practical and easy to make.
To start off, you’ll need some brown cardboard that you can use for the house’s foundation. You can cut it however you want, but your best bet would be to use rectangular pieces instead of square ones so they don’t warp under pressure later on.
After cutting them out, simply glue each piece together until you form a square with four walls. Don’t worry about not being able to see what you’re doing if using brown cardboard; just follow our instructions carefully until everything is covered!
Once that part is done, simply place another sheet of cardboard onto the first one, but this time glue two sheets together (for the roof) and use a sharper knife to cut off any parts that you want because it should be much easier to do so.
Use a ruler as a guide if you don’t feel confident enough to eyeball the measurements, but make sure your roof’s pieces are larger than those of the walls. It should look something like this once done:
Once all three sections are ready, just glue them together and let them dry for 15 minutes or more. Just follow whatever instructions came with your glue bottle if you’re not too familiar with using hot glue guns.
In addition to that, these Christmas window decorations shouldn’t take you too long because there aren’t many steps involved in making them! All that’s left is adding some colorful icing along with some Christmas lights and other decorations like you usually would on a gingerbread house.
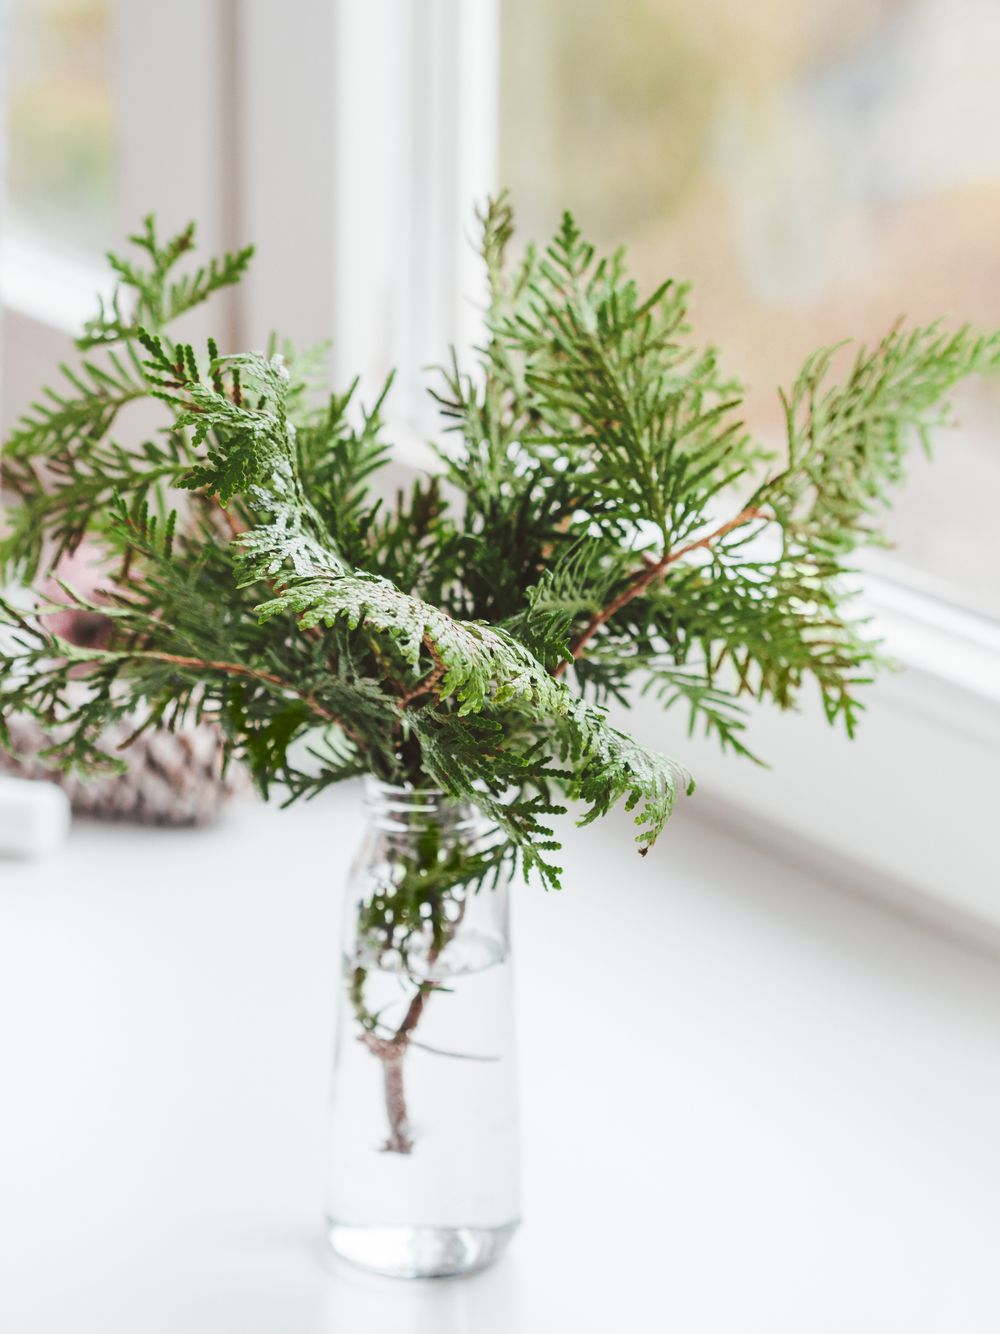
32. Vase With Thuja Branches – Christmas Window Display
Thuja branches are perfect for making Christmas window displays because they never lose their color, so you won’t have to worry about them turning brown or yellow after a few months. Just buy an inexpensive glass vase, some thuja branches, and glittery decorative stones. Then follow these steps:
To start off, put small amounts of glue on the bottom of the glass vase and place some glittery stones onto it until they cover the entire base of your decoration. This provides another way of reflecting light through your window.
Next, put a bunch of thuja branches into the vase and arrange them however you want. If you’re going to use a few smaller ones then make sure to glue them together before putting them in the vase or else they’ll be too long and won’t fit properly.
However, if you prefer using one big branch then that’s fine as well! Just remember that it should take up most of the room inside your glass vase because thujas are usually pretty thin.
Once all the arranging is done, just place your Christmas window decoration on whatever windowsill you desire, and voilà! You now have yourself some beautiful winter-themed decor for this holiday season!
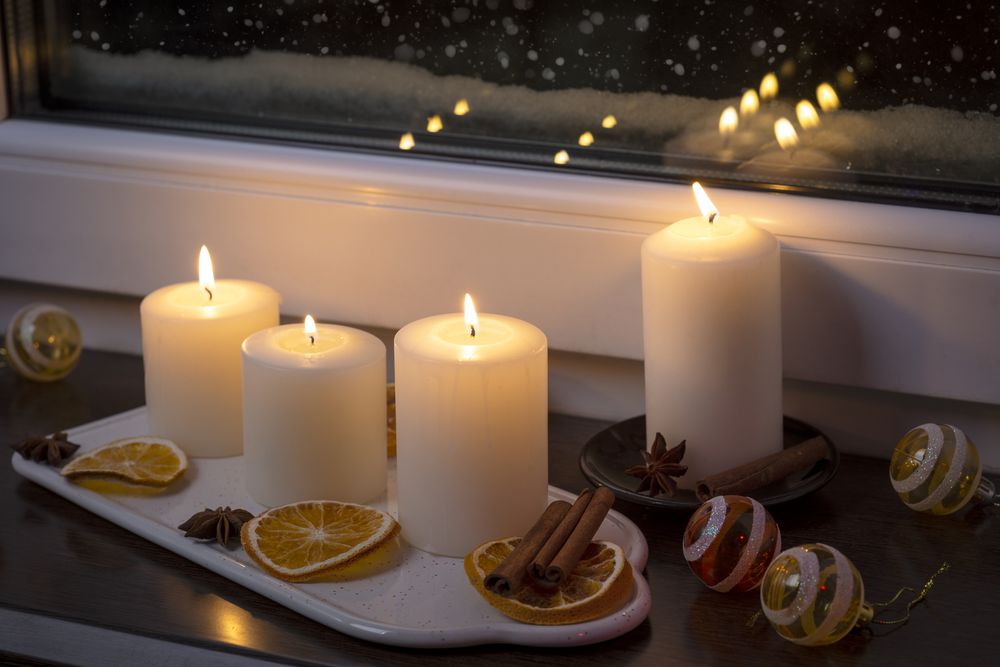
33. Candles, Cinnamon Sticks & Dried Orange Slices – Christmas Window
Candles, cinnamon sticks, and dried orange slices are perfect for making Christmas window displays because they give off a calm and cozy feeling that’s just right for the holiday season.
This isn’t exactly a craft, seeing as you don’t actually have to craft anything; no, this project is more of an arrangement, but trust us that the end result will give you the same Christmassy vibe that you’d get from any other crafts on our list.
First of all, you’ll need to find some candles that match the color scheme of your home by checking out any nearby dollar stores or craft/hobby shops. Then place them in a nice-looking glass cup or something else that will hold them nicely without letting too much heat out, if it’s wintertime where you are.
Place the candles on a long platter or some other type of support so that you don’t get wax all over your windowsills while the candles are burning.
You can’t have candles without some cinnamon sticks! They’ll help bring out the cozy atmosphere just like they do during Thanksgiving dinner.
Place these next to the candles, but make sure to leave enough room between the sticks and the candles. It wouldn’t be fun at all if one of the cinnamon sticks caught fire.
Last, but not least, you’ll need some dried orange slices too! You can find these at any dollar store or even craft shop for a cheap price, or even craft them yourself if you know how!
Just place them where they look the best on the platter while making sure to leave enough distance between them and the candles if you want to have nice-looking Christmas window displays.
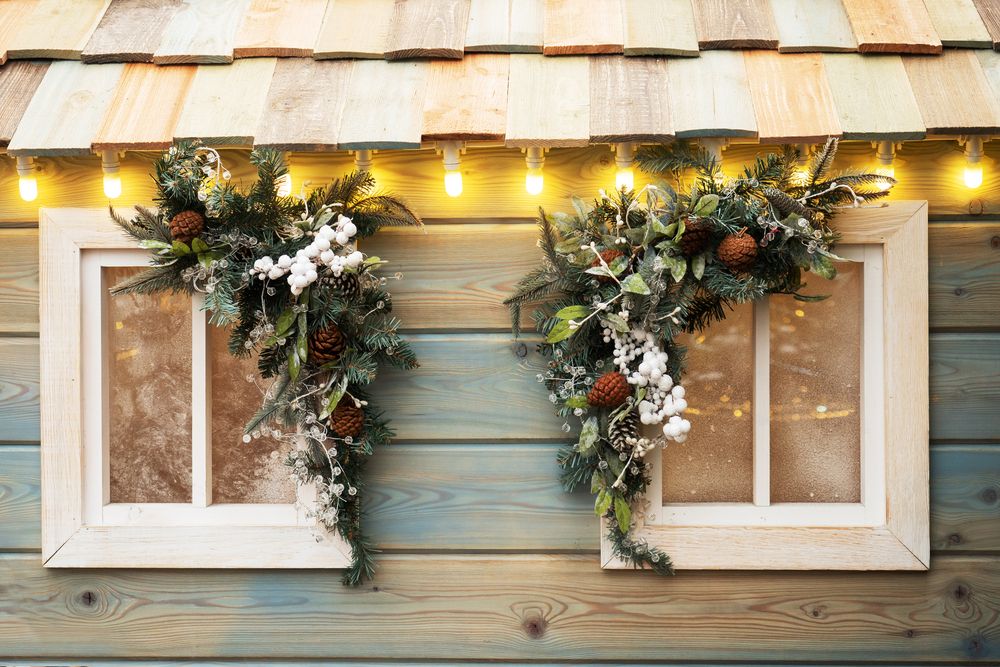
34. Garland Outdoor Window Frame Decoration – Christmas Window Decorations
These awesome outdoor window frame decorations are perfect for making Christmas window displays because they look just like gorgeous wreaths but without the mess!
Plus, they take up almost no space and provide great decor at the same time. The only downside is that you’ll place them outdoors, which means that you can only admire them while you’re outside the house.
Well, you can still see a small part of them from the inside, too, but the magic is happening outside. All you need to make this beautiful Christmas decoration is some rope garland (or whatever other variant you find appropriate) and some decorative objects.
You’ll want to craft a square-shaped wreath that’s large enough to cover your window frame. Now cover it with anything you see fit, including but not limited to spruce, pine, and Thuja branches, pinecones, cotton flowers, ribbons, berries, and Christmas ornaments and baubles.
Once the square-shaped wreath is complete, cut it diagonally, so that you end up with two equally-sized wreaths.
Now use whatever means you prefer (adhesive, thread, nails, thumbtacks) to secure these two wreaths on the corners of the windows of your choice (check the picture above for reference).
These Christmas window decorations are great to breathe some Christmas spirit into your house, especially if you’re into outdoor arrangements!
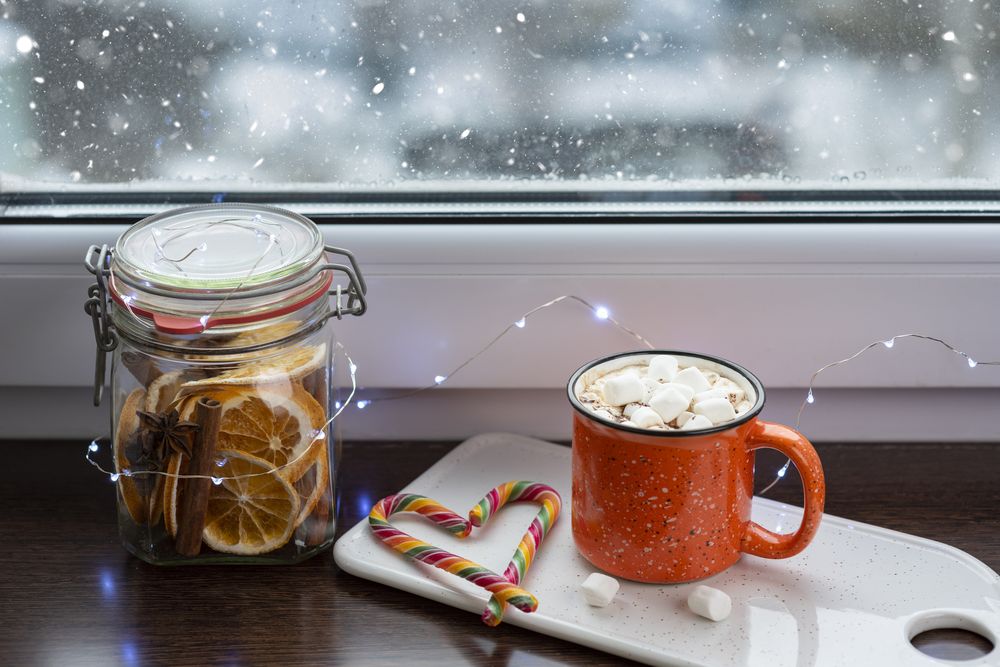
35. Cinnamon Sticks & Orange Slices In Glass Jars – Christmas Window Display
These cinnamon sticks and dried orange slices in glass jars are a great way of bringing the warmth of Christmas right into your home. These Christmas window decorations are not only easy to make, but they’re also extremely cheap!
In order to craft these, you only need to place some cinnamon sticks and orange slices in glass jars (you can use mason or jam jars). You can even add some holiday-themed embellishments, like pinecones or other greenery!
If you’re not exactly satisfied with the way it looks, you can add some mini Christmas lights inside the jars to make everything look even more fairytale-like. However, make sure to use lights that don’t heat up.
If you’re not sure about it, just place the lights outside the jars. After all, Christmas is not exactly the season where you turn stuff into fire hazards, right?
This lovely arrangement is perfect for creating that cozy atmosphere that comes with celebrating Christmas during the wintertime. Additionally, it takes almost no effort whatsoever! Just find the right ingredients, place them in the jars, and that’s it!
More Christmas Window Decorations to Inspire You This Year
We have some more cool Christmas window decorations you can make yourself this year, so let’s check them out.
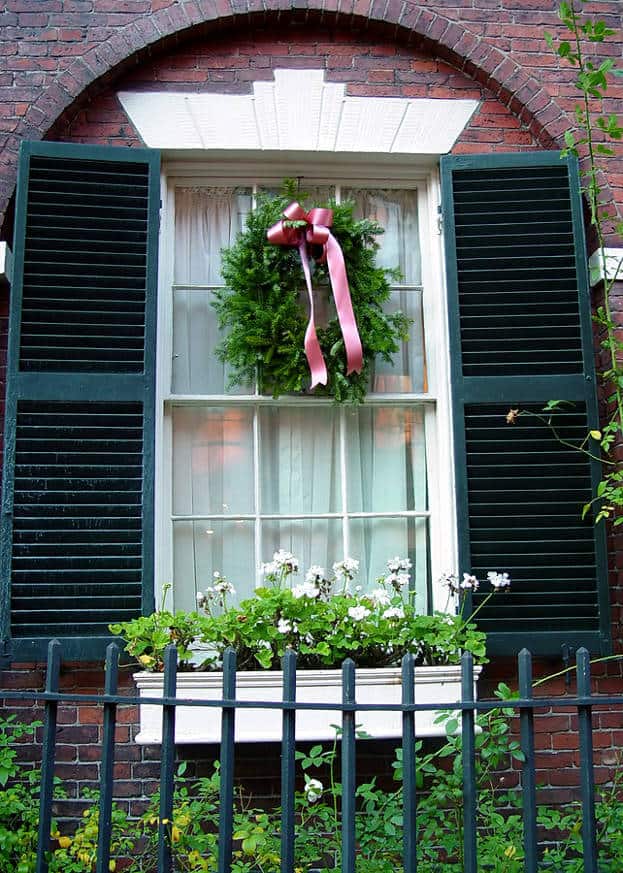
36. Christmas Window Decorations – Simple Wreath
Are you actually totally enamored with the basic concept of decorating your windows, but you’re torn between doing so on the inside, the outside, or both and you’re having trouble choosing which styles of decor might suit your window’s structure?
Then we’d suggest starting with this awesome resource fromImprovenet that’s full of all kinds of basic window decor tips and tricks!
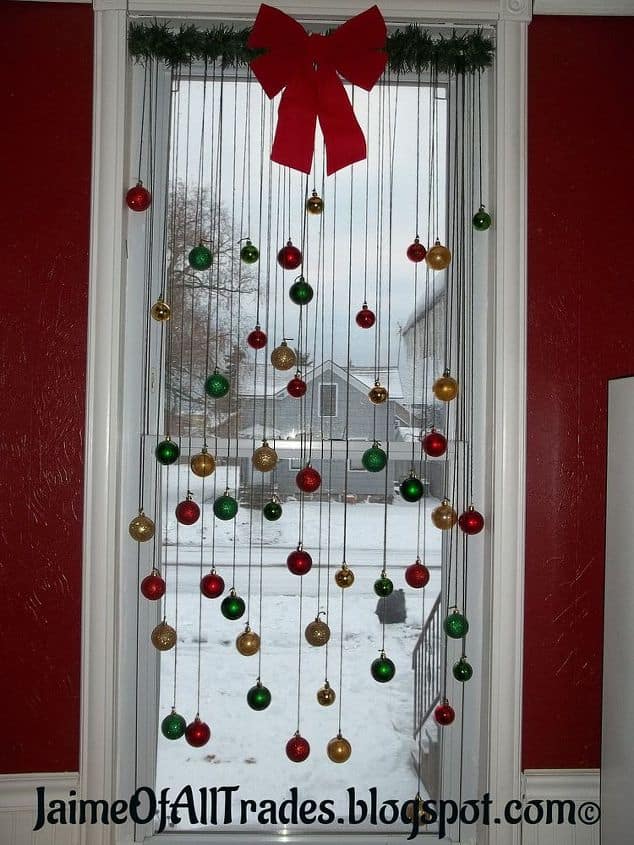
37. Christmas Window Decoration Ideas – Bow and Ornaments
This picture actually shows you an interesting way to create a beaded curtain-like display in your doorway, but we know that our front and side doors would never let such a setup survive.
That’s why we actually adapted this awesome mobile-like idea for our front window instead! You can still follow the basic instructions onHometalk for stringing up your Christmas balls; just anchor them to your window frame instead of the door jam!
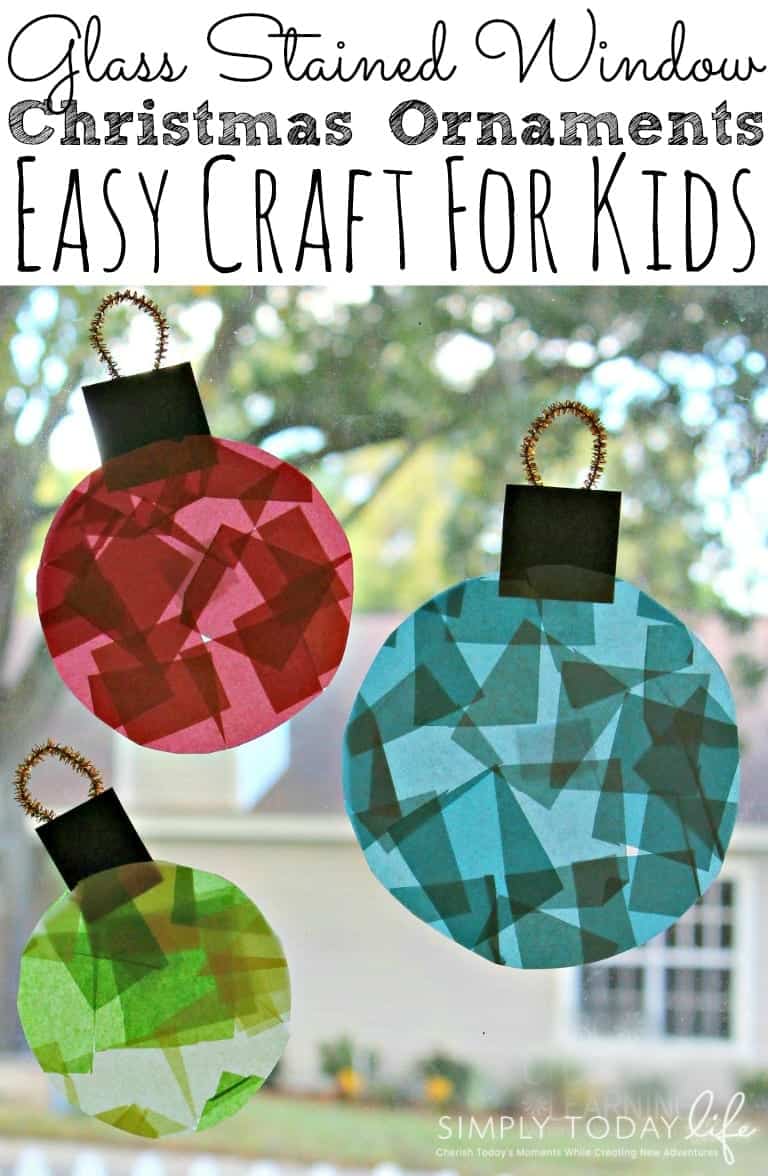
38. Tissue Paper Christmas Ornaments – Christmas Window Decorations
Are you actually feeling pretty intent on getting your kids involved in about as much of the holiday decor crafting you plan to do this year as you can?
In that case, we’dabsolutely suggest taking a look at howSimply Today Life did some classic tissue paper “stained glass” DIY in order to create these adorable Christmas bobble-shaped window hangers in a way that’s nice and easy.
39. Hanging Pinecones Christmas Window Decoration
Do you actually really adore the idea of making some kind of mobile-esque hanging decor but you’re just not sure that the glass ornaments design you saw above is quite the aesthetic you’re looking for?
In that case, we’dabsolutely suggest taking a look at howThe Do-It-Yourself Mom did something similar but using pinecones for a more rustic, wintery woodland feel instead!
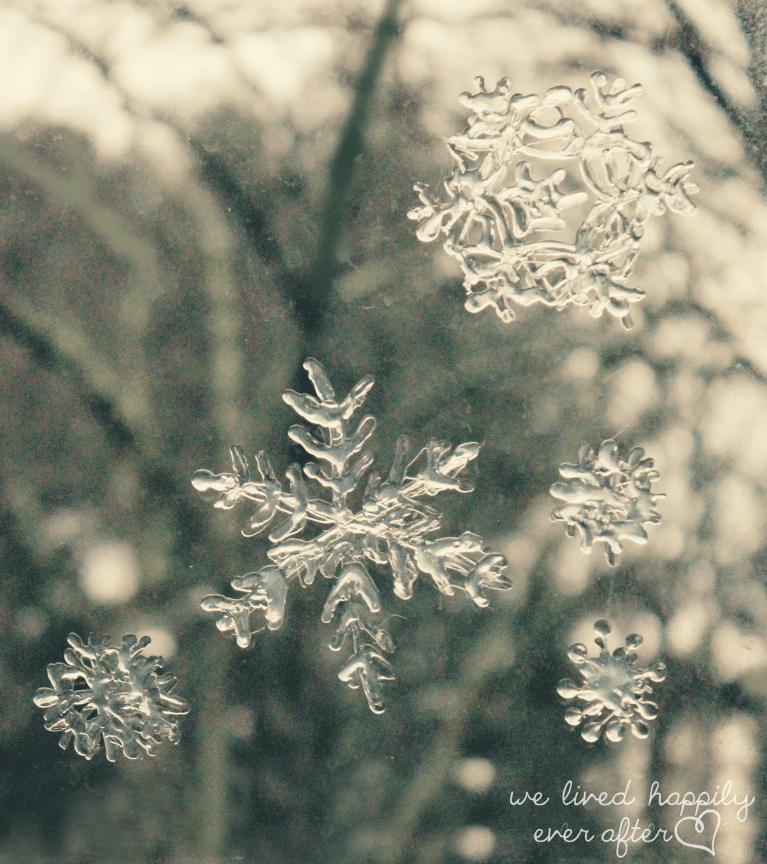
40. Christmas Window Decorations – Glue Gun Window Snowflakes
If you’re going to put in the time and effort it takes to actually create some DIY things that really help establish a wintery setting, would you rather do it in a way that can look quite realistic?
In that case, we think you’ll get a real kick out of this tutorial fromWe Lived Happily Ever After that shows you how to create hot glue snowflakes right on your window glass in a way that looks very icy indeed! Don’t worry; the dried glue will actually peel right off the glass when it’s time to take them down.
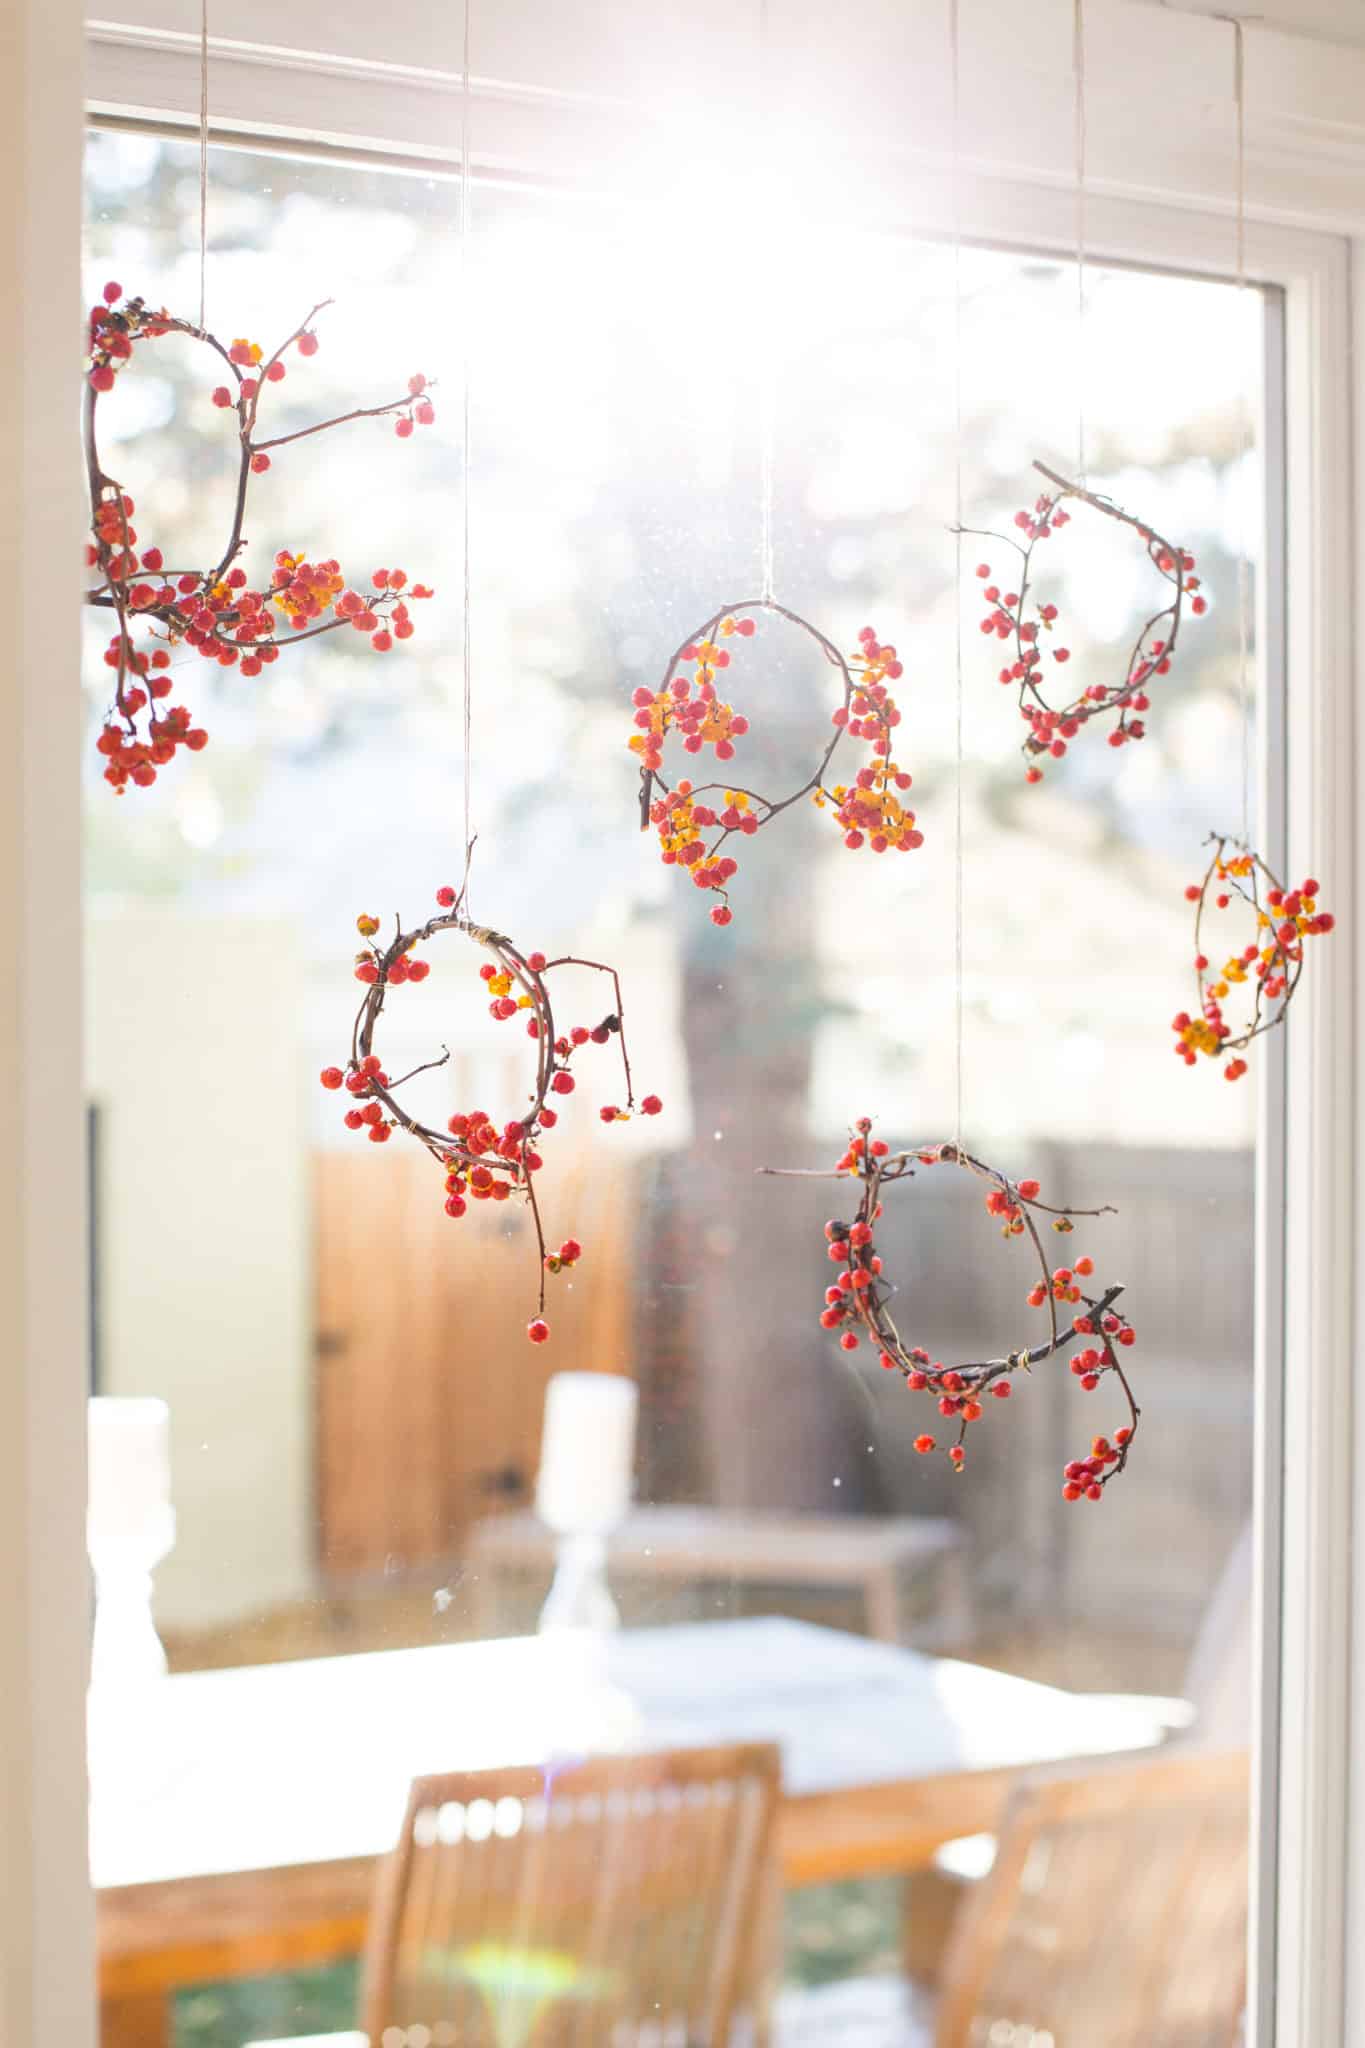
41. Twig and Berry Holiday Wreaths – Christmas Window Display
Whether you choose to display them as a multiple hanger set like you see in this picture or simply make one for a window display that has many DIY trinkets in it, we’ddefinitely suggest taking a look at howFlax & Twine made these adorable twig and berry holiday wreaths if the idea of making something wintery and nature-centric appeals to you!
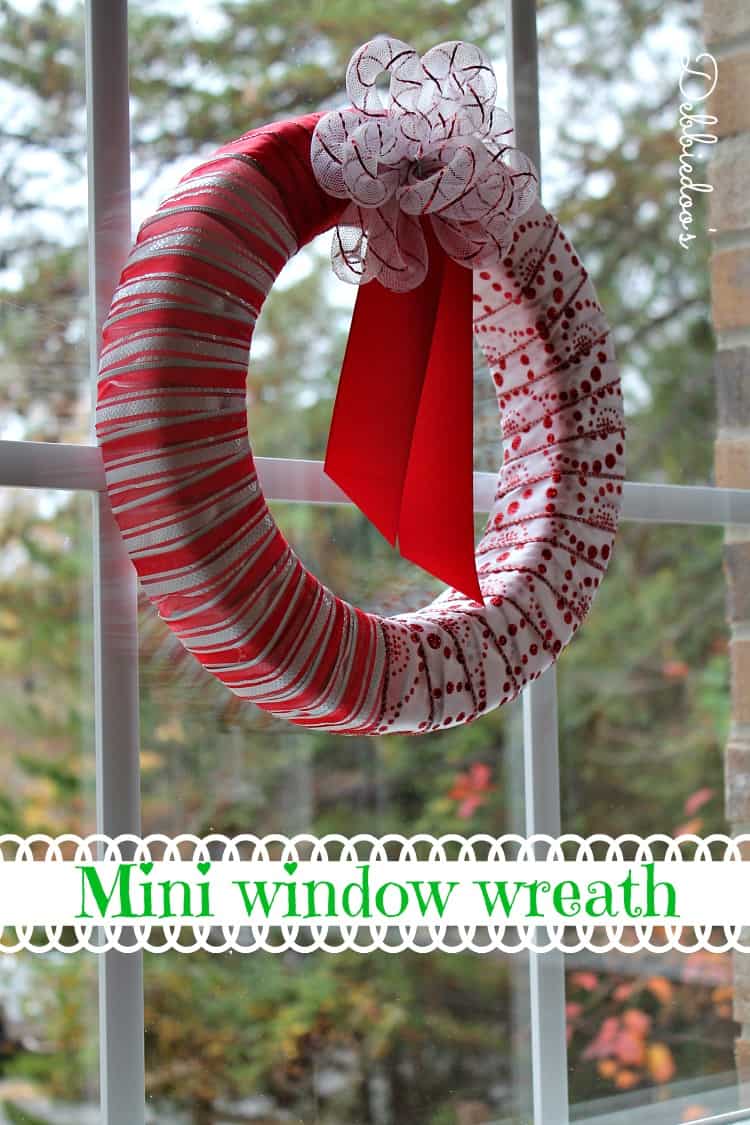
42. Mini Wreath – Christmas Window Decoration Idea
Did we actually really pique your interest with our mention of making small window wreaths for a delicate little winter-themed welcome but you’re more a fan of things like bright colors and trim rather than nature and rustic feels?
In that case, we think you might be a little better suited for something like this lovely little ribbon-wrapped gift bow wreath that Debbie Doo’s shows you how to make and hang up in the window just right!
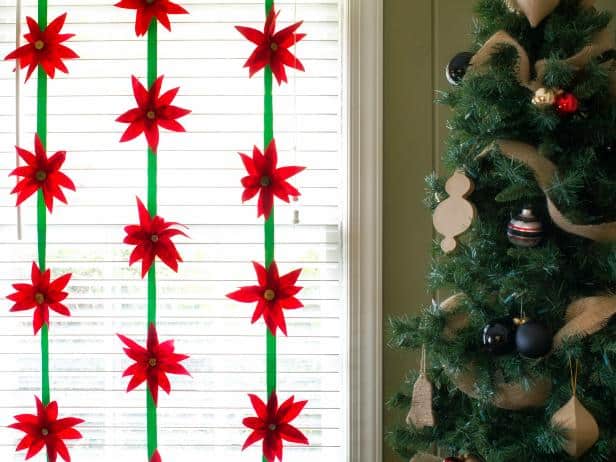
43. Felt Poinsettia Strips – Christmas Window Decoration
If you’re going to make some kind of cool vertical window display, would you rather make a hanger that has some embellishment all the way down, rather than just one little piece dangling at the end?
Then perhaps these brightly colored DIY poinsettia strips outlined in detail on HGTV will be a little more up your alley! We love that they look so explicitly Christmas-themed.
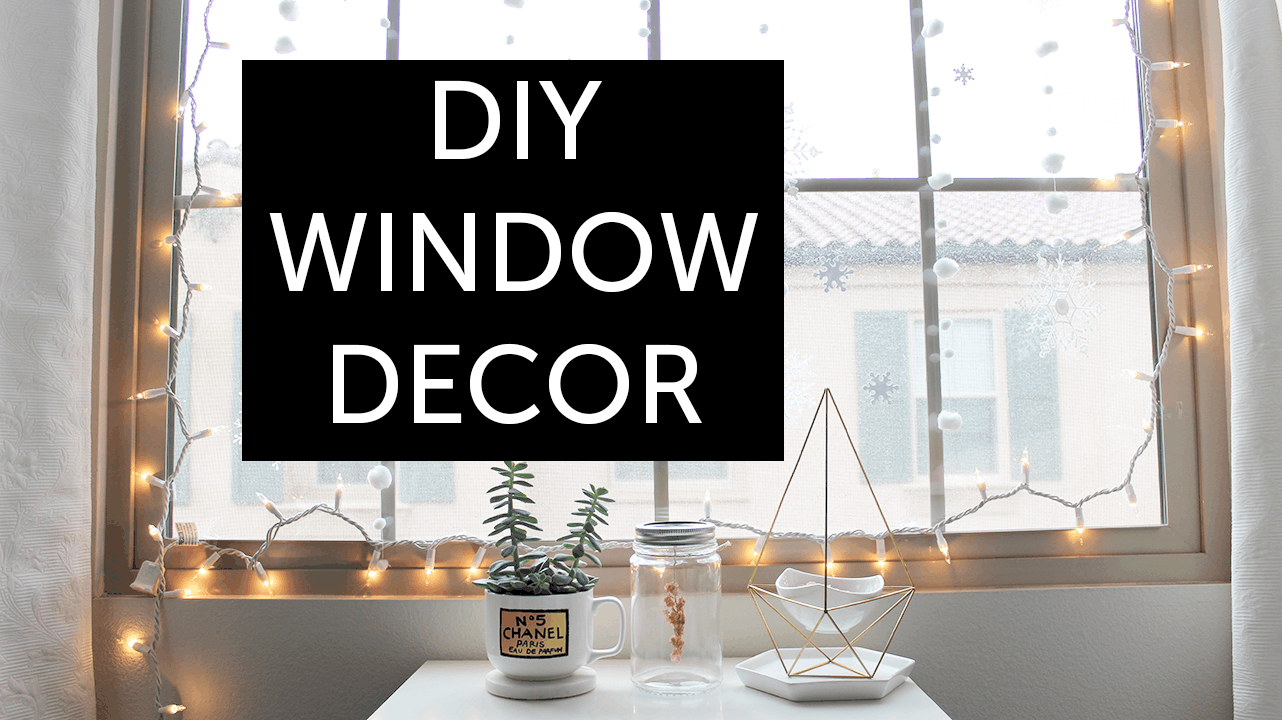
44. Lighted Christmas Window Display
Do you actually have a small framed window that doesn’t have any sill or much of a sunken edging so you’re having a bit of trouble finding ways to decorate it that really suit?
Then perhaps you’d get along a little better with a tactic like this one fromJune Beautique that shows you how to frame your window in little white lights that look almost like twinkle snow. Then, you have to decorate around the window and on the glass itself (they give you stick-on suggestions) to get a beautiful effect despite the setup!
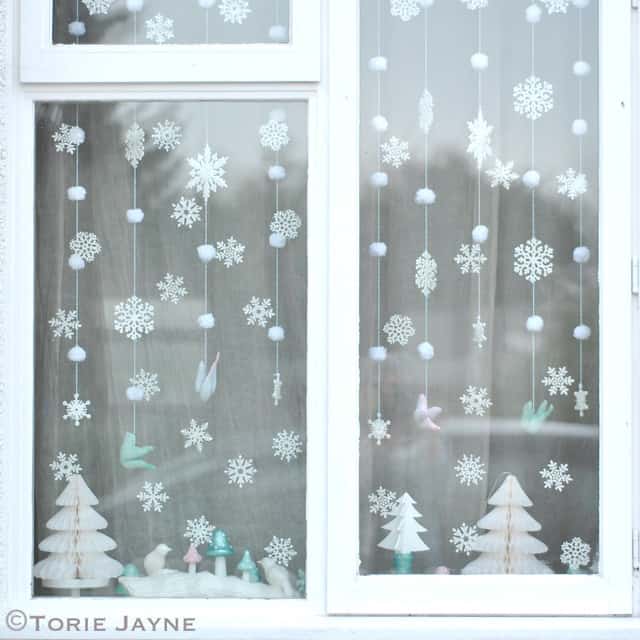
45. Winter Wonderland Christmas Window Decoration
Have you always just been a really big fan of craft ideas that are supposed to look like snow, perhaps because it doesn’t snow where you live? Maybe it does and you just really love the winter season.
Either way, we’dabsolutely suggest taking a look at howTorie Jayne made their window look like snow is falling right there in the frame using carefully strung fluffy white cotton balls.
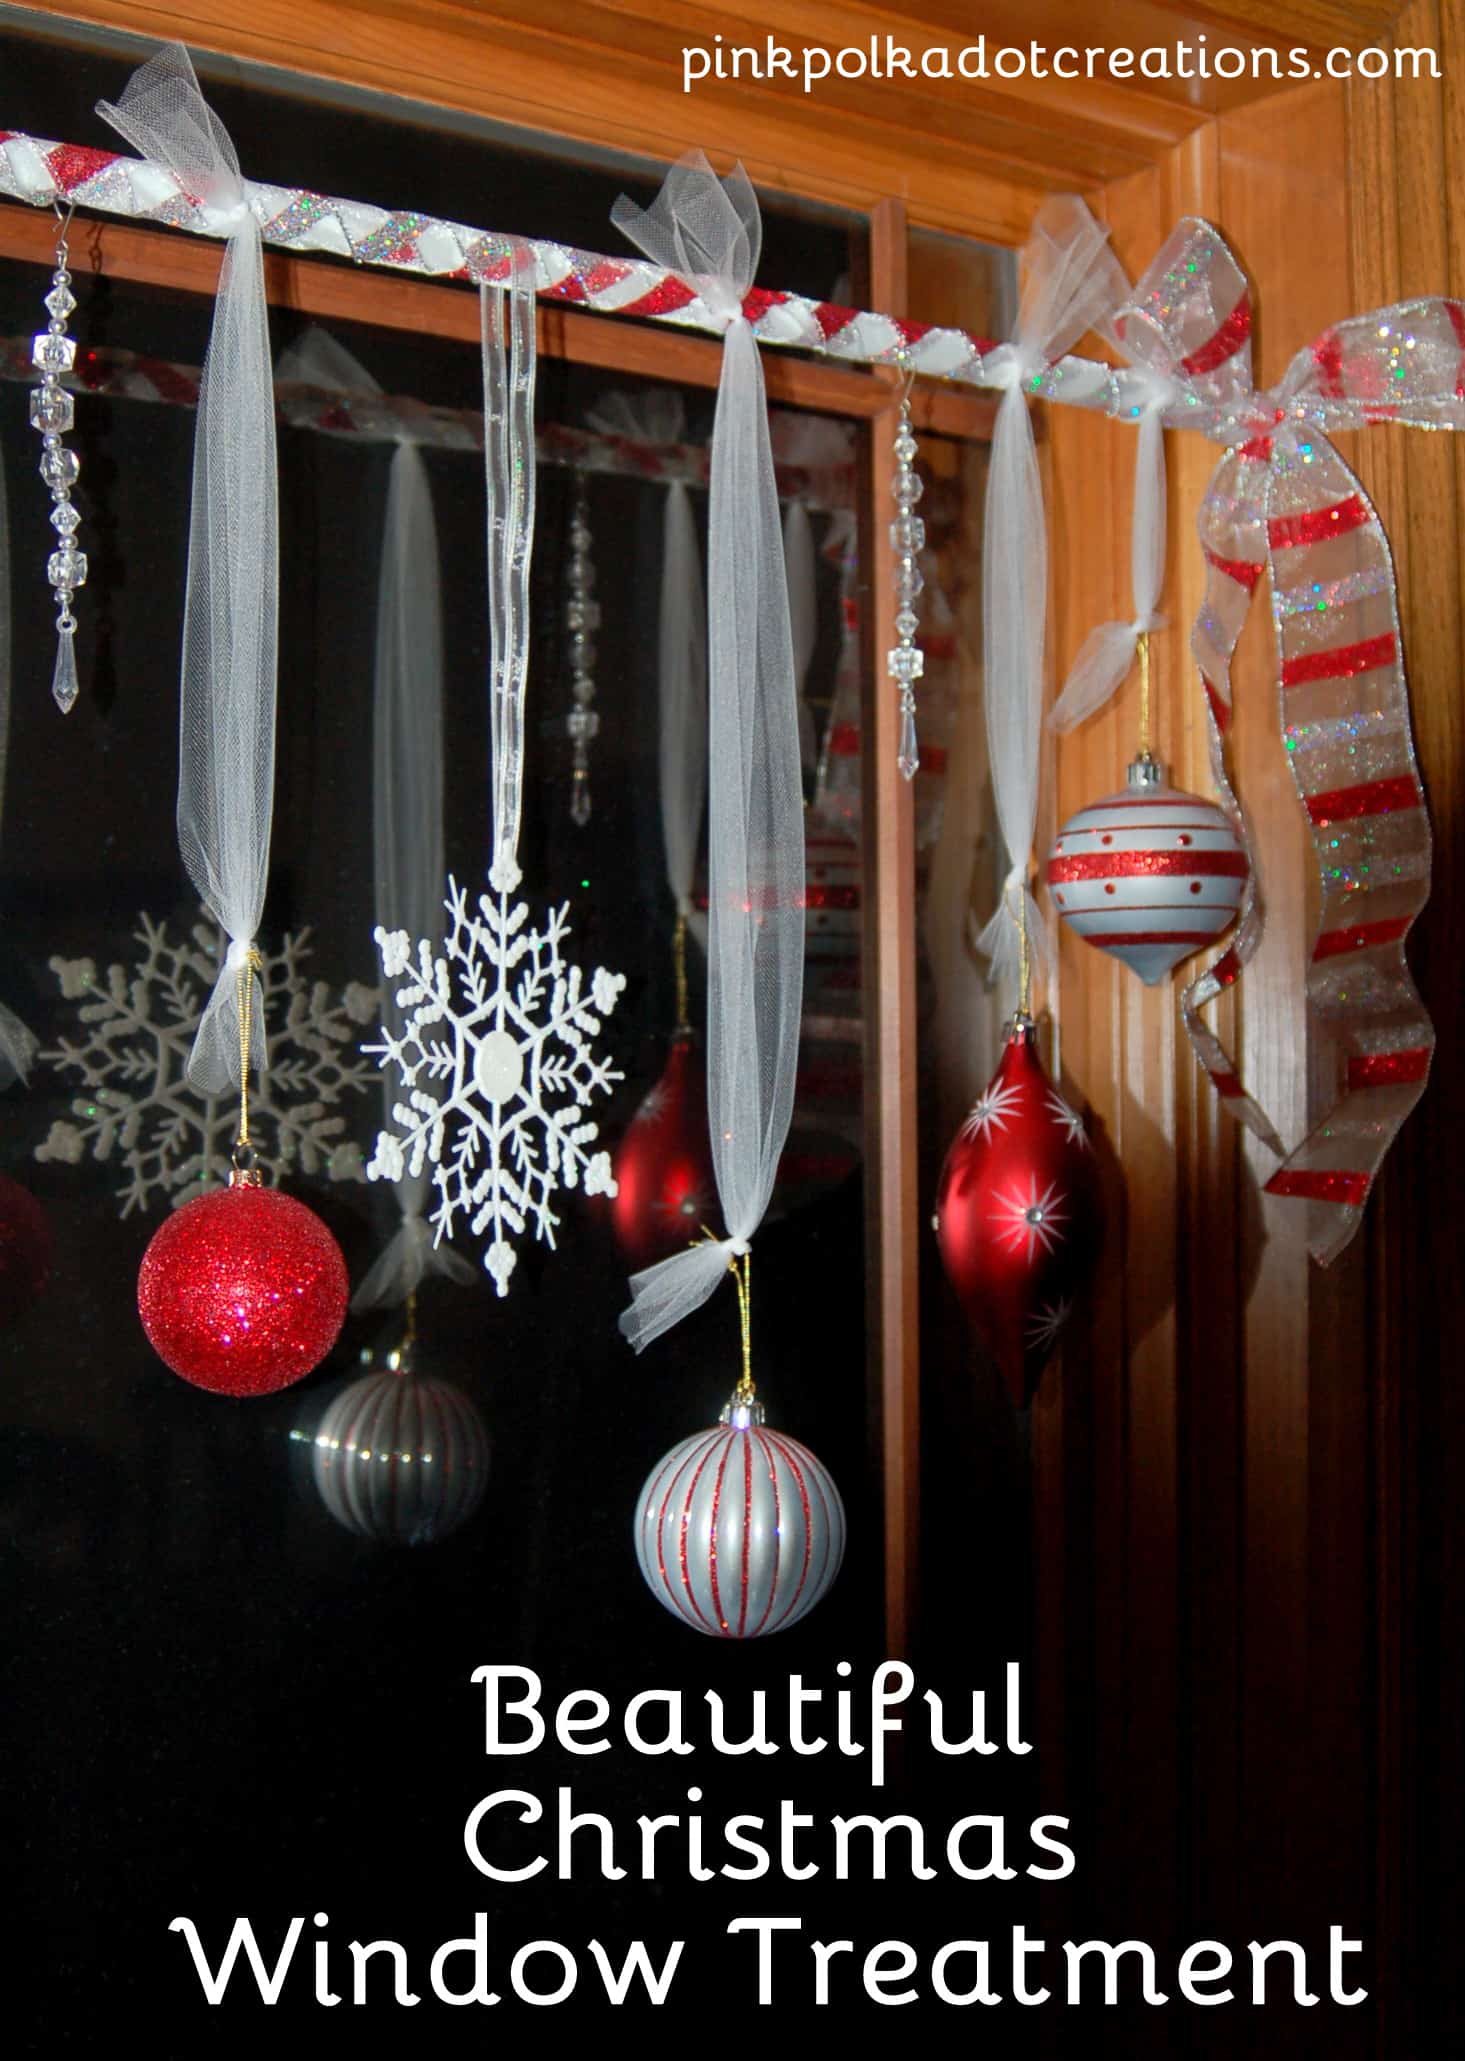
46. Hanging Ornament Christmas Window Decoration Idea
Were you actually quite intrigued by the very first hanging Christmas ornament idea we showed you on this list but you just can’t help feeling like you’d rather take the look to the next level by getting more creative with what you’re using to string the balls up too?
Then we feel like you might get a real kick out of the wayPink Polka Dot Creations outlined how they did it with ribbon and stripes of soft tulle! We think the look isextra festive.
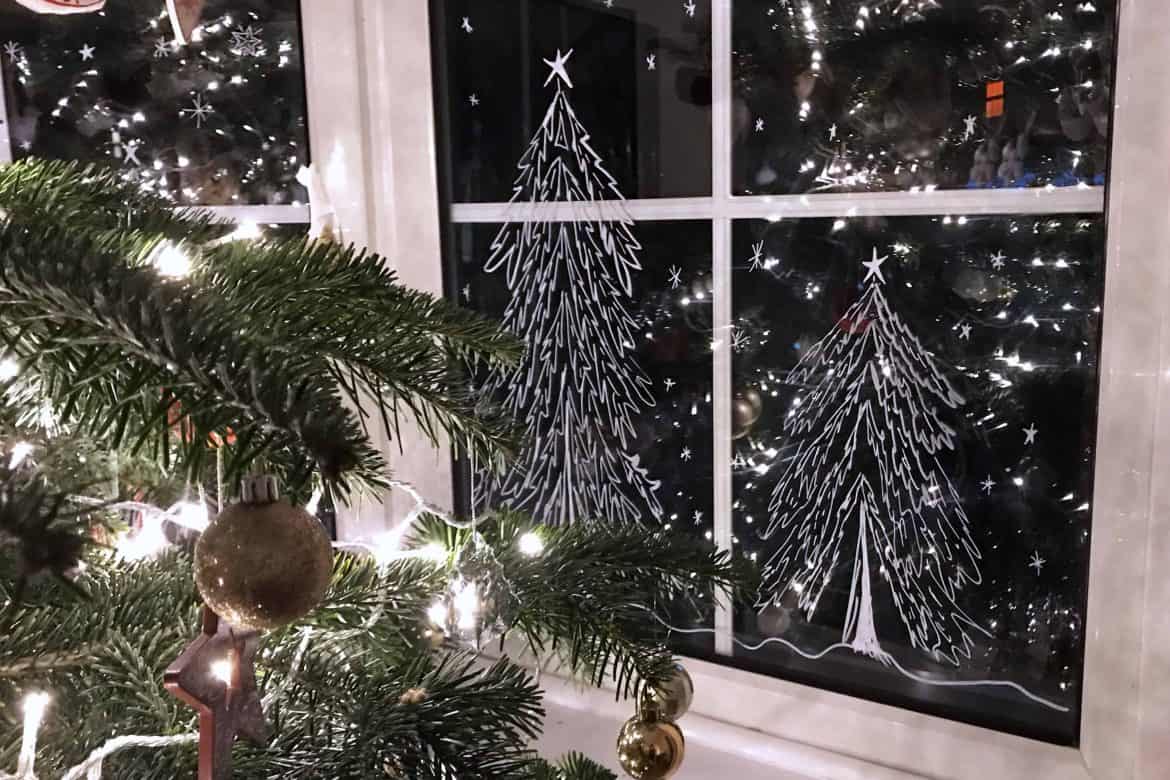
47. Winter Drawings Christmas Window Decoration
Maybe you’re the kind of DIY enthusiast who really loves trying your hand at all different kinds of crafts but who actually has the most practice in the world of freehand drawing?
In that case, we’re pretty surePinks Charming hasjust the tutorial for you! Check out their page to learn more about how they sketched a removable but gorgeous winter scene right onto their window glass using chalk pens.
We like that this gives a pretty look on both the inside and outside at once!
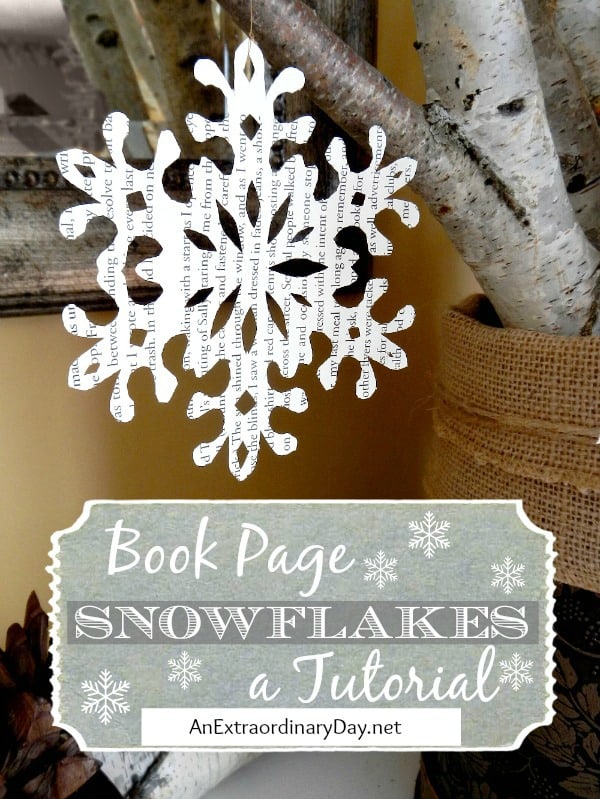
48. Book Page Snowflakes Christmas Window Decoration
Are you actually the kind of person who adores repurposing things so much that you’ll turn just about any season into an opportunity for upcycling through DIY?
Then reach for that stack of damaged books you’ve been meaning to donate but can’t read anymore thanks to missing pages and take a look at howAn Extraordinary Day turned book pages into lovely cut-out hanging snowflakes!
We come from a whole house of total book worms, so welove the idea of hanging a whole series of these in the window.
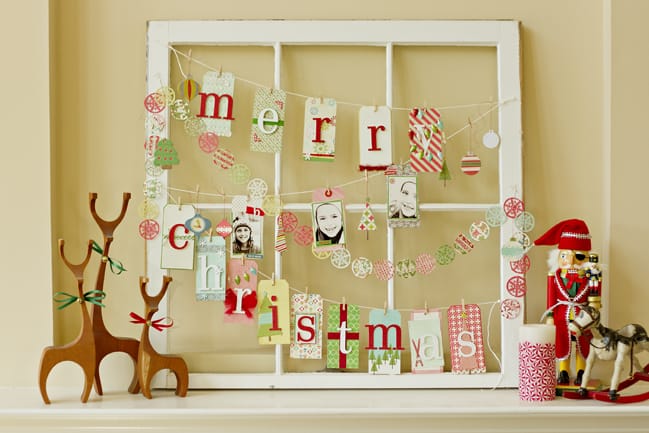
49. Merry Christmas Window Frame – Christmas Window Decoration
Are you actually currently living in a small apartment that, despite having windows (since every home must), doesn’t really have one that you can easily reach and decorate the way you want?
Then perhaps you’ll find a lot of appreciation for the wayShimelle got around that very issue by picking up a vintage wooden picture frame at a garage sale and creating a beautiful Christmas display around that instead! Lean it against the wall or on a side table and create the window decor of your dreams whether there’s glass or not.
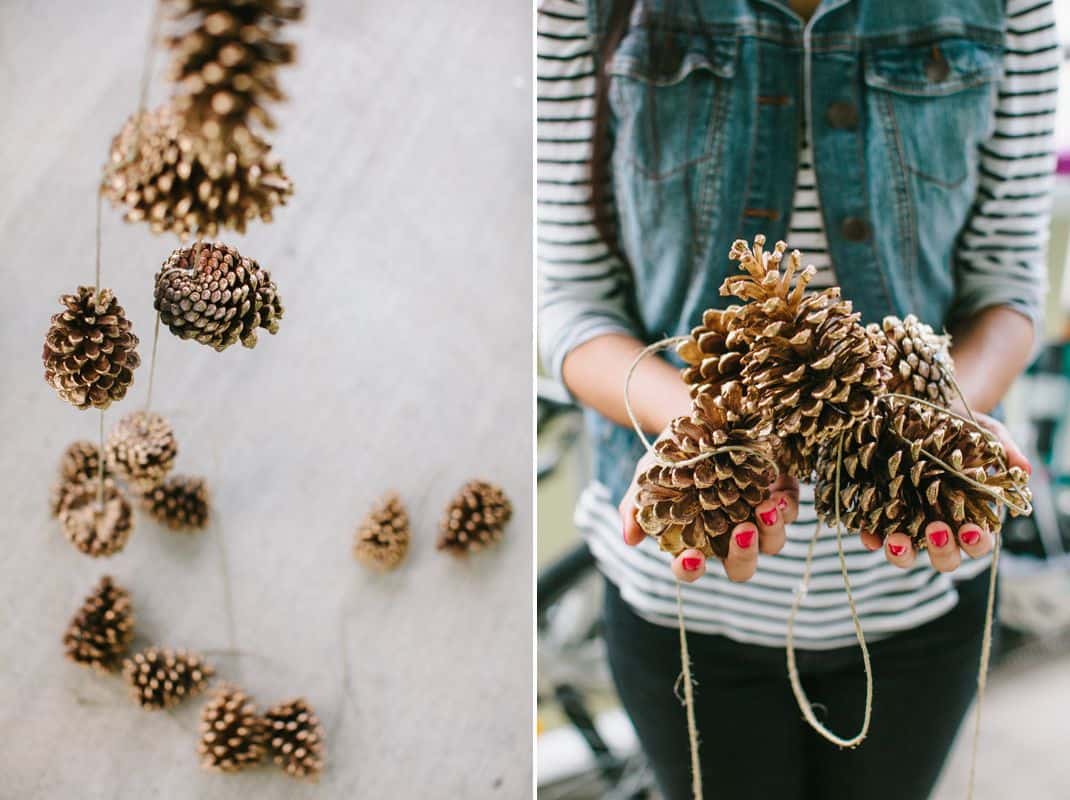
50. Pinecone Window Bunting – Christmas Window Decoration Ideas
Just in case you’re still not over this whole concept of strung window hangers, garlands, and buntings of all kinds, then here’s one more idea for your consideration before we go!
Check out howHomedit teaches you to make a beautiful, natural-looking window garland made of actual pinecones gathered from the park. We like that they used jute string to keep things on point aesthetically!
Conclusion
To wrap things up, Christmas window decorations are a great way to celebrate the holiday. They add a festive touch, and they even help you welcome Christmas with open arms!
Our guide is meant to help you choose or create some of the best Christmas decorations for your windows this season.
Furthermore, not only are these projects numerous enough, but they’re also varied so that you can make your pick from a wide assortment of crafts that are different (in terms of the time they take to be completed, difficulty, and materials needed).
However, if you don’t feel like doing something complicated with your window displays, just go for some cinnamon sticks and dried orange slices in glass jars or other similar simple projects. Some projects are certainly simple, but that doesn’t mean that they’re not effective.
Also, most importantly: have fun while decorating your house! After all, that’s what Christmas is about — spending time with your loved ones and having a good time!
